Showing posts with label Hello cards. Show all posts

Wednesday, March 16, 2022

Spellbinders Embossing Folder of the Month | Garden Path


Hello, crafty friends!
I have a springtime card to share today using the Embossing Folder of the Month by Spellbinders - Garden Path.  

You can join the Spellbinders Embossing Folder of the Month and receive an expertly designed die set each month along with membership-only savings! If you join between now and February 24th, you will receive this gorgeous “Garden Path” Embossing Folder.  There is no commitment and you can cancel at any time. Click HERE for more information.

The Embossing Folder adds texture and dimension to any project. The embossing folder is a whopping 5 1/2 x 8 1/2″and can be used to make slimline, 5″ x 7″, and a variety of sized projects. It’s a beautiful design and perfect for creating spring cards of all sizes.

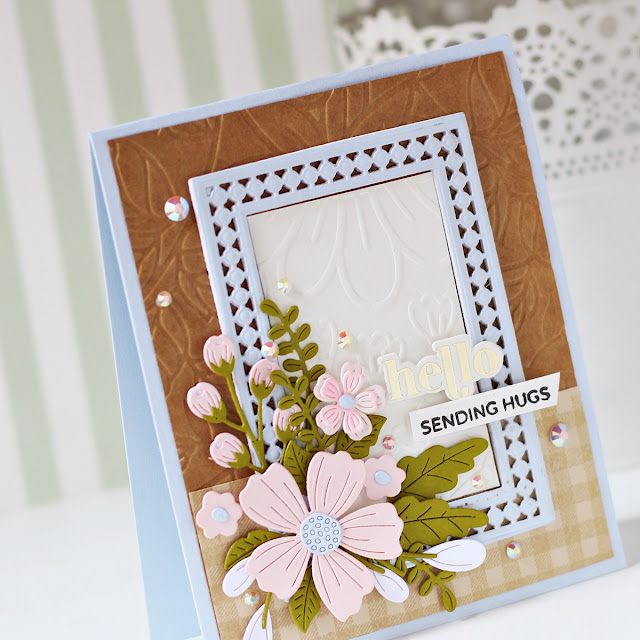
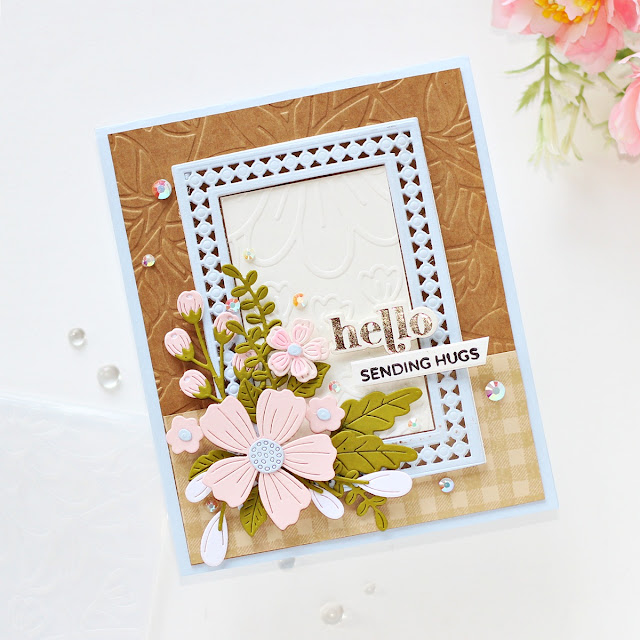
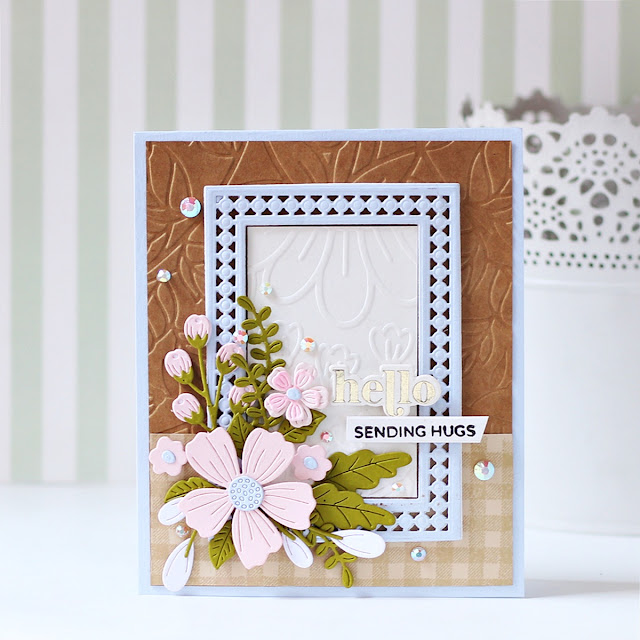
I used the Garden Path Embossing Folder along with the Be Bold Blooms Etched Dies and the Nestabilities Candlewick Rectangles Etched Dies to create my card. 
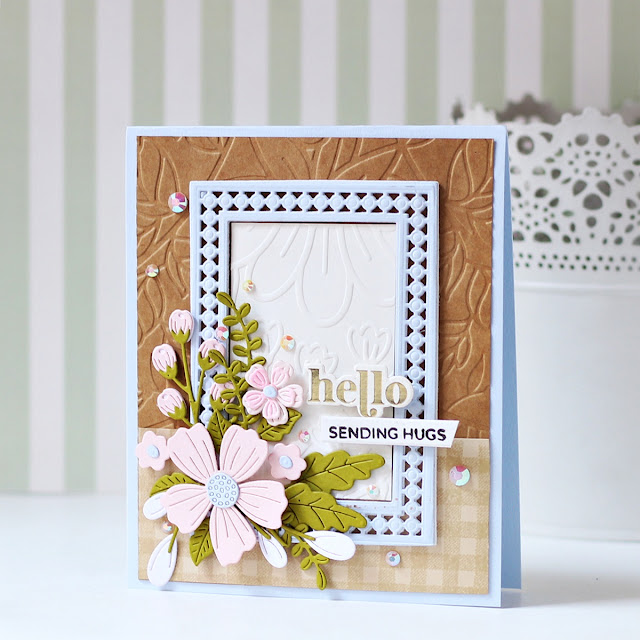

To create my card, I first die-cut Portbello Cardstock using the Layer 2 Die from the Precision Layering A2 B Etched Dies. Next, I embossed the panel using the Garden Path Embossing Folder in my Platinum 6 Die Cutting Machine. Then, I trimmed a piece of Snowdrift Cardstock to size before embossing it with the Garden Path Folder to create a pretty, textured, embossed pattern. Once that was done, I die-cut Waterfall Cardstock and White Fun Foam using the Rectangle 2 Die from the Nestabilities Candlewick Rectangles Etched Dies to create a frame for my embossed piece. I layered the pieces together, one on top of the other, using Craft Glue.

Next, to embellish my card, I die-cut Pink Sand, Fern, Waterfall, and Snowdrift Cardstock using the various flower and foliage dies in the Be Bold Blooms Etched Dies. I lightly blended Spun Sugar Distress Oxide ink over some of the smaller flowers using a sponge dauber to add a hint of colour. Then, I assembled the flowers, arranged them on my card, and adhered them down with both Craft Glue and foam squares. 

Next, I used Gold Hot Foil to foil Snowdrift Cardstock using one of the sentiments from the Be Bold Glimmer Sentiments Glimmer Hot Foil Plate & Die Set and cut it out using the coordinating die. I adhered the piece onto my panel using foam squares for a raised effect. Then, to complete, I stamped an accompanying sentiment from the I'm Here for You Sentiments Clear Stamp & Die Set on to a strip of Snowdrift Cardstock using Versafine Onyx Black ink and popped it on to my panel using foam adhesive. Next, to add some visual interest to the design, I stamped a gingham border on a piece of Barely Peach Cardstock using Antique Linen Distress Oxide Ink Pad and adhered the piece to my panel using Craft Glue. To finish, I adhered my card panel to a  top-folding A2-sized blue card base made out of  Waterfall Cardstock. I finished the card with some Glacier Jewels to embellish my panel.


The Embossing Folder of the Month is available exclusively at Spellbinders Paper Arts during March 2022. You can get the “Garden Path” Embossing Folder at the special Cub Kit price, along with other membership perks.

You can subscribe to any of the Spellbinders Clubs between the 1st - 24th of each month and never miss a fun kit like this again!
  

Limited Period Offer
Get a FREE Cardmaking Kit (valued at $55) with any $100+ purchase on the Spellbinders website. Hurry, offer valid only while supplies last!
!

That’s it for me today! I hope you liked my take on the embossing folder1 If you like what you've seen from me, please give me a follow over on my Instagram (@hussena_cal) and/or subscribe to my blog if you haven't already.
Have a great day ahead!

Tuesday, August 25, 2020

Pinkfresh Studio | You are Amazing Card


Hello, crafty friends!
It's my turn today to post on the Pinkfresh Card Blog, and I have a Card to share today featuring the gorgeous, Charming Floral Wreath Stamp Set, which I have paired with a couple of products from the NEW August Release from Pinkfresh. 

I wanted to use a colour combination which was different from my usual colour palette, so I decided to go with blue and yellow for my card. I also wanted to experiment with the Dye Inks from Pinkfresh, which come in such a wide variety of colours. They stamp so beautifully and I simply love them! 

To start off, I stamped the florals from the Charming Floral Wreath Stamp Set using my MISTI Stamping Tool. I used two different ink colours: Stargazer and Blue Jay for stamping the floral images. Using a stamp positioning tool helps you a lot when using layered stamp sets as it offers precision, but the Charming Floral Wreath Stamp Set is fairly simple to use, and so, you can most definitely use your acrylic blocks too for stamping. Next, I stamped the leaves for the wreath using Lemon Whip and Marigold dye inks. Then, I cut out the images using the coordinating Charming Floral Wreath Die Set.

I wanted a hint of colour behind my floral images, so I took a piece of white card panel and used the Lemon Whip Dye Ink to lightly ink blend the background using a blender brush. Then, I took another piece of White Cardstock and die cut the stitched shaker window die from the Essentials: Shaker Tags. Once I was done, I die cut the panel using the Essentials: Stitched Rectangles Die Set to make it look like a window frame. I always love stretching my supplies to create new and unique designs, so I was quite happy with how this worked out!

I arranged my florals over the panel and then adhered them down using foam squares. I wanted to add a little something in the background, so I pulled out the Color Block: Gradiating Stripes Stamp Set and stamped it on a piece of White Cardstock using four different blue inks:
Ocean Blue, Summer Shower, Seaside, and Storm. I then trimmed the panel to size and adhered it directly to my card base. 

My die cut sentiment is from two different die sets: Lea's Ornate Uppercase Die Set, and Heather Uppercase Die Set. I die cut the letters from White Cardstock and lightly coloured them using Sky Blue Dye Ink. Then, I stamped a coordinating sentiment from the Charming Floral Wreath Stamp Set using the Detail Black Hybrid ink. I die cut it using the small shaker window die from the Essentials: Shaker Tags. Finally, I mounted it to my panel using foam dots. 

I hope you enjoyed this card and hope that you are inspired to make something new today!
Thanks so much for stopping by!

Saturday, July 29, 2017

Just Saying Hello | Card

Hi friends,
I am back to share another card today. I had made this a few days back, but just got around editing the pictures. I have made this card using some of my newest crafty goodies.  Here's a look at it :


 Close-up of the magnolias which I have watercoloured.


A flat-lay view of the card :

To begin with, I stamped the magnolias, the leaves and buds from the Altenew Magnolias For Her set using Versamark Embossing ink. I stamped it on Canson Montval watercolor cardstock and then heat-set the images in white. After I heat-embossed them, I coloured them using my Zig Clean Color brush pens. This is my favourite watercolour mediums these days and I love using them for all my projects. I fussy-cut the images and arranged them on my card base. The sentiment is from the Altenew Super Script stamp and die set. The 'just saying' has been heat-embossed in gold on a strip of white cardstock which I then distressed on the edges using Worn Lipstick Distress ink. I also watercoloured the base of my card base using Hickory Smoke Distress ink. I then added a strip of gold cardstock which I created by smooshing my Versamark ink pad on a piece of white cardstock and then heat-embossing it in gold. Finally I added few sparkling clear sequins from Pretty Pink Posh and gold paint spatters.

I hope you liked my card. I'm entering this in the Altenew Inspiration challenge this month. I really loved the colours and had to play along!


Thanks for dropping by! See you soon with another card on Monday :)

Wednesday, July 27, 2016

Hello !

Hi friends!
I hope you are not bored seeing my cards with Mudra stamps. Today I have my last card to share from my Debut Post. Here's a look at it :


As I had written in my earlier post, this set is my absolute new favorite. This Wild Florals set by Mudra has really caught my eye and I love working with it.

To create this card, I first took an A2 card base in White. I die-cut another card panel which was approximately a quarter inch smaller than my card base. It was die-cut using a Gina Marie die from a watercolored panel I had created earlier. Next, I die-cut another white card panel using my Gina Marie Stitched Rectangles die and created a textured background using embossing paste and a stencil by Winnie & Walter - Do you see what I see.
It was time to now create the focal of my card and I stamped and clear heat embossed the florals from the Mudra Wild Florals set and colored them using various shades of Distress inks. I fussy-cut the images and popped them on my foam tape for some lovely dimension. To finish off, I stamped and hand cut the sentiment which is from the Altenew- Label Love set and added some black paint splatters and sequins.

I really enjoyed creating this card and hope you liked it too. Do leave me your comments/suggestions. I love to hear from you!

I'm entering my card in the following challenges :
Creative with Stamps, Happy Little Stampers- Anything goes with Dies, Wow Embossing Powder Challenge (I have used clear embossing powder for the flowers & leaves) and Uniko Studio -Flowers and Time out Challenges (I was inspired by the white, black and red colours as well as the florals on the pillow)


Have a nice day everyone!

Wednesday, July 13, 2016

Some exciting news!

Hi bloggy friends,
I'm so happy to share that I have been invited to join the Mudra team as a Design Team Member.
Mudra is an Indian based stamp manufacturing company making high quality photopoylymer stamps. Their designs are really gorgeous and I like the crisp impressions they give every time so I was really happy when I was approached by the company to join their team :)

Here's a sneak peek for you of a few cards I made using their stamps! Please hop over to the Mudra blog for the full reveal and don't forget to drop me in a line ;)


Have a nice day everyone!

Monday, March 7, 2016

Hello Friend

Hello friends,
Today I have a card to share based on the current challenge at Altenew and this is also my Guest Design Post for the Tic Tac Toe challenge. Here's a look at my card :

Here's a side view which shows the layers of my card pretty well.

To create my card I first die cut a card panel using the largest of my Stitched Rectangles die from a Kraft paper, then I die cut some square frames using various sizes of the Spellbinders Square Nesting dies and I slightly colored them using Red Cosmos ink cubes set from Altenew. 
I glued these squares on my card base creating a geometric grid like pattern. Then I stamped my flowers, leaves and foliage from two different Altenew stamps- Peony Bouquet & Vintage Flowers and gold heat embossed them. The flowers and leaves are all colored by using various Altenew Crisp inks - Red Cosmos & Green Fields ink cubes set using a Inkessentials foam applicator to give them two- tone shading. The sentiment is from a Hero Arts set - All Occasion Messages set and I stamped it on a piece of card stock using Versafine Onyx Black ink and cut it in a banner shape and colored it lightly using Altenew- Forest Glades ink and  a Inkessentails foam applicator. It was then foam mounted on the square frame.

The colors and the design of my card is inspired from the current challenge at Altenew. I tried to incorporate the maze garden in my card by creating a geometric background and have shaded my flowers using two shades of pink to incorporate the colors too.

The stamped and embossed flowers and leaves are also foam mounted on my card panel and they give quite a nice dimension in real life. I matted my card panel on a light pink cardstock and attached it to a Kraft card base. I have used a few Pretty Pink Posh sequins to finish off my card.

Also entering my card in the NBUS challenge by Darnell- I have used my Altenew Peony Bouquet stamp & Gina Marie die for the first time, Stamping Sensations- Flower Power & SSS- Touchy Feel ( I have used embossing and layers for the texture).
PhotoInspiration_March


I hope you like my card. I would love to hear your views on it. Thanks for visiting!


Tuesday, January 12, 2016

Hello !!

Hello friends,
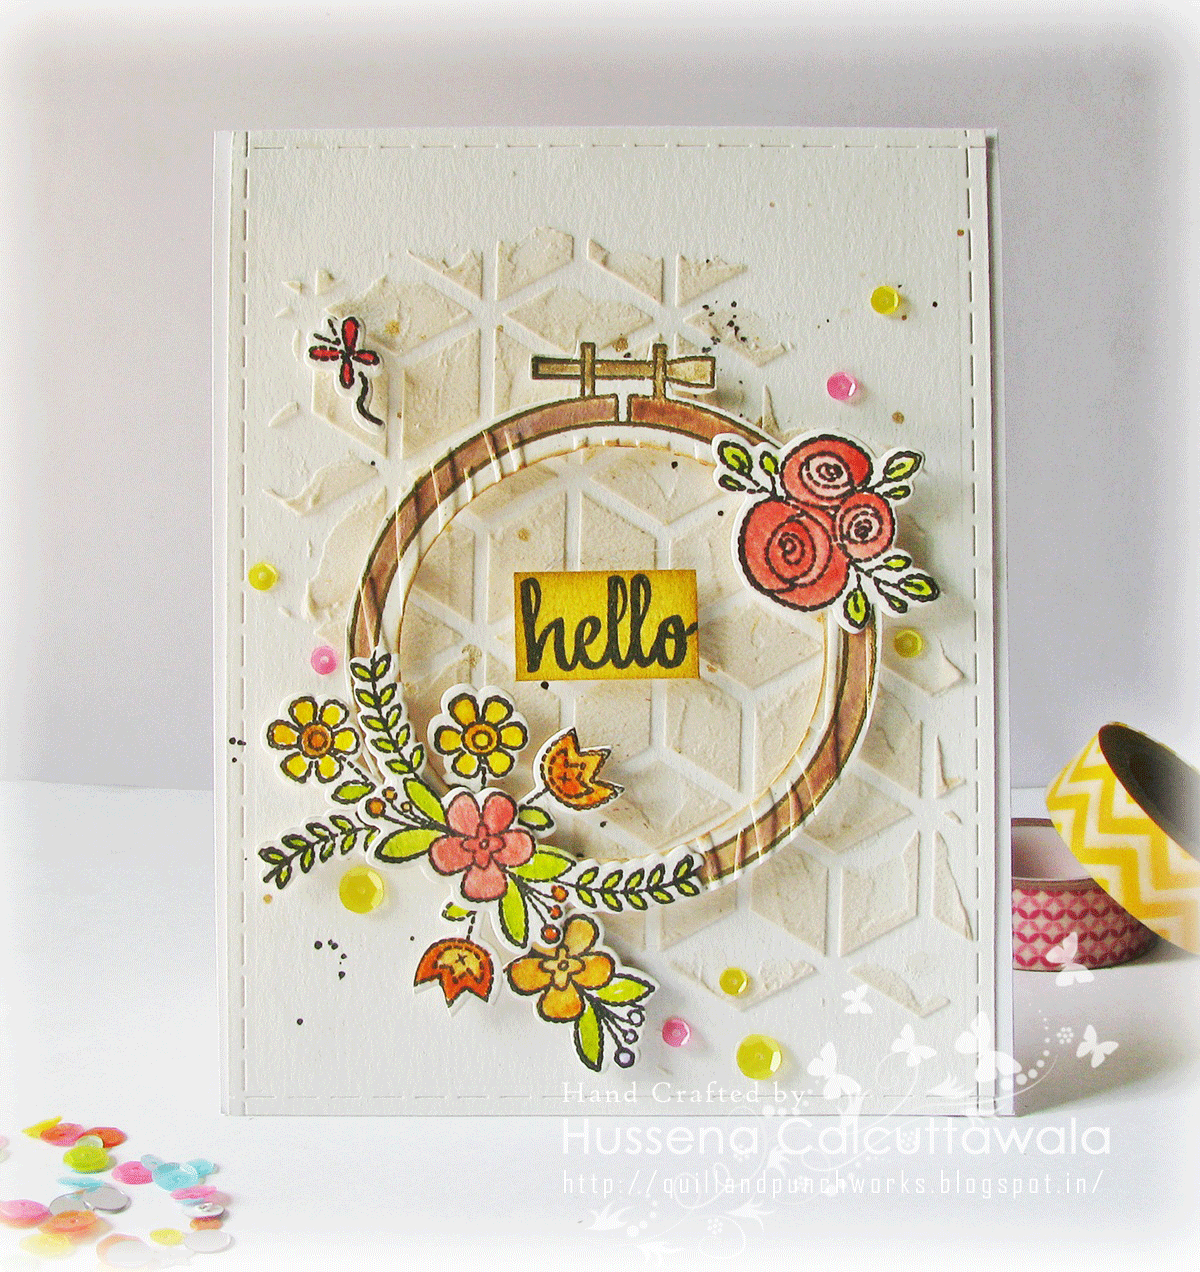
I have a card to share today and it was made using Neat and Tangled stamp and dies which I have been hoarding for quite sometime now!
This is my first buy at a stamp and die combo and I was like a kid with a new toy while trying it out :D ...I stamped and colored all my images on the Fabriano Brustro watercolor paper and believe me this paper is a pain to fussy cut with especially with tiny images, but thankfully I had the cordinating die set to rescue :)

So here's a look at my card ...I have clicked it in all angles possible because I loved it that much :D


I told you didn't, I ?
Okay, so a little bit about how I went about creating this ...All the elements on my card are stamped and die cut ..The embroidery hoop does not have a co-ordinating die ..Its an another stand alone die which you can buy separately but alas I didn't have it so I improvised with my circle dies to cut the inner circle the outer part was fussy cut then watercolored with Vintage photo Distress ink and embossed with the Darice Woodgrain embossing folder to give it a more natural look. All the flowers and leaves and even the butterfly were watercolored with a combination of Distress inks and the Nirmal watercolors that I mentioned about in my last post here.
The background of my cardbase is embossed using Wendy Vecchi embossing paste to which I added a little bit of vintage photo ink and the stencil I used is from Winnie and Walter creative screenings (Do you see what I see).
Hope you all like my card.Would love to hear your views on it so do drop me a line :)

I am entering this card in the following challenges :
Little Tangles #64 : Hello
Paru's Cardmaking challenge : New
Stamping Smiles Design : Tic Tac Toe ( I have used the middle grid. (Sparkles, Embossing, New).


Have a nice day everyone!

Monday, January 12, 2015

Watercolored Hello

Hi friends and fellow crafters!
I have a card to share today using the new Altenew stamp- Doodle flowers which I recently laid hands on. LOVE, love, love these stamps !! 
I decided to play along the Runaway Inspired challenge this time as the inspiration picture really called to me.  The bright neon pink and that jeweled neckline from the Ralph Lauren collection is gorgeous and here's my take on it :


I was inspired by the color and the layered skirt. To recreate that, I took a piece of watercolor paper and just smooshed my Picked raspberry Distress ink pad on it very unevenly and I then I heavily spritzed it with water and let it dry.
I was also inspired by the neckline and tried to recreate it on my card by stamping and gold heat embossing the Altenew Doodle flowers stamp set on vellum and fussy cutting it. Placed some blue and yellow rhinestones in the center of the flowers. as well as scattering them on the sides,
I die cut my sentiment on a piece of black cardstock, used the negative of it and placed gold washi behind it to incorporate the belt.
I wanted to incorporate the yellow shirt on the right side of the picture on my card so I stamped a striped panel and placed it on the bottom of my card.
I know I went quite literal in my inspiration of the picture but I guess thats how my mind works, stuck on details. He he! :D

Supplies used :
Base cardstock- Watercolor paper, The Paper Accents Vellum and Campap
Dies- Spellbinders A2 Bracket Borders One,  WRMK Albums Made Easy Text dies.
Stamps- Altenew Doodle flowers, Bo Bunny To the Point stamp set.
Inks - Distress ink Picked Raspberry, Hero Arts Butter Bar ink pad, Versamark Dazzle Embossing ink pad.
Ranger Super fine Gold embossing powder, Gold Glitter Washi tape and rhinestones.


Challenges entered :
RIC - Photo Inspiration ( Made it to Top 3! )
Jo's Scrap Shack- Bling it up
STAMPlorations- Stamps & inks
Little Red Wagon - Sparkle and Shine

I hope you like my take on the inspiration picture. I'm not 100% sure about this card so would love to hear your view on it.
Have a nice day everyone!

Friday, March 8, 2013

A very colorful Hello! :)

Hi friends,
I am bit late in sharing this card which I had made posted on the Crafter's Corner blog two days back...But nevertheless ,today being Women's day & a weekend to look forward to I am finally sharing it on my blog today...So without further rambling here's a look at my card :-


All the details of how I went about making this card I have shared in the Crafter's Corner blog...Do check it out HERE...!!

Supplies Used :-
Base CS -Campap
Dies :-
Spellbinders Label 8 (Traced & cut)
For the embossed background :-
Versamark Embossing ink pad
Ranger Super fine Clear Embossing Powder
Inks used :-
Distress inks used : Mustard seed ,Shabby Shutters ,Ripe Persimmon ,Tumbled Glass ,Scattered Straw and Fired Brick .
Versafine onyx black ink pad
Stamps :-
Hero arts Flourishes stamp
Unity Fall for you stamp set -Bought from Ujjwal
Inkadinkadoo Flowers stamp set
Sentiment -TPC Studio
White Pearls -Stash , Golden Pearl -RAK from Sindhu :)                                        

Challenges Entered :-
A blog named Hero -Make your own embellishments
Little Red wagon -Shaped Card
Oldie but goldie challenge- Feeling floral ( My Inkadinkadoo & TPC stamps are really old...I have them for more than 2 years now) (Made it to Top 3)

Hope you all like my card..Do leave me your comments/suggestions...Love to hear from you!
Have a nice day everyone!