Friday, May 17, 2019

Spellbinders + Amazing Paper Grace Die of the Month | May 2019


Hello, crafty friends!
I have a card to share today featuring the Spellbinders + Amazing Paper Grace May Die of the Month. This month's Nostalgic Serenade Card Frame Die Set is perfect for making gorgeous cards and more. Many of the monthly die sets will include options to make 5 x 7 cards, while the inlays and accessories include options for smaller presentations. Becca Feeken, the designer of these exquisite die sets, has shared some fabulous inspiration and ideas using this month's kit on her blog, which I highly recommend checking out. HERE is a link to her blog post. 

If you want to find out more about the Club – prices, how you sign up and what’s included, please look ——–> HERE. These dies are only available through the Club and are limited to the month of May, so hurry before they are sold out.


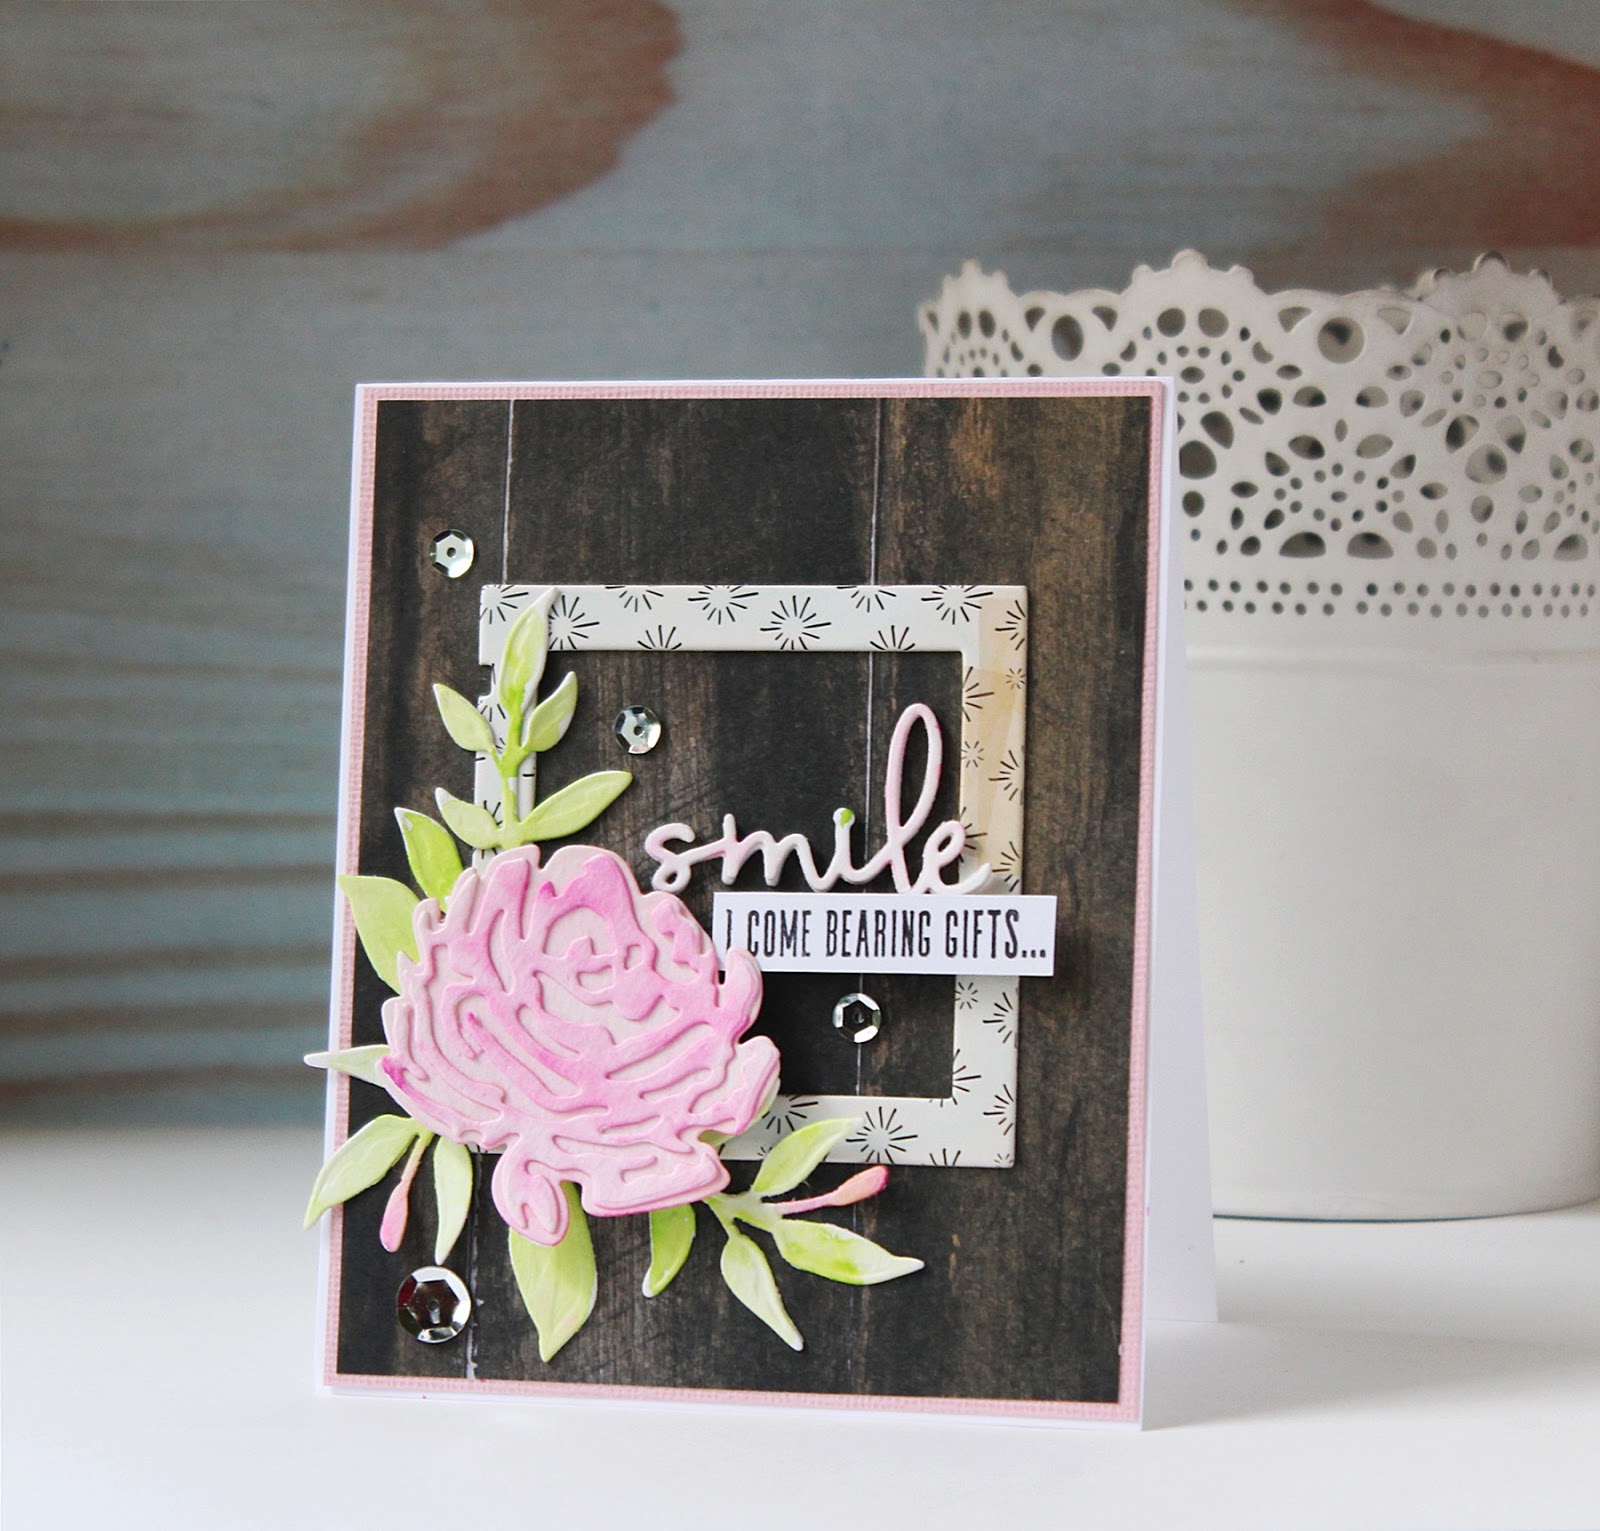
Now, let's have a look at my card. I tried to keep it simple and sweet and let the focus be on the elegant die cuts.

I love creating layered cards as such because they really make the dies the star of the show! To create my card, I first started by die cutting all the frames included in the set from Cream Cardstock. I cut out multiples of the largest frame, so that I could stack them one on top of the other for a raised look. Once I adhered all the frames in place, I started working on the embellishments for my card.

If you have been following me for a while now, you would know know, that I absolutely love creating my own handmade flowers. This time, I decided to create a paper rose using the Cinch and Go Flowers III Etched Dies. I die cut the flowers from White 80 LBS Cardstock, embossed them, and inked the petals using dye inks. The leaves are also a part of the same set and were lightly inked in green to complement the bright pink rose. The tiny flowers that you along the sides are made using the smallest flower die from the Cinch and Go IV Etched Dies. I used some Crystal Clear Glitter from Papericious for some sparkle and shine on the rose.

I added some rose buds and handmade filler flowers to complete my floral arrangement. Lastly, I stamped my sentiment on the smallest die cut piece which is from an older stamp set by Becca Feeken. And that's it! This card was finished!

Amazing Paper Grace Die of the Month Membership
If you are still on the fence about the Amazing Paper Grace Die of the Month Membership, do check out the other project samples created using it on the Spellbinders blog. The dies are total value for money and the cost of the kit includes shipping cost within USA. Isn't that awesome?!

That's it from me today! I hope you liked my card. If you did, please do let me know in the comments below. I always love hearing from you.

Thank you so much for your visit to my blog today!
Have a great day ahead!

Tuesday, May 14, 2019

Spellbinders May Card Kit of Month - Stay Wild


Hello there, everyone!
I have an exciting post to share today featuring the May  Card Kit of the Month by Spellbinders - Stay Wild. If you haven't heard about the Monthly Card Kits by Spellbinders or don't know how to subscribe to one, you can go over to the Spellbinders website and/or blog and read more about them HERE

This month's kit "Stay Wild", like all other of their Card Kits, gives you everything you need to create 10 unique cards and even more. You now also get better goodies, including a 40 sheet paper pad, clear stamps, an adorable die set, tons of embellishments, and more!
Card Kit of the Month Membership

I have made FOUR Cards using the kit, so without further ado, let's get started!

My first card is made using the Stay Wild Paper Pad,   
Stay Wild Clear Stamp Set, Chipboard Frames, and dies from the kit. 

I used the layering dies from the kit to die cut the flowers and leaves from Watercolor Cardstock. I coloured these pieces using Watercolor Brush Markers and popped them on foam dots for dimension. Next, I die cut the word 'Smile' a couple of times from White Cardstock and stacked them one on top of the other so that it would give a raised look. I also stamped the rest of the sentiment (from the Stay Wild Clear Stamp Set) on a strip of white cardstock to finish the card. 

And finally, I added some silver sequins as finishing touches for my card. Isn't this so simple and pretty?! 


Moving on to my second card which features the Stay Wild Die Cut Shapes Set, the Stay Wild Clear Stamp Set, and the Stay Wild Paper Pad.

It took me a while to compose this card because of the design and the colours used. I started by pulling out some die cuts from the Stay Wild Die Cut Shapes Set and arranging them on my card base. I tried to use similar colours and patterns to help achieve a balance in design. I also adhered two coordinating patterned papers on my card base. 

To complete the card, I die cut some leaves using Copper Foil Cardstock and stamped my sentiment on a piece of White Cardstock, which was then matted onto Copper Foil Cardstock And that's it! This card was finished!


To create this card, I first adhered a foiled patterned paper from the Stay Wild Paper Pad on the bottom of my card. Next, I adhered a piece of embossed cardstock on the top which was created using the Fun Stampers Journey Layered Scallops Embossing Folder. For the focal of my card, I added some die cuts (from the Stay Wild Die Cut Shapes Set) which were layered over one another to help create a balanced card design.  

I also added some Copper Foil Cardstock die cut leaves on either side of the card to complete the look. I love how this one turned out!


Finally, my last card for today is something very different from my usual style. I have used a mix of the Stay Wild Die Cut Shapes Set, the Stay Wild Clear Stamp Set, and the Stay Wild Paper Pad.

This card is slightly smaller than the standard A2 Card size. To create this one, I started by adhering a foiled patterned paper on my card base, which happens to be the same one I used on my previous card as well. Next, I die cut a decorative shape from another patterned paper and adhered it on the foiled patterned paper. For the focal, I used a bunch of die cut shapes, a chipboard frame, and some stamped, coloured, and fussy cut elements. 

This card was really fun to put together as it has elements and patterns which I don't generally tend to work with. I hope you like it!

And here is a picture of all the four cards together! I would love to know if you have a favourite!

Here is a video showing you some card ideas using this month's kit by Spellbinders. Watch this to have a closer look at the kit contents. 


That's it from me today! I hope you liked my cards using the Spellbinders May Card Kit of the Month. If you have a favourite, please do let me know. I would love to hear from you! :)

Thank you so much for stopping by!
Have a great day ahead. 

Saturday, May 11, 2019

Spellbinders Guest Post | May Glimmer Hot Foil Plates


Hello, friends!
 I am thrilled and honoured to say that I am a guest blogger today on the Spellbinders blog. I am here to share some projects that I’ve made with the NEW May Glimmer Hot Foil Plates. These Glimmer Plates are so elegant and such a joy to work with!
I can't wait to show you my projects using this collection.

Glimmer Hot Foil Plates add stunning foil features to any project from cards to mixed media and more. They are designed to be used with the Spellbinders Glimmer Hot Foil System (or other compatible hot foil system). Depending on its design, some plates may be used for letterpress and embossing.

I have THREE Cards to share using this new collection, so let's get started!
My first card is made predominantly using White & Gold and features the Circle Pattern Glimmer Hot Foil Plate and Fanciful Corners Glimmer Hot Foil Plate.

This card was really simple to put together because the Glimmer Plates did all the job for me. I started first by foiling the circles from the Circle Pattern Glimmer Hot Foil Plate using Glimmer Hot Foil Roll - Gold. Once I finished foiling both the plates, I die cut the large circle using the Hemstitch Circles Etched Dies. I wanted to keep the Glimmer Plates the focal of my card and hence die cut the circles and adhered them to the centre of my card. 

I decided to create a stamped background for my card using the Fun Stampers Journey Deco Wall Stamp Journey Gold Ink Pad. This gave my card a rich look and went well with my card design. 

To embellish my card, I used some very elegant flowers, leaves, and vines from the Vintage Burst Paper Flowers, Leaves & Vines. At this point, I felt that my card design needed something more to balance it. I decided to add two foiled corners to my card using the Fanciful Corners Glimmer Hot Foil Plate & Glimmer Hot Foil Roll - Gold. This almost completed my card. All that was left to do now was to add a sentiment. I die cut the word 'Hello' twice, once from Vellum, and the other from Gold Mirror Cardstock. I popped them one on top of the other and this card was done! 


Moving on to my second card which is something very different from my usual style. I used the gorgeous, Flower Pattern Glimmer Hot Foil Plate & Hello Glimmer Hot Foil Plate to create this card. 

To be fairly honest, this card did not take me more than 30 minutes to complete. That's the advantage of using such gorgeous Glimmer Plates. They fill in the entire card front and do not need any further accents. I foiled the Flower Pattern Glimmer Hot Foil Plate using Glimmer Hot Foil Roll - Rose Gold. I initially had decided to keep the background as is, but then felt it was too white. I used some of my Zig Clean Colour Real Brush pens to add some colour to the flowers. I feel, this lifted the background altogether!

I did not want the background to be hidden under various card layers, so I directly popped my sentiment piece on this panel. I used the Hello Glimmer Hot Foil Plate to foil the sentiment. I used the Hello Die outline to adhere the foiled piece onto it, which was die cut using Gold Mirror Cardstock. 


My third and final card for today features the Fanciful Corners Glimmer Hot Foil Plate. These corners are exquisite and add beauty to any project. I used them here as a part of my card design.

To create this card, I first started with a piece of 5" X 5" Pink Cardstock. I die cut this piece using the Shapeabilities Antiquities Square Etched Dies. Once it was die cut, I used the Fanciful Corners Glimmer Hot Foil Plates to foil the four corners on my card panel. I used the Glimmer Hot Foil Roll - Gold for it. Next, I die cut the intricate label pattern from Pink and Gold Mirror Cardstock respectively and layered them one on top of the other, slightly off-setting them so that the gold would show through.  I used the Fun Stampers Journey Text Happy Stamp Set for my sentiment which I stamped on another die cut piece. 

I kept the embellishing very minimal on this one. I die cut few flowers using Cream Foamiran, embossed them lightly, and added pearl pollens for the centres. I also added some die cut leaves and vines, some filler flowers and rose buds to balance the floral design. The Glimmer Plates make creating cards so much fun and easy!


Other Supplies: Neenah Solar White 110 LB cardstock, Cream Linen Textured 12 x 12 Cardstock, Light Pink Textured Cardstock, Gold Mirror Cardstock, Vellum Sheets, White Fun Foam; Adhesive: Scrapbook Adhesives 3D Foam Squares, Tombow Mono Multi Liquid Glue, Double Sided Foam Tape, Mini Glue Gun; Zig Clean Colour REal Brush Markers, Foamiran Sheets (Cream), McGill Inc. Paper Blossoms Tool kit, Pollens, Micro Rose Buds, Filler Flowers.

I hope you liked my creations! If you did, please let me know which one is your favourite! :) To see more of my work with Spellbinders products, do visit me on my Instagram and subscribe to my Blog.
Have a wonderful day ahead!