Showing posts with label Spellbinders Embossing Folder of the Month Club. Show all posts

Wednesday, March 16, 2022

Spellbinders Embossing Folder of the Month | Garden Path


Hello, crafty friends!
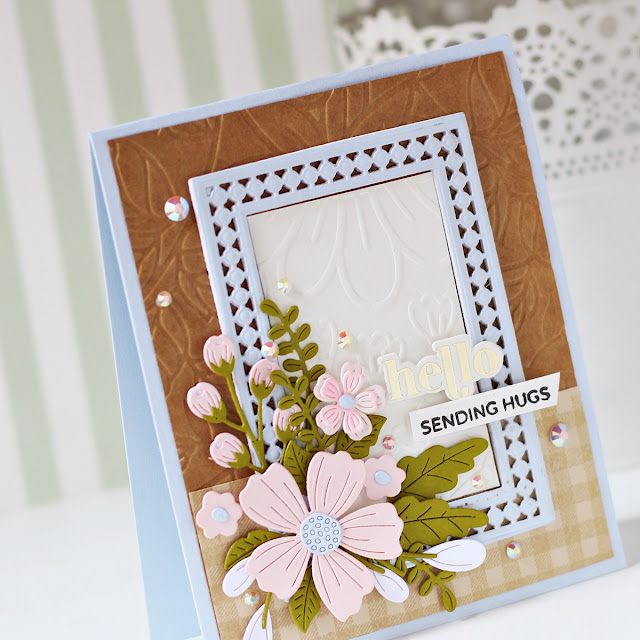
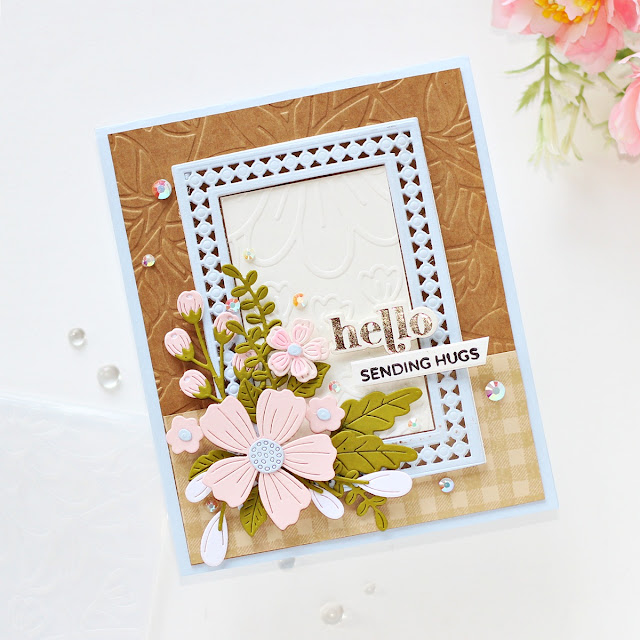
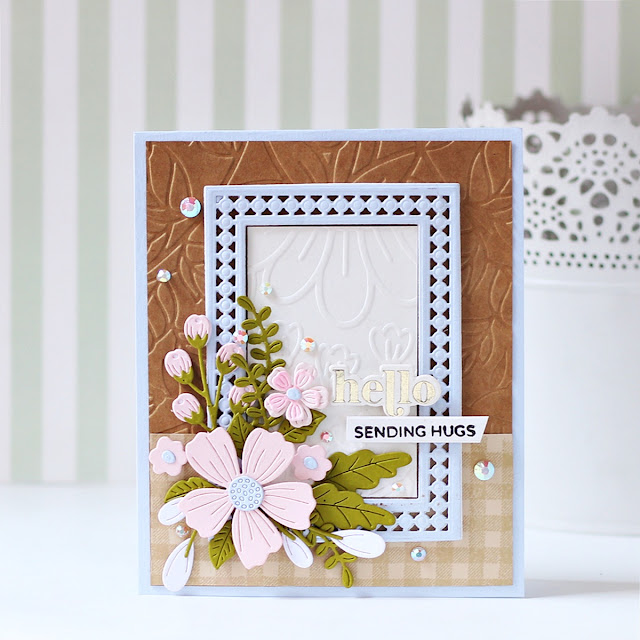
I have a springtime card to share today using the Embossing Folder of the Month by Spellbinders - Garden Path.  

You can join the Spellbinders Embossing Folder of the Month and receive an expertly designed die set each month along with membership-only savings! If you join between now and February 24th, you will receive this gorgeous “Garden Path” Embossing Folder.  There is no commitment and you can cancel at any time. Click HERE for more information.

The Embossing Folder adds texture and dimension to any project. The embossing folder is a whopping 5 1/2 x 8 1/2″and can be used to make slimline, 5″ x 7″, and a variety of sized projects. It’s a beautiful design and perfect for creating spring cards of all sizes.

I used the Garden Path Embossing Folder along with the Be Bold Blooms Etched Dies and the Nestabilities Candlewick Rectangles Etched Dies to create my card. 
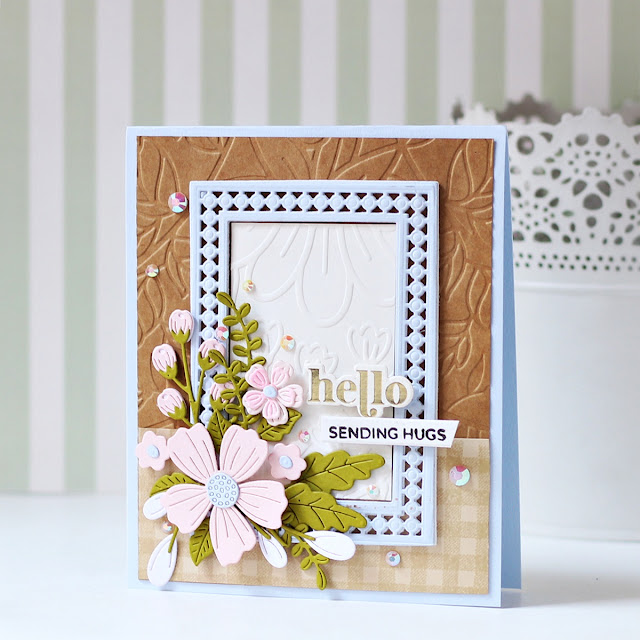

To create my card, I first die-cut Portbello Cardstock using the Layer 2 Die from the Precision Layering A2 B Etched Dies. Next, I embossed the panel using the Garden Path Embossing Folder in my Platinum 6 Die Cutting Machine. Then, I trimmed a piece of Snowdrift Cardstock to size before embossing it with the Garden Path Folder to create a pretty, textured, embossed pattern. Once that was done, I die-cut Waterfall Cardstock and White Fun Foam using the Rectangle 2 Die from the Nestabilities Candlewick Rectangles Etched Dies to create a frame for my embossed piece. I layered the pieces together, one on top of the other, using Craft Glue.

Next, to embellish my card, I die-cut Pink SandFern, Waterfall, and Snowdrift Cardstock using the various flower and foliage dies in the Be Bold Blooms Etched Dies. I lightly blended Spun Sugar Distress Oxide ink over some of the smaller flowers using a sponge dauber to add a hint of colour. Then, I assembled the flowers, arranged them on my card, and adhered them down with both Craft Glue and foam squares

Next, I used Gold Hot Foil to foil Snowdrift Cardstock using one of the sentiments from the Be Bold Glimmer Sentiments Glimmer Hot Foil Plate & Die Set and cut it out using the coordinating die. I adhered the piece onto my panel using foam squares for a raised effect. Then, to complete, I stamped an accompanying sentiment from the I'm Here for You Sentiments Clear Stamp & Die Set on to a strip of Snowdrift Cardstock using Versafine Onyx Black ink and popped it on to my panel using foam adhesive. Next, to add some visual interest to the design, I stamped a gingham border on a piece of Barely Peach Cardstock using Antique Linen Distress Oxide Ink Pad and adhered the piece to my panel using Craft Glue. To finish, I adhered my card panel to a  top-folding A2-sized blue card base made out of  Waterfall Cardstock. I finished the card with some Glacier Jewels to embellish my panel.


The Embossing Folder of the Month is available exclusively at Spellbinders Paper Arts during March 2022. You can get the “Garden Path” Embossing Folder at the special Cub Kit price, along with other membership perks.

You can subscribe to any of the Spellbinders Clubs between the 1st - 24th of each month and never miss a fun kit like this again!
  

Limited Period Offer
Get a FREE Cardmaking Kit (valued at $55) with any $100+ purchase on the Spellbinders website. Hurry, offer valid only while supplies last!
!

That’s it for me today! I hope you liked my take on the embossing folder1 If you like what you've seen from me, please give me a follow over on my Instagram (@hussena_cal) and/or subscribe to my blog if you haven't already.
Have a great day ahead!

Friday, February 25, 2022

Spellbinders Embossing Folder of the Month | Sketched Floral


Hello, crafty friends!
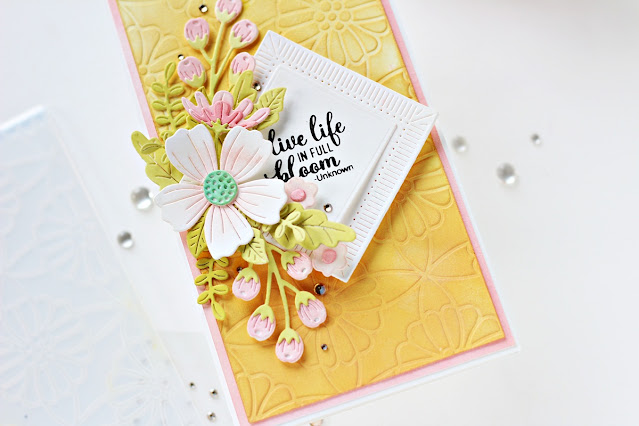
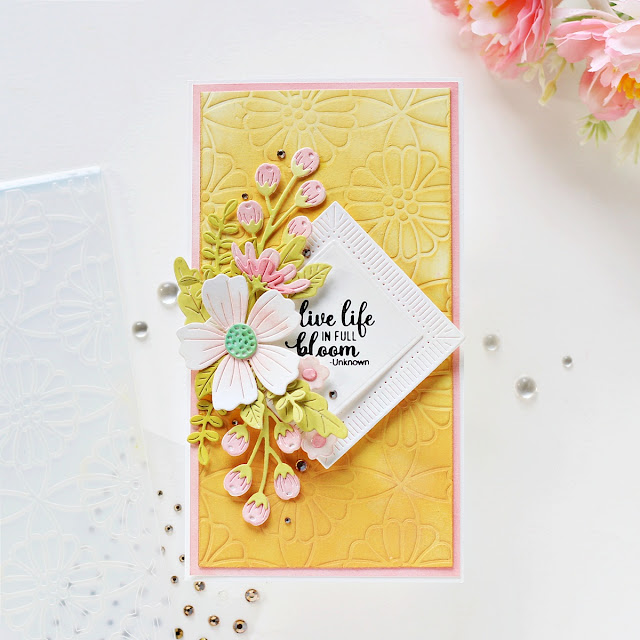
I am back today to share a Mini Slimline Card using the Embossing Folder of the Month by Spellbinders - Sketched Floral.  

You can join the Spellbinders Embossing Folder of the Month and receive an expertly designed die set each month along with membership-only savings! If you join between now and February 24th, you will receive this gorgeous “Sketched Floral” Embossing Folder.  There is no commitment and you can cancel at any time. Click HERE for more information.

The Embossing Folder adds texture and dimension to any project. The embossing folder is a whopping 5 1/2 x 8 1/2″and can be used to make slimline, 5″ x 7″, and a variety of sized projects. It’s a simple and pretty design and oversized dimensions make it super versatile.

I created a Mini Slimline Card in springtime colours using the Sketched Floral Embossing Folder along with the Be Bold Blooms Etched Dies and the Fluted Classics Square Etched Dies.

To create my card, I die-cut Snowdrift Cardstock using the Layer 2 Die from the Precision Layering A2 B Etched Dies in my Platinum 6 Die Cutting Machine. Next, I embossed the card panel using the Sketched Floral Embossing Folder. Then, to add some visual interest, I applied Spiced Marmalade and Mustard Seed Distress Oxide inks on the panel using an ink blending tool to highlight and bring out the raised areas more.  

Once that was done, I die-cut Snowdrift Cardstock using the Small Square Outer Rim and Insert dies from the Fluted Classics Square Etched Dies. Then, I die-cut Snowdrift Cardstock using the Small Inner Rim Die from the Fluted Classics Square Etched Dies and stamped a sentiment from the Garden Favorites Sentiments Clear Stamp Set in the centre of the panel using Versafine Onyx Black ink. Once that was done, I affixed the die-cut pieces on my embossed panel using foam squares for dimension.

Next, to embellish my card, I die-cut Snowdrift and Peridot Cardstock using the various flower and foliage dies in the Be Bold Blooms Etched Dies. I lightly blended Worn Lipstick Distress Oxide ink over top of each die-cut piece using a sponge dauber to add a hint of colour. I assembled the flowers first, arranged them on my card, and adhered them to with both Craft Glue and foam squares

Next, I die-cut Snowdrift Cardstock using the Layer 1 Die from the Precision Layering A2 A Etched Dies and applied Worn Lipstick Distress Oxide ink over the entire panel using a blending brush. I mat my embossed panel with this custom-colored background panel before adhering it to a side-folding Mini Slimline White Card Base using tape runner. I finished the card with some Gold Mix Color Essentials Gems to embellish my panel.

The Embossing Folder of the Month is available exclusively at Spellbinders Paper Arts during February 2022. You can get the Sketched Floral” Embossing Folder at the special Cub Kit price, along with other membership perks.

You can subscribe to any of the Spellbinders Clubs between the 1st - 24th of each month and never miss a fun kit like this again!
  

Limited Period Offer
Don't miss the BOGO (Buy One Get One) Die Cutting Sale going on over at Spellbinders from now until Sunday. Be sure to take advantage of the sale and stock up on your favourite die sets!
    

That’s it for me today! I hope you liked my take on the die set! If you like what you've seen from me, please give me a follow over on my Instagram (@hussena_cal) and/or subscribe to my blog if you haven't already.
Have a great day ahead!

Sunday, February 20, 2022

Spellbinders Large Die of the Month | February 2022

Hello, crafty friends!
I hope you're having a great weekend so far! I have a spring-time card to share today featuring the Spellbinders Large Die of the Month Kit. This month’s Large Die of the Month Kit, “Typing Class“, is a huge set of 22 dies that can be used to cut a beautiful typewriter, several sentiments, and a big bouquet of leaves and flowers. 

You can join the Spellbinders Large Die of the Month Kit and receive an expertly designed die set each month along with membership-only savings! If you join between now and February 24th, you will receive this gorgeous “Typing Class” Die Set.  There is no commitment and you can cancel at any time. Click HERE for more information.

This month's die set create a detailed typewriter that when stacked together creates a fun dimensional look that fits easily into an 5″x7″ envelope. I used most of the dies included in the kit to create this 5″ x 7″ card for creating a springtime thank-you card.

To create my card, I first die-cut Snowdrift, Pink Sand, and Silver Glitter Cardstock using the main typewriter design, keyboard, the key strips, knob, and the backer dies. I assembled the different pieces following the Video Tutorial on the Spellbinders YouTube channel, which you can check out HERE. This was rather easy to put together and super fun as well! Next, I die-cut Snowdrift and Silver Glitter Cardstock using one of the sentiment dies included in the set. I adhered the white die-cut sentiment on top of the silver die-cut with Craft Glue, and then ink blended Picked Raspberry ink to the bottom three-quarters of the sentiment die-cut piece for more depth. I used 3D Foam Adhesive Tape to adhere my sentiment piece on the typewriter, giving it some extra dimension. 

Next, to embellish my card, I die-cut Wild BerryBeeswaxRainforest, and Teal Topaz Cardstock using the flower and leaf dies included in the set. Once I had the desired number of die-cut pieces, I adhered them on my card front using a combination of foam adhesive and Craft Glue. Next, I die-cut Snowdrift Cardstock using the typewriter message die included in the Clear Stamp & Die of the Month Club. Then, I stamped a sentiment from the Old School Notes Set and popped it on my panel using foam adhesive

Then, to create my card background, I embossed a piece of Onyx Cardstock using the Sketched Floral Embossing Folder of the Month Set. and lightly distressed the raised areas using a Distressing Tool to add texture and dimension. I matted this panel with a piece of Pink Sand Cardstock before adhering it to a top-folding 5"X7" card base with tape runner. I popped the typewriter up on top and added a few Prism AB Color Essentials Gems to embellish.

 
If you'd like to see some more project inspiration using the Large Die of the Month Kit, check out the Spellbinders Blog where you can find some stunning project samples using it.  
 

Limited Period Offer
SAVE $25 Off $100+ orders on the Spellbinders website. This is a cart-level discount that will be applied to all orders with a subtotal of $100+, clubs are not eligible for this promotion.

 That’s it for me today! I hope you liked my take on the die set! If you like what you've seen from me, please give me a follow over on my Instagram (@hussena_cal) and/or subscribe to my blog if you haven't already.