Happy Friday, crafty friends!
I have two Cards to share today that I made using a multitude of dies and stamps from Pinkfresh Studio. I have combined and used dies from the November Release along with stamps and dies from previous releases for my cards today and I am so excited to share them with you.
My first Card features the Essentials: Stitched Scallop Rectangles Die Set, Diagonal Stitched Plaid Die, Diagonal Stitched Circles Die Set, Classic Words Die Set, and the Fancy Blooms Stamp Set.

To create my card, I began by stamping the floral images from the Fancy Blooms Stamp Set onto a piece of Canson Montval Watercolor Paper using a light hybrid ink that is watercolor-friendly. I then started coloring the images using Liquid Watercolors from Pinkfresh. The flowers were colored using Bubble Gum and Aquamarine, while the leaves were colored using Key Lime and Emerald City. I diluted the colors with water while watercoloring to achieve a nice, soft look. After the coloring was complete, I die cut the images using the coordinating Fancy Blooms Die Set and set it aside to work on other components of my card.

To create the background, I die cut a card panel using the Diagonal Stitched Plaid Die from Canson Montval Watercolor Paper and did a light color wash on it using Aquamarine Liquid Watercolor. I also flicked some black paint splatters on the panel for detail and interest. Then, I foam mounted this panel to my card base.

Next, I die cut the two stitched circles from the Diagonal Stitched Circles Die Set from Neenah Claasic Crest Solar White Cardstock (110 LBS) and adhered them to the card panel using foam dots. Once that was done, I die cut the outer rectangle from the Essentials: Stitched Scallop Rectangles Die Set from Neenah Cardstock and foam mounted it to my card panel for dimension.

I then arranged the floral images to my card front using foam squares. I also fussy cut some of the smaller flowers from the floral cluster and added them to the card to create a more cohesive design.

The sentiment is die cut from the Classic Words Die Set. I cut the outer shadow for the sentiment from Vellum Paper and 'Hooray' from from Gold Glitter Cardstock. The sentiment from the Floral Notes Stamp Set was heat embossed in white on a strip of Black Cardstock and then attached to the panel using foam squares. I finished off the card with a few clear Jewels.

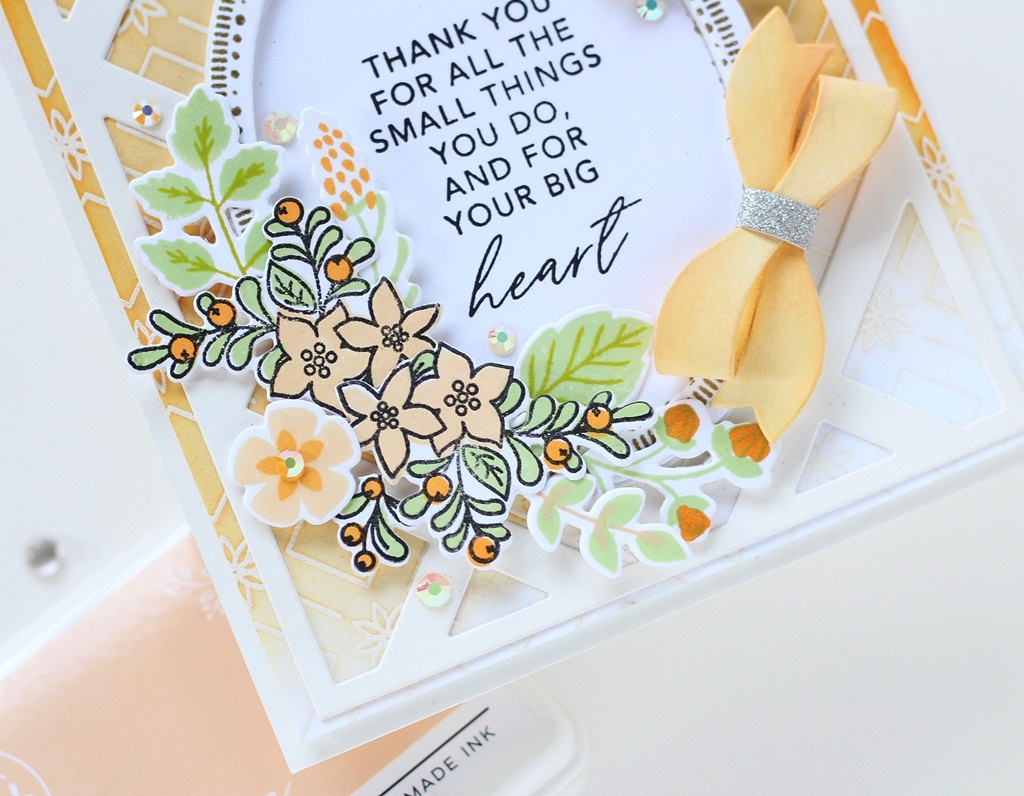
My next Card features the Essentials: Stitched Scallop Rectangles Die Set, Fancy Oval Frame Die, Slim Stripes Die Set, the You Are My Favorite Stamp Set, Lea's Onrnate Lowercase Die Set, and Heather's Lowercase Die Set.

To begin, I stamped the floral outline cluster using the You Are My Favorite Stamp Set on a piece of a Neenah Classic Crest Solar White Cardstock (110 LBS) using Detail Black ink. The You Are My Favorite stamp, die, and stencil set is one of my all-time favorites from Pinkfresh and I love using it time and again for my cards. One of the things I like about this set is that the coordinating Stencils make it so easy to add color without stamping or coloring, so you can blend colors and add shading as you like.

The coordinating You Are My Favorite stencils consist of 3 layering stencils to color the stamped image without having to mask. I used Berrylicious and Sparkling Rose to ink the flowers and Fresh Pear for the leaves and foliage. Once I was done, I die cut the image using the coordinating You Are My Favorite Die Set and set it aside to work on other elements for my card.

For my card background, I die cut a couple of paper strips from White Cardstock using the Slim Stripes Die Set. I colored the die cut strips using Mint and Coral Reef and then adhered the various strips to the centre of my card panel. Next, I die cut the Fancy Oval Frame Die from Neenah Cardstock and foam mounted it over on my card panel. I also went ahead and die cut a stitched rectangle frame from the Essentials: Stitched Scallop Rectangles Die Set. I lightly coloured the frame using Coral Reef ink and then foam mounted it to my card front.

I adhered my floral clusters on my panel using foam tape for dimension. For my sentiment, I used a combination of Lea's Onrnate Lowercase Die Set, and Heather's Lowercase Die Set. l love that these are all interchangeable and can be mixed and matched together. They are truly very versatile! I die cut the letters to spell Hi twice - once in Gold Glitter Cardstock and again in White (which was then colored using Coral Reef for a soft, transparent look) to swap out the pieces for the outline before adhering them to my card. The sentiment from the Floral Notes Stamp Set was heat embossed in white on a piece of Black Cardstock and then adhered to the card front using foam tape. To finish, I embellished my card with clear Jewels. This card required me to do quite a bit of die cutting, but I really enjoyed creating it.

I hope you like today's cards! I would love to hear what you think of them.
Thanks so much for stopping by!