Showing posts with label Sequins. Show all posts

Sunday, May 22, 2022

Altenew Paint-A-Flower: Magnolia Rustica Outline Stamp Set Release Blog Hop + Giveaway ($200 in Total Prizes)


Hello, crafty friends!
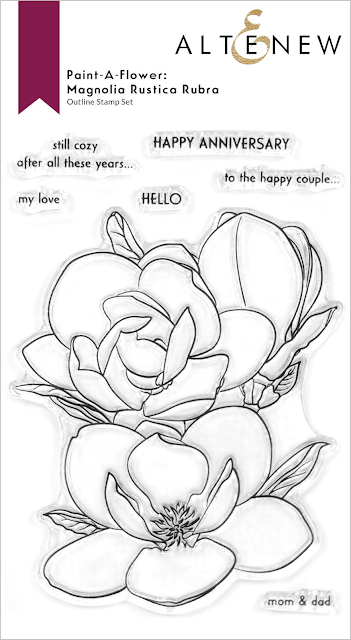
I'm so happy to be joining Altenew for the Magnolia Rustica Outline Stamp Set Release Blog Hop today showcasing the next installment in their monthly Paint-A-Flower series! You can purchase this fabulous set here individually for $15.99, or you can subscribe to receive the new Paint A Flower sets at a discount each month! When signed up, you are guaranteed a spot in their monthly their monthly Paint-A-Flower releases and will receive a set each month - at a specially discounted price! ($15.99 →$12.99)

If you arrived here from Preeti Chandran's Blog, then you are on the right track. If this is your first stop, then you will want to start at the beginning, the Altenew Card Blog. We've got tons of inspiration and giveaways for you on the hop today, so keep reading till the end of this post for more information.

 I have a soft, floral card for you today with a twist, so let’s get started with the details!

I began by stamping the magnolia image on some Neenah Classic Crest Solar White Cardstock using Obsidian Pigment Ink. I then used Altenew Coral Berry, Grapevine, Sea Glass, Ocean Waves, Evergreen, and Forest Glades Alcohol Markers from the Cosmic Garden Set to add highlights and shadows to the magnolia flower using the pointillist coloring technique. Look closely - I used the palest peach and aqua in the petals for overall color, and then I used the darker tone to add shading. It's simple to get it right on this magnolia image because the shading is already illustrated. I also added a bit of yellow in the flower centres for interest and dimension! 

After I'd completed the coloring, I did a little stenciling. I used my Altenew Blending Brushes to blend some beautiful Sweet Leaf ink to the background panel using the Altenew Sketched Lines Stencil to showcase these meticulously-colored flowers.

While my background was drying, I stamped a greeting from the  Magnolia Rustica Outline Stamp Set using  Obsidian Pigment Ink onto a piece of White Cardstock. Next, I adhered a strip of Citrine Cardstock along the bottom of the piece for a little pizzazz. I adhered  it down on my panel using foam adhesive for extra dimension and added gathered gold thread to give the panel more interest.

Then, to finish, I adhered the panel to a top-folding A2-sized white card base using foam adhesive. I added a few Antique Gold - Sequins to help add some sparkle to the card front.


Giveaway Prizes:
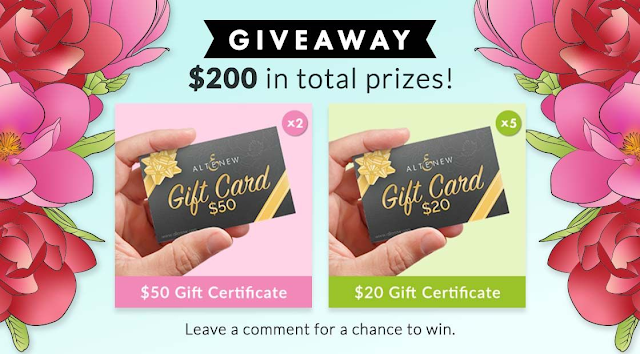
$200 in total prizes! To celebrate this release, Altenew is giving away a $50 gift certificate to 2 lucky winners and a $25 gift certificate to 5 winners! Please leave a comment on the Altenew Card Blog and/or each designer’s blog post on the blog hop list below by 05/28/2022 for a chance to win. Altenew will draw 10 random winners from the comments left on each stop of this blog hop and announce the winners on the Altenew Winners Page on 05/30/2022.

Blog Hop Order:
Next Stop on this Blog Hop is, Eva Bussom's blog. Just in case you lose your place along the way, here is the complete list of participants so that you can find your way back:

 Altenew Card Blog

Emily Midgett

Ann Taylor

Nathalie DeSousa

Carol Hintermeier

Jenny Colacicco

Angela Brennan

Tenia Nelson

Nenette S. Madero

Virginia Lu

Natasha Davies

Amy Hill

Terri Koszler

Nandini Karmarkar

SathyaKala Sankaran

Colleen Balija

LauraJane

Bridget Casey

Linda Westfall

Rosie Neustaedter

Preeti Chandran

                      Hussena Calcuttawala (You are HERE)

Eva Bussom

Daniel Diaz

Sande Woodson


Well, that's all for me today. Thanks so much for stopping by today, and have a marvelous day!
If you like what you've seen from me, please give me a follow over on my Instagram (@hussena_cal) and/or subscribe to my blog if you haven't already.

Friday, March 12, 2021

Spellbinders March'21 Blog Hop + Giveaway!


Hello, crafty friends!
I'm so happy to be joining Spellbinders for the March 2021 Clubs Inspiration Blog Hop today. Spellbinders is celebrating all their Club Kits in shop for March 2021.

If you arrived here from Jenny Colacicco's Blog, then you are on the right track. If this is your first stop, then you will want to start at the beginning, the Spellbinders Blog. We've got tons of inspiration and giveaways for you on the hop today, so keep reading till the end of this post for more information.

I have a Slimline Card and a Shaped Card to share for the hop today using the Amazing Paper Grace – March 2021 Die of the Month Set. In case you missed, it I shared a Card on my blog a few days ago using this month's "Mini 3D Vignette Floral Mason Jar" Set, which you can check out HERE.

The Mini 3D Vignette Floral Mason Jar is a beautiful set of sixteen dies and it features a bouquet as well as lovely dimension, and folds flat like all of the 3D Vignettes.

 It's been a hot minute since I made a Slimline card and I was very excited to create one using the Mini 3D Vignette Floral Mason Jar Die Set. 

For my card, I first die cut all the different components of the jar and the flowers from White Cardstock using my Spellbinders Platinum 6" Machine. Then, I cut a piece of Watercolor Cardstock to size and did a light watercolour wash on it using Broken China ink. I also added a couple of black paint splatters for definition and interest. 

Next, I die cut an aperture in the body of the jar to create a frame. Then, I added a bit of soft colour to the front and back pieces of the jar using Broken China ink with a sponge to create a soft, natural look. I wanted to recreate the look of a clear jar/vase, so I added a layer of acetate in between the cardstock die cut pieces and used White Fun Foam to adhere the pieces to my panel for added dimension. 

I coloured the flowers, stems, leaves, and foliage using Mermaid Markers by Jane Davenport and Distress inks. I LOVE layering die sets and layered flowers are my absolutely favourite! I had so much fun colouring each piece and assembling them to create the bouquet on my card front.  

I stamped on the lid of the jar using a Gingham stamp and Pool Play ink and then die cut it to add over the base of the jar. I wrapped some natural hemp thread around it for visual interest and adhered it to the jar using foam squares. I attached the stems through the the jar lid to the top of the mason jar. The flowers and foliage were also adhered to the panel using foam squares. 

I stamped my sentiment on a stitched tag die cut from the Mini 3D Vignette Floral Mason Jar Die Set. I used hemp thread to tie the two tags together and then popped it over the lid of the jar using foam squares. To assemble the card together, I adhered the panel to a piece of lemon yellow Cardstock, which was then adhered to a side-folding white card base with Craft Glue.


My next project is a Shaped Shaker Card. I think you can tell that i love this die set a bit too much, so I have gone all out in creating with it! 

First, I die cut the different components for the card from White Cardstock using my Spellbinders Platinum 6" Machine. I wanted to create a shaped card, so I used the partial die-cutting technique here to create a hinged card base. If you don't know how to create one, you can check out Becca Feeken's tutorial HERE where she shows you how to do it. It's very simple and easy.

In order to create the Shaker piece, I die cut an aperture in the body of the jar to create a frame. Then, I added a bit of soft colour to the front and back pieces of the jar using Tattered Rose ink with a blending brush to create a soft, natural look. I followed the same process as above to create the shaker frame, but this time I added some steel coloured Glass Glitter and patterned sequins to create the shaker piece. I used two layers of White Fun Foam in between the die cut layers to create a sturdy frame. 

The flowers, leaves, stems, and foliage were once again coloured using Mermaid Markers by Jane Davenport. I created the gingham lid following the same technique as I did for the earlier card. I wrapped some natural hemp thread around it for visual interest. I attached the stems through the the jar lid to the top of the mason jar, while the flowers and foliage were adhered using foam squares and  Craft Glue.

I stamped my sentiment on a stitched tag die cut from the Mini 3D Vignette Floral Mason Jar Die Set. I die cut another tag and used a Gingham stamp to stamp on it using  Rustic Rose ink. I used hemp thread to tie the two tags together and then popped it over the lid of the jar using foam squares. And that's it - This card was done! This would be such a sweet little card to give to a family member or a friend. I love how it turned out.


Giveaway:
To celebrate this release, Spellbinders is giving away a $50 gift certificate to 3 lucky blog readers – selected from the comments on our blog. Giveaway closes on Sunday, March 14th, 11:59 pm MST. The winner will be announced in this blog hop post the following Tuesday. The winner is responsible for shipping cost, duties and taxes.

Please note, store credit (gift certificate) cannot be applied to Club Subscriptions. Store credit can be applied to shop past Club products, Club extras and regular releases.


Blog Hop Order: 
Next Stop on this Blog Hop is, Virginia Lu's blog.
Just in case you lose your place along the way, here is the complete list of participants so that you can find your way back:

                            Hussena Calcuttawala (You are HERE) 

Thank you so much for your stopping by and reading this blog post. I hope you liked my projects! 

If you like what you've seen from me, please give me a follow over on my Instagram (@hussena_cal) and/or subscribe to my blog if you haven't already.
Wishing you a great day ahead!

Saturday, May 16, 2020

Spellbinders May Card Kit of the Month | All The Little Things

Hello there, crafty friends!
I have a couple of cards to share today featuring the May Card Kit by Spellbinders - All The Little Things. If you haven't heard about the Monthly Card Kits by Spellbinders or don't know how to subscribe to one, you can go over to the Spellbinders website and/or blog and read more about them HERE. 

This "All The Little Things" Kit, like all their other Card Kits, gives you everything you need to create 10 unique cards and even more. You now also get better goodies, including a 40 sheet paper pad, clear stamps, an adorable die set, tons of embellishments, and more!
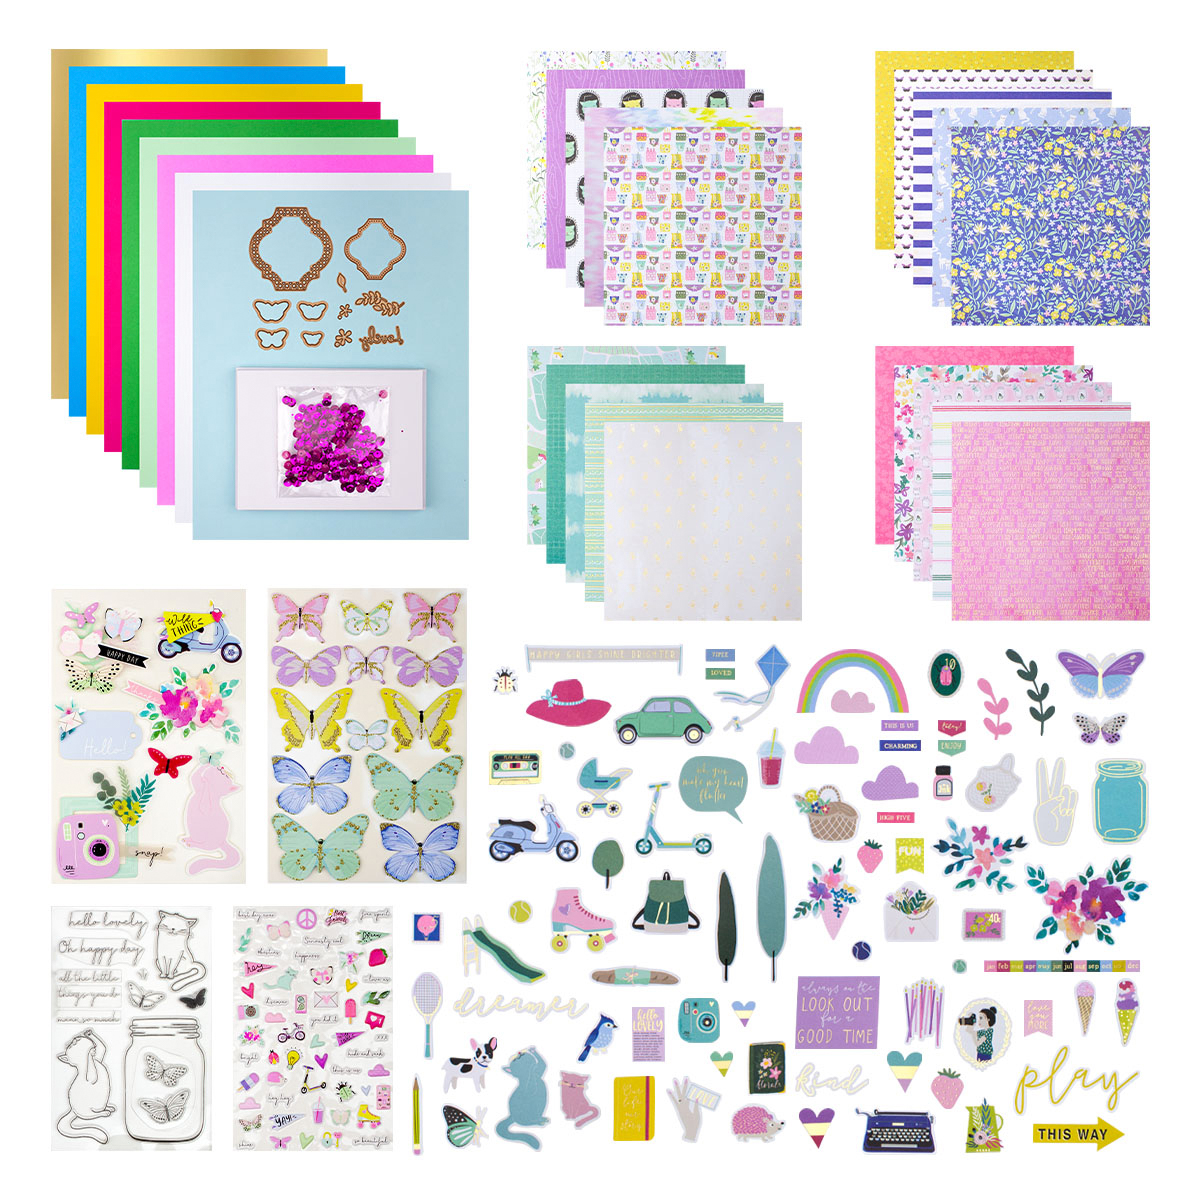

I have FIVE Card ideas to share with you today using this kit, so let's get started!


Card #1
My card uses the All the Little Things Die Cut Shapes Set, All the Little Things Clear Stamp Set, All The Little Things Dies, and the All The Little Things Sticker Sheets.

For this card, I die cut several labels using the main shape die from the Card Kit from Sky Blue Cardstock. I adhered them down to my panel and started working on my focal.

I used a mix of 3D Stickers for my card design. I love the soft colours and the sheer variety of prints in the Stickers. You are so spoilt for choice! I could have never imagined creating cards predominantly with them, but they really are so amazing to use.

I tucked in two stickers together to create one single piece. I also stamped and coloured a butterfly using the All the Little Things Clear Stamp Set. I used its coordinating die to die cut the butterfly and popped it over on my panel. I also adhered some additional 3D Butterfly Stickers to jazz up the design. Finally, I added some Epoxy Stickers to create my sentiment and complete my card design. This was really so fun to create!


Card #2
My card uses the All the Little Things Paper Pad, All the Little Things Die Cut Shapes Set, All The Little Things Dies, Sticker Sheets.

My second card is another Clean and Simple design. To create this card, I first die cut three circles of different sizes from varied patterned papers from the All the Little Things Paper Pad using a Stitched Circles Die Set and adhered them down to my panel. Then, for my focal, I used a beautiful 3D Sticker. I have rarely used Stickers to create my cards, so this was definitely a great experience. I love how they can dress up any project in a jiffy!

I wanted to add some more elements to my card to make it all look cohesive, so I adhered a bird die cut from the All the Little Things Die Cut Shapes Set. I also popped in a 3D Butterfly from the Sticker Sheet included in the Card Kit along with the sentiment banner. And my card was complete!


Card #3
My card uses the All the Little Things Paper Pad, All the Little Things Die Cut Shapes Set, All The Little Things Dies, and the All the Little Things Clear Stamp Set.

For my card, I first die cut a panel using a Stitched Rectangles die from a patterned paper from the All the Little Things Paper Pad. Next, I die cut another rectangular frame using the same Stitched Rectangles Set from another patterned paper. Then, I used my Nestabilities Standard Circles Dies to die cut a circle from the green patterned paper and adhered it to my card base. I also adhered the frame using foam dots to give it some dimension.

For my focal, I picked out few die cuts from the All the Little Things Die Cut Shapes Set and adhered them to my panel. I die cut some leaves using the dies included in the Kit from Mirror Gold Cardstock and added them to my panel as well. I also die cut my sentiment using the word die included in the Kit from White Cardstock which was then coloured using a Yellow dye ink.

Then, I stamped the word 'Hello' onto the mason jar to complete my sentiment. Next, I stamped and die cut few butterflies and popped them on my panel. The beautiful butterflies are from the All the Little Things Clear Stamp Set and I love how Spellbinders now has coordinating dies for their Stamps in the Card Kit. It makes creating so much more simple and easy. Lastly, I die cut two flowers using the flower Dies from the Kit and colored them using the same Yellow dye ink.


Card #4
My card uses the All the Little Things Die Cut Shapes Set, All The Little Things Dies, and the All The Little Things Stickers.

I rarely do 'Cute' Cards, so this was again something new for me. For this one, I first took a piece of A2 Whip Cream Cardstock and embossed it using the Layered Scallops Embossing Folder. I have used this particular folder quite a few times on my cards and love how it goes well with almost any card design.

I had to use the beautiful frame die included in the Card Kit, and so die cut it from Mirror Gold Cardstock. I also die cut the coordinating inlay piece from Sky Blue Cardstock which is again from the Kit itself. I adhered both the pieces using foam dots on my panel.

 For my card focal, I used a combination of Die Cuts and Stickers. I used a 3D Sticker for the cat on the right, while the one in the centre is a die cut from the All the Little Things Die Cut Shapes Set. The sentiment bubble is also from the Die Cut Shapes Set. To add some more interest to my design, I added tiny little butterflies, which came from the Sticker Sheets from the Kit. As the finishing touch, I added two hearts to tie it all in together!


Card #5
My final card uses the All the Little Things Paper Pad, All the Little Things Die Cut Shapes Set, and the All The Little Things Sticker Sheets.

For my card, I first die cut a panel using a Stitched Rectangles die from a patterned paper from the All the Little Things Paper Pad. Next, I die cut another card panel using the same Stitched Rectangles Set from Whip Cream 12x12 Cardstock. I adhered this one right on top of the previous panel using foam dots. I then picked out few die cuts which would go well with my card design.

The rainbow and the clouds are from the All the Little Things Die Cut Shapes Set while the scooter is a gorgeous 3D Acetate Sticker included in the All The Little Things Kit. I wanted to dress up this sticker for some more visual interest, so I popped in another Epoxy Sticker to add to the fun quotient.

I also used some 3D Epoxy Stickers to create my sentiment. As the finishing touch, I adhered two puffy heart stickers which are again from the Card Kit. Simple and easy, and SO FUN!


If you want to find out more about the Club – prices, how you sign up and what’s included, please look ——–> HERE. 
 The Card Kits for Spellbinders Monthly Clubs are exclusive to Spellbinders and you won't find them anywhere else, so be sure to gets yours before it gets sold out! If there are any leftovers, they are added to the Spellbinders store for sale at full price. You can see all of the past Card Kits HERE.

If you'd like to see some more project inspiration using the Card Kit, check out THIS super helpful YouTube video that has some awesome card ideas using the Card Kit. 


That's it from me for today! I hope you liked my cards. Let me know if you have any favourite(s)! I would love to hear from you.
If you would like to see more of my work using Spellbinders, do follow my Instagram page - @hussena_cal

Thank you so much for your visit to my blog today!
Monday, July 1, 2019

Pinkfresh Studio Guest Designer


Hello, crafty friends!  
I'm so excited to share that I am a Guest Designer for Pinkfresh Studio this month! I have a couple of cards to share today using two of my favourite sets - Embroidered Blossoms & Fancy Blooms.

My first card features the Embroidered Blossoms stamp set. What I absolutely adore about this set is the large variety of foliage it has to offer. I am a sucker for them and love sets which include such images!

To create my card, I first started by stamping a mix of images from the Embroidered Blossoms stamp set. I stamped them on white  heavy weight cardstock using different dye inks and cut them out using the Embroidered Blossoms die set. I have to say, that I really like the coordinating die sets from Pinkfresh because they include dies for each and every element from the stamp set, which is so wonderful. 

Once I had the images all die cut and ready, I started working on my card panel. I used the Essentials: Diagonal Stitched Rectangles Die Set to die cut my card panel, again from white cardstock. I also used the Essentials: Braided Circles Die Set to die cut two different circle designs.

I took another piece of cardstock, slightly bigger than the previous one, and lightly ink blended the centre using Broken China Distress ink. I adhered the panels one on top of the other and arranged all my flowers and foliage. Once I was happy with the design, I adhered them on the panel.

For the sentiment, I used the Essentials: Classic Words Die Set. I die cut it twice, once from vellum and the other from gold glitter cardstock. I layered them one on top of the other and adhered it to my card. I added some gold sequins and black paint splatters to finish off my card.


My next card again features the Embroidered Blossoms stamp set. This stamp set is really versatile and I wanted to create another card using it, but in a totally different style. I began by ink blending Worn Lipstick and Mustard Seed Distress Oxide inks on an A2 sized watercolor panel. Once I was happy with the blending, I flicked some drops of water on it using a paint brush and put a piece of paper tissue over it. This left me with a soft, ink blended background. 

To create the focal for my card, I die cut the rectangle frame from the Essentials: Diagonal Stitched Rectangles Die Set. I adhered it using foam tape on my card. Now it was time to work on the other design elements for my card. I stamped some florals and leaves from the Embroidered Blossoms stamp set using various dye inks. I die cut them out using the coordinating Embroidered Blossoms die set.

I adhered these images to my card panel and used foam dots for added dimension. I also added Stickles to the centres of certain flowers for added interest.

The sentiment again comes from the Essentials: Classic Words Die Set. I die cut the words from white cardstock and used foam tape to adhere it, so that I would get a raised effect. Then, I lightly inked the bottom of the letters using Picked Raspberry Distress ink just to add a little more interest to my card design. 

All that was left for me to do now was to adhere the card panel on a top folding card base and my card was finished!


My final card for today features the Fancy Blooms Stamp Set. Now, bold colours are not really my thing, but I decided to break away from my comfort zone and use them for this particular card. To start, I took an A2 sized panel of cold pressed watercolor paper and saturated the panel using lots of water. Then, I gathered a couple of Distress inks in shades of blue and swiped them across the upper half of the panel. I went back and forth with the different shades till I achieved my desired look. Once I was happy with it, I let it dry and then added some paint splatters. 

For my card focal, I used the flowers and leaves from the Fancy Blooms stamp set. I stamped them using black pigment ink on white cardstock and then clear heat embossed them. I used the coordinating Fancy Blooms die set to die cut my stamped images. If you see my card closely, you will notice, that I have cut apart some images and used them as fillers. I tend to use this technique sometimes to stretch my supplies. After I die cut all the pieces, I coloured the images using Zig Markers. I went for very simple colouring as the images were very detailed in themselves.

To complete my card design, I die cut a circle frame from the Essentials: Braided Circles Die Set using gold glitter cardstock. I arranged all my flowers and leaves around this frame and popped them on foam dots for dimension. 

I used the same technique for my sentiment as I did for my first card. I used the Essentials: Classic Words Die Set to die cut the words twice, once from vellum, and the other from black cardstock. I layered them one on top of the other and adhered it to my card panel. And that's it! My card was done. 

This brings me to the end of the post. I hope you liked the cards I made. I am glad you stopped by to read this post. I would love to hear what you think of my cards! 

Have a lovely day, you all!