Showing posts with label Amazing Paper Grace. Show all posts

Thursday, January 19, 2023

Spellbinders January 19th Clubs Blog Hop + Giveaway!


Hello, crafty friends!
I'm happy and honoured to be joining Spellbinders for the January 2022 Clubs Inspiration Blog Hop today. Spellbinders is celebrating all their Club Kits in shop for January 2023.

If you arrived here from the wonderful, Michelle Short's Blog, then you are on the right track. If this is your first stop, then you will want to start at the beginning, the Spellbinders Blog. We've got tons of inspiration and giveaways for you on the hop today, so keep reading till the end of this post for more information.
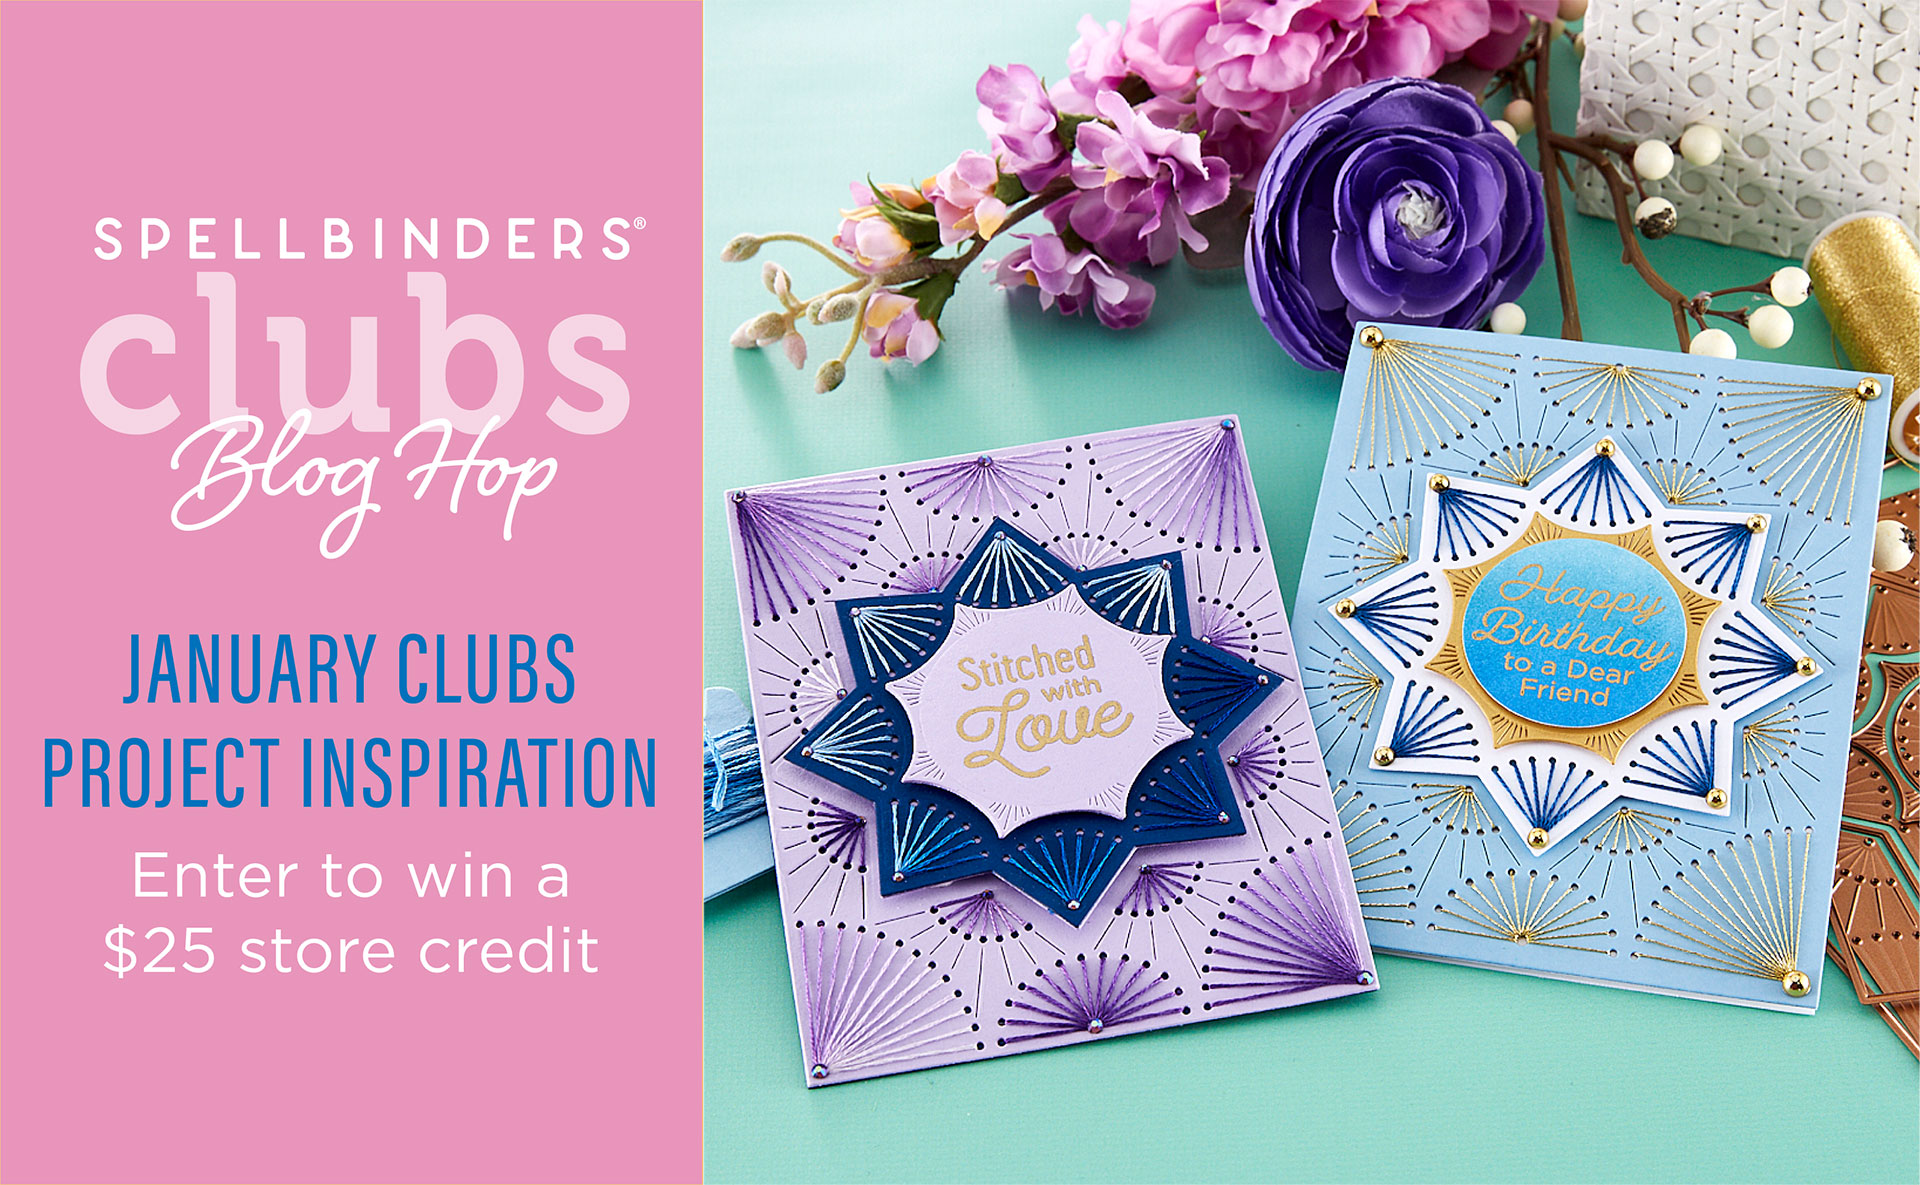
I am excited to share with you a thank-you card I created using the Stitching Die Club of the Month - Nested Stitched Burst from Spellbinders. Spellbinders has just introduced this NEW Club from this month, and it is such a beautiful one. 

 Join the NEW Stitching Die Club of the Month and receive an expertly designed die set each month, complete with inspiration. 

To create the card, I used three different shades of orange floss from the DMC Color Essentials Floss Bundle Warm 10-Pack. I began by die-cutting the main panel using a piece of Cream Cardstock. This gave me a base with a perforated grid to do my stitching.

Next, I cut out the center panel, which is also a part of this die and added some stitching using a light coloured thread. To add some extra detail, I added some Gold Pearls to accentuate the design. I then die-cut two other circles from this die set and layered them using some foam tape.

This month also features an optional à la carte clear stamp set that coordinates with the Stitching Die Club of the Month called the Sentimental Greetings Clear Stamp. I used a sentiment from this set and stamped it in the center of the circle die-cut piece.

Finally, once I had stamped and heat embossed my sentiment using Clear Embossing Powder, I cut out some flowers and leaves using the Be Bold Blooms Etched Dies from the Be Bold Collection and I Dance Etched Dies.  Then, I colored my florals using some OLO Coral Tones Alcohol Markers Set and the leaves using the OLO Forest Alcohol Markers. I assembled the pieces on to my card panel using foam tape. Then, to complete, I mounted my card panel to an A2 top-folding card base using tape runner.

Giveaway:
To celebrate this release, Spellbinders are giving away a $25 gift certificate to 3 lucky blog readers – selected from the comments on our blog. Giveaway closes on Sunday, January 22nd, 11:59 pm MST. The winner will be announced in this blog hop post the following Wednesday. The winner is responsible for shipping costs, duties, and taxes.

Please note, store credit (gift certificate) cannot be applied to Club Subscriptions. Store credit can be applied to shop past Club products, Club extras and regular releases.

Blog Hop Order:
Next Stop on this Blog Hop is, Jumi Baek's blog. Just in case you lose your place along the way, here is the complete list of participants so that you can find your way back:


                         Hussena Calcuttawala (You are HERE)

Well, that’s all for my project today! Thanks so much for stopping by and reading. I hope you have a wonderful day!

If you like what you've seen from me, please give me a follow over on my Instagram (@hussena_cal) and/or subscribe to my blog if you haven't already.

Wednesday, June 22, 2022

Guest Post using Spellbinders Layered Fleur Bouquet Slimlines Collection by Becca Feeken


Hello everyone!
This is Hussena from Quill and Punch Works, and I am so excited to be guest designing on the Spellbinders Blog today showcasing the NEW Layered Fleur Bouquet Slimlines Collection by Amazing Paper Grace. The beautiful detailed border and frame dies, as well as the exquisite floral layering dies, inspired me to make a set of three cards perfect for gifting to friends and family!


My first card features the Half Slimline Oval Etched Dies and the Layered Cherry Blossoms Etched Dies along with the Geo Screen Embossing Folder. The Layered Cherry Blossom Set creates such gorgeous flowers that I had to try them out first.  I also used one of the slimline background designs from this collection for this bright and cheery friendship card.

To start with, I die--cut Snowdrift Cardstock several times using all of the components of the Layered Cherry Blossoms Etched Dies. Next, I added a bit of Worn Lipstick, Twisted Citron, and Shabby Shutters Distress Oxide Inks to the petals and leaves, Mustard Seed ink to the flower centres, and Rusty Hinge ink for the branch with a sponge dauber to add shading and assembled the pieces with liquid glue.

To create the ornate background panel, I die-cut Snowdrift Cardstock and White Foam twice using the Half Slimline Outline and Insert dies from the Half Slimline Oval Etched Die Set. Next, I trimmed a piece of Pink Sand Cardstock to 8.5" X 3.5" and adhered the die-cut pieces on the panel with liquid glue. Next, I embossed the leftover die-cut oval piece using the Geo Screen Embossing Folder. Once that was done, I mat it with a layer of Silver Glitter Paper and adhered the layers together with liquid glue.

Next, I die-cut  Snowdrift Cardstock and White Foam using the 'You' die from the Sweet Sayings Notecard Sentiments Etched Dies. I adhered them together with liquid glue, then ink blended Worn Lipstick Distress ink to the top three-quarters of the sentiment die-cut piece for more depth. Next, I stamped a sentiment from the I'm Here for You Sentiments Clear Stamp & Die Set on to a strip of Snowdrift Cardstock using Versafine Onyx Black ink and popped it on to my panel using foam adhesive. I arranged the branch, leaves, and flowers on top of the card front and adhered them down with liquid glue and foam adhesive. I adhered the card panel to a top-folding white card base measuring 9” x 4” with tape runner to complete. I embellished the flowers with some Glacier Jewels to finish.


My next card features the Layered Lilies Etched Dies, the Half Slimline Bracket Etched Dies, and the Half Slimline Oval Etched Die Set. and the Butterfly Bliss Garden Shutters 5 x 7" Card Base Etched Dies. I went with a easy and simple design with light shading on the flowers to keep the lilies the star of the show here!

To make my card, I started off by die-cutting Snowdrift Cardstock several times using all of the components of the Layered Lilies Etched Dies. Next, I blended Peeled Paint and Twisted Citron Distress Inks on the leaves and stem to give them lots of colours and a bit of shading, Spiced Marmalade for the flower stamens, and a light flicking of Squeezed Lemonade Distress Oxide Ink in the centre of the lillies with a sponge dauber. I then adhered the pieces together with liquid glue to create the main blooms.

Next, I die-cut Snowdrift Cardstock, Mirror Gold Cardstock, and White Foam twice using the Half Slimline Bracket Etched Dies and adhered the pieces together with liquid glue, offsetting the gold mirror die cut to create a shadow. Then, I trimmed a piece of Snowdrift Cardstock to 8.50" x 1.80" and applied a thin layer of Liquid Watercolor - Aquamarine to the panel. I dragged the color out loosely with an Aqua Brush to create a soft, watercolored background and then adhered the intricate border die-cut pieces on it with liquid glue.

I die-cut Snowdrift Cardstock and Mirror Gold Cardstock using the sentiment die from the Half Slimline Oval Etched Die Set and adhered the layers together, allowing the gold layer to peek out from behind like a shadow. Next, I applied Squeezed Lemonade and Spiced Marmalade Distress Oxide inks horizontally across the sentiment piece with my blending brushes to add shading and dimension. Once that was done, I die-cut Snowdrift Cardstock using the Tag 1 Die in the Swallowtail Tags Etched Dies and stamped a sentiment from the Sentiments for You Clear Stamp Set onto the piece using Versafine Onyx Black ink. I then popped it to the card front using foam adhesive for dimension. 

Next, I die cut Snowdrift Cardstock and White Foam twice with the butterfly dies from the Butterfly Bliss Garden Shutters 5 x 7" Card Base Etched Dies. Then, I used Peacock Feathers, Mermaid Lagoon, Evergreen Bough, and Antique Linen Distress inks to colour the die-cut pieces and assembled them with liquid glue, before adhering them to the card front using foam adhesive. To finish, I adhered the card panel to a top-folding white card base measuring 4” x 9” with tape runner. I embellished the background with some Glacier Jewels to finish. 


My last project for today features the Layered Daisies Etched Dies, Half Slimline Diamond Etched Dies, Fluted Classics Slimline Etched Dies, and the Bella Ovalette - APG Die of the Month.  The Layered Daisies Die Set is one of my favourites from the collection and I love the variety of sizes included in the set. I added die-cut tag to an die-cut background for this slimline floral card.

To create this card, I die-cut Snowdrift Cardstock several times using all of the components of the Layered Daisies Die Set. Then, I added a bit of Worn Lipstick, Picked Raspberry, Abandoned Coral, Wilted Violet, Peeled Paint, and Shabby Shutters Distress Oxide Inks to the petals and leaves and Mustard Seed ink to the flower centres with a sponge dauber to o give them lots of color and a bit of shading and assembled the pieces with liquid glue. 

Next, I die-cut Waterfall Cardstock and Mirror Gold Cardstock using the twice using the Half Half Slimline Diamond Etched Dies and adhered the layers together with liquid glue, allowing the gold layer to peek out from behind like a shadow. Then, I die-cut Snowdrift Cardstock using the Large Slimline Rim and Insert Dies from the Fluted Classics Slimline Etched Dies and adhered the intricate background pieces on it with liquid glue.

Then, for the sentiment piece, I die-cut Snowdrift Cardstock and White Foam using the Diamond Insert Die included in the Bella Diamante Set and adhered the pieces together with  liquid glue. Next, I die-cut  Waterfall Cardstock, Mirror Gold Cardstock, and White Foam using the Inner Oval Design Outline and Insert Dies from the Bella Ovalette Die Set and adhered the layers together with liquid glue, allowing the gold layer to peek out from behind like a shadow. Once that was done, I stamped a sentiment from the  Butterfly Sentiments Clear Stamp Set on to the negative oval die-cut piece using Versafine Onyx Black ink and adhered it down using foam adhesive for lots of dimension.

To finish, I arranged the flowers, stems, and leaves on the card front and adhere them down with liquid glue and foam adhesive for dimension. Next, I mat the panel with Waterfall Cardstock and adhered it to a top-folding white card base measuring 9” x 4” with tape runner.

SPELLBINDERS SUPPLIES:
CS-017, CS-027, SCS-118, SCS-160, S4-1192, S2-327, S4-1148, S4-1193, S4-1194, S4-1197, S4-1198, S4-1199, S6-183, S6-186, ST-0147, STP-079, STP-081, SES-030, DOMAPG-FEB21, DOMAPG-MAR22, JD-044, TD056362, TD055792,TD056294, TD056355, TD056119, TD056089, TD056102, TD056164, AD-0081, AD-0084, MISTI, PCGO4E, PE-100, T-021

OTHER SUPPLIES:
Neenah Solar White Cardstock, Picked Raspberry, Abandoned Coral, Shabby Shutters Mermaid Lagoon, Evergreen Bough Distress Oxide ink, Versafine Onyx Black Ink, Tape Runner.

That’s it for today’s post! I hope you enjoyed it and have been inspired to create with these stunning dies and stamp from the Layered Fleur Bouquet Slimlines Collection. Thank you so much for stopping by!
You can find more inspiration over at my Instagram page. 

Thursday, May 12, 2022

Spellbinders May 12th Clubs Blog Hop + Giveaway!

 
Hello, crafty friends!
I'm happy and honoured to be joining Spellbinders for the May 2022 Clubs Inspiration Blog Hop today. Spellbinders is celebrating all their Club Kits in shop for May 2022.

If you arrived here from Linh Van's Blog, then you are on the right track. If this is your first stop, then you will want to start at the beginning, the Spellbinders Blog. We've got tons of inspiration and giveaways for you on the hop today, so keep reading till the end of this post for more information.


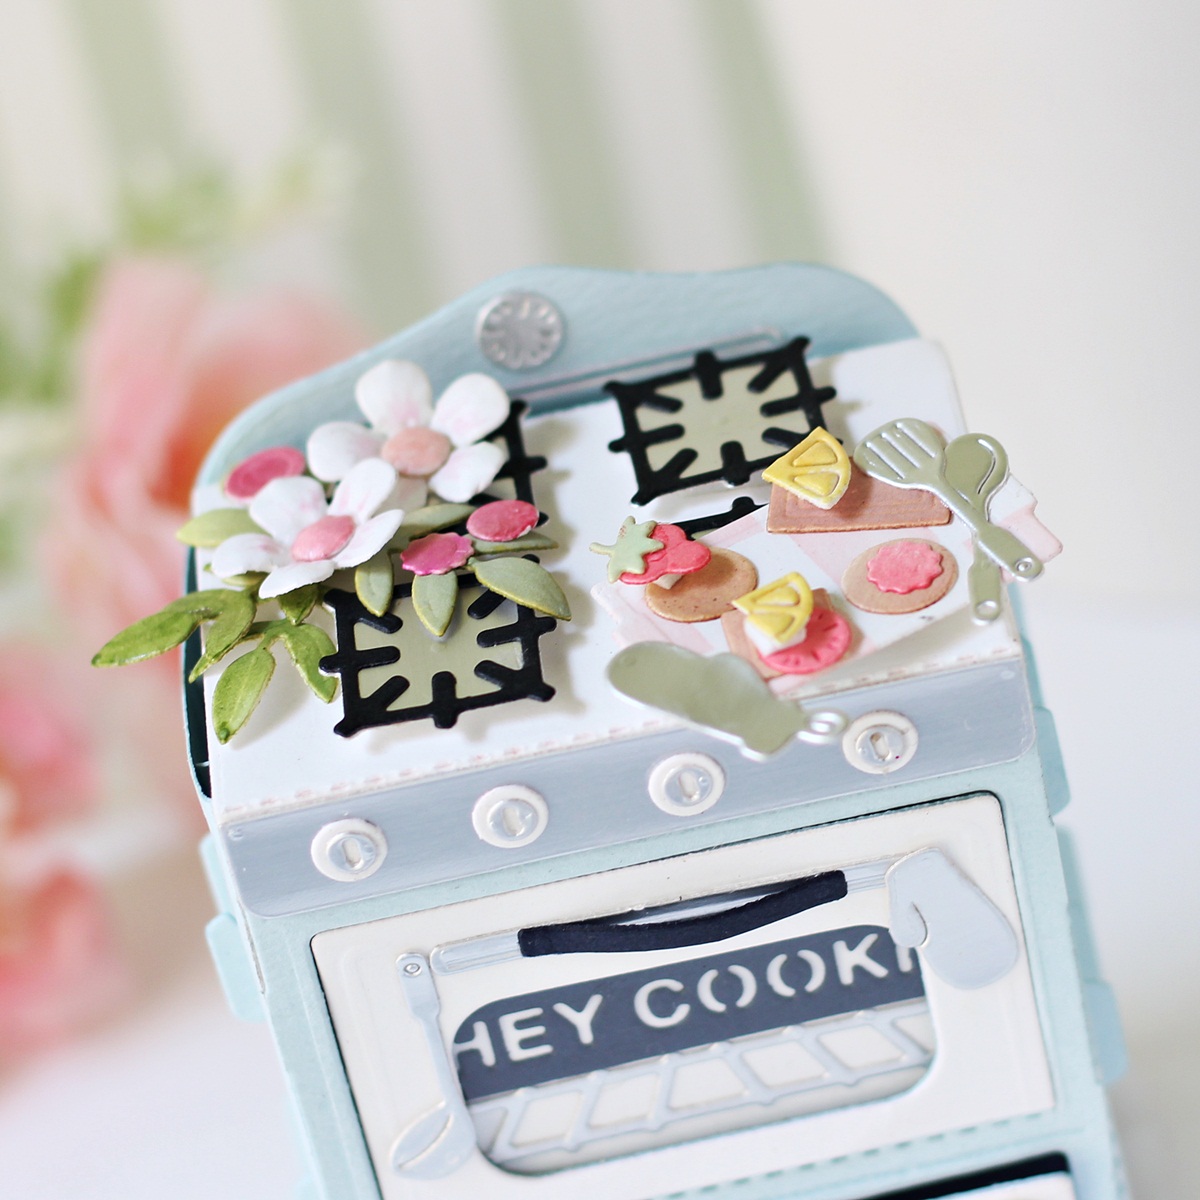
I have a 3D Vignette Card to share for the hop today using the Spellbinders and Amazing Paper Grace May 2022 Die of the Month Set. 

The Pop Up 3D Vignette What’s Bakin’ Oven Set is a new addition to the Amazing Paper Grace 3D Vignettes Collection and features fourteen cutting dies. The What’s Bakin’ Oven is an adorable 3D Oven that folds flat for mailing and comes complete with tons of baking accessory dies perfect for use on regular cards. There are a number of small pieces inside this die set, but the packaging has a helpful step by step guide on the back that makes it very simple to put this oven together. As with other Vignettes, you can make a 3D item or use it flat on a card.

To create my card, I first cut out the oven front die twice with door inserts using Waterfall and Snowdrift Cardstock. Next, I cut out the oven front die without door inserts six times using Silver Brushed Cardstock and Onyx Cardstock. I trimmed the pieces as required and then cut the remaining decorative pieces out of  Silver Brushed Cardstock and Onyx Cardstock.

Once I had all the pieces die-cut and ready to assemble, I adhered acetate behind the blue top door and added handles using Craft Glue. Next, I adhered the doors onto the blue layer - While adhering the doors, make sure the doors can open. Next, I adhered the strip with knobs with liquid glue and set it aside. 

Once the base was ready and assembled, I die-cut the sentiments from Onyx Cardstock and adhered it down on the front layer using liquid glue. Next, I adhered the baking racks and adhered the white oven layers onto the blue layer for definition and interest. Then, I folded the 3D Vignette pieces on perforations and used a tape runner to apply adhesive to the folded tabs. I attached one side of the Vignette piece to back layer of oven and placed 3 interior layers into slots. I repeated the process with the Vignette piece on other side. 

This 3D Vignette is a little different! It has a top layer (range top); and I die-cut and adhered 4 burners (cut from Silver Brushed Cardstock and Onyx Cardstock) to the range top to embellish the piece. Next, I folded the tabs and adhered the smaller Silver Brushed Cardstock tab to the back of the front oven layer so it is even with the top edge. Next, I attached the front of oven to the front of the 3D vignette assembled piece. Then, to further embellish the project, I adhered the utensil rack, utensils and other mitt to the 3D Vignette.

I die-cut some flowers and foliage out of Snowdrift Cardstock using the Petite Floral Potpourri Etched Dies and added a bit of Worn Lipstick, Twisted Citron, and Shabby Shutters Distress Oxide Inks to the petals and leaves and Spun Sugar ink to the flower centre with a sponge dauber to add shading. Then, I embossed the individual petals using the stylus tips from the Susan's Garden Ultimate Tool Kit and assembled the pieces with liquid glue.

I love this cute oven and how it all came together! The blessing is that if you don’t want to go all out 3D, it’s perfect to be used for the front of your card too. In fact, the oven door opens and it would make a lovely money holder, with the bills tucked into the door.


Giveaway:
To celebrate this release, Spellbinders are giving away a $25 gift certificate to 3 lucky blog readers – selected from the comments on their blog. Giveaway closes on Sunday, May 15th, 11:59 pm MST. The winner will be announced in this blog hop post the following Wednesday. The winner is responsible for shipping costs, duties, and taxes.

Please note, store credit (gift certificate) cannot be applied to Club Subscriptions. Store credit can be applied to shop past Club products, Club extras and regular releases.

Blog Hop Order:
Next Stop on this Blog Hop is the talented, Rosemary Dennis' blog.
Just in case you lose your place along the way, here is the complete list of participants so that you can find your way back:


Thank you so much for your stopping by and reading this blog post. I hope you liked my project! 

If you like what you've seen from me, please give me a follow over on my Instagram (@hussena_cal) and/or subscribe to my blog if you haven't already.
Wishing you a great day ahead!

Friday, April 8, 2022

Spellbinders Celebrate You Collection | Guest Design Post


Hello, crafty friends!
I am so excited to be guest designing on the Spellbinders blog today featuring the NEW Celebrate You Collection. This is a large collection with lots of great gifting and greeting cards goodies which pair beautifully with cardstock or patterned paper for a quick easy card, or something a little more stepped up with the addition of floral dies.


My first project is a set of Gift Bags made using the Gift Bag Etched Dies, Be Bold Blooms Etched Dies, the Mini Blooms and Sprigs Etched Dies, and the Geo Screen Embossing Folder. These are so simple and easy to make and are perfect for holding little treats or jewelry and more!

To start with, I die-cut Snowdrift Cardstock using the Gift Bag Etched Dies. Next, I embossed
the front and back panels of the gift bags using the Geo Screen Embossing Folder and assembled the bags with double sided tape. Next, I blended Cracked Pistachio and Worn Lipstick Distress inks over the bottom two-thirds of the cardstock pieces using a blending brush and adhered them down to the front and back of the bags. 


Next, I die-cut Snowdrift Cardstock using the flower and foliage dies from the Be Bold Blooms Etched Dies and the Mini Blooms and Sprigs Etched Dies. I inked the flowers using Worn Lipstick and Peacock Feathers Distress Oxide inks and the leaves using Peeled Paint Distress Oxide ink.

Next, I die-cut Silver Glitter Cardstock, Gold Glitter, and Snowdrift Cardstock using the Large, Medium, and Small circle dies from the Fluted Classics Circle Etched Dies. I stamped my sentiment from the Let's Celebrate Sentiments Clear Stamp Set onto the Small Circle Insert pieces using Versafine Onyx Black ink and adhered the pieces. I adhered the pieces down in the centre of my bags using a combination of liquid glue and foam adhesive. I then assembled my flowers and leaves around it and adhered them down using foam tape for dimension and interest.

Once that was done, I die-cut Snowdrift, Silver Glitter, and Gold Glitter Cardstock using the Small Round Tag Die in the Assorted Tags Etched Die Set. I trimmed the glitter die cut-pieces in half and adhered them over the white pieces. Next, I stamped my sentiment from the Sentiments for You Clear Stamp Set onto the die-cut pieces using Versafine Onyx Black ink. I then die-cut the handles of the bags using Snowdrift Cardstock and blended Cracked Pistachio and Worn Lipstick Distress inks over the pieces using a blending brush. I attached the tags to the bag using gold metallic twine and adhered the pieces on top using foam adhesive.


My next project features the Swallowtail Tags Etched Dies, the Romantic Slimline Borders Etched Dies, the Sentiments for You Clear Stamp Set, and the I Dance Etched Dies. I thought the banners in the Swallowtail Tags were so wonderful that they could be a focal point all on their own. I used a multitude of bright colours and paired it with an embossed background for a simple birthday card.

To create my card, I trimmed Snowdrift Cardstock to 4” x 5.25” and embossed it using the Optical Arches Embossing Folder. Next, I die-cut Snowdrift Cardstock using the Perforated Edge and Scalloped Border dies in the Romantic Slimline Borders Etched Dies. There are several beautiful designs you can create with this border set, and they're perfect for any card size. Once my border was die-cut, I went ahead and die-cut Mirror Gold Cardstock using the Ribbon/Twine die included in the Assorted Tags Etched Die Set and adhered it right above the perforated edge for visual interest. 

Next, I die-cut Snowdrift Cardstock using the various tag dies in the Swallowtail Tags Etched Dies. I coloured the pieces using Dried Marigold, Mustard Seed, Broken China, Twisted Citron, and Worn Lipstick Distress inks using a blending brush. Once they were all coloured, I assembled the pieces on my embossed panel using Craft Glue.

Then, I die-cut Dahlia, Fuchsia, Rainforest, Peridot, and Mirror Gold Cardstock using the flower and foliage dies in the I Dance Etched Dies. I assembled the flower together and adhered it down on the left-hand side of the panel using foam adhesive for a raised effect. Next, I tucked in the leaves and foliage underneath the bloom to create a floral spray on my card front. Then, to finish, I stamped a sentiment from the Sentiments for You Clear Stamp Set onto the card panel using Versafine Onyx Black ink. I adhered the embossed panel to a top-folding A2-sized white card base using tape runner to finish off the card. 


My last project for today is a Slimline Card made using the Radiant Burst Embossing Folder, Hats Off to You Etched Dies, Sentiment Labels Etched Dies, and the Open Road Sentiments Clear Stamp Set. I used the Hats Off to You die set to create a stand-alone focal point with a sentiment for this embossed graduation card. 

To start, I trimmed a piece of Snowdrift Cardstock to 3.50 x 8.50-inch and embossed it using the Radiant Burst Embossing Folder. Next, I blended Cracked Pistachio Distress ink over the top two-thirds of the cardstock using a blending brush. Next, I die-cut the mortarboard cap, with sentiment insert, and button from the Hats Off to You Etched Dies out of Onyx and Dahlia Cardstock. Then, I die-cut the solid mortarboard cap and tassel pieces from Mirror Gold Cardstock and assembled it using Craft Glue. I love the way this die set is designed. It's super cool and simply perfect for graduation cards! Next, I die-cut Snowdrift Cardstock and Vellum using the Fluted Classics Circle Etched Dies. I blended Scattered Straw Distress Oxide ink on the white die-cut piece using a blending brush and then adhered the circle die-cut piece over the circle layer on my panel using foam adhesive.

Once that was done, I stamped a sentiment from the Open Road Sentiments Clear Stamp Set to Snowdrift Cardstock using Versafine Onyx Black ink and cut it out using one of the inserts dies from the Sentiment Labels Die Set. Then, I die-cut Snowdrift Cardstock using the large label from the Sentiment Labels Die Set and blended Candied Apple Distress Oxide ink over the piece using a blending brush. Once that was done, I adhered the sentiment strip on top with liquid glue. Next, I die-cut Mirror Gold Cardstock using the twine die in the Sentiment Labels Etched Dies. I attached the sentiment label on the card using the twine and adhered it on top using foam adhesive.


Next, I die-cut Snowdrift Cardstock using the On Cloud Nine Etched Dies and blended Cracked Pistachio and Broken China Distress inks over the edges of the clouds using a blending brush. Then, I die-cut the seagulls from the Build a Summer Birdhouse Etched Die Set out of Snowdrift Cardstock and coloured them using the same ink colours. I popped the pieces onto my card front using foam adhesive and mat the card panel with Mirror Gold Cardstock. Finally, to complete, I adhered the embossed panel to a side-folding slimline white card base using tape runner. Then, as a finishing touch, I adhered a few Teal Color Essentials Gems around my panel. 

SPELLBINDERS SUPPLIES:
CS-004, CS-012, CS-013, CS-027, CS-030, S2-314, S2-327, S2-328, S3-427, S3-432, S3-434, S4-1108, S4-1150, S4-1165, S4-1179, S5-502,  S6-191, SES-030, SES-032, SCS-118, SCS-148, SCS-151, ST-0147, STP-066, STP-079, MBR-EOM,  TD056089, TD055914, TD056362, TD055846, TD056294, TD056188, TD056119, TD056102, AD-0084, MISTI, PCGO4E, PE-100, T-021


OTHER SUPPLIES:
Neenah Solar White Cardstock, Citrine Glitter Cardstock, Cracked Pistachio Distress Oxide ink, Versafine Onyx Black Ink, MISTI Stamping Tool, Gold Baker's Twine, Tape Runner.

That’s it for today’s post! I hope you enjoyed it and have been inspired to create with these stunning dies and stamp from the Celebrate You Collection. Thank you so much for stopping by!
You can find more inspiration over at my Instagram page.