Tuesday, October 26, 2021

Waffle Flower Guest Designer | October Challenge - Rainbow Shakers

 
Hello there, crafty friends!
I am thrilled to share that I am joining in with the Waffle Flower October Challenge with Arjita for this week’s inspiration using Rainbow colors. 

This month is all about Shaker Cards and this week's challenge in particular is to use Rainbow Colours on your project. Shaker Cards are so much fun to make and even more fun to shake! :D I absolutely loved this challenge! I haven't made Shaker Cards in a while now, so it was so wonderful to create one for this week's challenge.

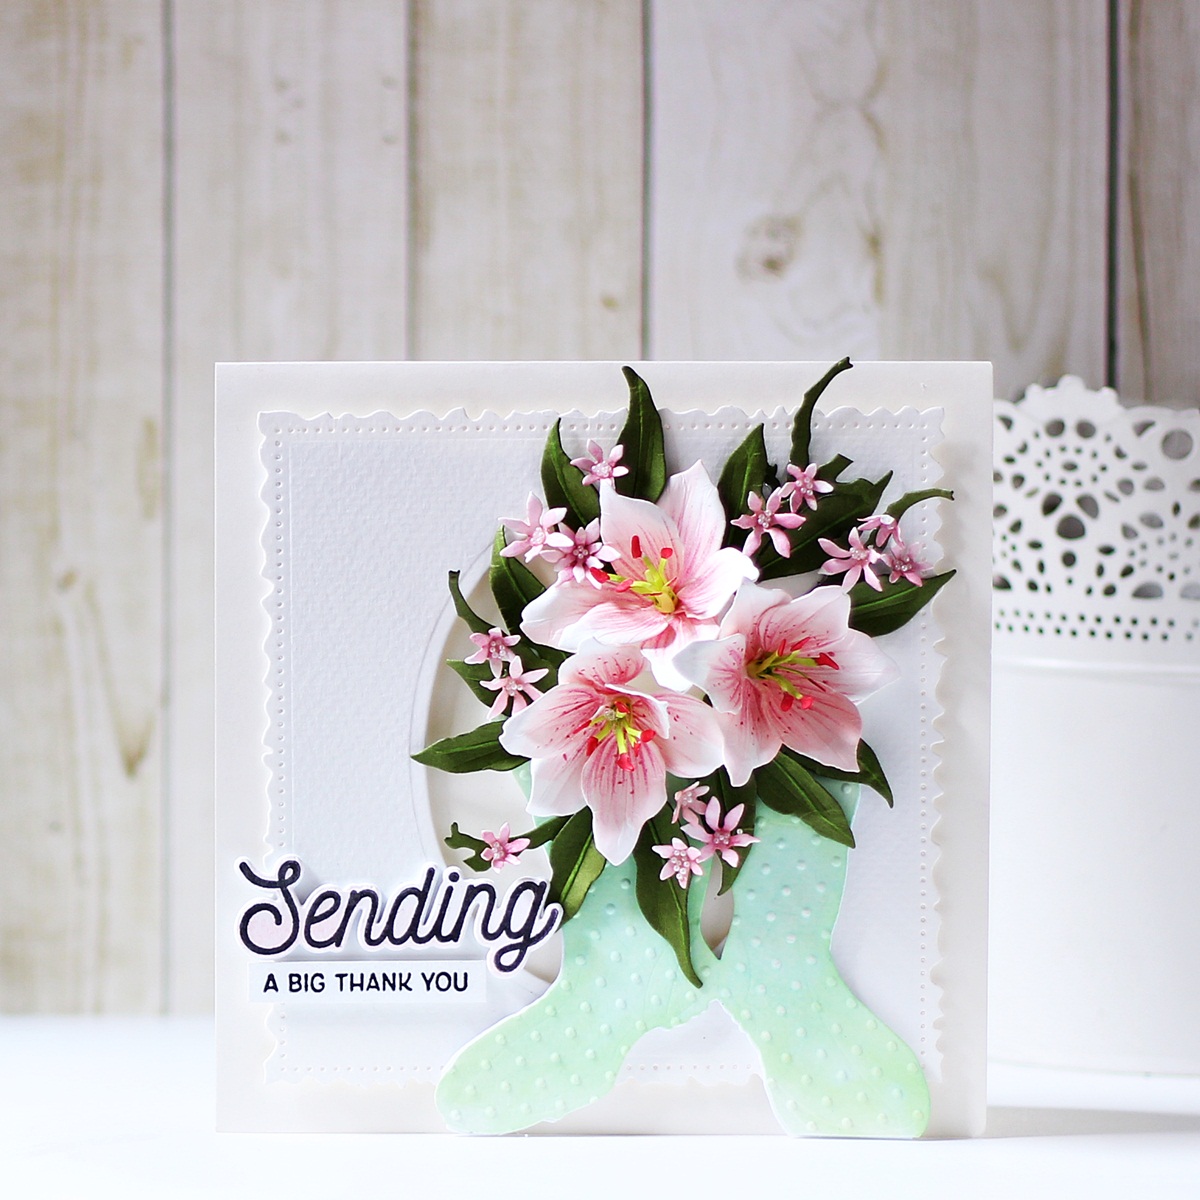
I have made a pastel floral card using the Anemone Stamp and coordinating Die Set, Quilt Cross Panel Die, and the Simple Stems Stamp and coordinating Die Set

To create my card, I used the Quilt Cross Panel Die not only for the shaker part, but also as my background. I started by die cutting Snowdrift Cardstock twice using the Quilt Cross Panel Die to use as the layers to build up the shaker. I then cut out the same Quilt Cross Panel Die using Acetate and White Foam Sheets for my shaker piece. Once that was done, I watercolored an A2 white panel cut from Snowdrift Cardstock in pastel rainbow colours using an assortment of watercolor half-pans from the Watercolor 36 Pan Set using a Watercolor Brush.

Then, to assemble it all, I adhered four of the outline layers together with liquid glue. I placed the watercolored panel in the center and filled it with Iridescent Micro Beads before adhering a piece of acetate on top, followed by another die cut layer. My shaker panel was now ready to be popped on my card base! 

I stamped the anemones and the leaves from the Anemone Stamp and the Simple Stems Stamp Sets onto Neenah Solar White Classic Crest Cardstock using Versafine Onyx Black ink. I coloured the flowers using the Nuvo Alcohol Markers from the Apricot Ombre Set, while the leaves were coloured using Persian Lime and Pea Pod markers from the Irish Clover Set. Once I had coloured the images, I cut them out using the Anemone coordinating Die Set and Simple Stems coordinating Die Set. I assembled the pieces on to my card panel and adhered them down using foam adhesive. Next, I stamped the sentiment from the Anemone Stamp onto a strip of Snowdrift Cardstock using Versafine Onyx Black ink and cut out the piece using the coordinating Die Set. I popped the piece onto my card panel using foam adhesive for dimension. Then, I adhered my shaker panel down to a top-folding white card base. Finally, to complete, I added Ranger Diamond Stickles to the centres of the flowers for a bit of glitz and glam!

I hope you liked my floral shaker card and thank you so much for stopping by today. A huge thank you to Sunshine and Arjita at Waffle Flower for inviting me as guest designer and making me feel very welcome!

Please head on over to the Challenges at Waffle Flower Blog and have a look at more inspiration by Arjita for Week 4: Rainbows, along with inspiration for weeks 1-3 of the October Shaker Cards Challenge. You'll love what you see and want to play along for sure! Don’t forget to post your Waffle Flower Shaker Challenge Cards on Instagram so we can see them. Make sure to tag Waffle Flower and use the hashtag #WFChallenge2110


If you like what you've seen from me, please give me a follow over on my Instagram (@hussena_cal) and/or subscribe to my blog if you haven't already.

Thursday, October 21, 2021

Spellbinders Susan's Garden Club Collection


Hello everyone!
I am back today to share a couple of cards featuring dies from the NEW Susan's Garden Club by Spellbinders. This is an exquisite collection comprising a variety of realistic florals which will help you add classic garden blooms into your creations. If you're a botanist or a flower enthusiast, you will certainly enjoy creating with the dies in this collection!


I think all flowers are beautiful, but there is something about a rose that makes it a prize to receive, to grow and to create using paper. My first card HAD to feature them in one of my all-time favorite colors - Pink! The tea pot and the lovely foliage made designing this card so much easy and fun!

To create my card, I first die cut Susan's Specialty Cardstock using the flower dies from the Hybrid Tea Rose and Tea Pot Die Set using my Spellbinders Platinum 6" Machine. I die cut quite a number of pieces, as I wanted to create a bunch of four flowers in total for my card. I coloured the die cut pieces using watercolor half-pans in the shades - Cotton Candy and Coral Berry and shaped the petals using the loop tool and tweezers from Susan’s Garden Ultimate Tool Kit. Next, I die cut Fern Cardstock using the leaf and fern dies from the Hybrid Tea Rose and Tea Pot Die Set and Ferns & Ivy Etched Dies. I added striations and veins to the die cut pieces using the leaf tool from Susan’s Garden Ultimate Tool Kit and blended Aged Mahogany Distress Oxide around the centres using a sponge dauber for interest. 

Next, I die cut Watercolor Sheets and Brush Gold Cardstock using the teapot die included in the Hybrid Tea Rose and Tea Pot Die Set. I watercoloured the piece using Mountain Mist paint and adhered the gold die cut pieces along the bottom of the teapot and the handle. Once that was done, I went ahead and die cut Snowdrift Cardstock and Brush Gold Cardstock using the mosaic pattern die from the Mosaic Bracket Card Builder Etched Dies and slightly offset the two pieces to create an illusion of depth. I adhered it to my card panel using foam adhesive and then assembled the rest of the card together. I then stamped the sentiment from the Sending You Stamp Set onto Snowdrift Cardstock using Versafine Onyx Black Ink and then die cut out the images using the coordinating dies. I popped them on to my card panel using foam tape for dimension.

 I matted my card panel to Pink Sand Cardstock and adhered it to a side-folding white square card base with tape runner. Then, to finish, I added a row of white pearls to the bottom of the tea cup and around my background panel, which were coloured using a Sharpie Metallic Marker in Gold. 


To begin, I die cut Susan's Specialty Cardstock using the flower dies from the Cactus Dahlia and Ornamental Garden Pottery Die Set using my Spellbinders Platinum 6" Machine. I die cut a large number of petals to help me create three large and a couple of other smaller flowers. I love Pink Dahlias, so I tried to create them using paper on my card here. I coloured the pieces using watercolor half-pans in Rubellite, Coral Berry, and Cotton Candy, and shaped the petals using the loop tool and tweezers from Susan’s Garden Ultimate Tool Kit. Next, I die cut Fern Cardstock using the leaf, fern, and ivy dies included in the Cactus Dahlia and Ornamental Garden Pottery Die Set and Ferns & Ivy Etched Dies. I added striations and veins to the die cut pieces using the leaf tool from Susan’s Garden Ultimate Tool Kit and blended Aged Mahogany Distress Oxide to the centres using a sponge dauber. I must also mention here that I have followed Susan's method of colouring and shaping the flowers as demonstrated in her videos on the Spellbinders YouTube channel, so if you would like to learn how to create such realistic-looking flowers, I highly recommend following her videos. 

Next, I trimmed a piece of patterned paper from Papericious's The Date Night Collection to a 5.75" square, mat it to a panel of Brushed Silver Cardstock, and then adhered it to a top-folding white square card base with tape runner. Next, I die cut Portobello Cardstock using the Pottery Die from the Cactus Dahlia and Ornamental Garden Pottery Die Set. I blended Aged Mahogany Distress Ink around the edges of the die-cut to add dimension. I popped the blooms, foliage, and the pot on to my card panel using a mix of liquid adhesive and foam squares.

 The sentiment from the Sending You Stamp Set was stamped on to Snowdrift Cardstock using Versafine Onyx Black Ink and then die cut out using the coordinating die. I trimmed out the secondary part of the sentiment 'Lots of Love' using my scissors and popped the pieces to my card background using foam adhesive. Then, to complete my design, I adhered a few Crystal Clear Droplets in varying sizes. 


Moving on to my third card for the day, which features the Geranium and Antique Wooden Bucket Die Set and the Ferns & Ivy Etched Dies. I decided to incorporate some stenciling on this card for texture and dimension. 

For my card, I first die cut Susan's Specialty Cardstock using the flower dies from the Geranium and Antique Wooden Bucket Die Set using my Spellbinders Platinum 6" Machine. I die cut quite a large number of flowers, since I wanted to create a bucket overflowing with handmade flowers. I blended two shades of orange (Sunkissed and Orange Cream) to colour the die cut pieces and shaped the petals using the loop tool and tweezers from Susan’s Garden Ultimate Tool Kit. I added White Micro Pearl Beads to the centres of each flower for interest and kept them aside to work on my other card elements.

Next, I die cut Fern Cardstock using the leaf and ivy dies included in the Geranium and Antique Wooden Bucket Die Set and Ferns & Ivy Etched Dies. I added striations and veins to the die cut pieces using the leaf tool from Susan’s Garden Ultimate Tool Kit and blended Aged Mahogany Distress Oxide around the edges of the pieces using a sponge dauber for definition. Next, I die cut Graphite Cardstock using the Antique Wooden Bucket Die from the Geranium and Antique Wooden Bucket Die Set. I also die cut Silver Mirror Cardstock using the Bucket Bail Die and Timber Cardstock using the Bucket Bail Handle Die. I assembled the piece together using liquid adhesive and kept it aside to work on my stenciled background. 

Next, I secured the Cubist Cube Stencil on a sheet of Watercolor Paper to stencil over the background using Modelling Paste mixed with Silver Lake ink. Once the panel was dry, I lightly watercolored the bottom of it with Paper Bag Ink as a way to ground the images. I also watercolored the upper two-thirds of the panel using Mountain Mist ink to help bring the colours together. I then adhered the geraniums and the bucket together on my stenciled card background using a mix of liquid adhesive and foam tape. The sentiment was stamped using Versafine Onyx Black onto a panel of Snowdrift Cardstock and then cut out using a Mini Tag Die. I matted my card background to a custom-colored panel, which was watercolored using Sunkissed and Orange Cream inks, and then adhered it to a top-folding white card base with tape runner. 


My last card for today features the Oriental Lily and Wellies Die Set, Kerria Japonica Etched Dies, Shapeabilities Vintage Stitched Squares Etched Dies, and the Sending You Stamp & Die Set. The cute rain boots included in the Oriental Lily and Wellies Die Set are very hard to resist, so I combined it with a bouquet of handmade lilies blooms for a cheerful thank you card.

To create my card, I first die cut Susan's Specialty Cardstock using the flower dies from the Oriental Lily and Wellies Die Set using my Spellbinders Platinum 6" Machine. I die cut a sizable number of petals to help me create three flowers for my card. I colored the centre of the petals using Pink Diamond and Cotton Candy watercolor half-pans and shaped the petals using the loop tool and tweezers from Susan’s Garden Ultimate Tool Kit. The tips of the stamens were coloured using Festive Berries Distress ink, while the base was coloured using Twisted Citron Distress ink. I also added some dot and line details with Alcohol Markers on the petals to help make the lilies look very realistic. 

Next, I die cut Fern Cardstock using the leaf and branch dies included in the Oriental Lily and Wellies Die Set and Kerria Japonica Etched Dies. I added striations and veins to the die cut pieces using the leaf tool and small ball stylus from Susan’s Garden Ultimate Tool Kit. I also die cut Snowdrift Cardstock using the Medium and Small Flower dies included in the Kerria Japonica Etched Die Set. I coloured the pieces using the Cotton Candy Paint Pan and shaped the petals using the loop tool and tweezers from Susan’s Garden Ultimate Tool Kit. I added White Micro Pearl Beads to the centres of each flower for interest and kept them aside to work on my other card elements.

I die cut Watercolor Paper using the Wellies die included in the Oriental Lily and Wellies Die Set. I watercolored the piece using Frayed Leaf and Mountain Mist half-pans and then embossed the panel using the Swiss Dots Embossing Folder. Next, I die cut Watercolor Paper using the Square 2 Die in the Shapeabilities Vintage Stitched Squares Etched Dies. Then, I cut an aperture in the centre of the panel using the Nestabilities Classic Ovals (Large) Etched Dies. Next, I stamped my sentiment from the Sending You Stamp Set on to Snowdrift Cardstock using Versafine Onyx Black Ink and then cut it out using the coordinating die. I trimmed out the secondary part of the sentiment 'A Big Thank You' using my scissors and popped the pieces to my card background using foam adhesive. I lightly inked the die cut sentiment using Cotton Candy ink for interest. 

The card panel was foam mounted to a top-folding white square card base for dimension. I assembled the wellies, the lilies, and the sentiment on my die cut panel and popped them to my panel using foam adhesive. Then, to finish, I popped the sentiment strip up on the bottom of the card with foam adhesive.


I hope you enjoyed this set of floral cards and thank you so much for stopping by today. Be sure to check out the Susan's Garden Club Collection on the Spellbinders website for more inspiration and details! The possibilities are truly endless!


If you like what you've seen from me, please give me a follow over on my Instagram (@hussena_cal) and/or subscribe to my blog if you haven't already.

Saturday, October 16, 2021

Crafty Meraki Instagram Hop | #MerakiCraftober


Hello, crafty friends!
I am excited and honoured to be joining Crafty Meraki for an Instagram Hop featuring some of their NEW stamps and dies! You can visit the Crafty Meraki Instagram page to find out all the details for today's hop!

Have you seen the AMAZING stamps and dies just released by Crafty Meraki this month? There are so many designs to choose from for all kinds of projects. Today, I am sharing a bright and cheery floral card using some of the new goodies from the shop. 


To create my card, I began by stamping the large layered flower from the Imperial Garden Layering Stamp Set in my MISTI on to Snowdrift Cardstock using Candy Apple, Berrylicious, Passion Fruit and Coral Reef dye inks. I then trimmed out the images with a pair of scissors, leaving a small white border.

Next, I stamped the leaves on to Snowdrift Cardstock using Fresh Pear, Key Lime and Olive dye inks. I fussy cut them using a pair of scissors to work on my card background. If you don't want to cut the images by hand, you can use the coordinating dies available for the set. 

Then, I trimmed a piece of Snowdrift Cardstock to 4.25" X 5.5" for my card background and applied a thin layer of Liquid Watercolor - Aquamarine towards the lower two thirds of the cardstock and dragged the color out loosely with water using a Waterbrush Pen. Next, I die cut Snowdrift Cardstock using the floret dies from the April Meraki Flora Para-Dies. I watercolored the pieces using Bubble Gum, Sunshine, and Aquamarine Liquid Watercolors in a light wash for a soft look. 

Next, I die cut Snowdrift Cardstock and White Foam Sheets using the outer rectangle die from the Stitched Scallops Rectangle Die Set. I adhered the foam die cut piece beneath the white die cut piece and popped it to my panel using liquid adhesive. I also adhered the stamped and die cut pieces to my panel using a mix of foam and liquid adhesive. Then, I stamped a sentiment from the Blooming Birthday Stamp Set on to a strip of Snowdrift Cardstock using Versafine Onyx Black ink and popped it on to my panel using foam adhesive. To finish, I added a few gold ink splatters using the Heidi Swapp Color Shine Spray in Gold Lame. 

I hope you enjoyed this bright floral card and thank you so much for stopping by today. Be sure to check out Crafty Meraki on Instagram or visit their Blog for tons of inspiration!

If you like what you've seen from me, please give me a follow over on my Instagram (@hussena_cal) and/or subscribe to my blog if you haven't already.

Monday, October 11, 2021

Spellbinders October 2021 Clear Stamp of the Month | Sending You


Hello, crafty friends!
Happy Monday! I am back today with a nature-inspired thank you card made with the Spellbinders Clear Stamp of the Month - Sending You. Check out the exclusive coordinating You - Die Set. Spellbinders now offers a coordinating die set that you can purchase separately as an add-on for the Clear Stamp of the Month Club Sets. I love this option as I can quickly and easily cut my favorite images from the set out and no longer have to fussy cut the images! The Clear Stamp and Coordinating Die of the Month Club kit is already sold out, however the stamp set on it’s own is still available.

The Spellbinders Clear Stamp for October is a 24 piece stamp set containing 3 large sentiment stamps – Sending, For, and You, and 21 different secondary sentiments! The stamp set is super versatile and one that I will reach for often in my stash! The Stamp Set coordinates with this month's Small Die of the Month and Large Die of the Month Sets, so you can mix and match your supplies to create different projects. This “Sending You” stamp set features made in the USA stamps from high-quality photo-polymer for clear, crisp impressions. 

I used some of the sentiments from the kit along with some bright florals from the Hex Tile Stamps for a thank-you card.

I started by stamping the outline images from the Hex Tile Stamps on a piece of Snowdrift Cardstock using Black Licorice ink. Then I stamped the layers for each bloom over top using Vineyard Berry and Sand Dunes inks from Altenew. Once that was done, I fussy cut the images using a pair of scissors.

I die cut Snowdrift Cardstock using the outer diamond die from the Diamond Floral Frame Glimmer Hot Foil Plate & Die Set and stamped a sentiment from the Clear Stamp of the Month Kit onto it using Black Licorice ink. Next, I die cut Gold Mirror Cardstock twice using the inner diamond die from the Diamond Floral Frame Glimmer Hot Foil Plate & Die Set and kept it aside to work on my panel. 

Then, I did some very light "ink smooshing" on a piece of Watercolor Cardstock using Tumbled Glass and Twisted Citron Distress inks. Once my panel was dry, I adhered down the two foiled die cut pieces to the centre of my card front using foam adhesive. Next, I adhered down the white die cut piece using the Bearly Art Precision Craft Glue. The 'Sending' was stamped in Black Licorice ink onto Snowdrift Cardstock and cut out with one of the coordinating dies. I popped in on to my panel using foam adhesive for dimension. 

I tucked in the stamped floral images around the centerpiece and adhered them down using liquid adhesive. I also added some foliage pieces die cut from Snowdrift and Gold Mirror Cardstock using the floral accessory dies from the Flourished Fleurit Die Set. I inked the white die cut leaves using Pine Needles and Shabby Shutters Distress inks and then added them to my floral arrangement using the Bearly Art Precision Craft Glue. I then adhered the card front to an A2-sized top-folding white card base using foam adhesive. To finish off the card, I added Crystal Jewels to the flower centers and to my panel for a bit of sparkle. 


I hope you liked my floral card and thanks so much for stopping by today. You can subscribe to any of the Spellbinders Clubs between the 1st - 24th of each month and never miss a fun kit like this again!  

If you like what you've seen from me, please give me a follow over on my Instagram (@hussena_cal) and/or subscribe to my blog if you haven't already.
Wishing you a great day ahead!

Sunday, October 10, 2021

Spellbinders & Amazing Paper Grace Die of the Month | October 2021


Hello, crafty friends! 
Happy Sunday! I have a Shaped Card to share today featuring the Spellbinders & Amazing Paper Grace October 2021 Die of the Month Set. This month's "Flourished Fleurit" Set is perfect for making gorgeous layered cards, boxes, gift baskets, and more. This die set features 9 dies.


The Flourished Fleurit Set has several strategic snipping points that make sizing it down very easy and simple. It cuts a gorgeous 5″ x 7” card background, but also includes inserts and floral accessory dies that can be used on smaller projects. Everything you need to make a complete card can be derived from this one die set and I had such a wonderful time creating with it!

I have created an Ornate Shaped Card using this month's Flourished Fleurit Die Set. I particularly love the Flourished Fleurit motif in this month's set. It can be used for so many projects and is so versatile!

To create my card, I first scored and folded Pink Sand Cardstock in half and placed the shadow outline die included in the Flourished Fleurit Die Set along the fold of the card, so the cutting edges of the die are just above the fold. I then ran it through my Spellbinders Platinum 6" Machine machine. This helped me create a folded card base that matches the shape of the card.

Next, I taped together the decorative frame die and the inner rim die from the Flourished Fleurit Die Set and die cut it from Metallic Ivory Cardstock. I made sure that the inner die is centered, so that it would cut out the thin side borders. Once it was die cut, I lined up and adhered the intricate frame down to my card base using the Bearly Art Precision Craft Glue

Next, I die cut Metallic Ivory Cardstock using the inner design rim and insert together to create the centerpiece for my card. I adhered the piece down to my card panel using the Bearly Art Precision Craft Glue. Once that was done, I die cut Waterfall Cardstock and Rainforest Cardstock using the little floral accessory dies that are included in the set. These are so beautiful and versatile - You’ll certainly find me using them on a lot of my projects! I cut out a bunch of flowers and leaves and embossed each of the pieces using the small ball tip from the Ultimate Tool Kit by Susan's Garden. Then, I added pearl finish pollens to the flower centres for definition and interest. 


Next, I die cut Pink Sand Cardstock using the Label 5 Die from the Curvy Labels Set. I stamped my sentiment in the centre of the die cut using Black Licorice ink and attached it to my panel using foam squares. Then, to finish, I adhered down the flowers and leaves around my sentiment using the Bearly Art Precision Craft Glue. This card came together in no time! and was such a pleasure to create!     `


The Amazing Paper Grace Die of the Month is available exclusively at Spellbinders Paper Arts during October 2021. You can get the Flourished Fleurit Set at the special Cub Kit price, along with other membership perks.

If you'd like to see some more project inspiration using the Amazing Paper Grace Die of the Month, check out the Spellbinders Blog where Becca shares some stunning project samples using it.  
 

Don't miss out on the BIG Scary Good Sale going on now with up to 40% off select Dies, Stamps, Embossing Folders, Glimmer Plates, and more through October 10th, 2021 at Midnight PST.

That’s it for me today! I hope you liked my take on the die set! If you like what you've seen from me, please give me a follow over on my Instagram (@hussena_cal) and/or subscribe to my blog if you haven't already.