Monday, February 25, 2013

Embossing with Stencil and Embossing powders! :)

Hi friends,
Today I am sharing a card made with stencils & heat-embossing....I have shared the tutorial for this on the Crafter's Corner blog HERE...So do check it out :)...And here's a look at my card :-


As I have told in the Crafter's Corner blog....The central flower is heat embossed using a stencil & then I have created the background by blending two colors of Distress inks- Shabby Shutters & Broken China & then stamped the bird & the shell with Hero Arts Antique Engravings stamp...The sentiment is stamped using Colorbox -White Pigment Ink & again clear embossed on a piece of vellum!...For more details about the card & the technique showcased do check out my tutorial on Crafters Corner blog..!

Supplies Used :-
Base CS -Campap.
Blue PP -Cosmo Cricket (Piali's Store).
Yellow CS- DCWV Brights Stack.
Stencil -Pie Lane.
Stamps -Hero Arts Antique Engravings (Bird & Shell) & Good Friends (Hero Arts)- Sentiment.
Distress inks -Shabby Shutters ,Broken China, Vintage Photo ,Mustard Seed.
Colorobx White Pigment Ink -(Bought from Priya's Store).
Twine- RAK from Michelle! :)
Flower -RAK from Shradddha :)
Bards- Making Memories
Pearls- Stash.

Challenges Entered :-
Creative Corner Challenges -Brads
4 Crafty Chicks -Twine
Paper Crafting Journey -Bingo (Brads ,twine & flowers)
The Perfect Sentiments -Floral Fantasia
Crafty Cardmakers- Blooming Images

Hope you all like my card & tutorial..Do leave me your comments/ feedback..I really appreciate it! :)
Have a nice day everyone!                                                                    

Friday, February 22, 2013

Sending you sunshine :)

Hi Friends ,
Today I have a quick card to share ...Its based on Heat embossing as well as dry embossing using a beautiful embossing folder from Darice called Interlocking Circle ...so here's a look at my card :

                                                       
I have Used my PTI sunflower stamps to stamp and emboss the sunflowers  I have first stamped on a Pattern paper using versamark Embossing ink then embossed it with white embossing powder from Zing! and colored over it using distress inks.. then Fussy cut my flowers and leaves and placed it on dimensions...I have also used the MFT fancy flourish and Cheery lynn Fanciful flourish in the background .

Supplies List :
Base CS : local buy
Embossed panel done with Darice Interlocking circle emboss folder( Bought from Color Conceptions )
Stamps : PTI sunflower's
Inks Versamark Embossing Ink,  Distress ink :Vintage photo,Mustard Seed And Shabby Shutter's And Versafine Black pigment Ink (Crafter's Corner )
Flourish :MFT fancy flourish (Crafter's Corner )
              Cheery lynn Fanci ful Flourish (Color Conception )
Sentiment : PTI
Banner :Ribbon Banner Die from Spellbinder's ( Crafter's Corner )

Challenges Entered :
ICR - Pin Inspirational Challenge ( inspired by Sunflower Crochet shawl )
365 days : fussy cutting and stamping.(Designer Spotlight)
Fab and Funky : Flower Power
Perfect Sentiment :Floral Fantastia
Catchy Challenges : Paper Piecing (Made it to Top 3)

I hope you like my card ...Please do leave me your comments/suggestions would love to hear from you :)
Have a Nice day Everyone :)


Saturday, February 16, 2013

Inspired by...Colors! :)

Hi friends,
This is a quick post to share with you the card which I had shared along with My Tutorial earlier today...I have made this card keeping in mind the colors from IBSIC challenge..A look at my card first :-

And an another view :-

 I was inspired by these colors below :-

                                                         
Supplies Used :-
Base CS - Campap
Brown CS -Recycled from an old wedding invite :)
Pink PP -W & M papers
Embossing Folder : Itsy Bitsy
Dies :-
Cheery Lynn Fanciful Flourish (Bought from Priya)
Oval tag die cut -(Bought from Jovi's store)
Punches :-
MS Doily Lace punch.
Stamps :-
Hero Arts Good friends
Inks:-
Versafine Onyx Black
Memento Pear Tart & Angel Pink inks.
Large Mulberry Flower- Candy from Shraddha :)
Small Flowers & Hat -pins -Bought from Crafter's Corner.
Seam Binding Ribbon -Priya's Store
Pearls- Stash

Challenges Entered :-
IBSIC : Color Challenge (Winner!)
Polka Doodles -Shabby Chic
Card and Scrap -Use lots of flowers
Really Reasonable Ribbon -Spring Colors and Ribbon (Made it to Top 3)
Created with love -Birthday with die cut & embossing
Penny black and More - Pink pearly and swirly

Hope you all like My card..Do leave  me your comments /Suggestions..Would love to hear from you! :)
Have a nice day everyone!
                                                                                                                                                                

Tutorial - Seam Binding Ribbons on a Card and a Tag! :)

Hi Friends,
Today I am sharing with you all a short tutorial on how to color your Seam Binding ribbons -For  all those of you who are wondering what seam binding ribbon is ...Its a very soft malleable ribbon which comes in two colors mainly ...White and Natural ...But many branded companies sell these ribbons in variety of colors and sizes and these are used a lot in crafting ..Whether it be card making ,scrap booking or any type of projects ...These are very versatile and they really add a little special touch to your projects :)...And as I mentioned earlier these  ribbons come in two colors and that's where my tutorial comes in ...I am sharing with you a simple and fast method  on coloring these ribbons to any color of your choice:)

Here's the supplies that you will need :

                                                                   
-You will require :
1.Seam Binding Ribbon -( Color Conceptions Store )
2.Any DYE -BASED Inks pads /Distress Ink/ Stains /Glimmer Mists
3.A small bottle of a Mini Mister  -Mine is a local buy      
4.Any laminated sheet / Ranger Craft Sheet

And this is how you go about coloring it :-

                                                     
Step 1 -Get your supplies ready!

Step 2 - Take your seam binding ribbon and keep it on a laminated craft sheet -Since I don't have a craft sheet took a A4 size paper & got it laminated and it works perfectly as a craft sheet...First came across this idea from Piali's blog! :)...Thank you Piali :D

Step 3- Apply your ink pad directly to the ribbon...You can color it completely or just dab on the ribbon depending on how bright you want your color!

Step 4 - Take your mini mister & spray water twice or thrice on to the ribbon ....This also depends on the size of the ribbon!


Step 5 -Once you have sprayed the ribbon with water start scrunching/crinkling it completely.

Step 6 - Then try soaking up all the left -over ink in your craft sheet by rubbing your seam binding ribbon over it...This will also help you to give it an even color!

Step 7 -Then open the ribbon & lay it straight..You can either let it air -dry or dry it using a heat tool or a hair dryer...Either thing works! :)
And taddaa!...Your ribbon is ready in 2 minutes & in any color of your choice :)) ...These ribbons are perfect for creating the  Shabby chic look at the same time they look very elegant too!

 I had some old Rubber Stampede Dye based ink pads which I had not been using because the colors were too dark...But these seem to work perfect with these ribbons & I even tried my hand at using Memento Dew Drops with the ribbon and the colors came out so well..!!
                                            
And now if you are wondering where you would you get these ribbons from..??..Then I am very happy to let you know that Priya  from Color Conceptions Store has them at very Reasonable rates in her store right now!..So if you are  like me & want to try this out then go ahead & place your order with Priya  :))

And here are My Card & Tag using these awesome ribbons! :)

                                                                                                         
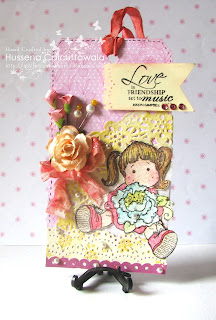
Here I have used the ribbon to make a small bow below the flower in the exact shade as my leaves ...And because the ribbon is so malleable I scrunched into shape & stuck it with glue & it retained its shape so well...That is the best  thing about the ribbon that you can scrunch it ,mold it in any shape & unlike stain or cotton ribbons this always retains its shape..!!

And here's my tag where I have scrunched the ribbon & made a bow out of it...I could'nt have done this with a satin ribbon even if I wanted but with seam binding it worked perfectly! :-

                                                         
Well hope you all liked the tutorial..If you have any queries do leave me comment below..I will be happy to answer them!
Have a nice day everyone! :)                                                                                       

Wednesday, February 13, 2013

Embossed Love! :)

Hi friends,
As my title suggest  I am sharing with you all a card I have made using embossing :)....I am quite new to embossing and I have really started to enjoy the possibilities that embossing has to offer!...There seems to be so many techniques and fun ways in which embossing can be incorporated & I am just starting to explore all of them!..Here's a look at My card where  I have used White embossing against the black background...I personally love this combo & think it looks quite stunning =D ...

This card came together very quickly! as I have used the Washi Tape to create my side panel and also used the glitter strips from Pie Lane on both sides of the black Cardstock...The black cardstock is popped up on dimensions..And the sentiment is also stamped & Clear -Embossed...Those cute little hearts are punched out from the Washi Tape which I had stuck on white cardstock!  

Supplies Used :-                
Black CS -Fabriano Elle Erre!
Washi Tape -Candy from Shraddha! :)
Stamps :
The Paper Company Studio -Sentiment
Inks :
Embossing Powders :
Heart Punch
Gems -Stash

                                                        
Challenges entered :-
CAS -ual -Fridays -Love song (My inspiration is from Stevie Wonder 's song -I just called to say I love you)- For all those of you who love this song just click on the link :) - I just love his songs.
PPS - Anything with Washi Tape 
Sentimental Sundays -Love is in the air
Hope you all like my card..!!
Have a nice day everyone!
                     

Sunday, February 10, 2013

Cross My Heart :)

Hi Friends,
Doing a quick post today as I wanted to share a card I have made for this time's Tuesday Trigger at the Moxie Fab World ...Cath has  put up an very beautiful inspiration picture for this time's trigger and the moment I saw it I wanted to give it a try ...but have ended up doing it at the last minute though :( !!.... Just Have a look at their inspiration picture to know what I am talking about :

                                                       
Isn't it just gorgeous :) ...Have a look at my card based on this inspiration !

   I have handcut the heart and added a slight shimmer to the edges and stamped the X's using Fiskars alphabet stamps in two colors ..Then die cut a window and embossed the white panel using Marraine designables folder and have scored the blue  background   paper  behind using a score board to reflect the wood grain in the chair  in the inspiration  picture... Lastly stamped the sentiment with distress ink   and added  an mulberry flower to complete the card:) ...Making a CAS card after ages ...But I felt this inspiration would not look good with layer's that I generally use in my cards ..And believe me it was tough restraining myself from adding more embellies here :)

Supplies Used :
Base Cardstock :Stash
Die :Spellbinder's Label 3 die
Embossing Folder :Marrianne designable's Embossing Folder (Daisy )
Stamps :Fiskar's alphabet stamp,Hero Arts Good Friends Set,
Inks :Memento Lilac posies and Angel Pink Dew drops,Broken China Distress inks.
Flower :Candy from Shradhha :)    

I am entering this card at the Moxie fab World For their this times Tuesday Trigger .  
Hope you like my card ..Please do drop me your comments and Suggestion I would love to hear from You :)                                
                                               

Monday, February 4, 2013

A Valentine Card! :)

Hi Friends,
Hope you all are doing fine ..I am back again to share with you a valentine card made for my inspiration at Crafter's Corner blog where our Theme this time is "Expression's of Love "and also our focus this time is on embossing and so keeping this in mind here's my card which has loads of embossing in it ...Here's a look first :-
  And here's a quick look at my gorgeous butterfly where I have done clear embossing with Versafine Black Ink and Ranger Super Fine Clear Embossing Powder ...Trust me this looks gorgeous in real life ..Wish I could have captured the essesnce in my picture though !!


  Okay gonna show you all an another view just to make sure you get how beautiful the embossing looks :)

                                       
There you have it !! ...I have done stamping and embossing on the heart 's as well they were hand-drawn and cut then embossed using  Ranger Super Fine Clear Embossing Powder with the Versafine Embossing Ink and then colored with two shades of the distress inks !  

Supplies used :
Base CS : Campap
Pattern Paper : Papermania,Graphic 45
Stamps :
Hero Arts :Flourish Background,Antique Engravings & Antique Brocade.
Lace stamp: My minds eye Miss Caroline collection
Dies:-
Cheery Lynn Olive Branches 
Inks :-
Tim Holtz Distress inks : Shabby Shutters ,Antique Photo ,Festive Berries ,Mustard seed & Tumbled Glass
Black ink -Versafine Onyx Black
For Embossing :-
Veramark Embossing Ink pad
American Crafts Zing! -Black
Ranger Super Fine Clear Embossing Powder
Sentiment -Simple Stories.(Sticker)
Mulberry Flowers These are part of the Candy I won at Shraddha's blog ...Lucky me :)
Laminated Jute -Itsy Bitsy
Leaves,Hat-pins ,Mesh ribbon ,Pearls & Key charm -Stash

Challenges Entered :
Glitter n Sparkle : Valentine/love          
Corrosive Challenge : Hearts and flower
My sheri crafts :Valentine (Honourable Mention)
Frosted Design :Love + Heart  
Simply Create Too : Valentine's day or include a heart
Flutter By Wednesday : must have a Butterfly.  

Hope you all like my work ...Please do leave me your Comments/ Suggestion.. It helps me grow :)
Have a nice day everyone! :)                                                         

Friday, February 1, 2013

Shabby chic Valentine Card! :)

Hi Friends,
Today being the first of the month its time again for a new Challenge  at Crafter's Corner blog and our theme this time is "Expression's of Love "...What could be better than this as this is the month of Love :)....So for my inspiration this time I decided to do a shabby chic Valentine card with lot of layering and details ...Here's a look at what I have created :


The two small flowers are handmade and the butterfly is embossed using   Ranger Super Fine Clear Embossing Powder and colored using Distress inks ...Here's a close up of both the pics :)


And a look at the butterfly now :

The Background multi dots paper and the sentiment  are all Digital freebie's from Papercraft Inspiration site ...You can check them out Here ...:)   And the corrugated heart is recycled from an old packaging box :). For the first time I have even done paper distressing on the top panel of my card using a serrated scissors I have and I am loving the look of it :).I have chosen very soft colors for my card as for me Valentine is synonymous with soft dreamy colors !!
I was also inspired by the colors from IBSIC :
                                                     

Supplies Used :
Base CS :Campap
PP's :W & M Company (Light pink dots paper on the top half )& Digital paper's
Die :Cheery Lynn Olive Branches (Crafter's Corner)              
Red flower in the center -Crafter's Corner
Punches - Flowers (Jef Retro flower ),and MS Lace Doily punch
Stamp :Hero Arts Antique Engraving (Butterfly )  
Inks :Tim Holtz Festive Berries and Fired Brick Distress Inks ...For the flowers I have used Festive Berries and Antique Photo (Crafter's Corner).
Corner Rub -Ons -RAK from Snehal! :)
Pearls,Gems,Lace ,Hat Pins are from stash.        
Used #GlossyAccent on the cupid which I have fussy cut & also on the flowers.(Crafter's Corner)

Challenges Entered :-
Itsy Bitsy -Pattern Papers
Beyond Grey Challenges -Shabby -Chic Love
Inspired by Stamping Inspiration Challenge # 44
In the Pink -Lots of pink +Distressing (Flowers are distressed as well as the pattern paper)
Moving along with the times -Punch it out (Used the Retro flower punch for the flowers & the MS Doily Lace punch)

Hope you all like my card..Do leave me your comments/suggestions..Love to hear from you all :)
Have a nice day everyone!