Showing posts with label Filler Flowers. Show all posts

Thursday, May 12, 2022

Spellbinders May 12th Clubs Blog Hop + Giveaway!

 
Hello, crafty friends!
I'm happy and honoured to be joining Spellbinders for the May 2022 Clubs Inspiration Blog Hop today. Spellbinders is celebrating all their Club Kits in shop for May 2022.

If you arrived here from Linh Van's Blog, then you are on the right track. If this is your first stop, then you will want to start at the beginning, the Spellbinders Blog. We've got tons of inspiration and giveaways for you on the hop today, so keep reading till the end of this post for more information.


I have a 3D Vignette Card to share for the hop today using the Spellbinders and Amazing Paper Grace May 2022 Die of the Month Set. 

The Pop Up 3D Vignette What’s Bakin’ Oven Set is a new addition to the Amazing Paper Grace 3D Vignettes Collection and features fourteen cutting dies. The What’s Bakin’ Oven is an adorable 3D Oven that folds flat for mailing and comes complete with tons of baking accessory dies perfect for use on regular cards. There are a number of small pieces inside this die set, but the packaging has a helpful step by step guide on the back that makes it very simple to put this oven together. As with other Vignettes, you can make a 3D item or use it flat on a card.

To create my card, I first cut out the oven front die twice with door inserts using Waterfall and Snowdrift Cardstock. Next, I cut out the oven front die without door inserts six times using Silver Brushed Cardstock and Onyx Cardstock. I trimmed the pieces as required and then cut the remaining decorative pieces out of  Silver Brushed Cardstock and Onyx Cardstock.

Once I had all the pieces die-cut and ready to assemble, I adhered acetate behind the blue top door and added handles using Craft Glue. Next, I adhered the doors onto the blue layer - While adhering the doors, make sure the doors can open. Next, I adhered the strip with knobs with liquid glue and set it aside. 

Once the base was ready and assembled, I die-cut the sentiments from Onyx Cardstock and adhered it down on the front layer using liquid glue. Next, I adhered the baking racks and adhered the white oven layers onto the blue layer for definition and interest. Then, I folded the 3D Vignette pieces on perforations and used a tape runner to apply adhesive to the folded tabs. I attached one side of the Vignette piece to back layer of oven and placed 3 interior layers into slots. I repeated the process with the Vignette piece on other side. 

This 3D Vignette is a little different! It has a top layer (range top); and I die-cut and adhered 4 burners (cut from Silver Brushed Cardstock and Onyx Cardstock) to the range top to embellish the piece. Next, I folded the tabs and adhered the smaller Silver Brushed Cardstock tab to the back of the front oven layer so it is even with the top edge. Next, I attached the front of oven to the front of the 3D vignette assembled piece. Then, to further embellish the project, I adhered the utensil rack, utensils and other mitt to the 3D Vignette.
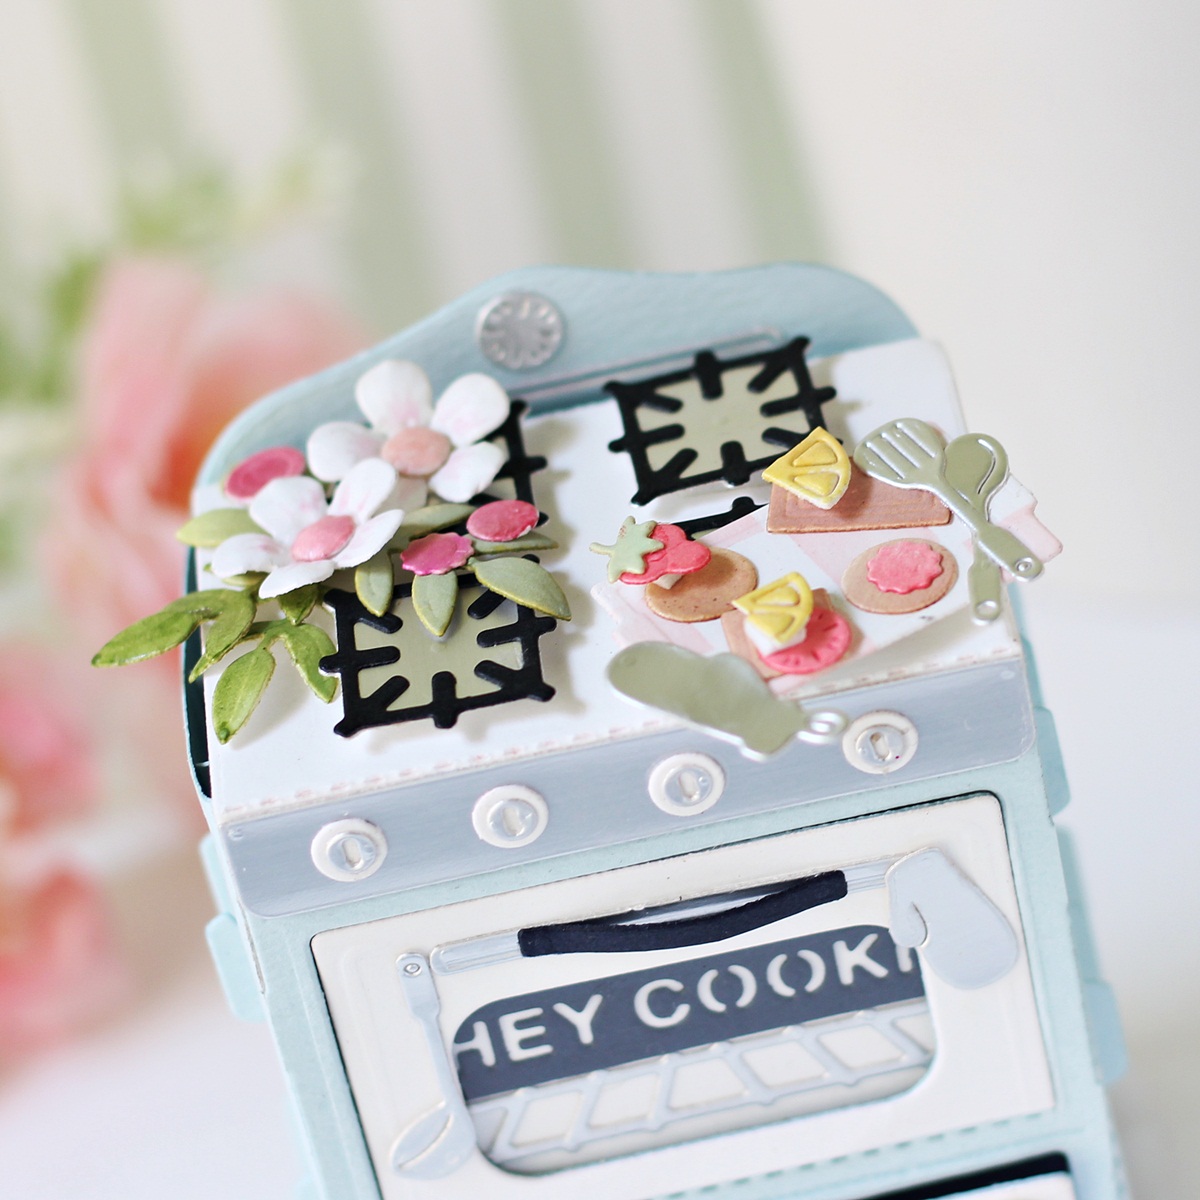
I die-cut some flowers and foliage out of Snowdrift Cardstock using the Petite Floral Potpourri Etched Dies and added a bit of Worn Lipstick, Twisted Citron, and Shabby Shutters Distress Oxide Inks to the petals and leaves and Spun Sugar ink to the flower centre with a sponge dauber to add shading. Then, I embossed the individual petals using the stylus tips from the Susan's Garden Ultimate Tool Kit and assembled the pieces with liquid glue.

I love this cute oven and how it all came together! The blessing is that if you don’t want to go all out 3D, it’s perfect to be used for the front of your card too. In fact, the oven door opens and it would make a lovely money holder, with the bills tucked into the door.


Giveaway:
To celebrate this release, Spellbinders are giving away a $25 gift certificate to 3 lucky blog readers – selected from the comments on their blog. Giveaway closes on Sunday, May 15th, 11:59 pm MST. The winner will be announced in this blog hop post the following Wednesday. The winner is responsible for shipping costs, duties, and taxes.

Please note, store credit (gift certificate) cannot be applied to Club Subscriptions. Store credit can be applied to shop past Club products, Club extras and regular releases.

Blog Hop Order:
Next Stop on this Blog Hop is the talented, Rosemary Dennis' blog.
Just in case you lose your place along the way, here is the complete list of participants so that you can find your way back:


Thank you so much for your stopping by and reading this blog post. I hope you liked my project! 

If you like what you've seen from me, please give me a follow over on my Instagram (@hussena_cal) and/or subscribe to my blog if you haven't already.
Wishing you a great day ahead!

Friday, March 18, 2022

Guest Post featuring Spellbinders Susan's Garden Favourites Collection


Hello everyone!
I am delighted to be guest designing on the Spellbinders blog highlighting the NEW Susan's Garden Favourites Collection. The breathtaking blooms and unique elements in this Collection inspired me to create three soft and cheery springtime cards featuring some of my favourite flowers.


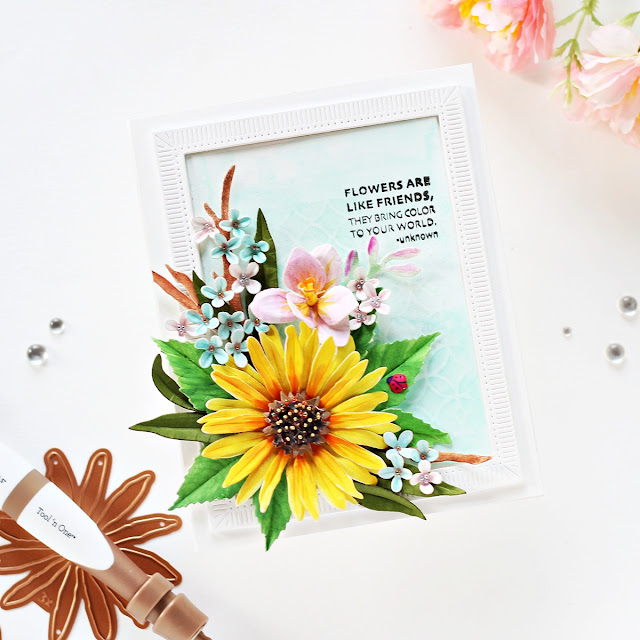
I loved the big bold blooms in the Sunflower and Ladybugs Die Set, so I decided to create with that first. I combined it with different elements from the Sunflower and Ladybugs Etched Dies, Freesia Etched Dies, Bearded Iris Etched Dies, Lilac Etched Dies, Dogwood Etched Dies, along with the Fluted Classics Rectangles Etched Dies.

To create my card, I first die-cut Susan's Garden Specialty Cardstock using the sunflower dies in the Sunflower and Ladybugs Die Set. I die cut enough layers to help me create on full sunflower. Next, I blended Orange Gouache in the center of each layer with a paint brush and then applied Yellow Gouache to the tips of each petal. I shaped the petals using the tweezers in Susan’s Garden Ultimate Tool Kit and adhered the layers together with liquid glue. Next, I die-cut Susan's Garden Specialty Cardstock using the flower centre and seed dies in the Sunflower and Ladybugs Die Set. I coloured the pieces using Brown Gouache and cupped the petals using the small ball tip in Susan’s Garden Ultimate Tool Kit and adhere the layers together with liquid glue. Next, I added Gold and Orange Glitter Balls to the centres for a realistic touch. 

Next, I die-cut Susan's Garden Specialty Cardstock using the leaf dies in the Sunflower and Ladybugs Die Set and Fern Cardstock using the curved and straight leaf dies included in the Bearded Iris Etched Dies. I coloured the white leaves using Green Gouache and added a vein to each using the leaf tip tool in the Susan’s Garden Ultimate Tool Kit.  Next, I shaped the tips using the medium ball tip for a more realistic finish. Once that was done, I die-cut Susan's Garden Specialty Cardstock using the branch die in the Freesia Etched Dies and coloured the pieces using Brown Gouache. Then, to create additional filler flowers and foliage for my card, I die-cut Susan's Garden Specialty Cardstock using the petal layers and bud dies in the Freesia Etched Dies. I coloured the die-cuts using Lilac Gouache and then used a dark orange Copic Marker to flick some colour out from the center to add some quick colour to the petals. Then, I embossed each piece using the tweezers in Susan’s Garden Ultimate Tool Kit and adhered the layers together with liquid glue. Next, I die-cut Susan's Garden Specialty Cardstock using the bloom die set in the Lilac Etched Die Set. I coloured the die-cut pieces using Light Pink and Blue Gouache and cupped the petals using  using the small ball tip in Susan’s Garden Ultimate Tool Kit. I added Silver and Orange Glitter Balls to the centre of the lilacs for added interest.

Next, I die-cut Snowdrift Cardstock using the Large Rectangle Outer Rim and Insert Die together from the Fluted Classics Rectangles Etched Dies to create a frame for my card front. Then, I trimmed a panel of White Cardstock to size and wet the panel with water and used Tumbled Glass and Peacock Feathers Distress Inks with a Water Brush in a dabbing motion, allowing the colors to mix slightly. Next, I placed a stencil in the centre of the panel and applied Mint Ink lightly all over with a blending brush to create a soft background. I stamped a sentiment from the Garden Favorites Sentiments Clear Stamp Set on to the panel using Versafine Onyx Black ink. I adhered the flowers, foliage, and frame down on to my panel using the Bearly Art Original Precision Craft Glue for a strong hold. Then, as a finishing touch, I die-cut Snowdrift Cardstock using the four spot ladybug die in the Sunflower and Ladybugs Die Set and coloured the piece using a red Copic Marker and Black Fineliner Pen to add some details to the body. I adhered it down on one of the leaves and then mounted my card front to an A7-sized white card base using tape runner. 


My next card features the Clematis Etched Dies, which is one of the most impressive-looking flowers in the collection. I wanted to make sure I used a canvas large enough to really show off all of the layers and detail, so I created a 6” x 6” Card, which would be perfect to gift someone on their wedding or any other really special occasion.

To create my card, I first die-cut Susan's Garden Specialty Cardstock using the flower dies in the Clematis Etched Dies. I die-cut just enough petals to help me create two large flowers for my card front. Next, I used a Light Pink Copic Marker to create sweeping strokes from the center of the flower stopping before the outer edge of the petal, leaving some white area. Once that was done, I blended Spun Sugar Distress ink to the centre of the flowers with a sponge dauber and around the edges of the die-cuts to add dimension. Next, I shaped the petals using the tweezers and the loop tool from the Susan’s Garden Ultimate Tool Kit. I then die-cut Susan's Garden Specialty Cardstock using the the stamen die included in the set and coloured the pieces using a Yellow Copic Marker and cupped the petals using  using the small ball tip in Susan’s Garden Ultimate Tool Kit. 

Next, I die-cut Susan's Garden Specialty Cardstock using the leaf dies in the Clematis Die Set and Fern Cardstock using the curved and straight leaf dies included in the Bearded Iris Etched Dies. I coloured the white leaves using Spring Green Gouache and added a vein to each using the leaf tip tool in the Susan’s Garden Ultimate Tool Kit.  Next, I shaped the tips using the medium ball tip for a more realistic finish. 

Once that was done, I die-cut Susan's Garden Specialty Cardstock using the branch die in the Dogwood Etched Die Set and coloured the pieces using Brown Gouache. Then, I die-cut Snowdrift Cardstock using the Large Circle Outer Rim, Insert, and Inner Rim Dies from the Fluted Classics Circle Etched Dies. I die-cut another piece of Snowdrift Cardstock and White Fun Foam using the Large Circle Insert Die to create a window for my card panel. I adhered the circle frame down on to the panel using foam squares for a raised effect and arranged the flowers and foliage down around the frame. Next, I placed a stencil in the centre of the card base and applied Blush Ink lightly all over with a blending brush to create a soft stenciled background. Then, I stamped a sentiment from the Garden Favorites Sentiments Clear Stamp Set on to a strip of Snowdrift Cardstock using Versafine Onyx Black ink. I die-cut the sentiment using a coordinating banner die and adhered the piece onto my panel using foam squares for a raised effect.  

Next, I die-cut Susan's Garden Specialty Cardstock using the bloom die set included in the Lilac Etched Die Set. I coloured the die-cut pieces using Light Blue Gouache and cupped the petals using  using the small ball tip in Susan’s Garden Ultimate Tool Kit. Then, I added Silver Glitter Balls to the centre of the lilacs for added interest and adhered them to my panel using the Bearly Art Original Precision Craft Glue. Then, to finish, I affixed the card front to my 6" X 6" white card base using foam tape for dimension. Then, as a finishing touch, I adhered a few Teal Color Essentials Gems around my floral wreath. I love the beautiful sparkle of the gems! 


My last card for today features the Dogwood Etched Dies, along with the Fluted Classics Rectangles Etched Dies. I thought I'd create a Dogwood floral branch for this card and wanted the die set to be the star of the show for this one. This cheery card would be perfect for sending a happy hello to a friend or to just let them know that you have been thinking about them.

For my card, I first die-cut Susan's Garden Specialty Cardstock using the blossom petal dies in the Dogwood Etched Dies. I cut out a bunch of the blossoms, just enough to help me create a number of Dogwood floral branches. I blended Light Pink Gouache onto about half of each petal and added veins to the petals using the leaf tip tool in the Susan’s Garden Ultimate Tool Kit. I shaped the tips using the medium ball tip and then die-cut the stamens out of Susan's Garden Specialty Cardstock. I coloured the tips of the pieces using an Orange Copic marker and shaped the pieces using the small ball tip in the in the Susan’s Garden Ultimate Tool Kit. Susan’s assembly videos helped me abundantly while creating the flowers and made it a really relaxing and fun process.  

Next, I die-cut Snowdrift Cardstock and White Fun Foam using the branch dies in the Dogwood Etched Dies. I adhered two stems branches together with liquid glue to form sturdier die-cuts. Next, I applied Vintage Photo Distress Ink around the edges of the die-cuts using a blending tool to add depth. Once that was done, I die-cut Susan's Garden Specialty Cardstock using the tiny leaf dies in the set and coloured them using Light Green and Spring Green Gouache  \and added veins to the leaves using the leaf tip tool in the Susan’s Garden Ultimate Tool Kit. I shaped the tips using the small ball tip for dimension and kept them aside to work on my background. 

I die-cut Snowdrift Cardstock and White Fun Foam using the Large Rectangle Outer Rim and Insert dies from the Fluted Classics Rectangles Die Set. Next, I die-cut Snowdrift Cardstock using the Medium Insert Die from the Fluted Classics Ovals Etched Die to create a window for my card panel and ink blended the left one-quarter of the panel using Tumbled Glass Distress ink, concentrating the darker shade towards the top. I then flicked some blue paint on my panel using a paint brush for a fun splatter effect. Once that was done, I trimmed another piece of Snowdrift Cardstock to size and ink blended the centre of the panel using Tumbled Glass Distress ink again, concentrating the darker shade towards the left. Once I was happy with the way it looked, I adhered the layers down on my card base using liquid glue. I adhered down the branches and dogwood flowers on my panel using a combination of liquid adhesive and foam squares for dimension. Then, to complete, I stamped a sentiment from the Garden Favorites Sentiments Clear Stamp Set to the card panel using Versafine Onyx Black ink.

Lastly, I mounted the panel to a top-folding card base using tape runner and embellished the card using a few Teal Color Essentials Gems. I am quite happy with the way this turned out!


 SPELLBINDERS SUPPLIES:
CS-007, CS-010, CS-019, CS-027, SCS-117, SCS-118, SCS-160, SDS-167, S4-1163, S4-1164, S5-491, S5-492, S5-493, S6-177, PCGO4E, PE-100, T-021, AD-0084

OTHER SUPPLIES:
Neenah Solar White Cardstock, Copic Markers, Brustro Goauche Paints, Tumbled Glass and Peacock Feathers Distress inks, Versafine Onyx Black Ink, Heat Tool, MISTI Stamping Tool, Stencils, Flower Soft, Gold and Orange Glitter Balls, Groove Golf Tools, Black Fineliner Pen, Paint Brush, Blue Acrylic Paint, Tape Runner.

I hope you enjoyed this bunch of springtime floral cards and have been inspired to create with these gorgeous dies from the Susan's Garden Favourites Collection. Thank you so much for stopping by!
You can find more inspiration over at my Blog and Instagram page.

Thursday, March 10, 2022

Spellbinders March 10th Clubs Blog Hop + Giveaways!


Hello, crafty friends!
I'm happy and honoured to be joining Spellbinders for the March 2022 Clubs Inspiration Blog Hop today. Spellbinders is celebrating all their Club Kits in shop for March 2022.

If you arrived here from Deborah Jenkins' Blog, then you are on the right track. If this is your first stop, then you will want to start at the beginning, the Spellbinders Blog. We've got tons of inspiration and giveaways for you on the hop today, so keep reading till the end of this post for more information.

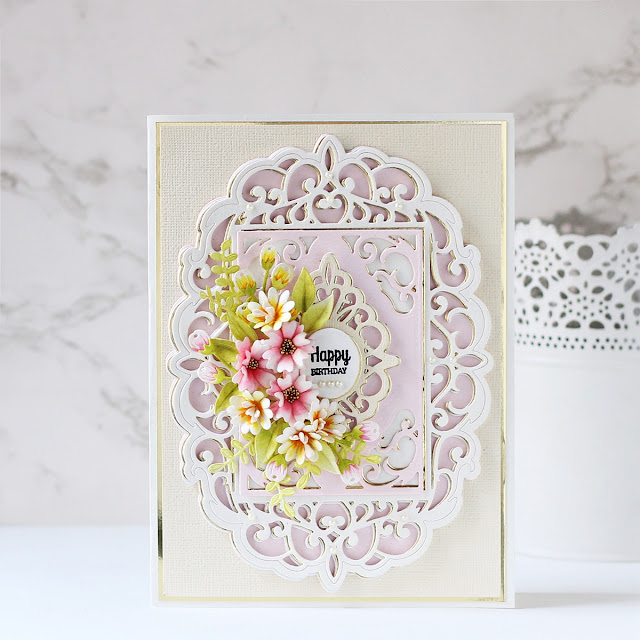
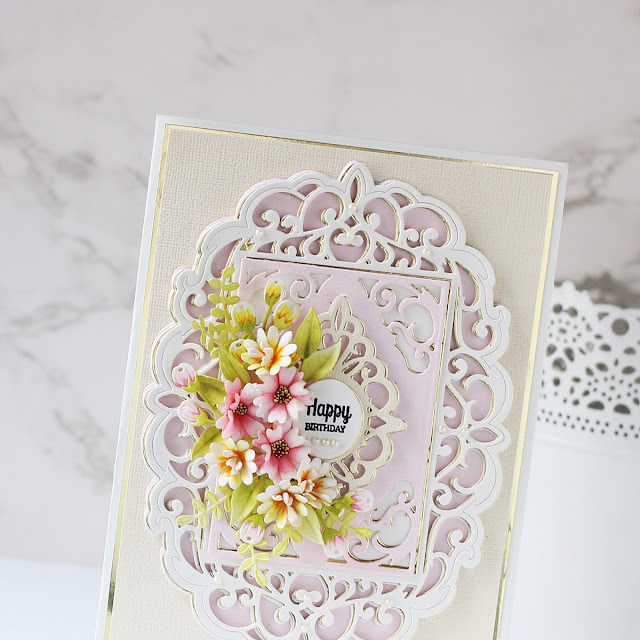
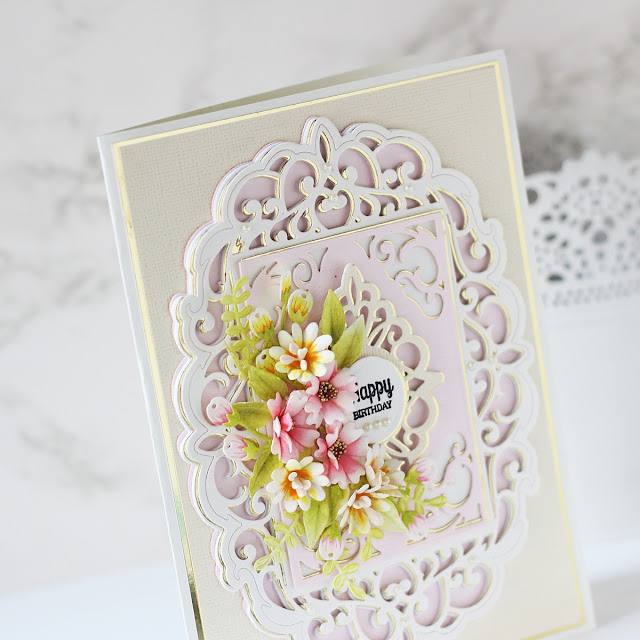
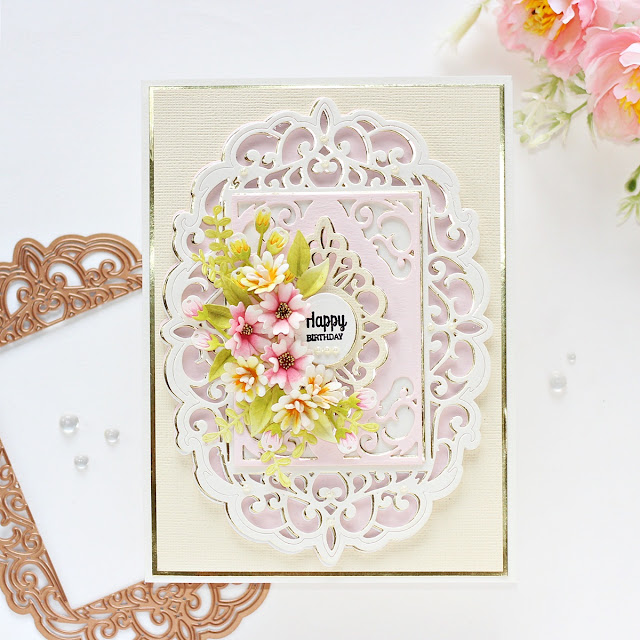
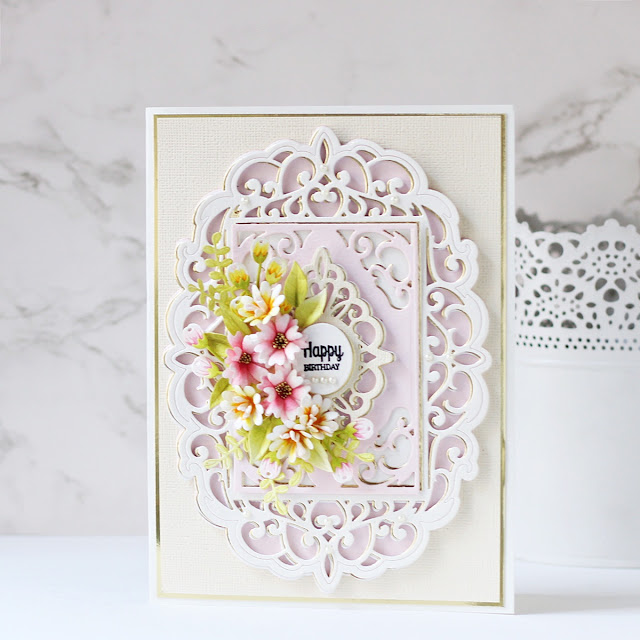
I have an A2 Shaped Note Card cum Pocket to share for the hop today using the Spellbinders  – Amazing Paper Grace March 2022 Die of the Month Set. This month’s Amazing Paper Grace Die of the Month Set, “Bella Ovalette“, is a large set of 12 dies that can be used to cut gorgeous decorative background panels as well as some pretty flowers and leaves to embellish.  It’s a versatile die and is a beautiful match to Bella Diamante. I love the soft curves and the unique shape of the shadow layer that can be used to make a shaped card.

To create my card, I first die-cut Snowdrift Cardstock, Mirror Gold Cardstock, Pink Sand Cardstock, and White Foam using the A2 Decorative Layer Die from the set and layered the pieces atop the card panel using Craft Glue. Next, I die-cut Mirror Gold Cardstock and Pink Sand Cardstock using the Large Motif Die from Bella Ovalette and adhered the pieces down on my decorative panel using liquid adhesive. The, I die-cut , and White Foam using the Smaller Motif Die in the set and popped up the layers up with foam tape to create a raised effect. 


Once the layers were all in place, it was time to embellish the card. I cut some of the flowers and leaves out of Snowdrift Cardstock and coloured the pieces using Cotton Candy, Coral Berry, Warm Sunshine, and Sunkissed paints from the Watercolor 36 Pan Set. I also used Copic Markers (RV52, YR68) to flick some colour out from the centers to add some quick colour to the flowers before layering them up and adding Gold Glitter Balls to the centers. I wanted my floral spray to look more full and wholesome, so I die-cut some leaves  and additional foliage from the Be Bold Blooms Etched Dies out of Snowdrift Cardstock and Peridot Cardstock. I watercolored the pieces using Bamboo and Frayed Leaf and embossed them with a ball stylus for a bit of interest.

Next, I cut the tiny Oval Die in the Bella Ovalette Set out of Snowdrift Cardstock, Mirror Gold Cardstock, and White Foam and layered up the pieces atop my panel using Craft Glue. I stamped my sentiment in the centre of the piece using Versafine Onyx Black ink and added some white pearls for visual interest. To finish, I mat the card panel with layers of Barely Peach and Mirror Gold Cardstock before adhering it to a side-folding A7-sized white card base using tape runner. 


Giveaway:
To celebrate this release, Spellbinders is giving away a $25 gift certificate to 3 lucky blog readers – selected from the comments on our blog. Giveaway closes on Sunday, March 13th, 11:59 pm MST. The winner will be announced in this blog hop post the following Wednesday. The winner is responsible for shipping costs, duties, and taxes.

Please note, store credit (gift certificate) cannot be applied to Club Subscriptions. Store credit can be applied to shop past Club products, Club extras and regular releases.


Blog Hop Order: 
Next Stop on this Blog Hop is, Linh Van's blog.
Just in case you lose your place along the way, here is the complete list of participants so that you can find your way back:


Thank you so much for your stopping by and reading this blog post. I hope you liked my project! 

If you like what you've seen from me, please give me a follow over on my Instagram (@hussena_cal) and/or subscribe to my blog if you haven't already.
Wishing you a great day ahead!

Tuesday, November 16, 2021

Spellbinders November 15th Clubs Blog Hop + Giveaway!


Hello, crafty friends!
I'm delighted to be joining Spellbinders for the November 2021 Clubs Inspiration Blog Hop today. Spellbinders is celebrating all their Club Kits in shop for November 2021.

If you arrived here from Jessica Vasher's Blog, then you are on the right track. If this is your first stop, then you will want to start at the beginning, the Spellbinders Blog. We've got tons of inspiration and giveaways for you on the hop today, so keep reading till the end of this post for more information.

I have an A7 Layered Monochromatic Card to share for the hop today using the Amazing Paper Grace – November 2021 Die of the Month Set. In case you missed, it I shared a Dimensional Christmas Card on my blog a few days ago using this month's "Pop Up 3D Vignette Christmas Tree" Set, which you can check out HERE.

The Amazing Paper Grace Die of the Month for November 2021 is quite unique. It’s a fold-flat card that fits into a small catalog envelope and opens up into a showcase card.  On the other hand, it’s a gorgeous set of layered trees and adorable gifts. All of the details, the packages, the bows, the ornaments and such are really delightful and you can easily assemble a beautiful little pop-up scene using the dies in the set or use the elements separately on a traditional Christmas card.

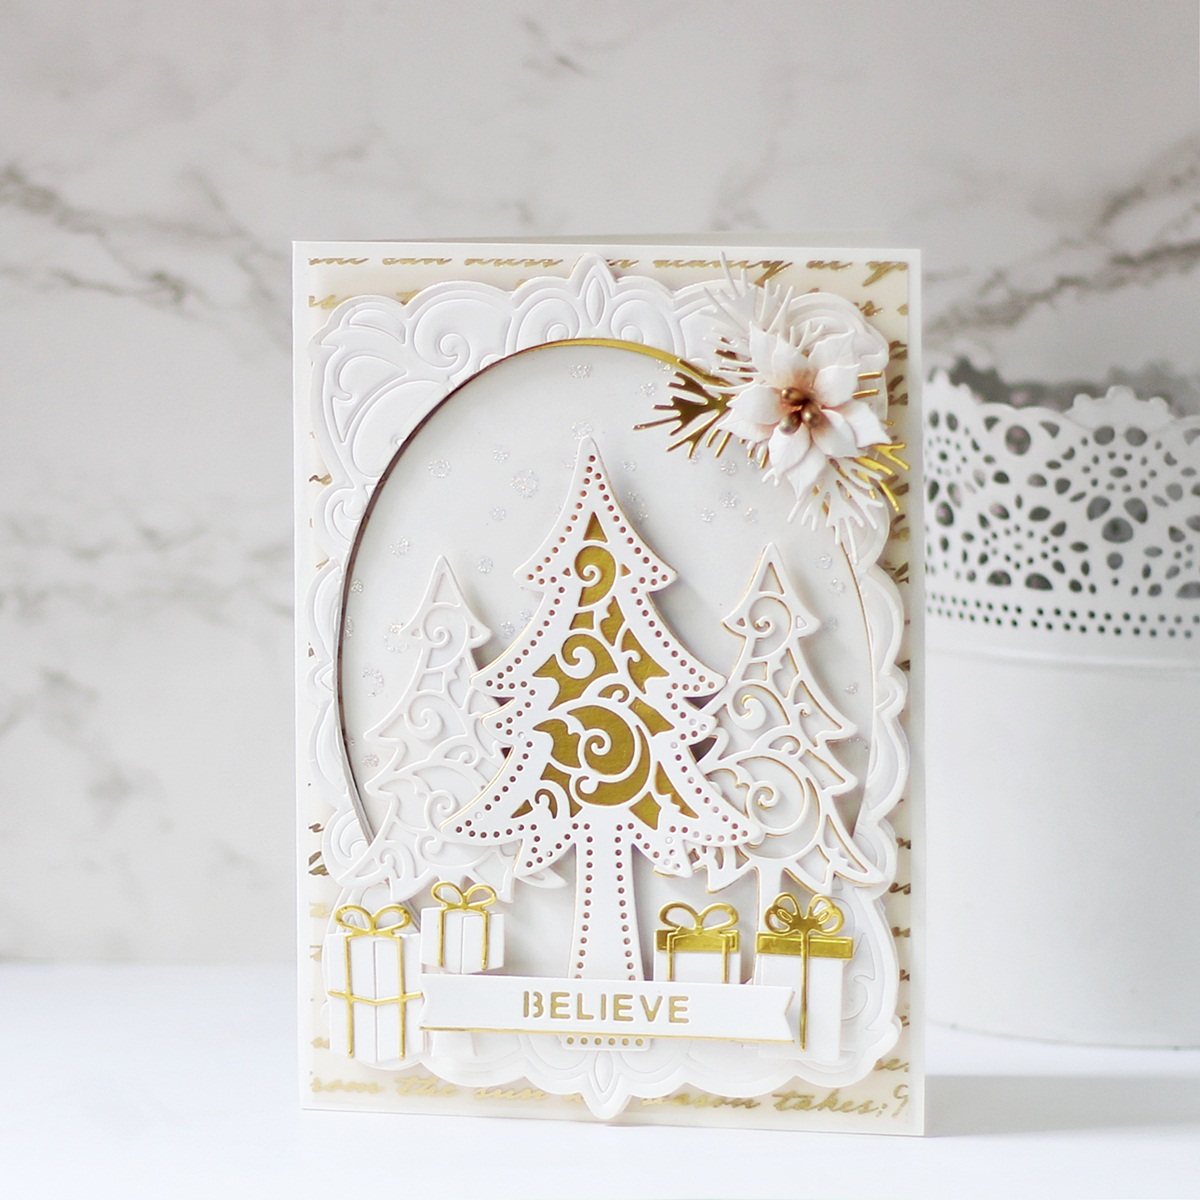
Today's card is a bit different from my usual cards in terms of size. This card is really huge, measuring 5-1/2″ x 7-1/2″ inches. I just I folded an A4 Sheet of Snowdrift Cardstock in half and burnished the crease well to make the card base.

To create my card, I first debossed Alabaster and Brushed Gold Cardstock using the Outer Rim and the Large Decorative Insert Dies in my Spellbinders Platinum 6" Die Cutting Machine (I positioned my Platform Standard; Die Template Cut Ridges UP with Cardstock Inside; Embossing Mat; XL Embossing Plate and then ran this through my die cut machine as I would an embossing folder. The thick dies pressed into the paper leaving a lovely impression), followed by die cutting with the Large Oval Outer Rim from the Fluted Classics Ovals Etched Die Set. I adhered the ivory die-cut piece on top of the gold die-cut with liquid glue, offsetting them a bit to form a shadow. Next, I trimmed a piece of foiled vellum from the DCWV Scripts And Music Notes Paper Pack to 5" X 7" and adhered it down to my card base using tape runner. Once that was done, I adhered the delicate oval frame and the solid oval die cut on my card panel using a combination of foam adhesive and Craft Glue for dimension. 

Next, I die cut Alabaster and Brushed Gold Cardstock using the Medium and Small Filigree Tree Dies from Pop Up 3D Vignette Christmas Tree Die Set. I assembled each of the pieces together and adhered them down with Craft Glue. Next, I die cut a whole bunch of gift boxes from Alabaster and Brushed Gold Cardstock to add underneath the tree. I assembled the pieces together and adhered them down to my card front using foam adhesive for dimension. Then, I die cut Alabaster and Brushed Gold Cardstock using the solid banner and banner insert dies from the Pop Up 3D Vignette Christmas Tree Die Set. I adhered the pieces together with Craft Glue, allowing the gold layer to peek out from behind as a shadow.

My card background was already quite embellished at this point, but I still went ahead and die cut Alabaster and Brushed Gold Cardstock using the Medium and Small Poinsettia Dies along with the Evergreen Die included in the Pop Up 3D Vignette Poinsettia Sleigh Die Set to create a small poinsettia flower. I rarely make cards without flowers and felt that the design would look incomplete without one. :) I embossed the petals using the small ball tip from the Ultimate Tool Kit and then added matte-finish gold pollens to the centres of the flowers to give them a more realistic look. I then adhered the poinsettia and the leaves on the right-hand side of my card front using Craft Glue.

Once everything was assembled and adhered down to my card front, I used Ranger Diamond Stickles to create little circles to give the illusion of snowfall on my card background for a bit of glitz and glam. Then, to complete, I mounted my card panel to a side-folding A7 ivory card base made out of Alabaster Carfdstock.

I love the fact that the size of the trees and embellishments make it possible to make both A7 and A2 cards with the set. This gives you so many options! I also really enjoyed challenging myself to use only two colours to create my card. I would love to know what you think about it. :)


Giveaway:
To celebrate this release, Spellbinders is giving away a $50 gift certificate to 3 lucky blog readers – selected from the comments on our blog. Giveaway closes on Sunday, November 21st, 11:59 pm MST. The winners will be announced in this blog hop post the following Wednesday. The winner is responsible for shipping cost, duties and taxes.

Please note, store credit (gift certificate) cannot be applied to Club Subscriptions. Store credit can be applied to shop past Club products, Club extras and regular releases.

Blog Hop Order: 
Next Stop on this Blog Hop is, Melody Rupple's blog.
Just in case you lose your place along the way, here is the complete list of participants so that you can find your way back:

Thank you so much for your stopping by and reading this blog post. I hope you liked my project! 

If you like what you've seen from me, please give me a follow over on my Instagram (@hussena_cal) and/or subscribe to my blog if you haven't already.
Wishing you a great day ahead!

Friday, March 12, 2021

Spellbinders March'21 Blog Hop + Giveaway!


Hello, crafty friends!
I'm so happy to be joining Spellbinders for the March 2021 Clubs Inspiration Blog Hop today. Spellbinders is celebrating all their Club Kits in shop for March 2021.

If you arrived here from Jenny Colacicco's Blog, then you are on the right track. If this is your first stop, then you will want to start at the beginning, the Spellbinders Blog. We've got tons of inspiration and giveaways for you on the hop today, so keep reading till the end of this post for more information.

I have a Slimline Card and a Shaped Card to share for the hop today using the Amazing Paper Grace – March 2021 Die of the Month Set. In case you missed, it I shared a Card on my blog a few days ago using this month's "Mini 3D Vignette Floral Mason Jar" Set, which you can check out HERE.

The Mini 3D Vignette Floral Mason Jar is a beautiful set of sixteen dies and it features a bouquet as well as lovely dimension, and folds flat like all of the 3D Vignettes.

 It's been a hot minute since I made a Slimline card and I was very excited to create one using the Mini 3D Vignette Floral Mason Jar Die Set. 

For my card, I first die cut all the different components of the jar and the flowers from White Cardstock using my Spellbinders Platinum 6" Machine. Then, I cut a piece of Watercolor Cardstock to size and did a light watercolour wash on it using Broken China ink. I also added a couple of black paint splatters for definition and interest. 

Next, I die cut an aperture in the body of the jar to create a frame. Then, I added a bit of soft colour to the front and back pieces of the jar using Broken China ink with a sponge to create a soft, natural look. I wanted to recreate the look of a clear jar/vase, so I added a layer of acetate in between the cardstock die cut pieces and used White Fun Foam to adhere the pieces to my panel for added dimension. 

I coloured the flowers, stems, leaves, and foliage using Mermaid Markers by Jane Davenport and Distress inks. I LOVE layering die sets and layered flowers are my absolutely favourite! I had so much fun colouring each piece and assembling them to create the bouquet on my card front.  

I stamped on the lid of the jar using a Gingham stamp and Pool Play ink and then die cut it to add over the base of the jar. I wrapped some natural hemp thread around it for visual interest and adhered it to the jar using foam squares. I attached the stems through the the jar lid to the top of the mason jar. The flowers and foliage were also adhered to the panel using foam squares. 

I stamped my sentiment on a stitched tag die cut from the Mini 3D Vignette Floral Mason Jar Die Set. I used hemp thread to tie the two tags together and then popped it over the lid of the jar using foam squares. To assemble the card together, I adhered the panel to a piece of lemon yellow Cardstock, which was then adhered to a side-folding white card base with Craft Glue.


My next project is a Shaped Shaker Card. I think you can tell that i love this die set a bit too much, so I have gone all out in creating with it! 

First, I die cut the different components for the card from White Cardstock using my Spellbinders Platinum 6" Machine. I wanted to create a shaped card, so I used the partial die-cutting technique here to create a hinged card base. If you don't know how to create one, you can check out Becca Feeken's tutorial HERE where she shows you how to do it. It's very simple and easy.

In order to create the Shaker piece, I die cut an aperture in the body of the jar to create a frame. Then, I added a bit of soft colour to the front and back pieces of the jar using Tattered Rose ink with a blending brush to create a soft, natural look. I followed the same process as above to create the shaker frame, but this time I added some steel coloured Glass Glitter and patterned sequins to create the shaker piece. I used two layers of White Fun Foam in between the die cut layers to create a sturdy frame. 

The flowers, leaves, stems, and foliage were once again coloured using Mermaid Markers by Jane Davenport. I created the gingham lid following the same technique as I did for the earlier card. I wrapped some natural hemp thread around it for visual interest. I attached the stems through the the jar lid to the top of the mason jar, while the flowers and foliage were adhered using foam squares and  Craft Glue.

I stamped my sentiment on a stitched tag die cut from the Mini 3D Vignette Floral Mason Jar Die Set. I die cut another tag and used a Gingham stamp to stamp on it using  Rustic Rose ink. I used hemp thread to tie the two tags together and then popped it over the lid of the jar using foam squares. And that's it - This card was done! This would be such a sweet little card to give to a family member or a friend. I love how it turned out.


Giveaway:
To celebrate this release, Spellbinders is giving away a $50 gift certificate to 3 lucky blog readers – selected from the comments on our blog. Giveaway closes on Sunday, March 14th, 11:59 pm MST. The winner will be announced in this blog hop post the following Tuesday. The winner is responsible for shipping cost, duties and taxes.

Please note, store credit (gift certificate) cannot be applied to Club Subscriptions. Store credit can be applied to shop past Club products, Club extras and regular releases.


Blog Hop Order: 
Next Stop on this Blog Hop is, Virginia Lu's blog.
Just in case you lose your place along the way, here is the complete list of participants so that you can find your way back:

                            Hussena Calcuttawala (You are HERE) 

Thank you so much for your stopping by and reading this blog post. I hope you liked my projects! 

If you like what you've seen from me, please give me a follow over on my Instagram (@hussena_cal) and/or subscribe to my blog if you haven't already.
Wishing you a great day ahead!