Showing posts with label Distress Oxides. Show all posts

Wednesday, June 22, 2022

Guest Post using Spellbinders Layered Fleur Bouquet Slimlines Collection by Becca Feeken


Hello everyone!
This is Hussena from Quill and Punch Works, and I am so excited to be guest designing on the Spellbinders Blog today showcasing the NEW Layered Fleur Bouquet Slimlines Collection by Amazing Paper Grace. The beautiful detailed border and frame dies, as well as the exquisite floral layering dies, inspired me to make a set of three cards perfect for gifting to friends and family!


My first card features the Half Slimline Oval Etched Dies and the Layered Cherry Blossoms Etched Dies along with the Geo Screen Embossing Folder. The Layered Cherry Blossom Set creates such gorgeous flowers that I had to try them out first.  I also used one of the slimline background designs from this collection for this bright and cheery friendship card.

To start with, I die--cut Snowdrift Cardstock several times using all of the components of the Layered Cherry Blossoms Etched Dies. Next, I added a bit of Worn Lipstick, Twisted Citron, and Shabby Shutters Distress Oxide Inks to the petals and leaves, Mustard Seed ink to the flower centres, and Rusty Hinge ink for the branch with a sponge dauber to add shading and assembled the pieces with liquid glue.

To create the ornate background panel, I die-cut Snowdrift Cardstock and White Foam twice using the Half Slimline Outline and Insert dies from the Half Slimline Oval Etched Die Set. Next, I trimmed a piece of Pink Sand Cardstock to 8.5" X 3.5" and adhered the die-cut pieces on the panel with liquid glue. Next, I embossed the leftover die-cut oval piece using the Geo Screen Embossing Folder. Once that was done, I mat it with a layer of Silver Glitter Paper and adhered the layers together with liquid glue.

Next, I die-cut  Snowdrift Cardstock and White Foam using the 'You' die from the Sweet Sayings Notecard Sentiments Etched Dies. I adhered them together with liquid glue, then ink blended Worn Lipstick Distress ink to the top three-quarters of the sentiment die-cut piece for more depth. Next, I stamped a sentiment from the I'm Here for You Sentiments Clear Stamp & Die Set on to a strip of Snowdrift Cardstock using Versafine Onyx Black ink and popped it on to my panel using foam adhesive. I arranged the branch, leaves, and flowers on top of the card front and adhered them down with liquid glue and foam adhesive. I adhered the card panel to a top-folding white card base measuring 9” x 4” with tape runner to complete. I embellished the flowers with some Glacier Jewels to finish.


My next card features the Layered Lilies Etched Dies, the Half Slimline Bracket Etched Dies, and the Half Slimline Oval Etched Die Set. and the Butterfly Bliss Garden Shutters 5 x 7" Card Base Etched Dies. I went with a easy and simple design with light shading on the flowers to keep the lilies the star of the show here!

To make my card, I started off by die-cutting Snowdrift Cardstock several times using all of the components of the Layered Lilies Etched Dies. Next, I blended Peeled Paint and Twisted Citron Distress Inks on the leaves and stem to give them lots of colours and a bit of shading, Spiced Marmalade for the flower stamens, and a light flicking of Squeezed Lemonade Distress Oxide Ink in the centre of the lillies with a sponge dauber. I then adhered the pieces together with liquid glue to create the main blooms.

Next, I die-cut Snowdrift Cardstock, Mirror Gold Cardstock, and White Foam twice using the Half Slimline Bracket Etched Dies and adhered the pieces together with liquid glue, offsetting the gold mirror die cut to create a shadow. Then, I trimmed a piece of Snowdrift Cardstock to 8.50" x 1.80" and applied a thin layer of Liquid Watercolor - Aquamarine to the panel. I dragged the color out loosely with an Aqua Brush to create a soft, watercolored background and then adhered the intricate border die-cut pieces on it with liquid glue.

I die-cut Snowdrift Cardstock and Mirror Gold Cardstock using the sentiment die from the Half Slimline Oval Etched Die Set and adhered the layers together, allowing the gold layer to peek out from behind like a shadow. Next, I applied Squeezed Lemonade and Spiced Marmalade Distress Oxide inks horizontally across the sentiment piece with my blending brushes to add shading and dimension. Once that was done, I die-cut Snowdrift Cardstock using the Tag 1 Die in the Swallowtail Tags Etched Dies and stamped a sentiment from the Sentiments for You Clear Stamp Set onto the piece using Versafine Onyx Black ink. I then popped it to the card front using foam adhesive for dimension. 

Next, I die cut Snowdrift Cardstock and White Foam twice with the butterfly dies from the Butterfly Bliss Garden Shutters 5 x 7" Card Base Etched Dies. Then, I used Peacock Feathers, Mermaid Lagoon, Evergreen Bough, and Antique Linen Distress inks to colour the die-cut pieces and assembled them with liquid glue, before adhering them to the card front using foam adhesive. To finish, I adhered the card panel to a top-folding white card base measuring 4” x 9” with tape runner. I embellished the background with some Glacier Jewels to finish. 


My last project for today features the Layered Daisies Etched Dies, Half Slimline Diamond Etched Dies, Fluted Classics Slimline Etched Dies, and the Bella Ovalette - APG Die of the Month.  The Layered Daisies Die Set is one of my favourites from the collection and I love the variety of sizes included in the set. I added die-cut tag to an die-cut background for this slimline floral card.

To create this card, I die-cut Snowdrift Cardstock several times using all of the components of the Layered Daisies Die Set. Then, I added a bit of Worn Lipstick, Picked Raspberry, Abandoned Coral, Wilted Violet, Peeled Paint, and Shabby Shutters Distress Oxide Inks to the petals and leaves and Mustard Seed ink to the flower centres with a sponge dauber to o give them lots of color and a bit of shading and assembled the pieces with liquid glue. 

Next, I die-cut Waterfall Cardstock and Mirror Gold Cardstock using the twice using the Half Half Slimline Diamond Etched Dies and adhered the layers together with liquid glue, allowing the gold layer to peek out from behind like a shadow. Then, I die-cut Snowdrift Cardstock using the Large Slimline Rim and Insert Dies from the Fluted Classics Slimline Etched Dies and adhered the intricate background pieces on it with liquid glue.

Then, for the sentiment piece, I die-cut Snowdrift Cardstock and White Foam using the Diamond Insert Die included in the Bella Diamante Set and adhered the pieces together with  liquid glue. Next, I die-cut  Waterfall Cardstock, Mirror Gold Cardstock, and White Foam using the Inner Oval Design Outline and Insert Dies from the Bella Ovalette Die Set and adhered the layers together with liquid glue, allowing the gold layer to peek out from behind like a shadow. Once that was done, I stamped a sentiment from the  Butterfly Sentiments Clear Stamp Set on to the negative oval die-cut piece using Versafine Onyx Black ink and adhered it down using foam adhesive for lots of dimension.

To finish, I arranged the flowers, stems, and leaves on the card front and adhere them down with liquid glue and foam adhesive for dimension. Next, I mat the panel with Waterfall Cardstock and adhered it to a top-folding white card base measuring 9” x 4” with tape runner.

SPELLBINDERS SUPPLIES:
CS-017, CS-027, SCS-118, SCS-160, S4-1192, S2-327, S4-1148, S4-1193, S4-1194, S4-1197, S4-1198, S4-1199, S6-183, S6-186, ST-0147, STP-079, STP-081, SES-030, DOMAPG-FEB21, DOMAPG-MAR22, JD-044, TD056362, TD055792,TD056294, TD056355, TD056119, TD056089, TD056102, TD056164, AD-0081, AD-0084, MISTI, PCGO4E, PE-100, T-021

OTHER SUPPLIES:
Neenah Solar White Cardstock, Picked Raspberry, Abandoned Coral, Shabby Shutters Mermaid Lagoon, Evergreen Bough Distress Oxide ink, Versafine Onyx Black Ink, Tape Runner.

That’s it for today’s post! I hope you enjoyed it and have been inspired to create with these stunning dies and stamp from the Layered Fleur Bouquet Slimlines Collection. Thank you so much for stopping by!
You can find more inspiration over at my Instagram page. 

Sunday, April 24, 2022

Guest Post using Spellbinders Susan's Garden Through The Garden Gate


Hello everyone!
I am so excited to be back today to share a couple of projects using the Through the Garden Gate Collection by Susan Tierney-Cockburn. The GORGEOUS garden-themed dies and heartfelt greetings in this Collection inspired me to create a set of three cards perfect for sending to your friends and family! 


My first card features the Hollyhock Etched Dies, Forget-Me-Not and Ladybugs Etched Dies, and the Beeblossom Etched Dies. I paired it with the dies from the Fluted Classics Ovals Etched Dies and added a few tropical bunches to this cheerful thank-you card.

To create my card, I began by die cutting Susan's Garden Specialty Cardstock with the flower, stem, leaf, and stamen dies from the Hollyhock Etched Dies, Forget-Me-Not and Ladybugs Etched Dies, and the Beeblossom Etched Dies until I had enough pieces to form two blooms. I coloured the petals using Worn Lipstick, Tattered Rose, and Picked Raspberry Distress inks, and shaped them using the loop tool. Next, I coloured the stem and leaves using Mowed Lawn, Shabby Shutters, and Gathered Twigs Distress inks and shaped them with the leaf tool included in the Susan’s Garden Ultimate Tool Kit. Then, I coloured the stamens with Mustard Seed and Fossilized Amber Distress inks and added Yellow Flower Pollen to the lower tips with liquid glue. Once they dried, I rolled the pieces and adhered them down with liquid glue. Once that was done, I assembled the flowers with liquid glue.

Next, I colored the Beblossom petals using Picked Raspberry and Spun Sugar Distress inks and added a bit of light pink to the very center of all of the flower petal die-cuts using a Copic marker. Then, with a medium pink Copic marker, I flicked some colour out from the center to add some quick color to the flowers. Once that was done, I shaped the petals using the loop tool and bent the edges upward with tweezers. I coloured and shaped the stamens and leaves as done previously for the hollyhocks. 

I wanted to keep the focus on the flowers, so I kept of the design really simple.  I created the background pattern using the “ink smooshing” technique.  I pressed Tumbled Glass, Peacock Feathers, and Broken China Distress Inks onto different areas of my craft mat and spritzed them with water until they beaded up. I pressed a piece of watercolor cardstock into the droplets and dried it with a heat gun. Once I was happy with the background pattern, I used Antique Gold Metallic Spray and Jet Black Ink Spray to add some splatters to the background to make it extra artsy. I wanted the panel to have a framed look, so I debossed the Large Rectangle Outer Rim and Insert dies from the Fluted Classics Rectangles Etched Dies for a lovely thick impression on the paper. Then, I die-cut Snowdrift Cardstock, Mirror Gold Cardstock, and White Foam using the Medium Oval Rim and Insert and Small Inner Rim and Insert dies from the Fluted Classics Ovals Etched Dies. I adhered the layers together using liquid glue, allowing a bit of the gold to show as a shadow. 

I arranged the flowers and leaves on my panel and adhered them down using a Hot Glue Gun. Next, I applied Gold Hot Foil to Snowdrift Cardstock using the Sentiments for Everyday Glimmer Hot Foil Plate & Die Set and adhered it down on my panel using foam squares for a raised effect. I matted the panel with a layer of Mirror Gold Cardstock and adhered the panel down to a top-folding A2-sized white card base using tape runner. I added a few Gold Mix Color Essential Gems to embellish. 


My next card features the Gardenia Etched Dies and the Forget-Me-Not and Ladybugs Etched Dies. This is one of my favourite die sets from the Collection and i am quite pleased with how my card turned out. I love the contrast of the white gardenias against the black ink-blended background!

To make this card, I began by die cutting Susan's Garden Specialty Cardstock with the Petals and Leaf Dies from the Gardenia Etched Die Set and the Petals, Stem, and Stamen Dies from the Forget-Me-Not and Ladybugs Etched Die Set. Then, I shaded the centre of the gardenia petals with Mustard Seed and Squeezed Lemonade Distress inks and shaped the flower pieces with a loop tool and tweezers. 

Next, I coloured the flowers of the Forget-Me-Not and Ladybugs Die Set using Picked Raspberry, Worn Lipstick,  Abandoned Coral, and Mustard Seed Distress inks and shaped the flower petals with a ball stylus. Next, I coloured the stem using Picked Raspberry and Mustard Seed Distress inks and the leaves using Twisted Citron and Peeled Paint Distress inks and shaped them with the leaf tool and small ball stylus included in the Susan’s Garden Ultimate Tool Kit. 

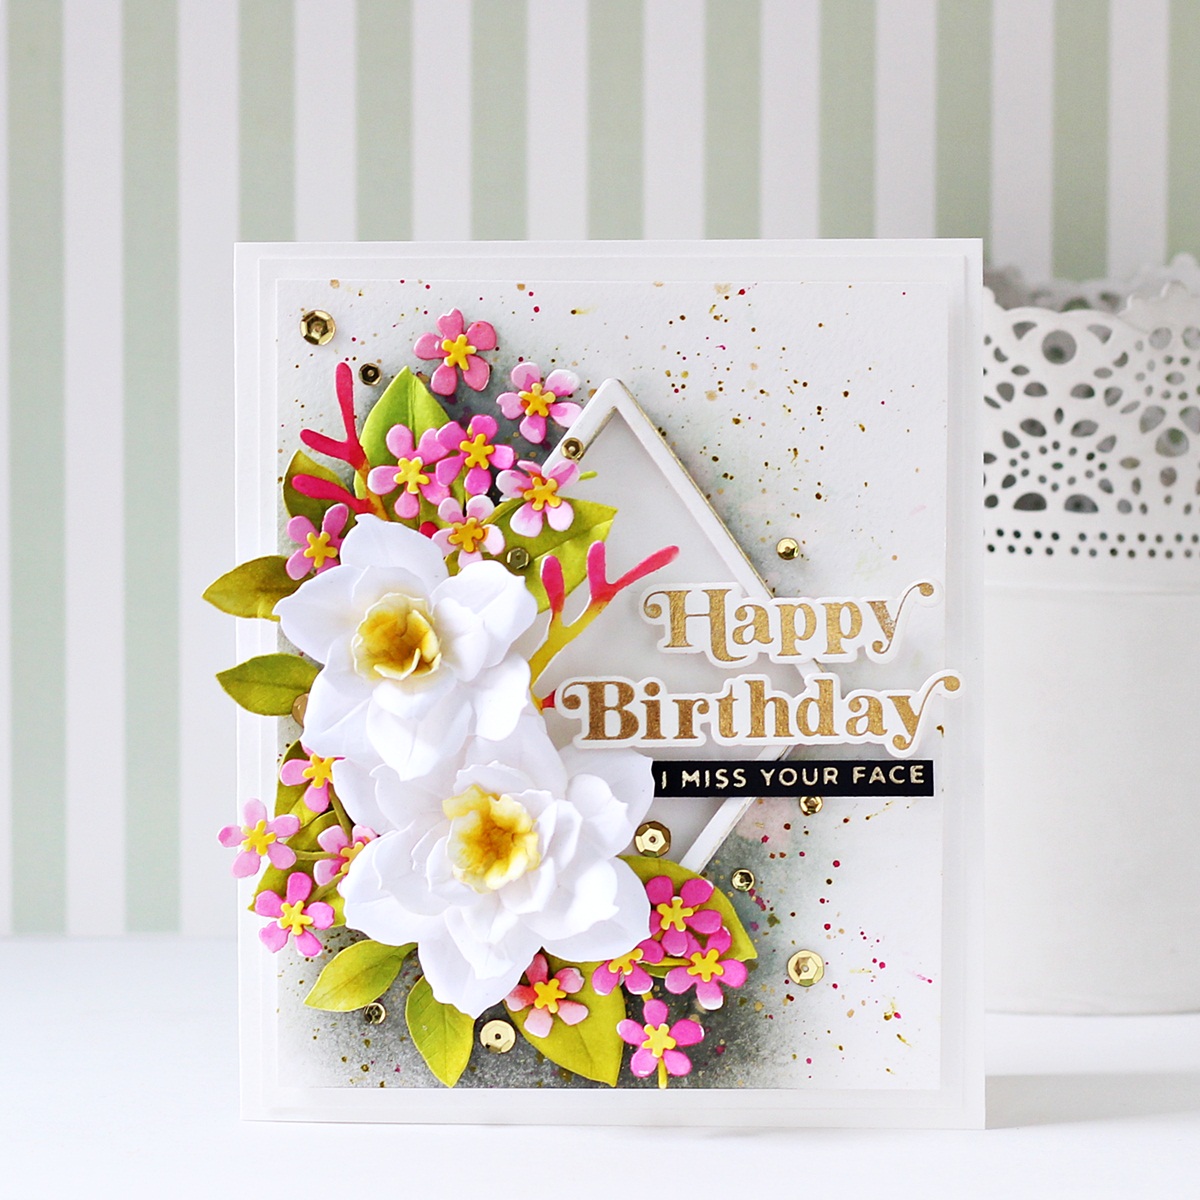
Next, to add a bit of contrast, I die-cut a diamond in the middle of the background panel using the Inner Diamond Die from the Diamond Floral Frame Glimmer Hot Foil Plate & Die Set. Next, I die-cut Snowdrift Cardstock and White Foam using the coordinating Outer Diamond Die and Inner Diamond Die from the set and adhered it over the card panel for a raised effect. After I’d finished die-cutting the images, I used blending brushes to blend some Black Soot and Hickory Smoke inks on the left side the panel, sprinkling some water droplets on the blended area, then dabbing them with a paper towel to pull up the color. Once done, I dried the panel and added fine gold and pink paint splatters for a dramatic look. Then, I adhered down the flowers, stem, and foliage around the frame using Hot Glue. 

The sentiment was foiled in gold using one of the plates from the Be Bold Glimmer Sentiments Glimmer Hot Foil Plate & Die Set on Snowdrift Cardstock and popped up on top with foam adhesive. Next, I used Gold Hot Foil to foil Onyx Cardstock using one of the sentiments from the Mini Sincere Sentiments Glimmer Hot Foil Plate and cut it out using the coordinating die. I adhered the piece onto my panel using foam squares for a raised effect. Then, to complete, I mat my background panel with Snowdrift Cardstock before adhering it to a side-folding white card base with tape runner. I finished the design with some sparkling gold sequins around the bouquet to embellish.


My final project for today feature the Floribunda Rose Etched Dies and the Forget-Me-Not and Ladybugs Etched Dies. The Floribunda Rose is one of the most impressive-looking flower in the collection and I wanted to make sure I used a canvas large enough to really show off all of the layers and detail.

To create my card, I first die-cut Susan's Garden Specialty Cardstock with all of the Petals and Leaf Dies from the Floribunda Rose Die Set and the Petals and Stamen Dies from the Forget-Me-Not and Ladybugs Etched Die Set. I coloured the Color the flower centers with Dried Marigold and Wild Honey Distress inks and and used Squeezed Lemonade Distress ink to colour the tips. Next, I shaped each petal with the loop tool and tweezers from the Ultimate Tool Kit and cupped them with the large ball tip before adhering the layers of petals together with liquid glue. For the bud, I used Spiced Marmalade and Dried Marigold Distress inks to colour the pieces and shaped the smallest two layers with a large ball stylus before adhering together.

The leaves were coloured Peeled Paint, Shabby Shutters, and Gathered Twigs Distress inks and shaped with the leaf tool included in the Susan’s Garden Ultimate Tool Kit. Next, I coloured the flowers of the Forget-Me-Not and Ladybugs Die Set using Tumbled Glass and Broken China Distress Inks and the centres with Dried Marigold ink. 

I wanted the background to be clean and crisp, so I die-cut Snowdrift Cardstock with the Scallop Rim and Outer Lace Eyelet Dies from the Eyelet Lace Frame Etched Dies. I then die-cut the coordinating layers with the Rectangle Outline and Inner Eyelet Insert dies and Inner Rectangle Outline and Inner Eyelet Insert dies from the same set out of Snowdrift Cardstock and adhered it to the center of the card front with foam adhesive.

Next, I die cut Snowdrift Cardstock using the Inner Oval Outline Die from the Eyelet Lace Frame Etched Dies. I stamped a sentiment onto the piece in Versafine Onyx Black ink and popped it on the die-cut panel using foam adhesive for dimension. Then, to finish, I adhered all the flowers and leaves down to the left of my panel with liquid glue and adhered the background panel to a top-folding A7-sized card base using tape runner. 


SPELLBINDERS SUPPLIES:
CS-027, CS-030, S2-340, S3-445, S4-1190, S4-1191. S5-474, S5-475, S5-507, S6-184, SCS-118, SCS-122, SCS-129, SCS-160, GLF-014, GLP-253, GLP-288, GLP-299, GLP-305, PCGO4E, T-021, T4645, AD-0084, MISTI, PCGO4E, PE-100, T-021


OTHER SUPPLIES:
Neenah Solar White Cardstock, Copic Markers, Picked Raspberry, Worn Lipstick,  Abandoned Coral, Tattered Rose, Spun Sugar, Mowed Lawn, Twisted Citron, Peeled Paint, Shabby Shutters, Gathered Twigs, Peacock Feathers, Tumbled Glass, Broken China, Dried Marigold, Wild Honey, Spiced Marmalade, Dried Marigold, Mustard Seed, Fossilized Amber, Squeezed Lemonade, Black Soot, Hickory Smoke Distress inks, Versafine Onyx Black Ink, Sponge Daubers, Blending Brushes, MISTI Stamping Tool, Hot Glue Gun, Tape Runner, Antique Gold Metallic Spray and Jet Black Ink Spray.

I hope you enjoyed this set of layered floral cards featuring the Through the Garden Gate Collection and are inspired to give it a try. Thank you so much for stopping by today!

You can find more inspiration over at my Instagram page.

Sunday, April 10, 2022

Guest Post using Open Road Collection by Spellbinders


Hello everyone!
I am so excited to be guest designing on the Spellbinders blog. I have three projects to share with you today highlighting the NEW Open Road Collection. The wonderful and fun products in this collection inspired me to create a set of three cards perfect for sending to your friends and family! 


My first project features the Open Road Etched Dies, On Cloud Nine Etched Dies, Head in the Clouds Embossing Folder, and the Open Road Sentiments Clear Stamp Set. I LOVE the convertible die in the set and used it to create soft pastel card for a friend. It was so fun to create this one!

To begin, I embossed the Head in the Clouds Embossing Folder on a piece of 4” x 5 1/4”  Waterfall Cardstock. Next, I trimmed a piece of Grey Woodgrain Paper to size and die-cut a circle in the middle of the pane using the Circle Shape Medium Die from the Essential Circles Die Set. Once that was done, I die-cut White Foam using the same die and adhered the two panels together with Craft Glue.

Next, I die-cut Snowdrift, Pink Sand, Silver Glitter Paper, Onyx, White Foam, and Mirror Gold Cardstock using the Open Road Etched Dies and assembled the car with liquid glue. Then, I blended Squeezed Lemonade and Scattered Straw Distress inks over the convertible and the balloon die-cut pieces using a sponge dauber for depth. I adhered all the pieces down on my panel with Craft Glue.

Next, I die-cut Silver Glitter Paper using the Ribbon/Twine die included in the Assorted Tags Etched Die Set and grouped the die-cut pieces together to create the balloon strings. Next, I die-cut Snowdrift Cardstock using the On Cloud Nine Etched Dies and adhered them down on the card panel suing foam adhesive for a raised effect. Once that was done, I die-cut Pink Sand Cardstock using the large label from the Sentiment Labels Die Set. Next, I stamped a sentiment from the Open Road Sentiments Clear Stamp Set to Snowdrift Cardstock using Versafine Onyx Black ink and cut it out using one of the inserts dies from the Sentiment Labels Die Set. Once that was done, I adhered the sentiment strip on top with liquid glue. Next, I die-cut Silver Glitter Paper using the twine die in the Sentiment Labels Etched Dies. I attached the sentiment label on the card using the twine and adhered it on top using foam adhesive.

To finish, I adhered the embossed panel to a piece of Silver Glitter Paper before adhering it to a top-folding A2-sized Pink Sand card base using tape runner. 


My next card features the Open Road Etched Dies, I Dance Etched Dies. and the Sentiments for You Clear Stamp Set.  I thought the balloons included in the Open Road Die Set were super fun on their own and just perfect for creating this easy and fun graduation card!

To start, I die-cut Barely Peach and Onyx Cardstock using the hand and leg dies from the I Dance Etched Dies.  I assembled the pieces with liquid glue and die-cut BnW Stripes Patterned Paper using the skirt die included in the same set. 

Then, I die-cut Snowdrift and Gold Glitter Cardstock using the balloon dies in the Open Road Etched Dies. I die-cut a bunch of them at once, so that I could use them later for other projects as well. Once that was done, I used an array of Distress Oxide inks to colour the balloons using sponge daubers. This took me some time to do, but I thoroughly enjoyed the process as it was very therapeutic. If you don't want to colour the pieces individually, you can die-cut the pieces from coloured cardstock scraps too. 

Once that was finished, I die-cut Mirror Gold Cardstock using the Ribbon/Twine die included in the Assorted Tags Etched Die Set and grouped the die-cut pieces together to create the balloon strings. Next, I stenciled on the panel with a DIY stencil created using the On Cloud Nine Etched Dies and lightly inked it with Shabby Shutters Distress ink as a way to ground the pieces. Once that was done, I die-cut Snowdrift Cardstock using the grass blade die in the Besties Forever Die Set and the itty bitty flowers and leaves from the Be Bold Blooms Etched Dies. I blended Mowed Lawn Distress Oxide ink over the glass blades using a blending brush to colour them, while the flowers were coloured using Ripe Persimmon, Milled Lavender, Shaded Lilac, and Broken China Distress Oxide  inks. I attached the pieces to the bottom of the panel using with liquid glue and adhered the flowers on the grass blades using foam adhesive for a raised effect. I then assembled the balloons and the skirt down on the panel  using foam adhesive for dimension and interest.

Next, I stamped a sentiment from the Sentiments for You Clear Stamp Set onto the panel using Versafine Black Onyx ink and then used the Antique Gold Metallic Spray and Jet Black Ink Spray to make it extra artsy! To finish things off, I mounted the panel to an A2-sized top-folding white card base using tape runner. 


My last card for today features the Open Road Etched Dies, On Cloud Nine Etched Dies, Fluted Classics Circle Etched Dies, and the Open Road Sentiments Clear Stamp Set. The convertible in the Open Road Die Set is super sleek and fun and can be customized with all of the little details included in the set. I added gold accents and colorful balloons to create this textured graduation card.

To begin, I trimmed a panel of Snowdrift Cardstock to 4 1/4” x 5 1/2” and stenciled on the panel with a DIY stencil created using the On Cloud Nine Etched Dies. I used Cracked Pistachio and Mowed Lawn Distress inks to apply ink over the top edge of the panel with a blending brush to give the illusion of blue skies.

Next, I die-cut Snowdrift Cardstock using the Medium Outer Rim and Insert dies from the Fluted Classics Circle Etched Dies. Then, I embossed the piece using the Radiant Burst Embossing Folder and inked the sides and the centre of the die-cut piece with Scattered Straw Distress Oxide ink on the top and Twisted Citron ink on the bottom using an ink blending tool to highlight and bring out the raised areas more.

Once that was done, I die-cut Poppy Field, Mirror Gold, Onyx Cardstock, and White Foam using the Open Road Etched Dies and assembled the car with liquid glue. Next, I die-cut Snowdrift Cardstock using the balloon dies from the same set. Then, I coloured the pieces using Spun Sugar, Dried Marigold, Broken China, Mowed Lawn, and Worn Lipstick Distress Oxide inks. Next, I stamped 'Congrats' from the Open Road Sentiments Clear Stamp Set on the pieces using closely coordinating ink colors and arranged the balloons in a cluster with a piece of masking tape. Then, I flipped them over and added foam adhesive, before flipping them back over and adhering them to the card front. Next, I cut several pieces of white and gold Baker's Twine and adhered them under the balloons for a realistic touch. I mounted the embossed circle on my panel using foam adhesive and then adhered the car  over it using  liquid glue.

To finish, I stamped another sentiment from the Open Road Sentiments Clear Stamp Set onto the panel using Versafine Onyx Black ink. I then adhered this panel to an A2-sized top-folding white card base using tape runner and added a few Gold Mix Color Essential Gems to embellish. 


SPELLBINDERS SUPPLIES:

CS-002, CS-005, CS-010, CS-017, CS-027, CS-030, SCS-118, SCS-160, S2-328, S3-413, S3-427, S3-432, S4-1039, S4-1150, S4-1179, SES-028, ST-0147, MBR-EOM, TD055846, TD056294, TD056362,  TD056119, TD056232, TD056218, TD056072, TD056188, AD-0084, MISTI, PCGO4E, PE-100, T-021, STP-066, SCS-129

OTHER SUPPLIES:
Neenah Solar White Cardstock, American Crafts Grey Woodgrain Paper, Citrine Glitter Cardstock, Cracked Pistachio Distress Oxide ink, Versafine Onyx Black Ink, MISTI Stamping Tool, Gold and White Baker's Twine, Antique Gold Metallic Spray and Jet Black Ink Spray, Tape Runner.

That’s it for today’s post! I hope you enjoyed it and have been inspired to create with these stunning dies and stamp from the Open Road Collection. Thank you so much for stopping by!
You can find more inspiration over at my Instagram page. 

Monday, April 4, 2022

Altenew 8th Anniversary Blog Hop Day 1 + Giveaway (over $1,900 in Total Prizes)


Happy Monday, friends!
I'm excited and honoured to be joining Altenew today for their 8th Anniversary Blog Hop and we are kicking things off with a multi-day blog hop with tons of prizes!

If you arrived here from Jaycee Gaspar's Blog, then you are on the right track. If this is your first stop, then you will want to start at the beginning, the Altenew Card Blog. We've got tons of inspiration and giveaways for you on the hop today, so keep reading till the end of this post for more information


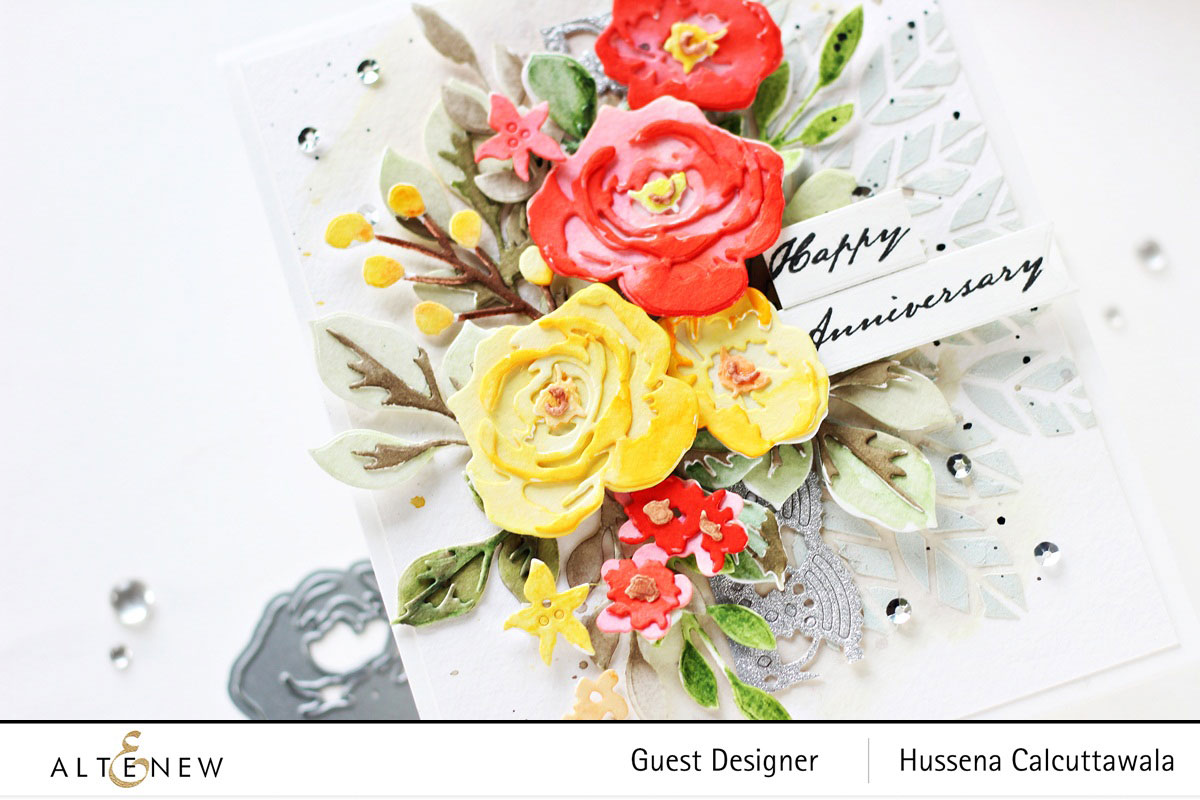
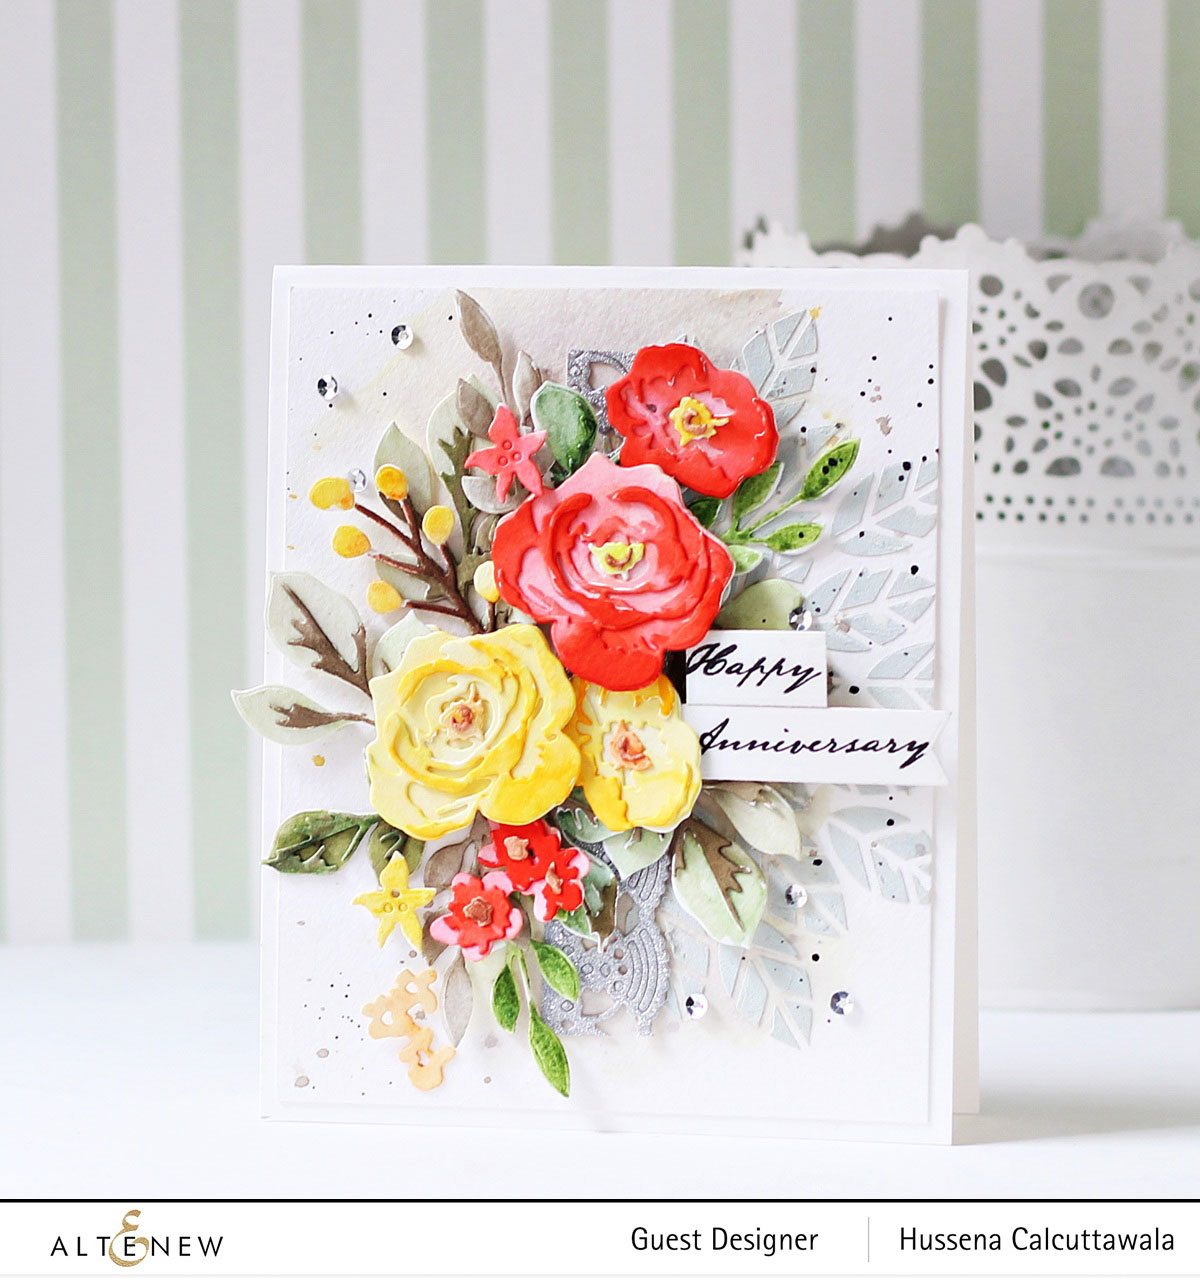
I have a project to share with you today using one of my all-time favorite Altenew sets: Garden Picks 3D Die Set. I am revisiting this die set after a while and I created some vibrant, cool red and yellow roses for my project today, colored with the Tropical Fiesta Brush Markers. Let’s get started with the details!

To start, I die-cut several of the flowers from Garden Picks 3D Die Set and Rose Flurries 3D Die Set using Altenew’s Watercolor Paper. When using the multi-layered die sets like the Garden Picks and Rose Flurries Layering Die Sets, I like to die cut a bunch of them, so that I can create several projects at once. It's super easy when the layers are all grouped together in one convenient die set, like they are in the Garden Picks Die Set. The Crimson and Fresh Lemon Brush Markers are my favorite colours from the Tropical Fiesta Set and I used them to colour my die-cut pieces in a variety of shades. Altenew's brush markers have a beautiful vibrancy and are available in a gorgeous array of colors! You can use the brush markers as is, or as liquid watercolors with your own paintbrush, which is what I did for my card today. It was very easy to get three different shades of the same colour from one marker and I think this is a great way of maximizing your stash. Once I had all the pieces coloured and dried, I spent some time just putting everything together with Craft Glue.

Next, I  die-cut some additional flowers, leaves, and foliage for my floral spray from the Layered Floral Elements Die Set and Garden Picks 3D Die Set using Altenew’s Watercolor Paper. The smaller layering flower clusters and foliage included in the Layered Floral Elements Set are so pretty and I really like how the die set works well together with the Garden Picks and other Layering Die Sets from Altenew. I coloured the die-cut pieces using Sweet Leaf, Lime, Lava Rock, Paper Bag, and Sunkissed Brush Markers from the Tropical Fiesta Set and assembled them using Craft Glue. I also die cut the Creative Edges: Lace from some Dazzling Diamond Cardstock, which I snipped into a few smaller pieces for visual interest. 

Next, I watercolored a panel of Altenew's Watercolor Paper using Lava Rock and Tea Bag Brush Markers and drug the color out loosely with water for a soft, watercolored background. Then, I stenciled on the panel with the Altenew Leaf Burst Stencil – I love this design so much. I mixed Modelling Paste with a few drops of Lava Rock ink to create a custom grey colour to match my background panel. Once it dried, I mounted all elements on the panel using foam adhesive, and then added black ink splatters all around the card using the Jet Black Ink Spray. 

I stamped a very simple sentiment from the Altenew – Vintage Roses Stamp Set (an oldie, but a Goldie) using Obsidian Ink and adhered it to the panel using foam adhesive for dimension. Then, to finish, I adhered the panel to a top-folding A2-sized white card base using tape runner. A few sparkling silver sequins finished the card off!

Special Offer
Enjoy FREE U.S. shipping with code HAPPY8TH or $8 OFF international shipping with code ANNIV22 at checkout. Offer valid from 04/04/2022 at 12:01 am EDT through 04/06/2022 at 11:59 pm EDT. Not valid on prior purchases. Cannot be combined with other promo codes. Shop HERE.(Sale up to 45% off HERE and NEW releases HERE)

Giveaway Prizes

Over $1,900 in total prizes! Altenew is giving away a $80 Gift Certificate to 5 lucky winners and one Altenew Academy Online Class($8.95 value) to 15 lucky winners. There are also 25 awesome companies/crafty friends who are celebrating with us, and they are offering the following prizes:


Be sure to leave comments by 4/13/2022 for a chance to win one of 49 prizes! To make the hop more exciting, start your comment with "Hi from (city or country where you're from)!" 49 winners will be chosen at random from the comments left on any of the blogs listed below and will be announced on the Altenew Card Blog on 4/21/2022.


Blog Hop Order:

Next Stop on this Blog Hop is, Jenny Colacicco's blog. Just in case you lose your place along the way, here is the complete list of participants so that you can find your way back:

Altenew Blog

Simon Says Stamp

Jaycee Gaspar

                       Hussena Calcuttawala (You are HERE)

Jenny Colacicco

Keisha Charles

Virginia Lu

TaeEun Yoo

Agnieszka Małyszek

Bumbleberry Papercrafts

Colleen Balija

Juhi Khanna

Annemarie Caister

Joylita Dsouza

Nandini Karmarkar


Well, that’s all for my project today! Thanks so much for reading, and have a wonderful day!

If you like what you've seen from me, please give me a follow over on my Instagram (@hussena_cal) and/or subscribe to my blog if you haven't already.