Showing posts with label Glimmer Plates. Show all posts

Friday, September 3, 2021

Spellbinders & Amazing Paper Grace Holiday Medley Collection


Hello everyone!
I have a couple of cards to share today using the NEW Holiday Medley Collection by Amazing Paper Grace for Spellbinders. 
The collection is a magical grouping to celebrate one of the most festive time of the year through paper crafting. Becca Feeken designed an array of dies that can mix within existing sets to offer more creative options, and some that can be added in wonderful larger size card formats or projects.

The gorgeous die sets, the delightful Glimmer Plates, and the wonderful sentiments in this collection inspired me to create a soft and pastel Mini Slimline Card using the Joy Crescent Card Builder Etched Dies, Beautiful Inside and Out Sentiments Clear Stamp, Lattice Petal Foldover Etched Dies, Sweet Cottage Flowers Etched Dies, and the Curvy Labels Etched Dies. 

To create my card, I first trimmed a piece of Waterfall Cardstock to about 7.5" X 4". Next, I die cut Alabaster Cardstock and White Fun Foam using the crescent card builder outer rim and inner rim dies from the Joy Crescent Card Builder Etched Die Set. I then flipped the panel over and die cut the other side to complete the design. Then, I die cut Alabaster Cardstock, Gold Mirror Cardstock, and White Fun Foam using the inner square die from the Lattice Petal Foldover Etched Die Set. I adhered the layers together using liquid glue, allowing a bit of the gold to show as a shadow. 

I die cut Alabaster Cardstock and Gold Mirror Cardstock using the Layer 5 die from the Curvy Labels Etched Dies. I stamped a sentiment from the Beautiful Inside and Out Sentiments Clear Stamp on to the white die cut piece using Versafine Onyx Black ink and then layered the pieces together with liquid glue, allowing for the gold to peek through as a shadow. Next, to create my floral arrangement, I die cut Baby Pink Foamiran sheets using the Sweet Cottage Flowers Etched Dies. I shaped the flowers using the 5mm and 8mm ball stylus ball tips from the Ultimate Tool Kit by Susan's Garden. The coordinating fillers were die cut from Soft Pink Foamiran Sheets using a mix of dies from the Layered Bloom Etched Dies and the Mini Blooms and Sprigs Etched Dies. I embossed the flower die cuts using the small ball stylus tip and added wire pollens to the centre of the tiny flowers for interest. Similarly, the leaves were die cut from Sage Cardstock using the leaf frond die from the Layered Bloom Etched Die Set. I arranged the various elements together on my card panel and adhered them to the left side of the card using a mix of Hot Glue Gun and liquid glue.

To finish, I trimmed a piece of Gold Mirror Cardstock and mat it over my card panel. Then, I adhered the whole stack to a top-folding white card base made from Alabaster Cardstock.


I love the way the Mosaic Bracket Card Builder Etched Dies and Pinstripe Bracket Card Builder Glimmer Hot Foil Plates & Dies Set look together. Pinstripes go with just about everything and they make the layering look simply perfect! Here I have used the two together to create a floral encouragement card.

To begin, I trimmed a piece of Pink Sand Cardstock to 5.5" X 5" and a piece of Alabaster Cardstock to 5.5" X 2". I then applied Gold Foil to the piece of Pink Sand Cardstock using the  pinstripe panel from the Pinstripe Bracket Card Builder Glimmer Hot Foil Plates and the Glimmer Hot Foil System. I repeated this process on a separate piece of  Pink Sand Cardstock and die cut the lower edge using the bracket split rim die from the Mosaic Bracket Card Builder Etched Dies.

Next, I die cut Alabaster Cardstock, Gold Mirror Cardstock, and White Fun Foam using the mosaic pattern die from the Mosaic Bracket Card Builder Etched Dies. I slightly offset the two pieces to create the illusion of depth without an excessive amount of bulk. Then, I die cut Alabaster and Gold Mirror Cardstock using the smallest circle pattern die from the Candlewick Circles Etched Dies. I layered the pieces together using liquid adhesive, allowing the gold to peek out as a shadow. Once that was done, I stamped a sentiment from the Sending Floral Wishes Stamp set on to the white die cut piece using Versafine Onyx Black ink and then popped it on my panel using foam adhesive. 

The varied flowers and foliage were die cut from Snow Drift Cardstock using the Petite Floral Potpourri Etched Dies from Amazing Paper Grace. I coloured each of the individual flower die cut pieces using Worn Lipstick Distress ink and then embossed the petals using the small ball stylus tip from the Ultimate Tool Kit. Next, I spritzed the die cut pieces with water to give them a washed-out, natural look and added thread pollens to the centres for a finished look. Similarly, the leaves were coloured using Bundled Sage Distress ink and then embossed using a small ball stylus tip. I adhered each of the pieces around the die cut frame using liquid adhesive.

To finish, I trimmed a piece of Pink Sand Cardstock to 5.5" X 5.125" and mat it with Gold Mirror Cardstock. I then adhered the stack to a top-folding card base made from Pink Sand Cardstock.


I hope you enjoyed this duo of layered Christmas cards and thanks so much for stopping by today! You can check out the Holiday Medley Collection on the Spellbinders website for more inspiration and details! 

Don't miss out on the fantastic Glimmer Hot Foil Fiesta going on now with up to 40% off select Glimmer Hot Foil Plates and 25% off Glimmer Hot Foil Rolls through Sunday, September 5th!

If you like what you've seen from me, please give me a follow over on my Instagram (@hussena_cal) and/or subscribe to my blog if you haven't already.

Saturday, May 8, 2021

Spellbinders Duo Glimmer Essentials Collection


Hello, crafty friends!
I am very excited to share a foiled set of cards today showcasing the Spellbinders Duo Glimmer Essentials Collection. The Essential Duo Lines Glimmer Rectangles Glimmer Hot Foil Plate includes 8 glimmer duo lines glimmer plates and creates the perfect accent border for any background, sentiment, or focal image. These are meant to work in conjunction with Glimmer Hot Foil System Platform and Platinum 6 Die Cutting and Embossing Machine (or another compatible die cutting machine).


Simple square borders make for a perfect focal point for a floral arrangement, so I created this cheerful floral card using the Essential Duo Lines Glimmer Squares.

To create my card, I first applied Glimmer Hot Foil Roll - Copper to a piece of White Cardstock using the two largest plates from the Essential Duo Lines Glimmer Squares Glimmer Hot Foil Plates using the Glimmer Hot Foil System. I then die cut it using the Square Shape Extra Large Die from the coordinating Essential Squares Etched Dies set. I wanted to create a foiled frame for my card front, so I went ahead and die cut the panel once again using the Square Shape Large Die from the same set.

Next, I applied Glimmer Hot Foil Roll - Gold to a piece of patterned paper using the For You Glimmer Hot Foil Plate Set. I then die cut it out using a past Large Die of the Month Set - Floral Lace Frame. This is a stunning die set, but sadly is not available at present in the Spellbinders shop. You can, however, use any frame die that you have in your stash for your cards. I also die cut it out of Gold Mirror Cardstock to to give the frame a golden shadow. I slightly offset it before adhering to the back of the foiled die-cut in order to give an illusion of depth. 

It's been a while since I created any handmade flowers for my card, so I thought this'd be a a perfect opportunity to use the Double & Single Peonies Etched Dies from Susan's Spring Flora Collection. This is a GORGEOUS die set and helps create the most realistic flowers ever! I die cut Susan’s Specialty Cardstock with all of the petal and leaf dies from the Double & Single Peonies Etched Dies. I inked the edges of each of the petal die cuts using Picked Raspberry Distress ink and a sponge dauber to create a pink peony. Then, I shaped each petal with the loop tool from the Ultimate Tool Kit and embossed them with the large ball tip. I adhered the layers of petals together with liquid glue. The stamens were die cut out of Lemon Drop Cardstock using the Double & Single Peonies Etched Dies. Once they were die cut, I simply rolled them up using a pair of tweezers and added them to the centre of the peony using liquid glue. Similarly, the leaves were coloured using Twisted Citron Distress ink. I shaped the tips of the leaves using the medium ball tip from the Ultimate Tool Kit. Then, for the foliage, I die cut Susan’s Specialty Cardstock using the fern dies from the Ferns & Ivy Die set. I coloured them with Mowed Lawn Twist Distress ink and embossed them with the small ball tip. I also die cut Susan’s Specialty Cardstock using the medium and small layer dies from the Kerria Japonica Die set. I coloured each of the petal die cuts using Fossilized Amber Distress ink, embossed them with the small ball tip, and adhered the layers of petals together with liquid glue. I also added little Jewels to the centres of the flowers for a pop of shine! 

I adhered the foiled background panel to a top-folding ivory card base with foam adhesive and then popped the square panel up on top in the center. Then, to complete, I arranged my flowers, leaves, and foliage around the left side of the panel using liquid adhesive. 


My next card features the Essential Duo Lines Glimmer Ovals Glimmer Hot Foil Plates. I used the Glimmer Plates for creating an elegant frame for my clean and simple floral card.

To begin, I first applied Glimmer Hot Foil Roll - Copper to a piece of Lemon Drop Cardstock using the Oval 2 Plate from the Essential Duo Lines Glimmer Squares Glimmer Hot Foil Plates using the Glimmer Hot Foil System. I then die cut it out using the Rectangle Shape Large Die from the Essential Rectangles Etched Dies, followed by die-cutting with the Oval Shape Large Die from the Essential Ovals Etched Dies. This helped me create a frame for my card front. 

 Next, I applied Glimmer Hot Foil Roll - Copper to a piece of Silver Fox Cardstock using the Oval 3 Plate from the Essential Duo Lines Glimmer Squares Glimmer Hot Foil Plates. I then followed the same process as above, but used the Oval Shape Medium Die to die cut the frame this time. Next, I die cut Silver Fox Cardstock using the Rectangle Shape Extra Large Die from the Essential Rectangles Etched Dies to create an additional frame for my card front. I then went ahead and applied Glimmer Hot Foil Roll - Gold to the centre of the die cut panel using the sentiment plate from the Thank You & Happy Birthday Glimmer Hot Foil Plates. 

To create my focal point, I die cut out White Cardstock using several of the flower and leaf dies from the Simply Perfect Layered Blooms Etched Dies. I coloured the flower and leaf die cuts using the Mermaid Markers from Jane Davenport. I then adhered the various layers together using liquid glue.

To finish, I foam mounted the foiled and die cut background panels one on top of the other for dimension and interest. Then, I matted Silver Fox Cardstock and Lemon Drop Cardstock before adhering it to a top-folding white card base with liquid adhesive. Lastly, I arranged my flowers, leaves, and foliage around the left side of the panel using a combination of foam tape and liquid adhesive. 

I hope you enjoyed learning how-to-make these bright springtime cards showcasing the Spellbinders Duo Glimmer Essentials Collection. I would love to know what you think of them!

If you like what you've seen from me, please give me a follow over on my Instagram (@hussena_cal) and/or subscribe to my blog if you haven't already.
Wishing you a great day ahead!

Friday, May 7, 2021

Spellbinders Yana's Blooming Birthday Glimmer Collection


Hello, crafty friends!
I am hoping you are staying safe and healthy. I am excited to share some cards today featuring the Spellbinders Yana's Blooming Birthday Glimmer Collection. I LOVE the dainty florals and the beautiful sentiments in this collection and have two card ideas to share using them today. 

Yana's Blooming Birthday Collection is a modern and fresh look to help celebrate birthdays! The assembly has everything you need to make a birthday sparkly with designs that includes sentiments, backgrounds, accents and more using the Glimmer Hot Foil System.


My first card features the Diamond Floral Frame Glimmer Hot Foil Plate & Die Set. I paired the diamond frame and the flowers with one of the sentiments from Yana's Tiny Sentiments Glimmer Hot Foil Plate & Die Set to create this soft watercolour thank you card. 

To begin, I applied Glimmer Hot Foil Roll - Gold to white cardstock using the floral outline images in the Diamond Floral Frame Glimmer Hot Foil Plate & Die Set and the Glimmer Hot Foil Machine. I repeated the process till I had a sufficient number of pieces for my design. I highly recommend foiling a bunch of images together to save on time and effort. All the images were then die cut using the coordinating dies from the set. 

Next, I applied Glimmer Hot Foil Roll - Copper to white cardstock using the Diamond Plate in the Diamond Floral Frame Glimmer Hot Foil Plate & Die Set. I repeated the process for one more copy of the image. I then die cut the pieces using the coordinating Outer Diamond Die and Inner Diamond Die included in the Diamond Floral Frame Glimmer Hot Foil Plate & Die Set. 

Then, I die cut a diamond from Pink Sand Cardstock using the die included in the Diamond Floral Frame Glimmer Hot Foil Plate & Die Set and applied Glimmer Hot Foil Roll - Copper to the die-cut piece using the sentiment plate in the Thank You & Happy Birthday Glimmer Hot Foil Plate set. Once my foiling was complete, I trimmed a piece of white cardstock to size and added a light watercolour wash to the panel using the Jane Davenport Watercolour Set - Brights. I also went ahead and added some pink paint splatters to the card background using the leftover paint from my palette.

I added a bit of colour to several of the foiled flowers and leaves using the Jane Davenport Watercolour Set - Brights. It was now time to assemble everything together. I matted the background panel to a piece of Pink Sand Cardstock and adhered it to my card front using liquid adhesive. I then affixed this to a top-folding white card base. Next, I adhered the foiled diamond die-cut to the panel using liquid adhesive and then popped up the two foiled frames to the centre of my panel using foam adhesive. I slightly offset the two frames to create the illusion of depth without an excessive amount of bulk. The foiled flowers and leaves were adhered to the panel using foam adhesive. Finally, to complete my design, I applied Glimmer Hot Foil Roll - Copper on a tiny strip of white cardstock using one of the sentiments in the Yana's Tiny Sentiments Glimmer Hot Foil Plate & Die Set . I adhered that on to my panel using liquid adhesive and my card was done! 


My second card features the Diamond Floral Frame Glimmer Hot Foil Plate & Die Set and the Yana's Tiny Sentiments Glimmer Hot Foil Plate & Die Set.  I combined the two together to create this clean and simple card with pretty springtime flowers.

To begin, I applied Glimmer Hot Foil Roll - Gold on white cardstock using the floral outline images in the Diamond Floral Frame Glimmer Hot Foil Plate & Die Set and the Glimmer Hot Foil Machine. I repeated the process till I had a sufficient number of pieces for my design. Then, I added a bit of colour to several of the foiled flowers and leaves using the Jane Davenport Watercolour Set - Brights. Once I had everything foiled and coloured, I die cut out the images using the coordinating dies from the set. I then set them aside to work on the rest of the elements for my card. 

I applied Glimmer Hot Foil Roll - Copper to Pink Sand Cardstock using the Diamond Plate in the Diamond Floral Frame Glimmer Hot Foil Plate & Die Set. Then, I die cut the foiled diamond out using the Outer Diamond Die. Once that was done, I applied Glimmer Hot Foil Roll - Copper to white cardstock using the sentiments and heart strip plates from Yana's Tiny Sentiments Glimmer Hot Foil Plate & Die Set . I then die cut them cut out using the coordinating dies. 

I wanted to pair the florals with an elegant background, so I stamped the Diamond Design Background on a piece of White Cardstock with Versamark Ink and used Super Fine Gold Embossing Powder to heat emboss the background.

I popped up the foiled diamond piece in the centre of the panel using foam adhesive and arranged the flowers and foliage around it and adhered them down using foam tape. Then, I trimmed the sentiment and heart strips to size and popped them over on my card front using foam tape. I then adhered some Jewels to accentuate the design. To assemble, I matted the heat-embossed background panel with a Wild Berry Cardstock panel and adhered it to a top-folding white card base with liquid adhesive. 


I hope you enjoyed looking at my projects today and I hope they inspire you as you create with these gorgeous new products! You can see Yana’s Blooming Birthday Glimmer Collection HERE. It is truly spectacular and these plates and die sets make creating so fun! 

Thank you so much for your stopping by and reading this blog post. I hope you liked my projects! 

If you like what you've seen from me, please give me a follow over on my Instagram (@hussena_cal) and/or subscribe to my blog if you haven't already.
Wishing you a great day ahead!

Tuesday, May 4, 2021

Spellbinders Stained Glass Bouquet Collection | Handmade Cards

Hello, crafty friends!
I hope you're well and staying safe!
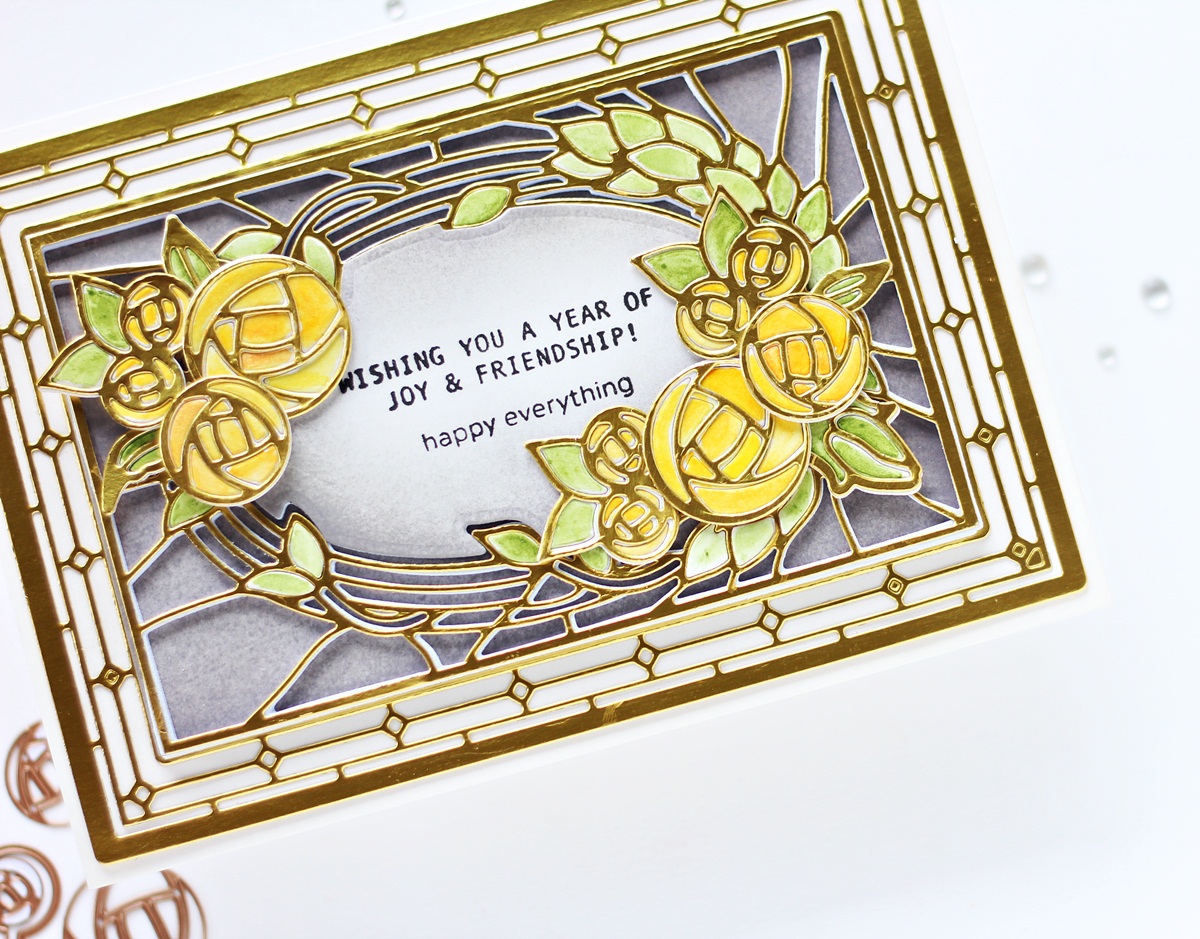
It's the start of a new month and I am so happy to be sharing two cards with you today featuring the NEW Stained Glass Bouquet Collection by Amazing Paper Grace. 

A beautiful assembly of stained glass inspired patterns can be found in the Stained Glass Bouquet Collection from Amazing Paper Grace by Becca Feeken. Look at the wonderful details only seen in these amazing works of colored glass art.

I have made a set of cards using the Radiant Oval Etched Dies and the Deco Bloom Etched Dies. I simply love the intricate background dies and the pretty flower dies in this collection. 
 

I created a textured glass design for my first card featuring the Radiant Oval Etched Dies and the Deco Bloom Etched Dies.

To create my card, I first die cut Gold Mirror Cardstock and White Cardstock using the floral swag outline and insert dies from the Radiant Oval Etched Dies. I then die cut Pink Sand Cardstock and Gold Mirror Cardstock using the oval rim and insert dies from the Radiant Oval Etched Dies.

I coloured the white floral die-cut pieces using alcohol markers and let dry. Then, I adhered the oval frame and floral swag outline die-cuts to their backer dies with liquid glue and foam tape. I also adhered the coloured insert pieces back into the gold foil outlines and reassembled the shapes. Then, I slightly offset the gold oval frame to the back of the pink die-cut before adhering for visual interest and dimension. Next, I die cut Pink Sand Cardstock using the outer frame die from the Deco Bloom Etched Dies. I also die cut White Cardstock using the inner rim die. I adhered the layers to my card base using liquid glue. 

I then applied Gold Hot Foil Roll to White Cardstock using one of the sentiments from the Borders and Sentiments Hot Foil Plates using my Spellbinders Glimmer Hot Foil Machine. I then snipped the foiled strips into two pieces and attached them to my card panel using foam adhesive. 

I die cut Pink Sand Cardstock using the fleur swirl die from the Shapeabilities Swirl Tags Dies Set. I die cut four pieces and then added them to my card panel using liquid glue. To finish, I adhered the largest layered background panel to a top-folding white card base measuring using tape runner. I adhered some pink Jewels to complete my design. 


For this card, I created a dramatic and striking background to showcase the gorgeous bunch of roses from the Deco Bloom Etched Dies. 

To start, I die cut Gold Mirror Cardstock using the outer frame die from the Deco Bloom Etched Dies. Next, I die cut Gold Mirror Cardstock and White Cardstock using the leaf frame rim and insert dies from the Deco Bloom Etched Dies. I ink blended the plain white die-cut piece for the background using Black Soot Distress ink and a sponge dauber. Then, I adhered the gold metallic frame outline die-cut to the coloured die-cut with liquid glue and foam adhesive. 

Next, I die cut  White Cardstock and Gold Mirror Cardstock using the large, medium, and small rose bunch rim and insert dies from the Deco Bloom Etched Dies. I adhered the gold metallic outline die-cuts to their backer die-cuts with liquid glue. Once that was done, I pieced all the white die cut insert pieces into the gold outlines to reassemble the frame. 

I colored the individual reassembled pieces using the Jane Davenport's Watercolors Set Brights for a soft, artsy look. Next, I ink blended the negative die-cut of the leaf frame insert die using Black Soot Distress ink and a sponge dauber and adhered it to my card panel using foam adhesive for dimension. I also stamped my sentiment on the piece using Versafine Onyx Black ink. 

Once everything was done, I adhered the largest layered background panel to a top-folding white card base using tape runner. I popped the layered medium frame up on top using two layers of foam adhesive.


I hope you enjoyed looking at my projects today and I hope they inspire you as you create with these gorgeous new products. I would love to hear what you think of them. 

If you like what you've seen from me, please give me a follow over on my Instagram (@hussena_cal) and/or subscribe to my blog if you haven't already.
Thank you so much for your visit to my blog today!

Saturday, February 6, 2021

Spellbinders Celestial Zodiacs Collection | Cards


Hello, crafty friends!
I have a card set to share today using a few of the new products from the Spellbinders Celestial Zodiacs Collection. This is such a wonderful collection with twinkling star patterns, a magnificent moon image, awesome sentiments, and even an embossing folder. Stargazers and Zodiac fans alike will enjoy the Celestial Zodiacs Collection with unique motifs in each set to use in their creations! 

The twelve zodiac foil plate sets in the collection are perfect for creating a variety of projects. I created a birthday card for a stargazing friend using the Glimmer Hot Foil Plates from the collection.

For my card, I foiled the constellation from the Scorpio Set on a piece of Canson Montval Watercolor Paper using Gold Hot Foil in my Glimmer Hot Foil Machine. I also foiled the name, date, and traits plate from the Scorpio Set on a piece of Black Cardstock using Gold Hot Foil. I then cut them into two different strips to foam mount on my card panel. 

Once my foiling was complete, I watercolored the card panel using Chipped Sapphire Distress ink. I dabbed the ink pad onto my Craft Mat and used a Blending Brush to colour the entire panel. I let it dry for a while and then loosely painted some deodar trees on the bottom of the card panel using Black Acrylic Paint. Then, I added some paint splatters across the panel in white, blue, and black to add some interest.

 I affixed the foiled sentiment strips using foam squares and added a stitched rectangular frame die cut from Gold Mirror Cardstock on the panel to complete the card. To finish, I adhered the panel to a piece of Black Cardstock to mat a side-folding A2-sized white card base.


I used the Starstruck Sentiments Clear Stamp Set for my next card along with the Aquarius Glimmer Hot Foil Plate.
The stamp set has stars and heart designs, and five unique phrases which will can be used for so many occasions!

For my second card, I foiled the constellation from the Aquarius Glimmer Hot Foil Plate on a piece of White Cardstock using Gold Hot Foil in my Glimmer Hot Foil Machine. Then, I ink blended Chipped Sapphire and Cracked Pistachio Distress inks on the panel using a Foam Blending Tool. For variation, I added some blue paint splatters to the panel.

I ink blended another piece of White Cardstock using Cracked Pistachio Distress ink and then die cut a circle from the panel using the Nestabilities Standard Circles LG Etched Dies. Next, I took a piece of White Cardstock and stamped and heat embossed the stars from the Starstruck Sentiments Clear Stamp Set in gold. I ink blended this panel using Chipped Sapphire, Peacock Feathers, and Cracked Pistachio Distress inks to create the look of a night sky. 

I foiled the name and date plate from the Aquarius Glimmer Hot Foil Plate on a piece of Black Cardstock using Gold Hot Foil in my Glimmer Hot Foil Machine. I trimmed it to size and then added it over my heat embossed panel. The sentiments from the Starstruck Sentiments Clear Stamp Set were stamped using Black Licorice Ink directly on to the panel.

I adhered this panel over the previously ink blended panel using foam tape. I affixed the foiled constellation panel behind it to mat the panel with Gold Mirror Cardstock. To complete, I adhered the panel to the front of a top-folding A2-sized white card base with White Liner tape.


I had so much fun creating these cards and I hope they inspire you as you create with these wonderful new products. I love the Celestial Zodiacs collection and think it’s a really cool idea to make custom cards for friends and loved ones based on their zodiac sign and coordinating constellation. What do you think?!

 If you like what you've seen from me, please give me a follow over on my Instagram (@hussena_cal) and/or subscribe to my blog if you haven't already.
Have a great day ahead!