Hello, crafty friends!
I am very excited to share a foiled set of cards today showcasing the Spellbinders Duo Glimmer Essentials Collection. The Essential Duo Lines Glimmer Rectangles Glimmer Hot Foil Plate includes 8 glimmer duo lines glimmer plates and creates the perfect accent border for any background, sentiment, or focal image. These are meant to work in conjunction with Glimmer Hot Foil System Platform and Platinum 6 Die Cutting and Embossing Machine (or another compatible die cutting machine).

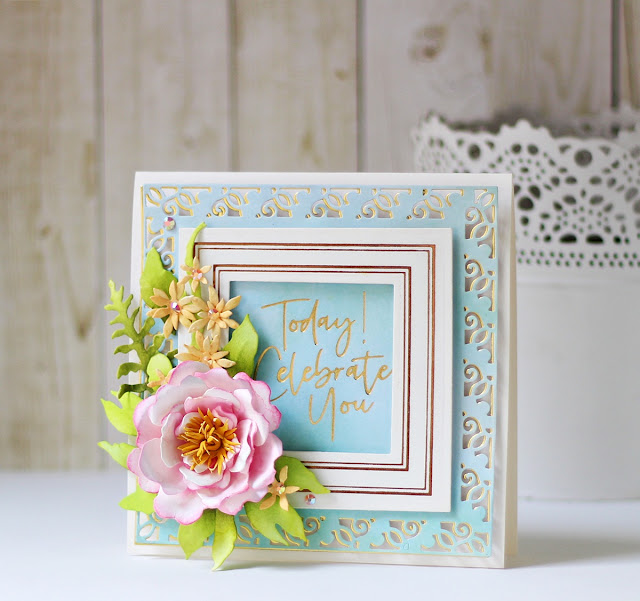
Simple square borders make for a perfect focal point for a floral arrangement, so I created this cheerful floral card using the Essential Duo Lines Glimmer Squares.
To create my card, I first applied Glimmer Hot Foil Roll - Copper to a piece of White Cardstock using the two largest plates from the Essential Duo Lines Glimmer Squares Glimmer Hot Foil Plates using the Glimmer Hot Foil System. I then die cut it using the Square Shape Extra Large Die from the coordinating Essential Squares Etched Dies set. I wanted to create a foiled frame for my card front, so I went ahead and die cut the panel once again using the Square Shape Large Die from the same set.
Next, I applied Glimmer Hot Foil Roll - Gold to a piece of patterned paper using the For You Glimmer Hot Foil Plate Set. I then die cut it out using a past Large Die of the Month Set - Floral Lace Frame. This is a stunning die set, but sadly is not available at present in the Spellbinders shop. You can, however, use any frame die that you have in your stash for your cards. I also die cut it out of Gold Mirror Cardstock to to give the frame a golden shadow. I slightly offset it before adhering to the back of the foiled die-cut in order to give an illusion of depth.
It's been a while since I created any handmade flowers for my card, so I thought this'd be a a perfect opportunity to use the Double & Single Peonies Etched Dies from Susan's Spring Flora Collection. This is a GORGEOUS die set and helps create the most realistic flowers ever! I die cut Susan’s Specialty Cardstock with all of the petal and leaf dies from the Double & Single Peonies Etched Dies. I inked the edges of each of the petal die cuts using Picked Raspberry Distress ink and a sponge dauber to create a pink peony. Then, I shaped each petal with the loop tool from the Ultimate Tool Kit and embossed them with the large ball tip. I adhered the layers of petals together with liquid glue. The stamens were die cut out of Lemon Drop Cardstock using the Double & Single Peonies Etched Dies. Once they were die cut, I simply rolled them up using a pair of tweezers and added them to the centre of the peony using liquid glue. Similarly, the leaves were coloured using Twisted Citron Distress ink. I shaped the tips of the leaves using the medium ball tip from the Ultimate Tool Kit. Then, for the foliage, I die cut Susan’s Specialty Cardstock using the fern dies from the Ferns & Ivy Die set. I coloured them with Mowed Lawn Twist Distress ink and embossed them with the small ball tip. I also die cut Susan’s Specialty Cardstock using the medium and small layer dies from the Kerria Japonica Die set. I coloured each of the petal die cuts using Fossilized Amber Distress ink, embossed them with the small ball tip, and adhered the layers of petals together with liquid glue. I also added little Jewels to the centres of the flowers for a pop of shine!
I adhered the foiled background panel to a top-folding ivory card base with foam adhesive and then popped the square panel up on top in the center. Then, to complete, I arranged my flowers, leaves, and foliage around the left side of the panel using liquid adhesive.
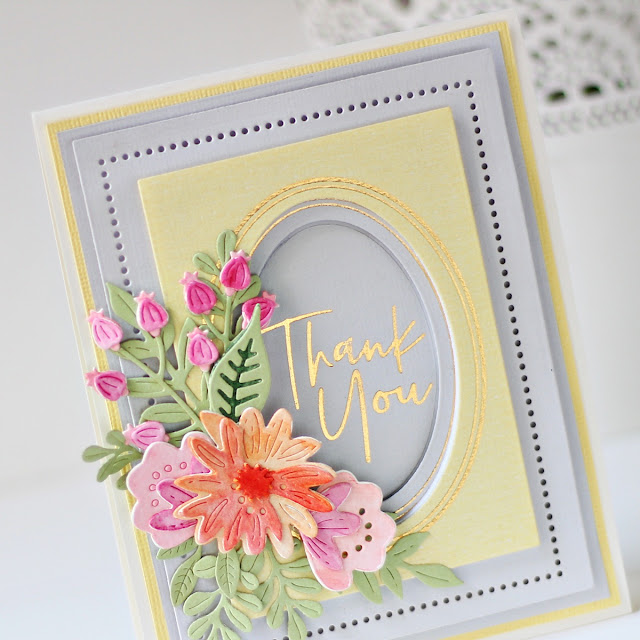
My next card features the Essential Duo Lines Glimmer Ovals Glimmer Hot Foil Plates. I used the Glimmer Plates for creating an elegant frame for my clean and simple floral card.
To begin, I first applied Glimmer Hot Foil Roll - Copper to a piece of Lemon Drop Cardstock using the Oval 2 Plate from the Essential Duo Lines Glimmer Squares Glimmer Hot Foil Plates using the Glimmer Hot Foil System. I then die cut it out using the Rectangle Shape Large Die from the Essential Rectangles Etched Dies, followed by die-cutting with the Oval Shape Large Die from the Essential Ovals Etched Dies. This helped me create a frame for my card front.
Next, I applied Glimmer Hot Foil Roll - Copper to a piece of Silver Fox Cardstock using the Oval 3 Plate from the Essential Duo Lines Glimmer Squares Glimmer Hot Foil Plates. I then followed the same process as above, but used the Oval Shape Medium Die to die cut the frame this time. Next, I die cut Silver Fox Cardstock using the Rectangle Shape Extra Large Die from the Essential Rectangles Etched Dies to create an additional frame for my card front. I then went ahead and applied Glimmer Hot Foil Roll - Gold to the centre of the die cut panel using the sentiment plate from the Thank You & Happy Birthday Glimmer Hot Foil Plates.
To create my focal point, I die cut out White Cardstock using several of the flower and leaf dies from the Simply Perfect Layered Blooms Etched Dies. I coloured the flower and leaf die cuts using the Mermaid Markers from Jane Davenport. I then adhered the various layers together using liquid glue.
To finish, I foam mounted the foiled and die cut background panels one on top of the other for dimension and interest. Then, I matted Silver Fox Cardstock and Lemon Drop Cardstock before adhering it to a top-folding white card base with liquid adhesive. Lastly, I arranged my flowers, leaves, and foliage around the left side of the panel using a combination of foam tape and liquid adhesive.
I hope you enjoyed learning how-to-make these bright springtime cards showcasing the Spellbinders Duo Glimmer Essentials Collection. I would love to know what you think of them!
If you like what you've seen from me, please give me a follow over on my Instagram (@hussena_cal) and/or subscribe to my blog if you haven't already.
Wishing you a great day ahead!


they are both so gorgeous, lovely flowers!
ReplyDeleteWUNDERSCHÖNE KARTEN::::
ReplyDeleteWÜNSCHE NOCH EINEN SCHÖNEN TAG
bis bald die BIRGIT aus TIROL