Showing posts with label Fun Stampers Journey. Show all posts

Wednesday, April 7, 2021

Spellbinders April 2021 Clear Stamp of the Month | Around The Bend


Hello, crafty friends!
Happy April and welcome to my blog! I have a set of spring-themed cards to share today featuring the Spellbinders Clear Stamp Set of the Month - Around The Bend. If you haven't heard about the Clear Stamp of the Month Club by Spellbinders, you can go over to the Spellbinders blog and read more about it HERE.

The Spellbinders Clear Stamp for April includes 10 different stamps, with images and sentiments perfect for a variety of occasions. The stamp set coordinates with the April 2021 Large Die of the Month and Glimmer Hot Foil Kit of the Month, so you can mix and match your supplies to create different projects. This “Around The Bend” stamp set features made in the USA stamps from high-quality photo-polymer for clear, crisp impressions. 
Here are my cards using this stamp set:


For my first card, I went with a clean and simple design. To begin, I took a piece of 4.25" X 5.5" White Cardstock and stamped the leafy stamp image using Brown color ink all over the panel. The task of stamping the rows in (almost) perfect distances is made easier with a stamp positioner like a MISTI. If you don't have one, you can always use an acrylic block, though that is a more time-taking process. Next, I stamped the flower stamp images included in the set using two different ink colours. 

I didn't want to take the focus away from the stamped panel, so I kept the rest of the elements simple. I used the Nestabilities Standard Circles LG and the Hemstitch Circles Etched Dies to die cut the circles from Gold Mirror Cardstock and Vellum Cardstock respectively. I adhered this to a scalloped circle die cut which was cut from Blue Cardstock. Then, I die cut a circle from the Nestabilities Standard Circles LG and stamped the sentiment on it using Licorice Black ink. I popped the circle using foam squares for dimension. 


I die cut the flowers from Beeswax, Haystack, and Raindrop Cardstock using the Mini Blooms and Sprigs Etched Dies. I adhered them around the circle using Craft Glue. The leaves were die cut from White Cardstock and then adhered down on the circles using Craft Glue. I matted this layer to a panel of Gold Mirror Cardstock, then Raindrop Cardstock, and finally to a top-folding A2-sized white card base. 


For my next card, I went with a different card orientation. To start, I took a piece of 4.25" X 5.5" White Cardstock and stamped the floral vine image using Brown color ink all over the panel. Next, I stamped the flower stamp images included in the set using two different ink colours. Then, I stamped a sentiment on the panel in Licorice Black ink above and die cut them just beneath with pierced and scalloped curved border dies. I also went ahead and die cut the scalloped border from Gold Mirror Cardstock and adhered it below the stamped panel for interest. 

I liked how this grid patterned paper from my stash complemented the colors on this panel, so I trimmed it to size and adhered it on a panel of Gold Mirror Cardstock. I die cut a few flowers and leaves from the Mini Blooms and Sprigs Etched Dies from Raindrop Cardstock, Gold Mirror Cardstock, and White Cardstock . I then them adhered down on the bottom right corner of my card using Craft Glue and foam squares.

I matted this panel over a layer of Raindrop Cardstock and then adhered it down to a top-folding card base. I like how this turned out!


The Around The Bend Set is available exclusively at Spellbinders Paper Arts during April 2021. You can get the Clear Stamp Set of the Month at the special Club Kit price, along with other membership perks.

I hope you enjoyed looking at my cards today! I would love to hear what you think of them. 

 If you like what you've seen from me, please give me a follow over on my Instagram (@hussena_cal) and/or subscribe to my blog if you haven't already.
Thank you so much for stopping by!

Wednesday, December 2, 2020

Spellbinders + Amazing Paper Grace Die of the Month | December 2020


Hello, crafty friends!
Hope you are doing well and are keeping healthy!
I have a Card to share today featuring the Spellbinders + Amazing Paper Grace December Die of the Month. This month's "Rose Garden Promise" Set is perfect for making exquisite cards, gift bags, gift boxes, and more.
If you want to find out more about the Club – prices, how you sign up and what’s included, please look ——–> HERE. These dies are only available through the Club and are limited to the month of November, so hurry before they are sold out. If there are any leftovers, they are added to the Spellbinders store for sale at full price. You can see all of the past Dies of the Month HERE.


I have a Card to share using the Rose Garden Promise. This Die of the Month will have you creating gorgeous layered projects in no time! It is versatile, elegant, and timeless. This die set features 4 dies.

Here's a look at my Card:

I LOVE the gorgeous design of this rose die set and couldn't help but create a floral birthday card. I love creating birthday cards, so this was one was simply a joy to create! To begin, I die cut the rose die layer from Brush Gold Cardstock and Watercolour Paper. Once they were die cut, I adhered the two layers down on my card base. 

I decided to use the inlaid die cutting technique for creating my card, but with a twist. I wanted the rose die layer to literally "pop" on the card front, so I die cut the entire die from White Fun Foam and adhered only the roses and leaves down on to my panel, so that the rose die design would pop out.

It was now time to assemble my card together. I used the negatives of the die cut roses and leaves or the "chads"  (which I got after die cutting the rose die layer from Watercolour Paper), and coloured the various pieces using the Watercolors Set Brights from Jane Davenport. I kept the colours very light and used loads of water with the paints to get the desired hues. I also lightly coloured the frame of the previously cut die layer, just to add a little dash of colour. I finally adhered all the pieces of the roses and leaves. 

The sentiment panel was cut from Light Blue Cardstock and White Fun Foam. I adhered it to my card panel. I used the Fun Stampers Journey Inside and Out Stamp Set and Licorice ink for my sentiment. I adhered everything to my card panel and glue the panel to my cream card base. I used a couple of gold sequins to finish off the card. 

This card did take me a while to put together, but I think the end result was worth it - What do you think?!


If you haven't had a chance to look at the Spellbinders Club Kits yet, do check them out. You can find more information about them HERE.

If you would like to see more project inspiration using the Rose Garden Promise Die Set, visit the Spellbinders blog to see the project samples created using it. There is also a super helpful YouTube video by Becca Feeken which you can see HERE. She shows you how to use the die set in a creative way, which you definitely don't want to miss!
Amazing Paper Grace Die of the Month Membership

MERRY MEMBER APPRECIATION MONTH!
Enjoy a free gift from Spellbinders as our Thanks for being part of the Club! Not a member yet? Join the Club & get a bonus goody!
Includes a free adhesive gift. Gift may vary. This gift may not be returned or exchanged.


That’s it for me today! I hope you liked my take on the Rose Garden Promise Die Set! If you like what you've seen from me, please give me a follow over on my Instagram (@hussena_cal) and/or subscribing to my blog if you haven't already.

Thank you so much for your visit to my blog today!

Thursday, October 29, 2020

Spellbinders + Amazing Paper Grace Die of the Month | October 2020


Hello, crafty friends!
Hope you are doing well and are safe and healthy!
I have a Card to share today featuring the Spellbinders + Amazing Paper Grace October Die of the Month. This month's "Pop Up 3D Vignette Camera" Set is perfect for making exquisite cards, 3D Explosion Boxes, bags, and more.
If you want to find out more about the Club – prices, how you sign up and what’s included, please look ——–> HERE. These dies are only available through the Club and are limited to the month of October, so hurry before they are sold out. If there are any leftovers, they are added to the Spellbinders store for sale at full price. You can see all of the past Dies of the Month HERE.


I have created a Card Front using the Pop Up 3D Vignette Camera Set with a little twist. Read on to find out what it is!

The die set consists of 16 dies to help you create a realistic 3D Pop Up Vignette Camera, Pop Up Card, Shaped Card, Shaped Scrapbook, Gift Card Holder, Wedding Tablesetting Favor and much more. As with all the other 3D Vignettes dies, it collapses flat to be sent in a regular envelope, which is definitely so cool!

For my card, I started off by die cutting all the different elements for the camera using my Platinum 6" Die Cutting and Embossing Machine. I did not want to use very bright colours for the camera, so I limited my colour choices to Powder Blue Cardstock, Whip Cream Cardstock, and Gold Mirror Cardstock. Once I had all the pieces die cut from various Cardstock sheets, I assembled it together following Becca's Video Tutorial. She walks you through the process in a very simple yet lucid way! I used copious amounts of foam tape and foam squares to adhere the layers, so that it would have a sturdy base. 

Next, I die cut two tabs from Powder Blue Cardstock and Whip Cream Cardstock using the message insert tab die. I wanted to add a little surprise for the recipient, so I thought I'd include these two tab inserts where they could pen down a special message or attach a photograph. 

I didn't want to keep the inserts as is, so I decided to pull out a few of my favourite stamp sets from Fun Stampers Journey to quickly dress them up. 

 I first worked on the blue insert - I used the Spring Bouquet stamp set to stamp the flowers and leaves, and a sentiment from the Text Happy Stamp Set. I used Pool Play, Cool Pool, and Huckleberry for the flowers, Sweet Pear for the leaves, and Licorice ink for the sentiment. Similarly, for the white insert, I used the Summer Rose Stamp Set and the Inside and Out Stamp Set to create my tab. I used the same ink colours, so that they'd coordinate with each other. 

I did not want to take away the focus from the camera, so I kept the rest of the card really simple. I die cut some flowers and leaves using the October 2019 and April 2019 Die of the Month Sets by Amazing Paper Grace from Whip Cream Cardstock. I coloured the flowers using Rustic Rose and Bubblegum inks, and the the leaves using Sweet Pear. I love using my FSJ inks for stamping as well as colouring die cut pieces. It's a great way to get more out of your ink pads too! I embossed the centres of the petals using the Stylus Tips for Tool N' One and then added Micro Thread Pollens to the centres for a more natural look. I also tucked in a little sentiment tag to accentuate my design. The sentiment is from the Text Happy Stamp Set and I stamped it using Licorice ink.

I mounted the camera to a piece of beach-themed designer paper which was then layered on to some Whip Cream Cardstock and Gold Mirror Cardstock respectively. I then adhered it down to a white card base. This was a labour of love, but totally worth the effort, don't you think!?


If you haven't had a chance to look at the Spellbinders Club Kits yet, do check them out. You can find more information about them HERE.

If you would like to see more project inspiration using the Amazing Paper Grace Die of the Month, visit the Spellbinders blog to see the project samples created using it. There is also a super helpful YouTube video which you can see HERE which shows you how to use the die set in a creative way!

The Club dies are absolutely great value for money and the cost of the kit includes shipping cost within USA. So, what are you waiting for? Sign up as soon as possible!
Amazing Paper Grace Die of the Month Membership

That's it from me for today! I hope you liked my card.
If you would like to see more of my work using Spellbinders, do follow my Instagram page - @hussena_cal
Thank you so much for your visit to my blog today!

Monday, March 30, 2020

Spellbinders March Card Kit of the Month | Feeling Hoppy

Hello there, crafty friends!
I have a couple of cards to share today featuring the March Card Kit by Spellbinders - Feeling Hoppy. If you haven't heard about the Monthly Card Kits by Spellbinders or don't know how to subscribe to one, you can go over to the Spellbinders website and/or blog and read more about them HERE. 

This "Feeling Hoppy" Kit, like all their other Card Kits, gives you everything you need to create 10 unique cards and even more. You now also get better goodies, including a 40 sheet paper pad, clear stamps, an adorable die set, tons of embellishments, and more!
Card Kit of the Month Membership

I have FOUR Card ideas to share with you today using this kit, so let's get started!

My first Card features the Feeling Hoppy Paper Pad, Feeling Hoppy Die Cut Shapes Set, and the Dies from the Kit.

To create my card, I first picked out a patterned paper for my card background from the Feeling Hoppy Paper Pad. Next, I die cut a scalloped oval from White Cardstock and the ears of the bunny from Gold Mirror Cardstock. Both of these dies are included in the Feeling Hoppy Card Kit. 

To embellish my card, I used several die cuts from the Feeling Hoppy Die Cut Shapes Set. I also added some mini purple flowers for my foliage. This foliage die is so pretty and has become a recent favourite! :) I also picked out a sentiment tile from the Feeling Hoppy Die Cut Shapes Set and popped it on my card panel. This card was so quick and easy to put together!

 My second Card features the Feeling Hoppy Paper Pad, Love Stripes Embossing Folder, and the Feeling Hoppy Die Cut Shapes Set.

For this card, I first took a piece of White Cardstock and embossed it using the Fun Stampers Journey Love Stripes Embossing Folder and trimmed it. Next, I picked out a patterned paper design from the Feeling Hoppy Paper Pad and trimmed it to fit on my card panel. I cut it at a diagonal to add some interest to the design.

I took out my Feeling Hoppy Die Cut Shapes Set and picked out several die cut images which would work for my card. I adhered these pieces together to form my focal. Finally, I added a sentiment banner to complete my card which was also from the Feeling Hoppy Die Cut Shapes Set.


My third card features the Feeling Hoppy Paper Pad, Feeling Hoppy Die Cut Shapes Set, and the Stamp set from the Kit.

This one is a bit different from my other two cards as I have used stamped images for my design. To create this one, I first stamped the bunnies and carrots from the Feeling Hoppy Stamp Set using Versafine Onyx Black Ink on Whip Cream Cardstock. I coloured the images, fussy cut them, and kept them aside. Next, I pulled out two patterned papers from the Feeling Hoppy Paper Pad. I adhered the striped patterned paper design to my card panel. Then, I die cut two circles using the Nestabilities Standard Circles SM Etched Dies from the other patterned paper to create a window to stamp the bunnies.

Next, I stamped two bunnies on Whip Cream Cardstock using Versafine Onyx Black Ink, which I later trimmed to fit my card base. Next, I adhered the die cut patterned paper over it. I also stamped some hearts and coloured them. To complete my card, I added a sentiment tab which was from the Feeling Hoppy Die Cut Shapes Set.


My last card features the Feeling Hoppy Paper Pad, Feeling Hoppy Die Cut Shapes Set, and the Dies from the Kit.

This one was again simple to put together. The adorable bunnies on this card are actually stickers which are a part of the Card Kit. I really loved them and wanted to use them on one of my cards! The background flowers are die cuts from the Feeling Hoppy Die Cut Shapes Set. I also added some small flowers which were die cut using the mini foliage die included in the Card Kit.

I also used a patterned paper from the Feeling Hoppy Paper Pad and adhered it to the bottom of my card. To complete my card, I used a die cut sentiment banner from the Feeling Hoppy Die Cut Shapes Set. And that's it. This card was done!

If you want to find out more about the Club – prices, how you sign up and what’s included, please look ——–> HERE.
I know that I say this every month, but this kit is amazing and so worth the cost! You get everything you need to create atleast TEN cards. How awesome is that?!

That's it from me today! I hope you liked my cards using the Spellbinders March Card Kit. If you have a favourite, please do let me know. I would love to hear from you! :)
Thank you so much for stopping by!

Friday, January 17, 2020

Spellbinders January Card Kit of the Month | Love The Moment


Hello there, crafty friends!
I have a couple of cards to share today featuring the January Card Kit by Spellbinders - Love The Moment. If you haven't heard about the Monthly Card Kits by Spellbinders or don't know how to subscribe to one, you can go over to the Spellbinders website and/or blog and read more about them HERE. 

This "Love The Moment" Kit, like all their other Card Kits, gives you everything you need to create 10 unique cards and even more. You now also get better goodies, including a 40 sheet paper pad, clear stamps, an adorable die set, tons of embellishments, and more!
Card Kit of the Month Membership

I have FIVE Cards to share with you today using this kit, so let's get started!

My first card features the Love the Moment Paper Pad, and the Love the Moment Die Cut Shapes Set.

This month's Card Kit is super gorgeous and I had a ball working with the floral images. To create this card, I picked out a patterned paper from the Love the Moment Paper Pad and adhered it on the right side of my card. Next, I used a couple of floral die cuts from the Love the Moment Die Cut Shapes Set and arranged them together in a cluster to create my focal.

I added a strip of Mirror Gold Cardstock to add some pizzazz to the design. Then, I added a sentiment piece and a butterfly from the Love the Moment Die Cut Shapes Set to complete my card design. I also adhered some pink rhinstones as the finishing touch for my card.


My next card is my favourite of the lot. I LOVE Vintage Cars and this month's "Love The Moment" Kit includes a fabulous die set to create your own customized cars. It is just perfect for creating Masculine Cards!
 My card features the Love the Moment Paper Pad, and the Love the Moment Die Cut Shapes Set, along with the Club Die Set.

I used the Cardstock sheets given in the Card Kit to create my car. Once I die cut and assembled it together, I started working on the background of my card. I pulled out a foiled patterned paper from the Love the Moment Paper Pad and adhered it to the bottom of my card. I also adhered a contrasting background patterned paper which would work well with the rest of my card. Next, I grouped some die cuts from the Love the Moment Die Cut Shapes Set together to create the backdrop for my car. I wanted all the die cuts to be circular in shape, so I die cut certain die cut shapes using the Nestabilities Standard Circles SM Etched Dies and popped them on my card panel using foam dots.

This card was very fun to create and I really enjoyed the process. I always struggle with Masculine Cards and the Die Set in the Card Kit die set offers some great possibilities! 


My third card is made using the Stamp Set included in the kit. I also used the Love the Moment Paper Pad on this card.

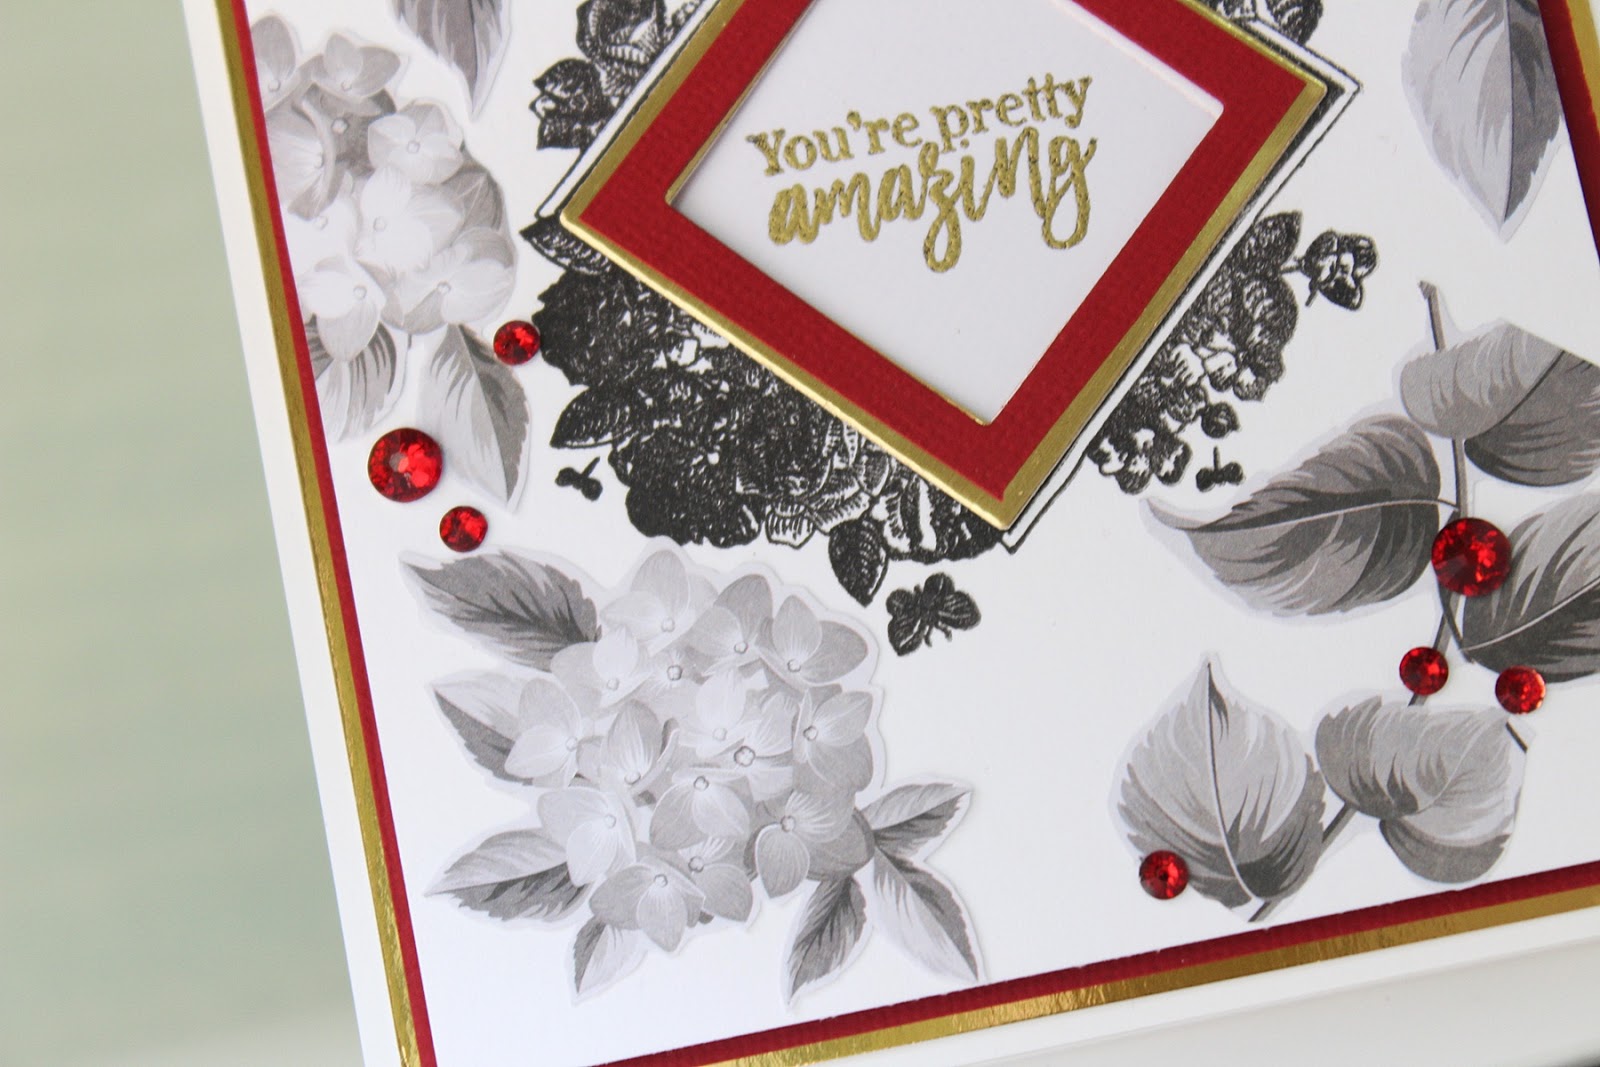
The background panel of my card features fussy cut floral motifs from a particular patterned paper design from the Love the Moment Paper Pad. I adhered these images all over my card panel and then trimmed it. Next, I die cut a frame in the centre using the Nestabilities Classic Squares SM Etched Dies. I then adhered two other frames over it to enhance the card design. I used the stamp set included in the Card Kit to stamp on the patterned paper to create the focal for my card.

I heat embossed the sentiment in gold to add some glam to my design. My card was almost done here - I simply added some red rhinestones as the finishing touch to my card.


My fourth card features the Love the Moment Paper Pad, and the Love the Moment Die Cut Shapes Set, and the Love the Moment 3 Sheet Sticker Pack.

This card was simple to put together. I again used a foiled patterned paper from the Love the Moment Paper Pad for my card background. Next, I used a 3D sticker from the Love the Moment 3 Sheet Sticker Pack and a couple of other stickers from the same pack to create my card focal. I combined the stickers with some die cuts from the Love the Moment Die Cut Shapes Set to create my design.

I also used gold shimmer leaves included in the Card Kit to add some sparkle and shine to my design. I love how this one turned out!


My last card for today features the Love the Moment Paper Pad, the Love the Moment Die Cut Shapes Set, and the Love the Moment 3 Sheet Sticker Pack.

For this card, I started by embossing a piece of White Cardstock using the Fun Stampers Journey Love Stripes Embossing Folder. Then, I adhered a patterned paper from the Love the Moment Paper Pad on the bottom of my card and a strip of Mirror Gold Cardstock in the centre. I used a number of floral die cut pieces from the Love the Moment Die Cut Shapes Set to create the floral cluster for my card. I also incorporated some gold shimmer paper leaves to balance the card design.

The sentiment was a die cut which was popped on foam dots. I backed the die cut with a gold scalloped circle to add some interest. I also added some sparkly rhinestones to complete my card design.


If you want to find out more about the Club – prices, how you sign up and what’s included, please look ——–> HERE.
I know that I say this every month, but this kit is amazing and so worth the cost! You get everything you need to create AT LEAST ten cards. How awesome is that?!

That's it from me today! I hope you liked my cards using the Spellbinders January Card Kit. If you have a favourite, please do let me know. I would love to hear from you! :)
Thank you so much for stopping by!