Hello, crafty friends!
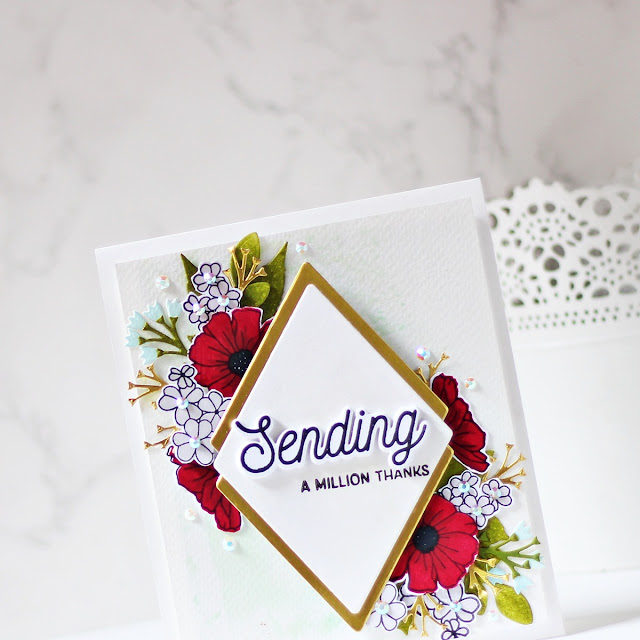
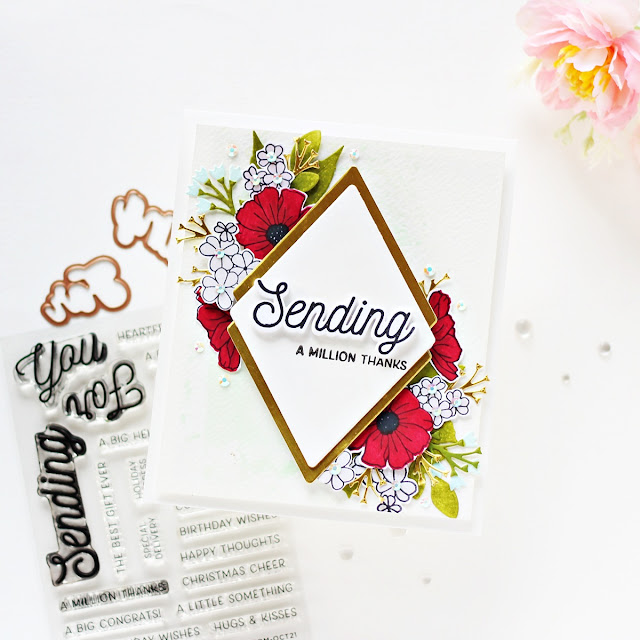
Happy Monday! I am back today with a nature-inspired thank you card made with the Spellbinders Clear Stamp of the Month - Sending You. Check out the exclusive coordinating You - Die Set. Spellbinders now offers a coordinating die set that you can purchase separately as an add-on for the Clear Stamp of the Month Club Sets. I love this option as I can quickly and easily cut my favorite images from the set out and no longer have to fussy cut the images! The Clear Stamp and Coordinating Die of the Month Club kit is already sold out, however the stamp set on it’s own is still available.
The Spellbinders Clear Stamp for October is a 24 piece stamp set containing 3 large sentiment stamps – Sending, For, and You, and 21 different secondary sentiments! The stamp set is super versatile and one that I will reach for often in my stash! The Stamp Set coordinates with this month's Small Die of the Month and Large Die of the Month Sets, so you can mix and match your supplies to create different projects. This “Sending You” stamp set features made in the USA stamps from high-quality photo-polymer for clear, crisp impressions.
I used some of the sentiments from the kit along with some bright florals from the Hex Tile Stamps for a thank-you card.
I started by stamping the outline images from the Hex Tile Stamps on a piece of Snowdrift Cardstock using Black Licorice ink. Then I stamped the layers for each bloom over top using Vineyard Berry and Sand Dunes inks from Altenew. Once that was done, I fussy cut the images using a pair of scissors.
I die cut Snowdrift Cardstock using the outer diamond die from the Diamond Floral Frame Glimmer Hot Foil Plate & Die Set and stamped a sentiment from the Clear Stamp of the Month Kit onto it using Black Licorice ink. Next, I die cut Gold Mirror Cardstock twice using the inner diamond die from the Diamond Floral Frame Glimmer Hot Foil Plate & Die Set and kept it aside to work on my panel.
Then, I did some very light "ink smooshing" on a piece of Watercolor Cardstock using Tumbled Glass and Twisted Citron Distress inks. Once my panel was dry, I adhered down the two foiled die cut pieces to the centre of my card front using foam adhesive. Next, I adhered down the white die cut piece using the Bearly Art Precision Craft Glue. The 'Sending' was stamped in Black Licorice ink onto Snowdrift Cardstock and cut out with one of the coordinating dies. I popped in on to my panel using foam adhesive for dimension.
I tucked in the stamped floral images around the centerpiece and adhered them down using liquid adhesive. I also added some foliage pieces die cut from Snowdrift and Gold Mirror Cardstock using the floral accessory dies from the Flourished Fleurit Die Set. I inked the white die cut leaves using Pine Needles and Shabby Shutters Distress inks and then added them to my floral arrangement using the Bearly Art Precision Craft Glue. I then adhered the card front to an A2-sized top-folding white card base using foam adhesive. To finish off the card, I added Crystal Jewels to the flower centers and to my panel for a bit of sparkle.
I hope you liked my floral card and thanks so much for stopping by today. You can subscribe to any of the Spellbinders Clubs between the 1st - 24th of each month and never miss a fun kit like this again! 

If you like what you've seen from me, please give me a follow over on my Instagram (@hussena_cal) and/or subscribe to my blog if you haven't already.
Wishing you a great day ahead!


No comments:
Post a Comment