Thursday, March 25, 2021

Altenew Celebrating Parents Card Drive Blog Hop + Giveaway


Hello, crafty friends!
I'm happy to be joining Altenew for their Celebrating Parents Card Drive Blog Hop today. Our goal is to send cards for the elderly that live in nursing homes or shelters to let them know they’re not forgotten. Please check out the Celebrating Parents Card Drive information HERE and join this great cause by sending in cards.

If you arrived here from, Helen Kalb's Blog, then you are on the right track. If this is your first stop, then you will want to start at the beginning, the Altenew Card Blog.


I have made a Mother's Day Card using the Smile and Hugs Stamp Set. I did simple and light watercoloring on the white heat embossed floral image and matched it with a stenciled background.

To begin, I white heat embossed the florals and leaves from the Smile and Hugs Stamp Set on Canson Montval Watercolor Paper. I watercoloured the flowers and leaves using the Purple Wine and Lime brush markers from the Tropical Fiesta Brush Markers Set. I then fussy cut the images and kept them aside to work on my card background. 

Then, to create the stenciled background, I die cut the Doodled Dots Cover Die from Classic Crest Solar White Cardstock to create my handmade stencil. I taped it in place using Washi Tape, so that it wouldn't shift when working. I used Altenew's Embossing Paste mixed with a few drops of Lava Rock Brush Marker to create colored embossing paste. Isn't that so cool!? I often use this technique when I don't have a particular stencil in my stash and it's a great way to get more out of your dies too. Altenew is currently offering 20% off ALL Dies in stock, so if you have been waiting to get your hands any of their dies, this is a good time to shop for them.

Once my panel dried, I die cut it using a Diagonal Stitched Rectangles Die Set and adhered it on a panel of Watercolor paper using White Fun Foam for dimension. I then die cut the oval frame, flower clusters, and foliage from the Create-A-Wreath Die Set out of White Cardstock. The flowers were coloured using Coral Berry and Frosty Pink dye inks, while the leaves were colored using Lime and Sweet Leaf Brush Markers from the Tropical Fiesta Brush Markers Set. I popped up the oval frame on my panel using foam squares and arranged the flowers and leaves around it. I used a combination of foam tape and Craft Glue to adhere the elements for dimension and interest. To assemble the card together, I adhered the panel to a piece of Watercolor Paper, which was then adhered to a top-folding white card base with Craft Glue

The sentiment is from the Extra Special Set. I stamped it on a stitched banner using Altenew Obsidian Ink. I popped it on my panel using foam tape and added a couple of Sparkling Clear Sequins to finish off my card. 


Giving Back Information:
Altenew will donate $1 with every order of the above stamp sets from 3/6/2021 until 5/31/2021 to the Food Bank of Central New York to support seniors in need.


Giveaway Prizes:
To celebrate this release, Altenew is giving away a $50 gift certificate to 2 lucky winners and a $20 gift certificate to 5 winners! Please leave a comment on the Altenew Card Blog and/or each designer’s blog post on the blog hop list below by 03/31/2021 for a chance to win. 

Altenew will draw 7 random winners from the comments left on each stop of this blog hop and announce the winners on the Altenew Winners Page on 04/2/2021.


Blog Hop Order:
Next Stop on this Blog Hop is, Jenny Colacicco's blog. Just in case you lose your place along the way, here is the complete list of participants so that you can find your way back:
          
                           Hussena Calcuttawala (You are HERE)

Thank you so much for your stopping by and reading this blog post. I hope you liked my project! 

If you like what you've seen from me, please give me a follow over on my Instagram (@hussena_cal) and/or subscribe to my blog if you haven't already.
Wishing you a great day ahead!

Friday, March 12, 2021

Spellbinders March'21 Blog Hop + Giveaway!


Hello, crafty friends!
I'm so happy to be joining Spellbinders for the March 2021 Clubs Inspiration Blog Hop today. Spellbinders is celebrating all their Club Kits in shop for March 2021.

If you arrived here from Jenny Colacicco's Blog, then you are on the right track. If this is your first stop, then you will want to start at the beginning, the Spellbinders Blog. We've got tons of inspiration and giveaways for you on the hop today, so keep reading till the end of this post for more information.

I have a Slimline Card and a Shaped Card to share for the hop today using the Amazing Paper Grace – March 2021 Die of the Month Set. In case you missed, it I shared a Card on my blog a few days ago using this month's "Mini 3D Vignette Floral Mason Jar" Set, which you can check out HERE.

The Mini 3D Vignette Floral Mason Jar is a beautiful set of sixteen dies and it features a bouquet as well as lovely dimension, and folds flat like all of the 3D Vignettes.

 It's been a hot minute since I made a Slimline card and I was very excited to create one using the Mini 3D Vignette Floral Mason Jar Die Set

For my card, I first die cut all the different components of the jar and the flowers from White Cardstock using my Spellbinders Platinum 6" Machine. Then, I cut a piece of Watercolor Cardstock to size and did a light watercolour wash on it using Broken China ink. I also added a couple of black paint splatters for definition and interest. 

Next, I die cut an aperture in the body of the jar to create a frame. Then, I added a bit of soft colour to the front and back pieces of the jar using Broken China ink with a sponge to create a soft, natural look. I wanted to recreate the look of a clear jar/vase, so I added a layer of acetate in between the cardstock die cut pieces and used White Fun Foam to adhere the pieces to my panel for added dimension. 

I coloured the flowers, stems, leaves, and foliage using Mermaid Markers by Jane Davenport and Distress inks. I LOVE layering die sets and layered flowers are my absolutely favourite! I had so much fun colouring each piece and assembling them to create the bouquet on my card front.  

I stamped on the lid of the jar using a Gingham stamp and Pool Play ink and then die cut it to add over the base of the jar. I wrapped some natural hemp thread around it for visual interest and adhered it to the jar using foam squares. I attached the stems through the the jar lid to the top of the mason jar. The flowers and foliage were also adhered to the panel using foam squares

I stamped my sentiment on a stitched tag die cut from the Mini 3D Vignette Floral Mason Jar Die Set. I used hemp thread to tie the two tags together and then popped it over the lid of the jar using foam squares. To assemble the card together, I adhered the panel to a piece of lemon yellow Cardstock, which was then adhered to a side-folding white card base with Craft Glue.


My next project is a Shaped Shaker Card. I think you can tell that i love this die set a bit too much, so I have gone all out in creating with it! 

First, I die cut the different components for the card from White Cardstock using my Spellbinders Platinum 6" Machine. I wanted to create a shaped card, so I used the partial die-cutting technique here to create a hinged card base. If you don't know how to create one, you can check out Becca Feeken's tutorial HERE where she shows you how to do it. It's very simple and easy.

In order to create the Shaker piece, I die cut an aperture in the body of the jar to create a frame. Then, I added a bit of soft colour to the front and back pieces of the jar using Tattered Rose ink with a blending brush to create a soft, natural look. I followed the same process as above to create the shaker frame, but this time I added some steel coloured Glass Glitter and patterned sequins to create the shaker piece. I used two layers of White Fun Foam in between the die cut layers to create a sturdy frame. 

The flowers, leaves, stems, and foliage were once again coloured using Mermaid Markers by Jane Davenport. I created the gingham lid following the same technique as I did for the earlier card. I wrapped some natural hemp thread around it for visual interest. I attached the stems through the the jar lid to the top of the mason jar, while the flowers and foliage were adhered using foam squares and  Craft Glue.

I stamped my sentiment on a stitched tag die cut from the Mini 3D Vignette Floral Mason Jar Die Set. I die cut another tag and used a Gingham stamp to stamp on it using  Rustic Rose ink. I used hemp thread to tie the two tags together and then popped it over the lid of the jar using foam squares. And that's it - This card was done! This would be such a sweet little card to give to a family member or a friend. I love how it turned out.


Giveaway:
To celebrate this release, Spellbinders is giving away a $50 gift certificate to 3 lucky blog readers – selected from the comments on our blog. Giveaway closes on Sunday, March 14th, 11:59 pm MST. The winner will be announced in this blog hop post the following Tuesday. The winner is responsible for shipping cost, duties and taxes.

Please note, store credit (gift certificate) cannot be applied to Club Subscriptions. Store credit can be applied to shop past Club products, Club extras and regular releases.


Blog Hop Order
Next Stop on this Blog Hop is, Virginia Lu's blog.
Just in case you lose your place along the way, here is the complete list of participants so that you can find your way back:

                            Hussena Calcuttawala (You are HERE) 

Thank you so much for your stopping by and reading this blog post. I hope you liked my projects! 

If you like what you've seen from me, please give me a follow over on my Instagram (@hussena_cal) and/or subscribe to my blog if you haven't already.
Wishing you a great day ahead!

Wednesday, March 10, 2021

Spellbinders & Amazing Paper Grace Die of the Month | March 2021


Hello, crafty friends!
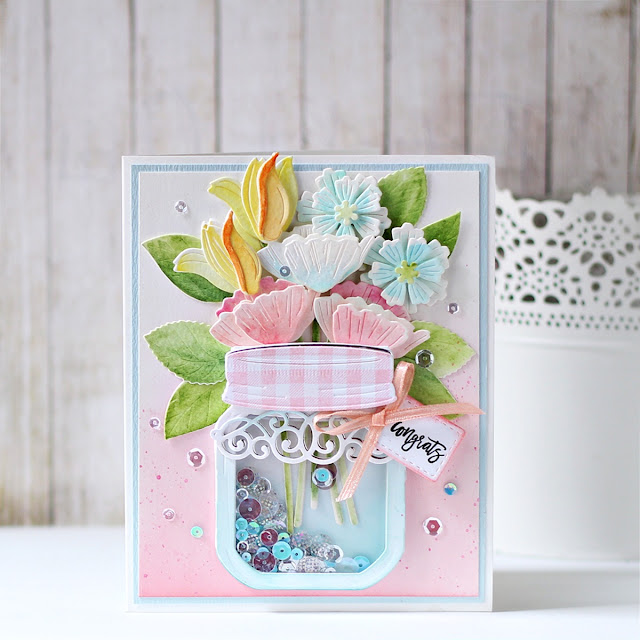
I have a Card to share today featuring the Spellbinders + Amazing Paper Grace March 2021 Die of the Month Set. This month's "Mini 3D Vignette Floral Mason Jar" Set is perfect for making gorgeous cards, gift boxes, gift bags, and more in no time! This die set features 16 dies.

I created a side-folding Mason Jar Shaker Card filled with dimensional flowers using the Mini 3D Vignette Floral Mason Jar. This is a beautiful set of dies and it features a bouquet as well as lovely dimension, and folds flat like all of the 3D Vignettes.

I have a soft corner for Mason Jars and I was thrilled to find that Becca has designed this stunning die set for this month.  To create my card, I die cut the jar, the various flowers, stems, leaves, the lid, the little tag, and the filigree lace element from White Cardstock using my Spellbinders Platinum 6" Machine

Once that was done, I die cut the jar from Acetate, White Fun Foam, and White Cardstock to create the shaker piece for my card front. I also die cut an aperture in the front of the jar, so that the sequins and stems would be visible. I added a bit of soft colour to the front and back pieces of the jar using Pool Play ink with a blending tool for visual interest.

The flowers, stems, and leaves were coloured using Mermaid Markers by Jane Davenport. Once they were dry, I assembled the different flowers together to create a nice bouquet. For my card background, I blended Rustic Rose ink on a piece of White Cardstock using a blending brush, concentrating the colour towards the bottom, to create an ombre effect. I also blended the ink around the sides with a blending brush just to define the edges and added some paint splatters for a nice, artsy look. 

I assembled all the different pieces of the mason jar together and popped it over on my card panel. To create the patterned lid, I used a Gingham Stamp to stamp on the die cut piece in Rustic Rose ink. Then, I adhered it using foam squares to the jar. The little lace filigree element was lightly coloured using Pool Play ink with a blending tool and tucked in below the lid using Craft Glue. I stamped my sentiment on the stitched tag using with Black Licorice ink and threaded some satin ribbon on the top to add over the jar. 

The flowers were all adhered using foam squares, while the leaves were glued down using Craft Glue. I affixed my ink blended background piece to a panel of light blue cardstock and then adhered it to a side-folding white card base using Craft Glue. As the finishing touch, I adhered a couple of Sparkling Clear Sequins. 


The Amazing Paper Grace Die of the Month is available exclusively at Spellbinders Paper Arts during March 2021. You can get the Mini 3D Vignette Floral Mason Jar Set at the special Cub Kit price, along with other membership perks.

If you'd like to see some more project inspiration using the Amazing Paper Grace Die of the Month, check out the Spellbinders Blog where Becca shares some stunning project samples using it.  

Amazing Paper Grace Die of the Month Membership


That’s it for me today! I hope you liked my take on the die set! If you like what you've seen from me, please give me a follow over on my Instagram (@hussena_cal) and/or subscribe to my blog if you haven't already.

Thank you so much for your visit to my blog today!

Friday, March 5, 2021

Spellbinders March 2021 Clear Stamp of the Month | Wonderful Spring


Hello, crafty friends!
Happy March and welcome to my blog! I have a set of Easter-themed cards to share today featuring the Spellbinders Clear Stamp Set of the Month - Wonderful Spring. If you haven't heard about the Clear Stamp of the Month Club by Spellbinders, you can go over to the Spellbinders blog and read more about it HERE


The Spellbinders Clear Stamp for March includes 11 different stamps, three of which have bunny images, and a number of coordinating sentiments. The stamp set coordinates with the Spellbinders Small Die of the Month, so you can mix and match your supplies to create different projects. This “Wonderful Spring” stamp set features made in the USA stamps from high-quality photo-polymer for clear, crisp impressions. 
Here are my cards using this stamp set:

To create my first card, I started by stamping one of the bunny images from the Wonderful Spring stamp set onto Snowdrift Cardstock using Versamark Embossing ink. I heat embossed the image using Super Fine White Embossing Powder and fussy cut it out using a pair of scissors. I added a bit of soft colour to the image using my Zig Clean Colour Brush Markers.

To create the watercolour background, I used a piece of Canson Montval Watercolor Paper which I loosely painted using Tumbled Glass and Shabby Shutters Distress inks. I added a bit of colour from the ink pads on a watercolor palette and used a wet paint brush to pick up that pigment for coloring the background.

Once dry, I die cut a bunch of small flowers, leaves, and foliage from the Simply Perfect Layered Blooms Etched Dies from Watercolor Paper. I coloured the pieces using Mermaid Markers by Jane Davenport and adhered them to my card panel using Craft Glue.  I then attached the bunny and a few of the coloured flower pieces to my panel using foam squares for dimension.

I die cut a tag from the Amazing Paper Grace Die of the Month Set and stamped a sentiment from the Wonderful Spring stamp set on it using Black Licorice ink. I added a little watercolored flower next to the sentiment and then popped it to my panel using foam squares.

As a finishing touch, I added some black paint splatters to the card background. Then I added the entire thing to a top-folding A2-sized white card base with foam squares.


Card Two
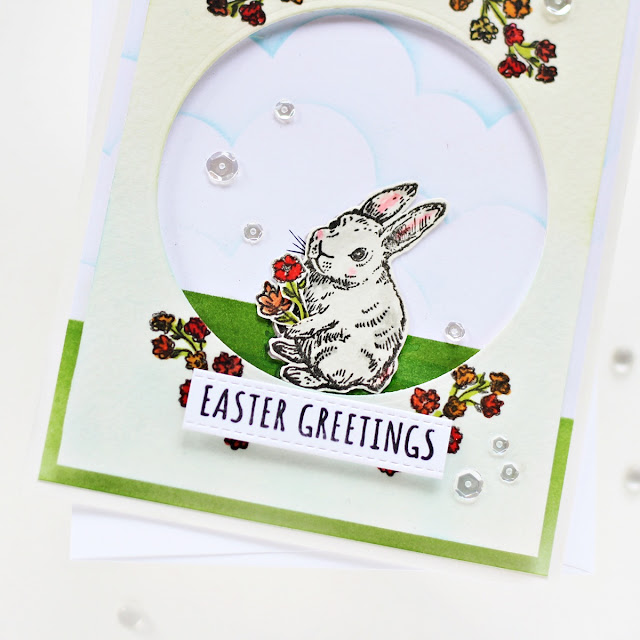
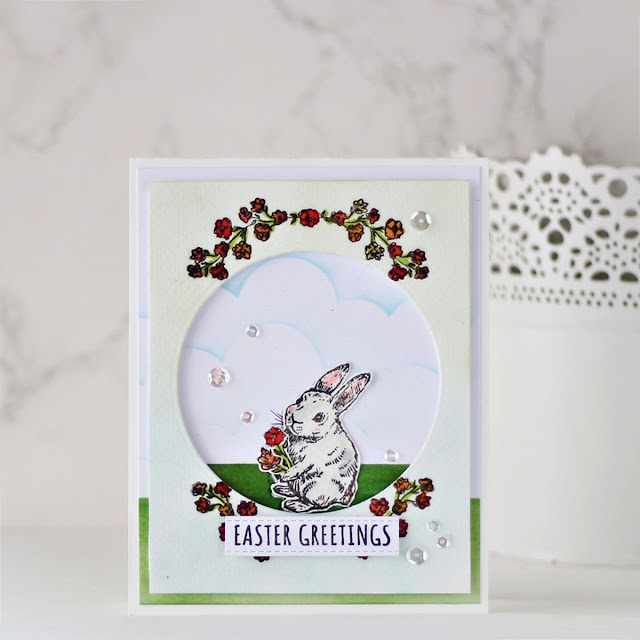
I started by stamping the floral spray from the Wonderful Spring stamp set onto Snowdrift Cardstock with Black Licorice ink. I used my MISTI Stamping Tool to stamp the floral sprays on the card front in order to line them up perfectly. I coloured the images using Nuvo Alcohol Markers and then die cut a circle from the centre of the panel using the Standard Circles LG Etched Dies. Then, I blended Shabby Shutters Distress ink around the sides with a blending brush just to define the edges.

I stamped one of the bunnies from the stamp set onto Snowdrift Cardstock with Black Licorice ink, coloured it using my Zig Brush Markers, and then fussy cut it. On another piece of Snowdrift Cardstock, I ink blended Mowed Lawn and Twisted Citron Distress inks over the panel using a blender brush, concentrating the lighter shades towards the bottom.

I wanted to create a little scene on my card front featuring the bunny and the floral sprays, so I stenciled some clouds on this panel using the Cloud Builder Stencil and Broken China Distress ink. I attached this panel to a top-folding A2-sized white card base with tape runner. I added the bunny in the centre of the panel and adhered the die-cut panel to the card base using foam squares. I also added two flowers in the hands of the bunny just for a fun, little touch. 

I stamped a sentiment from the Wonderful Spring stamp set on to a strip of Snowdrift Cardstock with Black Licorice ink. I then attached it to the panel using foam squares. As a finishing touch I added a couple of Clear Sparkling Sequins to the panel using Craft Glue.


The Wonderful Spring Set is available exclusively at Spellbinders Paper Arts during March 2021. You can get the Clear Stamp Set of the Month at the special Club Kit price, along with other membership perks.

I hope you enjoyed looking at my cards today! I would love to hear what you think of them. 

 If you like what you've seen from me, please give me a follow over on my Instagram (@hussena_cal) and/or subscribe to my blog if you haven't already.
Thank you so much for stopping by!