Wednesday, January 28, 2015

DIY Round Gift Boxes

Hello everyone,
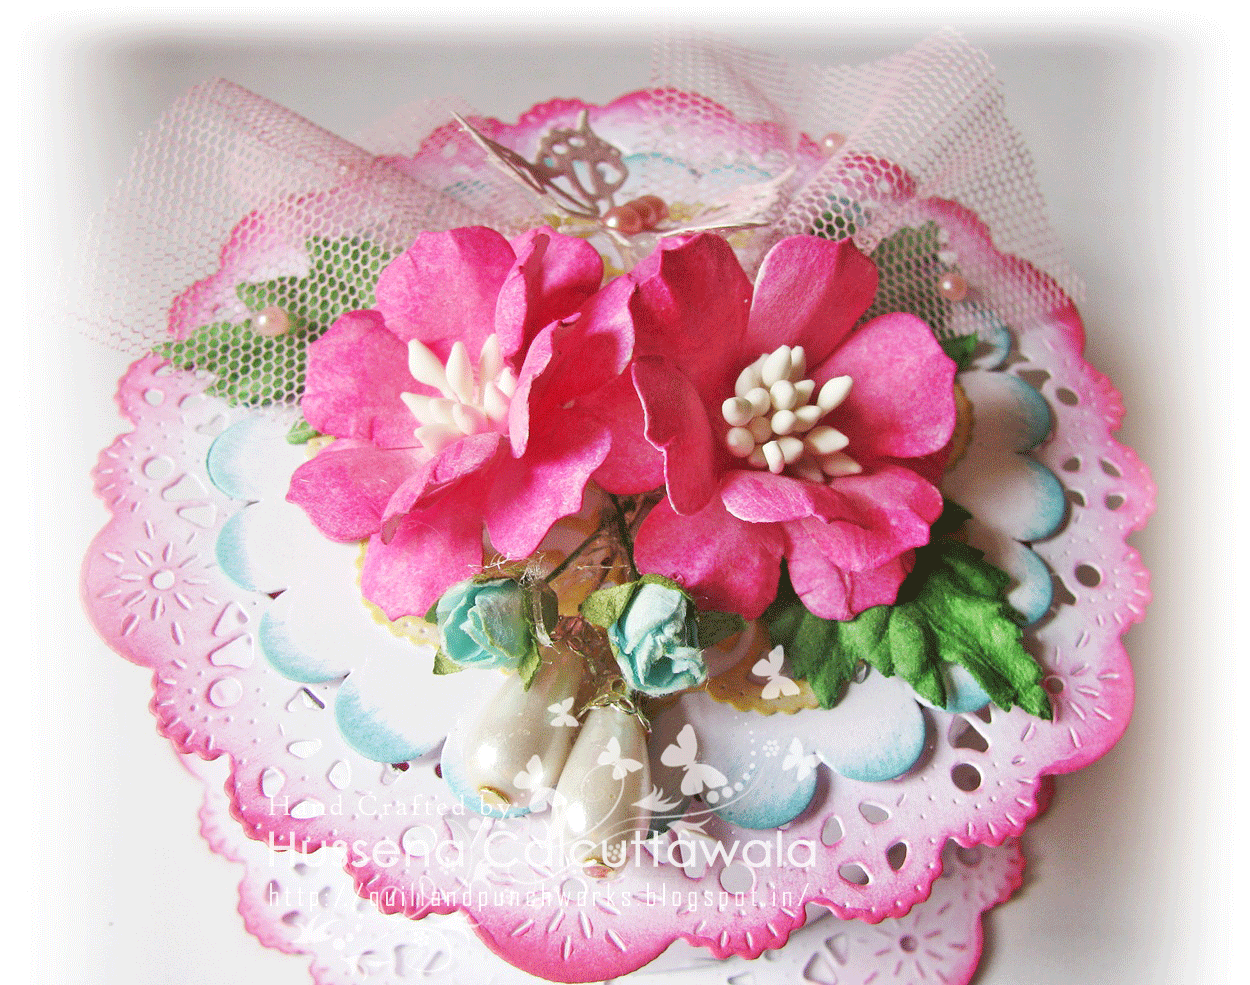
I'm here to share some gift boxes this time. These are totally made from scratch using dies as a base. I have a small pictorial on how I went about creating them. These are pretty easy to make once you have practiced with atleast one of them. For the tutorial on how to make them, I googled it and found a quite easy video on YouTube though the lady in the video used SVG cut files to make hers. The process is same. Here's a look at my boxes :

My second box which I made :

 Closer view of the box :

The first box I made was in White :
How it looks when opened

A close up of the details :

A small pictorial of the dies used to make the box :
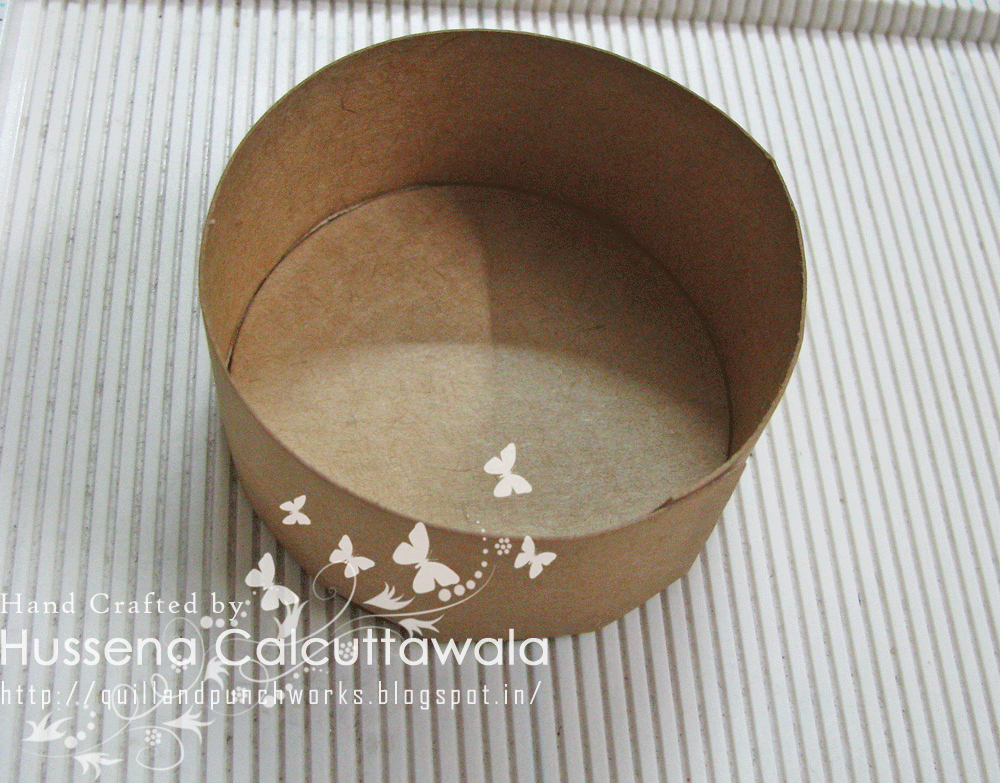
The strip is handcut and it measures approximately 10 inch by 3 inch. I have scored at the half inch mark and cut small slits to make it easy to adhere it on the round base.


I ended up making not one, but two of these boxes as the first one was my practice go and the second one, my finished product. Though, as it is usual, I ended up loving the first one more than the other  which is the White and pink box.

To make the base of these boxes, I die cut 4 circles, mine are 3 inches in size and you will need two doily dies for the upper and lower halves. (This is totally optional). You will need an approximately 10 inch by 2 inch paper strip for the base and for the lid you can use a 10 inch by 3 inch paper strip as the lid of the box has to be a bit larger than your base for your box to fit/close properly.

The flowers on my boxes are handmade using two of my favorite dies from Cheery Lynn- Medium Tea Rose and Gardenia Strip and the two doilies that I have used are also from Cheery Lynn - Sophie's Heart Mini die being my all time favorite!
While one of my box is made using a kraft colored cardstock, the other one is totally pastel with soft colors and a splash of hot pink!! 
Do let me know which one is your favorite among the two. ;)

Supplies used :
Kraft cardstock- Darice, White cardstock- Campap.
Pattern papers- DCWV Fresh Florals Stack.
Dies : Cheery Lynn- Medium Tea Rose, Cheery Lynn Gardenia Strip, Cheery Lynn French Pastry doily die, Cheery Lynn Sophie's Heart Mini doily die, Cheery Lynn Tropical Flourish die, Cheery Lynn Flourish Leaf strip die, Cheery Lynn Exotic Butterflies (Small), Cheery Lynn BAF Embellishments #3 die, Jags Circle dies, Papertrey Ink Filigree Border die.
Embossing folder- Provocraft Swiss Dots folder.
Inks- Distress inks- Picked Raspberry, Vintage Photo. Distress Stains- Mowed Lawn, Picked Raspberry, Spun Sugar, Distress Stain Spray- Picket fence, Lindys Stamp Gang Hottie Patottie Hot Pink spray.
Golden and White Pollens, Leaves, Hat pins, Rose buds, Tulle, Pearls, Golden strips.

Challenges entered :
Cheery Lynn- Anything goes ( Winner! )
Lulupu- 3D with Dies ( Made it to Top 3 )
SSS- Anything Goes
613 Create Avenue- Anything Goes with Twist ( I have used Patterned paper, die-cut, dry embossing, flower and ribbon (tulle).

Saturday, January 24, 2015

A Layered, Shabby Card !!

Hi bloggy pals,
I have a card to share today which I have created for this week's Cheery Lynn Designs challenge where the theme is 'Sweethearts'. For my card, this time I decided to play with some texture and layering so I created the background of my card using patterned papers from Kaisercraft and Graphic 45. These papers are so gorgeous!! I had a tough time cutting into them. Here's a look at what I've created :


To add some texture to my card, I die cut some corrugated cardboard paper from my heart dies and added some Gesso and Picket Fence Distress Spray Stain on it and die cut another scalloped heart from a watercolored paper and colored it lightly using Worn Lipstick Distress Stain. I added a few drops of the Heidi Swapp Gold Lame Color Shine mist. I even misted the upper half of the card using it.
The flowers are made from the Tea Rose Medium die by Cheery Lynn and colored using Worn Lipstick Distress Stain again and I painted Picket fence Distress Spray on the flowers using a brush! The leaves are also from this die and colored using Evergreen Bough and Mowed Lawn Distress Stains . The foliage was made using Tropical Flourish die by Cheery Lynn and layered the Sophie's heart Mini Doily die cut behind my hearts. The tiny flowers are die cut from the BAF Embellishments #3 die set by Cheery Lynn to which I have added some pollens.

Supplies used :
Cardstock Base- Campap.
Pattern papers- Kaisercraft Tea Break paper pad, graphic 45 Kraft Reflections pad, Chickaniddy Crafts Date Night paper pad.
Dies
Cheery Lynn Tea Rose Medium die, Cheery Lynn Tropical Flourish die,  Cheery Lynn BAF Embellishments #3 die, Cheery Lynn Sophie's Heart Mini Doily die, Nellie Snellen heart dies.
Inks- Distress Stain Evergreen Bough, Distress Stain Mowed Lawn, Distress Stain Worn Lipstick, Distress Spray Stain Picket Fence, Heidi Swapp Gold Lame Mist.
Clear rhinestones and Pollens.

 
Challenges entered :
Cheery Lynn- Sweethearts
Create Something Catchy Challenges- Use the word' Happy'. ( Made it to the Top 4 )
C.R.A.F.T - Recycle (The corrugated paper is from packaging which I have die cut and used ). ( Made it to the Top 3 )
SSS- Incorporate a Heart.
IBSIC - I have chosen the inspiration picture of Hearts.

I hope you like my card. I would love to hear your thoughts on it.
Have a nice day everyone!

Friday, January 16, 2015

A DIY Snowflake and card

Hello friends,
I am sharing a card today based on this weeks challenge theme at Cheery Lynn which is 'Snowflakes'. To tell the truth, I do not have any snowflake dies in my stash let along Cheery Lynn ones so I had to do a bit of an improvisation ad created my won snowflake using a paper punch and Cheery Lynn Olive Branches die. Before I show you how I made the snowflake, here's a look at my card :


 Here is the small tutorial on how I created the snowflake. I first punched out a medium size snowflake using white cardstock and colored it with Distress ink- Broken China. Then die cut 6 of the Cheery Lynn Olive branches leaves and cut them into half and stuck them on the base of the snowflake, thus creating the snowflake embellishment which then I blinged up by using a Silver Glitter Washi tape and punching out a snowflake through it !!

 This is how the snowflake embellishment looks like once its completed. You can distress it with any color ink.

To create my card, I first made two layers of these snowflakes and punched out the centre of it using silver glitter Washi tape. I layered it on Sophie's heart die and to create the frame, I die-cut the two 3 in 1 Corners (F) from Cheery Lynn again using silver washi tape and placed one each on the top and bottom. Then placed it on a DCWV pink polka dot patterned paper and added Anastasia Lace border.
Inked the edges of the lace using Distress ink- Spun Sugar. I distressed the edges of the card using Distress ink - Peacock feathers, added some rhinestones and made a bow using Seam Binding ribbon.

Supplies used :
Card base- Campap
Patterned papers- DCWV Fresh Floral Stack, Papermania Vintage Notes paper pack.
Dies :
Cheery Lynn Sophie's Heart mini doily die.
Cheery Lynn Olive Branches
Cheery Lynn Anastasia Border die,
Cheery Lynn 3 in 1 Corner dies (F)
Punch- Jef Snowflake punch.
Inks- Distress inks- Spun Sugar, Peacock Feathers and Broken China
Seam Binding Ribbon, Silver glitter Washi tape, Rhinestones and Twine.

Challenges entered :
Cheery Lynn - Snowflakes
Pinspirational Challenge- Snowflake (Made it to Top 3)
Craft Dee Bowz- Anything goes with a handmade bow

Hope you like my card. Do let me know your views regarding it. Would love to hear from you.
Have a nice day everyone!

Monday, January 12, 2015

Watercolored Hello

Hi friends and fellow crafters!
I have a card to share today using the new Altenew stamp- Doodle flowers which I recently laid hands on. LOVE, love, love these stamps !! 
I decided to play along the Runaway Inspired challenge this time as the inspiration picture really called to me.  The bright neon pink and that jeweled neckline from the Ralph Lauren collection is gorgeous and here's my take on it :


I was inspired by the color and the layered skirt. To recreate that, I took a piece of watercolor paper and just smooshed my Picked raspberry Distress ink pad on it very unevenly and I then I heavily spritzed it with water and let it dry.
I was also inspired by the neckline and tried to recreate it on my card by stamping and gold heat embossing the Altenew Doodle flowers stamp set on vellum and fussy cutting it. Placed some blue and yellow rhinestones in the center of the flowers. as well as scattering them on the sides,
I die cut my sentiment on a piece of black cardstock, used the negative of it and placed gold washi behind it to incorporate the belt.
I wanted to incorporate the yellow shirt on the right side of the picture on my card so I stamped a striped panel and placed it on the bottom of my card.
I know I went quite literal in my inspiration of the picture but I guess thats how my mind works, stuck on details. He he! :D

Supplies used :
Base cardstock- Watercolor paper, The Paper Accents Vellum and Campap
Dies- Spellbinders A2 Bracket Borders One,  WRMK Albums Made Easy Text dies.
Stamps- Altenew Doodle flowers, Bo Bunny To the Point stamp set.
Inks - Distress ink Picked Raspberry, Hero Arts Butter Bar ink pad, Versamark Dazzle Embossing ink pad.
Ranger Super fine Gold embossing powder, Gold Glitter Washi tape and rhinestones.


Challenges entered :
RIC - Photo Inspiration ( Made it to Top 3! )
Jo's Scrap Shack- Bling it up
STAMPlorations- Stamps & inks
Little Red Wagon - Sparkle and Shine

I hope you like my take on the inspiration picture. I'm not 100% sure about this card so would love to hear your view on it.
Have a nice day everyone!

Saturday, January 10, 2015

Celebrate with White on White

Helllo friends!
Today I have got a card to share based on the Cheery Lynn challenge this week which is to create a White on White card.
These cards are really difficult to photograph as one is never able to capture the true color and beauty of the creation. I find it very challenging to create something which is devoid of colors because I believe, that colors are the USP of my creations. I love working with colors and color is the thing which attracts me the most to any piece of art or work.
Having said that, here's a look at what I have created :


Close up of the flowers :

For this creation I wanted to play with textures and layers, a little bit of mixed media look without actually using any colors and this is what I have created :D..I did some stenciling using texture paste and stencil to create the background of my card and to give it a shabby torn look. I tore a bit of paper on the top and bottom and inlaid a doily in the space.To create the focal of my card I started first by layering Cheery Lynn Sophia's Heart doily die then placed my floral arrangement on it by creating the flowers using Shasta daisy flower die. The leaves and the foliage are also from various Cheery Lynn dies. I die-cut my sentiment using a Die-versions wordlet die and adhered it to my card base using Glue Dots. I have highlighted the entire card using White glitter glue to give it a little bit of sparkle.

Supplies used :
Card base- Campap
Dies :
Cheery Lynn Shasta Daisy die.
Cheery Lynn Sophia's heart Mini doily die.
Cheery Lynn French Pastry Mini doily die.
Cheery Lynn Flourish Leaf strip die.
Cheery Lynn Olive branches die.
Cheery Lynn Fanciful Flourish die.
Die-Versions Wordlets die.
Stencil- Prima Marketing Damask
Camel Texture White, Glitter tape, Rhinestones and Glitter glue.

Challenges entered :
Cheery Lynn- Winter Whites
CardMania- Make it Sparkle
We Do Doobadoo- Romantic Whites ( Made it to Top 3 )
Dies R Us- Anything goes with Something New ( My new dies used are the Cheery Lynn Shasta Daisy die and Cheery Lynn Flourish strip die).
Frosted Designs- White as a Snowflake ( Made it to the Top 3 )
Simply Create Too- Let's Celebrate

Hope you like my card. I would love to hear your thoughts on it. :)
Have a nice day everyone!

Saturday, January 3, 2015

A new beginning!

Hello Friends,
First of all let me wish all of you a very Happy New year! A little belated I know, but hopefully this new year brings all of all that you desired and loads of happiness your way.
Well today I have a card to share which I have created especially for the Cheery Lynn challenge where the theme is "Thank You"and I have based the sketch of my card on the Cardabilites current Sketch #114. It so easy to create a card based on sketches as it does half the job for you. The LO is already prepared and you just have to create your design based on it.
You'll have to forgive me for the poor photographs as it has been very cloudy these past few days and raining since morning today. :/ 
Here's a look at what I have made :

To create my card, I used some K&Company pattern papers from their Best of K&Company collection. I have used various Cheery Lynn dies to create the flowers, my ever faovrite Gardenia strip die.The leaves are from Cheery Lynn Olive branches and Cheery Lynn Tea Rose die(Only the leaves), and even the background doily is from Cheery Lynn called the French Pastry doily die. I have distressed and colored my flowers using Distress inks Victorian Velvet and Tumbled glass..As a final touch added some fillers and pearls and of course Platium Glitter in the form of Stickles to finish off my card.

Supplies used :
Card base- Fabriano Brustro
Pattern papers- Best of K&Company collection.
Dies
Cheery Lynn French Pastry Doily die, 
Cheery Lynn Gardenia strip die, 
Cheery Lynn Daisy strip die (For the blue filler flowers), 
Cheery Lynn Tea Rose die(Only the leaves), 
Cheery Lynn Olive Branches,
Cheery Lynn Embellishments #3 die, 
Cheery Lynn 3 in 1 Exotic Butterflies (Small), 
Memory Box Amira Flourish die.
Stamps- Simon Says Stamp' Thanks' stamp set.
Inks- Distress inks- Victorian Velvet, Tumbled Glass, Crushed Olive, Versafine Onyx Black ink pad.
Pearls and fillers, Platinum Stickles.


Challenges entered :
Cheery Lynn- Thank you.
Cardabilities- Sketch (Featured!)
Dies R Us - Anything goes with a twist (I have used my brand new Memory Box Amira Flourish die, my Cheery Lynn Embellishments #3 dieand my Simon Says Stamp' Thanks' stamp set.)
NBUS - Challenge #3 ( My NBUS is my new Memory Box Amira Flourish die, my Cheery Lynn Embellishments #3 die, and the Simon Says Stamp' Thanks' stamp set.)

I hope you like my card. I would love to hear your views on it so please do drop in your comments. :)
Thanks for stopping by and have a nice day everyone! :)