Hello, crafty friends!
I'm delighted to be joining Spellbinders for the November 2021 Clubs Inspiration Blog Hop today. Spellbinders is celebrating all their Club Kits in shop for November 2021.
If you arrived here from Jessica Vasher's Blog, then you are on the right track. If this is your first stop, then you will want to start at the beginning, the Spellbinders Blog. We've got tons of inspiration and giveaways for you on the hop today, so keep reading till the end of this post for more information.

I have an A7 Layered Monochromatic Card to share for the hop today using the Amazing Paper Grace – November 2021 Die of the Month Set. In case you missed, it I shared a Dimensional Christmas Card on my blog a few days ago using this month's "Pop Up 3D Vignette Christmas Tree" Set, which you can check out HERE.
The Amazing Paper Grace Die of the Month for November 2021 is quite unique. It’s a fold-flat card that fits into a small catalog envelope and opens up into a showcase card. On the other hand, it’s a gorgeous set of layered trees and adorable gifts. All of the details, the packages, the bows, the ornaments and such are really delightful and you can easily assemble a beautiful little pop-up scene using the dies in the set or use the elements separately on a traditional Christmas card.

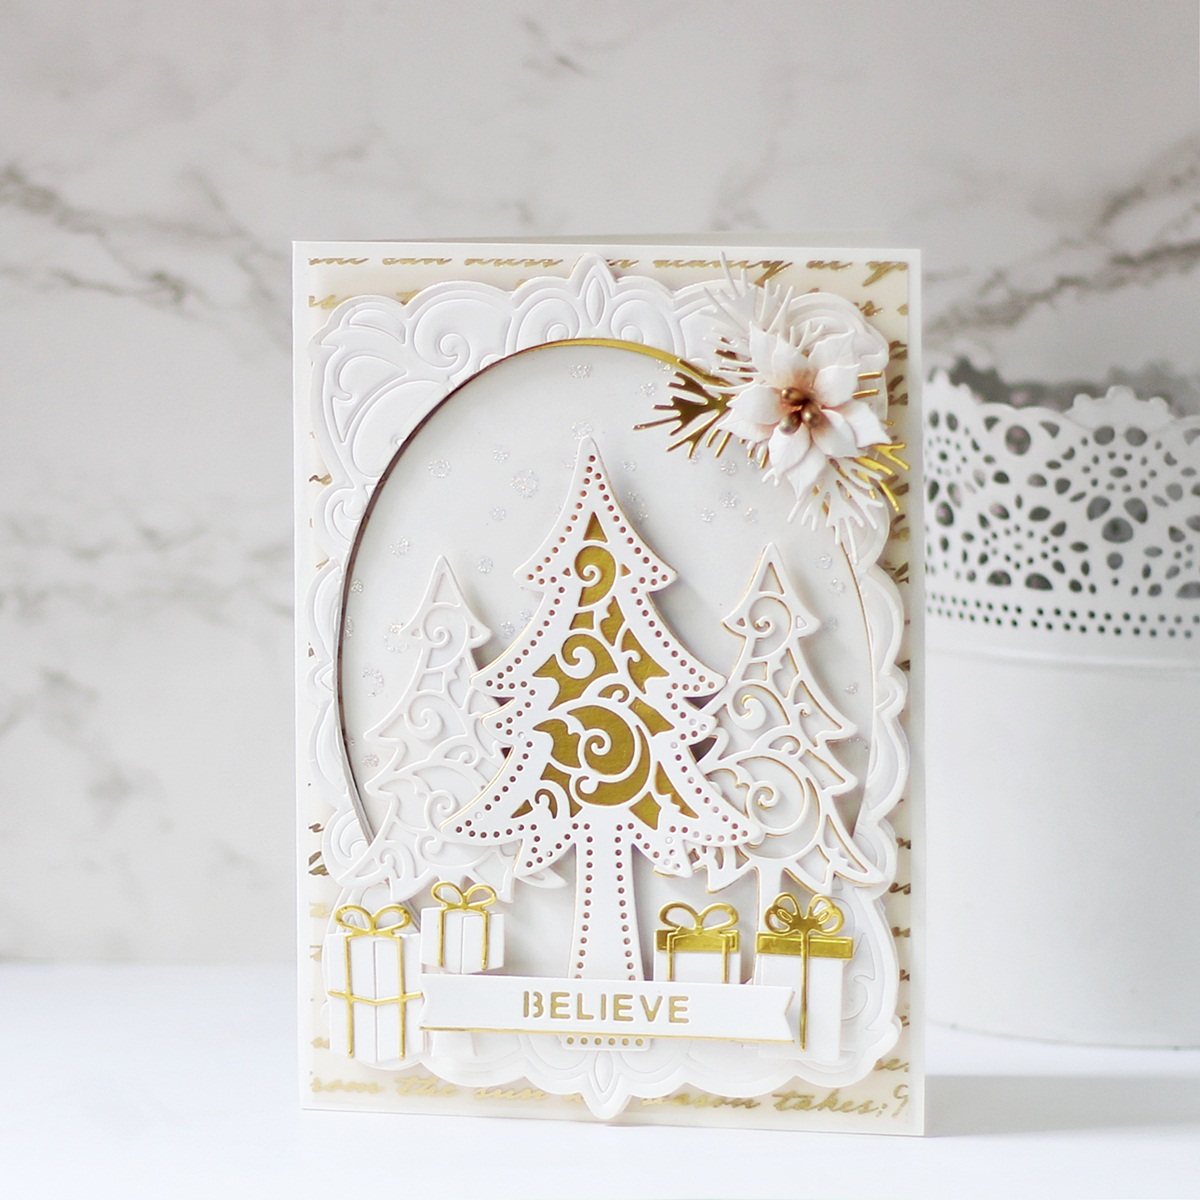
Today's card is a bit different from my usual cards in terms of size. This card is really huge, measuring 5-1/2″ x 7-1/2″ inches. I just I folded an A4 Sheet of Snowdrift Cardstock in half and burnished the crease well to make the card base.

To create my card, I first debossed Alabaster and Brushed Gold Cardstock using the Outer Rim and the Large Decorative Insert Dies in my Spellbinders Platinum 6" Die Cutting Machine (I positioned my Platform Standard; Die Template Cut Ridges UP with Cardstock Inside; Embossing Mat; XL Embossing Plate and then ran this through my die cut machine as I would an embossing folder. The thick dies pressed into the paper leaving a lovely impression), followed by die cutting with the Large Oval Outer Rim from the Fluted Classics Ovals Etched Die Set. I adhered the ivory die-cut piece on top of the gold die-cut with liquid glue, offsetting them a bit to form a shadow. Next, I trimmed a piece of foiled vellum from the DCWV Scripts And Music Notes Paper Pack to 5" X 7" and adhered it down to my card base using tape runner. Once that was done, I adhered the delicate oval frame and the solid oval die cut on my card panel using a combination of foam adhesive and Craft Glue for dimension.

Next, I die cut Alabaster and Brushed Gold Cardstock using the Medium and Small Filigree Tree Dies from Pop Up 3D Vignette Christmas Tree Die Set. I assembled each of the pieces together and adhered them down with Craft Glue. Next, I die cut a whole bunch of gift boxes from Alabaster and Brushed Gold Cardstock to add underneath the tree. I assembled the pieces together and adhered them down to my card front using foam adhesive for dimension. Then, I die cut Alabaster and Brushed Gold Cardstock using the solid banner and banner insert dies from the Pop Up 3D Vignette Christmas Tree Die Set. I adhered the pieces together with Craft Glue, allowing the gold layer to peek out from behind as a shadow.

My card background was already quite embellished at this point, but I still went ahead and die cut Alabaster and Brushed Gold Cardstock using the Medium and Small Poinsettia Dies along with the Evergreen Die included in the Pop Up 3D Vignette Poinsettia Sleigh Die Set to create a small poinsettia flower. I rarely make cards without flowers and felt that the design would look incomplete without one. :) I embossed the petals using the small ball tip from the Ultimate Tool Kit and then added matte-finish gold pollens to the centres of the flowers to give them a more realistic look. I then adhered the poinsettia and the leaves on the right-hand side of my card front using Craft Glue.

Once everything was assembled and adhered down to my card front, I used Ranger Diamond Stickles to create little circles to give the illusion of snowfall on my card background for a bit of glitz and glam. Then, to complete, I mounted my card panel to a side-folding A7 ivory card base made out of Alabaster Carfdstock.
I love the fact that the size of the trees and embellishments make it possible to make both A7 and A2 cards with the set. This gives you so many options! I also really enjoyed challenging myself to use only two colours to create my card. I would love to know what you think about it. :)

Giveaway:
To celebrate this release, Spellbinders is giving away a $50 gift certificate to 3 lucky blog readers – selected from the comments on our blog. Giveaway closes on Sunday, November 21st, 11:59 pm MST. The winners will be announced in this blog hop post the following Wednesday. The winner is responsible for shipping cost, duties and taxes.
Please note, store credit (gift certificate) cannot be applied to Club Subscriptions. Store credit can be applied to shop past Club products, Club extras and regular releases.
Blog Hop Order:
Next Stop on this Blog Hop is, Melody Rupple's blog.
Just in case you lose your place along the way, here is the complete list of participants so that you can find your way back:
Spellbinders Blog
Tina Smith
Bibi Cameron
Yasmin Diaz
Jill Hilliard
Jennifer Kotas
Virginia Lu
Sandra Nagel
Kathy Clement
Jean Manis
Marie Heiderscheit
Emily Leiphart
Jessica Vasher
Hussena Calcuttawala (You are HERE)
Melody Rupple
Jennifer Snyder
Natasha Vacca
Alanna Moses
Martha Lucia Gomez
Tiffany Pryce Russom
Thank you so much for your stopping by and reading this blog post. I hope you liked my project!
If you like what you've seen from me, please give me a follow over on my Instagram (@hussena_cal) and/or subscribe to my blog if you haven't already.
Wishing you a great day ahead!


Merry Christmas
ReplyDeleteVery elegant!
ReplyDeleteso elegant, I love your card. Thank you for sharing.
ReplyDeleteSo pretty. Love the gold and white look.thanks for the inspiration.
ReplyDeleteLove the classic Christmas card! Beautiful!
ReplyDeleteIncredible card, Hussena!
ReplyDeleteSo attractive!
Absolutely gorgeous card! Thank you for sharing.
ReplyDeleteWow! How stunning!!!!!!
ReplyDeleteNeat dies! Definitely ready for the holidays!
ReplyDeleteBeautiful!
ReplyDeleteI think your card is stunning and the white and gold create an elegant look!
ReplyDeleteBeautiful! White & gold paired together is stunning!!!
ReplyDeleteBeautiful card Love this months release, just gorgeous!
ReplyDeleteWow, what a beautiful and elegant card! That definitely needs to be given to a special person.
ReplyDeleteVery elegant!
ReplyDeleteAwesome card, so beautiful!
ReplyDeleteOh my gosh! Absolutely adore your beautiful card creation! And yes I luv the 2 color combination ...it looks elegant, but vintage at the same time! And thanks so much for sharing every detail to make one...Suzy Q
ReplyDeleteYour card is so elegant! I love the gold and white together!
ReplyDeleteThe white and gold is such an eye catching palette, gorgeous layering on your card.
ReplyDeleteSo elegant with the mix of white and
ReplyDeletegold. Beautiful card. thanks for sharing
txmlhl(at)yahoo(dot)com
Nothing is more elegant than gold and white. Very pretty Christmas card.
ReplyDelete