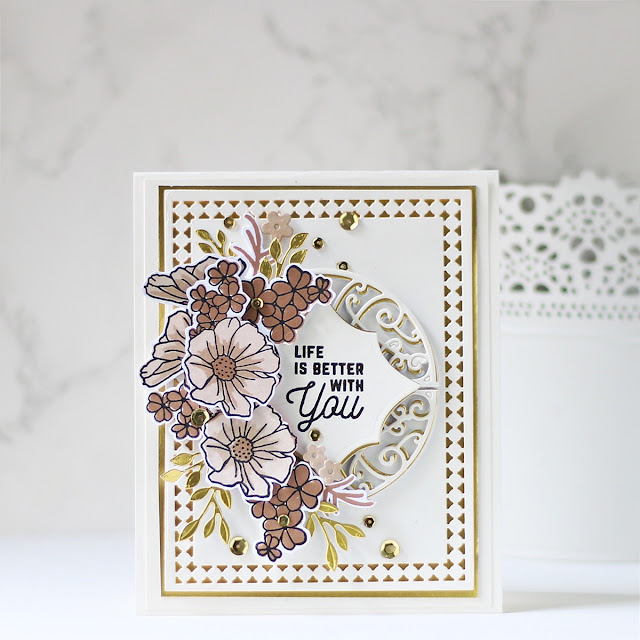
I have a couple of projects to share today featuring the
Lattice Petal Foldover Set. The latticework is truly gorgeous and I loved creating with the different elements included in the die set. Becca's die designs are always so ingenious and this is yet another remarkable die set to have in your stash. I truly can't have enough of it!
My first project is a Shaped Card created using the foldover outline die, foldover inserts, and the inner square die with rim, and the filigree corners from the
Lattice Petal Foldover Set.
I didn't have to do much to create this card because the dies all the work for me. To begin, I die cut
Metallic Ivory Cardstock using the foldover outline die in the
Lattice Petal Foldover Set using my
Spellbinders Platinum 6" Machine. Next, I die cut
Alabaster Cardstock using the foldover outline die and used the partial die-cutting technique to create a hinged card base. If you don't know how to create one, you can check out Becca Feeken's tutorial
HERE where she demonstrates how to create it in a lucid manner. Once my card base was die cut, scored, and folded, I adhered the foldover insert dies to the wings of the outline die cut with removable tape and ran it through my die cut machine to die cut the intricate lattice framework.

Next, I die cut the filigree corner die four times out of
Gold Mirror Cardstock to tuck in beneath the square motif die cut. Then, I die cut
Alabaster Cardstock using the inner square die to create the centerpiece for my card. Once that was done, I die cut
Alabaster Cardstock using the smallest square piece included in the die set for my sentiment piece. I stamped my sentiment in the centre of the die cut using Black Licorice ink and attached it to my panel using foam squares.

Next, I die cut
Snowdrift Cardstock with the mini flower and leaf sprig dies from the
Petite Floral Potpourri Etched Dies. I coloured each of the floral die cut pieces using Picked Raspberry and Worn Lipstick Distress inks and embossed them using the small ball tip from the
Ultimate Tool Kit by Susan's Garden. This is my go-to tool kit for flower shaping and embossing and I do recommend getting it if you are an avid flower maker or enthusiast. Once I had embossed the pieces, I added some pollens to the centres of the flowers for a realistic look. Similarly, the leaves were coloured using Twisted Citron and Mowed Lawn Distress inks. I shaped the tips of the leaves using the medium ball tip from the
Ultimate Tool Kit. Then, to complete the floral bunch, I adhered a shaded mulberry flower, the coordinating filler flowers, die cut leaves, and a pink satin ribbon bow.

I adhered the latticework die cut to my card base with foam adhesive. I then popped the square motif onto the card panel using foam adhesive. I simply love the delicate and lacey look of the die cuts! What do you think?!
My next project is a handmade Gift Box with a set of two note-cards. This is the most darling thing ever!
Becca's die designs are always very versatile and they lend themselves so well to a consortium of papercrafting projects! I used the dies included in the
Lattice Petal Foldover Set to create the lid of the box. This box measures. 4.5 inches X 4.5 inches and is 2.25 inches deep. I trimmed a piece of
Pink Sand Cardstock to 9 X 9 inches and scored the paper on all four sides at 2.25 inches to create the lid for my box. Similarly, for the base, I trimmed a piece of
Alabaster Cardstock to 8 3/4 inch X 8 3/4 inch and scored at 2.25 inches on all four sides. I adhered the flaps together using Red Liner Tape to create the base of the box.
I then used the domed lattice arch die from the
Lattice Petal Foldover Set to die cut an aperture in the centre of the lid of the box. I also die cut the arches from
Gold Mirror Cardstock and slightly offset the two pieces to create the illusion of depth without an excessive amount of bulk.

Once that was done, I scored, folded and adhered the flaps together to create the finished lid. I adhered a piece of pink satin ribbon in between the two domed lattice arch pieces to give it a more finished look. Next, I die cut
Snowdrift Cardstock with the mini flower dies from the
Petite Floral Potpourri Etched Dies. I coloured the centres of the die cut pieces using Picked Raspberry Distress ink and embossed them using the small ball tip from the
Ultimate Tool Kit by Susan's Garden. Once I had embossed the pieces, I added some pollens to the centres of the flowers. Similarly, the leaves were coloured using Twisted Citron Distress ink. I shaped the tips of the leaves using the small ball tip from the
Ultimate Tool Kit.

I arranged the flowers and leaves together to create a cluster and added them to the box using glue dots. Then, as the finishing touch, I die cut
Alabaster Cardstock and
Gold Mirror Cardstock using
the corner filigree die and slightly offset the pieces to create the shadow layer. I die cut four set of corners to attach to all four sides of the box. Then, as the finishing touch, I adhered white pearls to the corner filigree pieces and domed lattice arch pieces.


I also created a set of two note cards and a romantic little envelope to go with my box. I die cut
Alabaster Cardstock using the foldover outline die to create the outline layer for the envelope. I then adhered the foldover insert dies to the wings of the outline die cut with removable tape and ran it through my die cut machine to die cut the intricate lattice framework. Once it was die cut, I scored and folded the flaps to create the finished envelope. I then trimmed a piece of
Pink Sand Cardstock to size to fit inside the envelope.

Next, I die cut Pink Foamiran using the mini flower die included in the set. I wanted to create a cluster of three roses, so I die cut the flower die thrice in my die cutting machine. I used a slotted quilling tool to roll the mini flowers and then adhered them to the envelope using a hot glue gun. The leaves and sprig from the
Petite Floral Potpourri Etched Dies were die cut from paper and also adhered using a glue gun. I die cut
Alabaster Cardstock and
Gold Mirror Cardstock using the fastener die from the set and offset the two pieces to make it all come together!
The note-cards came together very quickly as well! I just used different colours on both of them for contrast and interest. I die cut
Alabaster Cardstock and
Gold Mirror Cardstock using the inner square frame die and offset the two pieces to create an illusion of depth. I then die cut
Alabaster Cardstock using the smallest square die included in the set and stamped my sentiment on it using Black Licorice ink.

Next, I die cut
Pink Sand Cardstock using the flower die included in the
Lattice Petal Foldover Set. I die cut the flower pieces thrice using my die cutting machine and used a slotted quilling tool to create the coiled roses. The coordinating flowers, leaves, and sprig pieces are from the
Petite Floral Potpourri Etched Dies. I colored the mini flowers using alcohol markers and adhered them to my panel using liquid adhesive. The leaves were die cut from
Limeade Splash Cardstock and adhered using liquid adhesive. To assemble, I matted the die cut background panel with layers of
Pink Sand and
Alabaster Cardstock before adhering it to a top-folding card base made using
Pink Sand Cardstock.

I repeated the process for the other note-card as well, but simply changed the colour of the flowers from pink to blue. I also die cut the sentiment piece from
Pink Sand Cardstock instead of Alabaster Cardstock and used a different sentiment on this card. I really love how they turned out! I would love to hear what you think of them!
That’s it for me today! I hope you liked my take on the die set! If you like what you've seen from me, please give me a follow over on my Instagram (
@hussena_cal) and/or subscribe to my blog if you haven't already.


