Hello, crafty friends!
I'm super excited and honoured to be joining Spellbinders for the May 2020 Clubs Inspiration Blog Hop today. If you arrived here from, Carrie Rhoades' Blog, then you are on the right track. If this is your first stop, then you will want to start at the beginning, the Spellbinders Blog. We've got tons of inspiration and giveaways for you on the hop today, so keep reading till the end of this post for more information.
I have made TWO project for the hop today using the Amazing Paper Grace – May Die of the Month. In case you missed, it I shared a Card on my blog few days ago using this month's Fleur de Lis Grandeur Fold Over, which you can check out HERE.
The dies for Spellbinders Monthly Clubs are exclusive to Spellbinders and you won't find them anywhere else. If you want to find out more about the Club – prices, how you sign up and what’s included, please look ——–> HERE. These dies are only available through the Club and are limited to the month of May, so hurry before they are sold out.

My first project is a Slimline Card featuring the Amazing Paper Grace – May Die of the Month.
To create this card, I first took a piece of Buttercream Cardstock and die cut three square motif pieces using the decorative square die included in the set using my Platinum 6 Die Cutting and Embossing Machine. I also die cut it thrice from Gold Mirror Cardstock as I wanted to offset the pieces to add some interest to my design.
To create this card, I first took a piece of Buttercream Cardstock and die cut three square motif pieces using the decorative square die included in the set using my Platinum 6 Die Cutting and Embossing Machine. I also die cut it thrice from Gold Mirror Cardstock as I wanted to offset the pieces to add some interest to my design.
Once I adhered the pieces down to my card base using the Fun Stampers Journey Craft Glue, it was time to work on the embellishments. I wanted the dies to be the star of the show, so I kept my embellishments minimal. I die cut some flowers using the Sweet Cottage Flowers Etched Dies from Color Splash Watercolor Sheets (I used the medium flower die to create my peony). Once they were die cut, I spritzed some water on the petals and used the Rustic Rose Ink Pad and Journey Medium Blending Brush to watercolor the flowers. Once that was done, I used Embossing Ball Tools and Groove Golf Tools to emboss and mould my flower petals. I colored a white styrofoam bud using Yellow Dye ink for my flower centre and added pollens to give it a more realistic look.
I repeated the same process for the mini filler flowers. I die cut them from one of the flower dies included in the Candlewick Edged Corners Die Set. Once they were die cut, I watercolored them using the Rustic Rose Ink Pad and added wire pollens to the centres to give it a fuller look. For my leaves, I used the leaf die included in the Sweet Cottage Flowers Etched Dies. I die cut them from Color Splash Watercolor Sheets and used the Fresh Sage Ink Pad to watercolor them in order to get this pale green colour. I also tucked in some golden foliage pieces to complete my floral arrangement.
I die cut a banner from Whip Cream Cardstock and stamped my sentiment onto it using the Black Licorice Ink Pad. I adhered this to my panel using foam dots. Then, I mounted my card panel to a piece of Gold Mirror Cardstock which I finally adhered to my card base. This is my second Slimline Card ever and I love the way it turned out!
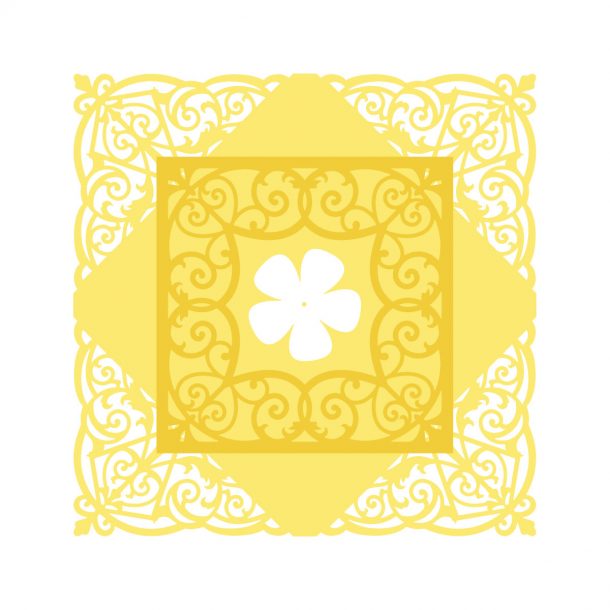
My next project is a Gift Basket I made using the Fleur de Lis Grandeur Fold Over Die of the Month from Amazing Paper Grace. I love creating my own handmade gifts and this month's die was perfect for creating one.
This gift basket was quite simple to put together. To start with, I die cut the main 6" die from Whip Cream Cardstock. I die cut this twice to create the basic framework of my basket. Once die cut, I used the score lines present in the die cuts to fold and create the shape of the basket. I attached the two pieces together in order to create my basket. Once that was done, I die cut the die from Gold Mirror Cardstock. I added the pieces at all the four sides of the basket in order to add some interest to my design.
Next, it was time to work on my handle. I used one of the decorative ribbon dies from the Shadow Box Ribbon Threader Etched Dies to create it. I die cut two pieces from Whip Cream Cardstock and Gold Mirror Cardstock respectively and adhered the two together to create my handle. I also die cut the decorative accents included in the set from Gold Mirror Cardstock and added them to either side of the handle to give it a more finished look.
To embellish the basket, I again used a handmade peony flower and some foliage. I used the same flower die that I used for my Slimline Card as well - Cottage Flowers Etched Dies. To colour the flower die cuts, I used the Rustic Rose Ink Pad. I wanted my flower to have a soft, shabby chic look to it, so I smooshed the ink pad onto my Craft Sheet and spritzed some water to dilute the colour. This is how I achieved this pale pink colour. I also coloured my regular styrofoam bud and added thread pollens to the centre to give it a more natural look. By the way, can you notice the different looks you can achieve from a single flower die? Here, I didn't use my Groove Tools to shape it, and only lightly embossed the petals.
For the filler flowers, I used the Candlewick Edged Corners Die Set. I die cut them from White Cardstock and colored them using the left over ink colour from my peony flower that I had on my Craft Sheet. Then, I added wire pollens to the centres of the flowers. For my leaves, I used the leaf die included in the Sweet Cottage Flowers Etched Dies. I die cut them from White Cardstock again and coloured them using the Sage Ink Pad. I did add some water to the die cuts once they were all coloured to give it a more distressed look.
I adhered my floral spray to my handle and my basket was ready! I had so much fun creating it! This would be perfect to gift some chocolates, jewlery pieces, or anything you'd like to give to your dear ones. The intricate die design makes it looks so regal and beautiful!
Affiliate Disclosure
All products in today's post are linked throughout the post. These are my personal affiliate links which you can shop from at no cost to you! Thank you for your support!
Giveaway:
To celebrate this release, Spellbinder is giving away a $50 gift certificate to 3 lucky blog readers – selected from the comments on our blog. Hop along for additional chances to win. Giveaway closes on Sunday, May 31st, 11:59 pm EDT. The winner will be announced in the blog hop post the following Tuesday. The winner is responsible for shipping cost, duties and taxes.
Additional Giveaway:
The generous folks at Spellbinders have allowed me to giveaway a $25 gift certificate to ONE lucky winner! For your chance to win, leave a comment on this post by 31st April, 2020. Winner is responsible for shipping cost, duties and taxes.
Please note, store credit (gift certificate) cannot be applied to Club Subscriptions. Store credit can be applied to shop past Club products, Club extras and regular releases.
Blog Hop Order:
Next Stop on this Blog Hop is, Jennifer Snyder's blog.
Just in case you lose your place along the way, here is the complete list of participants so that you can find your way back:
Spellbinders Blog
Yana Smakula
Nichol Spohr
Tina Smith
Desiree Kuemmerle
Kathy Clement
Bibi Cameron
Jackie Pasko
Marie Heiderscheit
Jill Hilliard
Carrie Rhoades
Hussena Calcuttawala
Jennifer Snyder
Jean Manis
Virginia Lu
Jeanne Jachna
Ilina Crouse
Yana Smakula
Nichol Spohr
Tina Smith
Desiree Kuemmerle
Kathy Clement
Bibi Cameron
Jackie Pasko
Marie Heiderscheit
Jill Hilliard
Carrie Rhoades
Hussena Calcuttawala
Jennifer Snyder
Jean Manis
Virginia Lu
Jeanne Jachna
Ilina Crouse
Thank you so much for your stopping by and reading this blog post. I hope you liked my project! If you would like to see more of my work using Spellbinders, do follow my Instagram page - @hussena_cal
Wishing you a wonderful day ahead!


