Hello everyone!
I am very excited about today's post as this is something I have never worked with before. I have always been fascinated with the idea of Card Kits and when Spellbinders reached out to me to ask if I would be interested to create some cards using their March Card Kit, I was really thrilled. The March Card kit is available for purchase on the Spellbinders website and you can find it HERE. The kit is jam packed with lots of dies, cardstocks, pattern papers, card bases and matching envelopes, and gorgeous embellishments. You can create 10 or more cards with each kit and they are absolute value for money!
Here's a look at my cards using it.

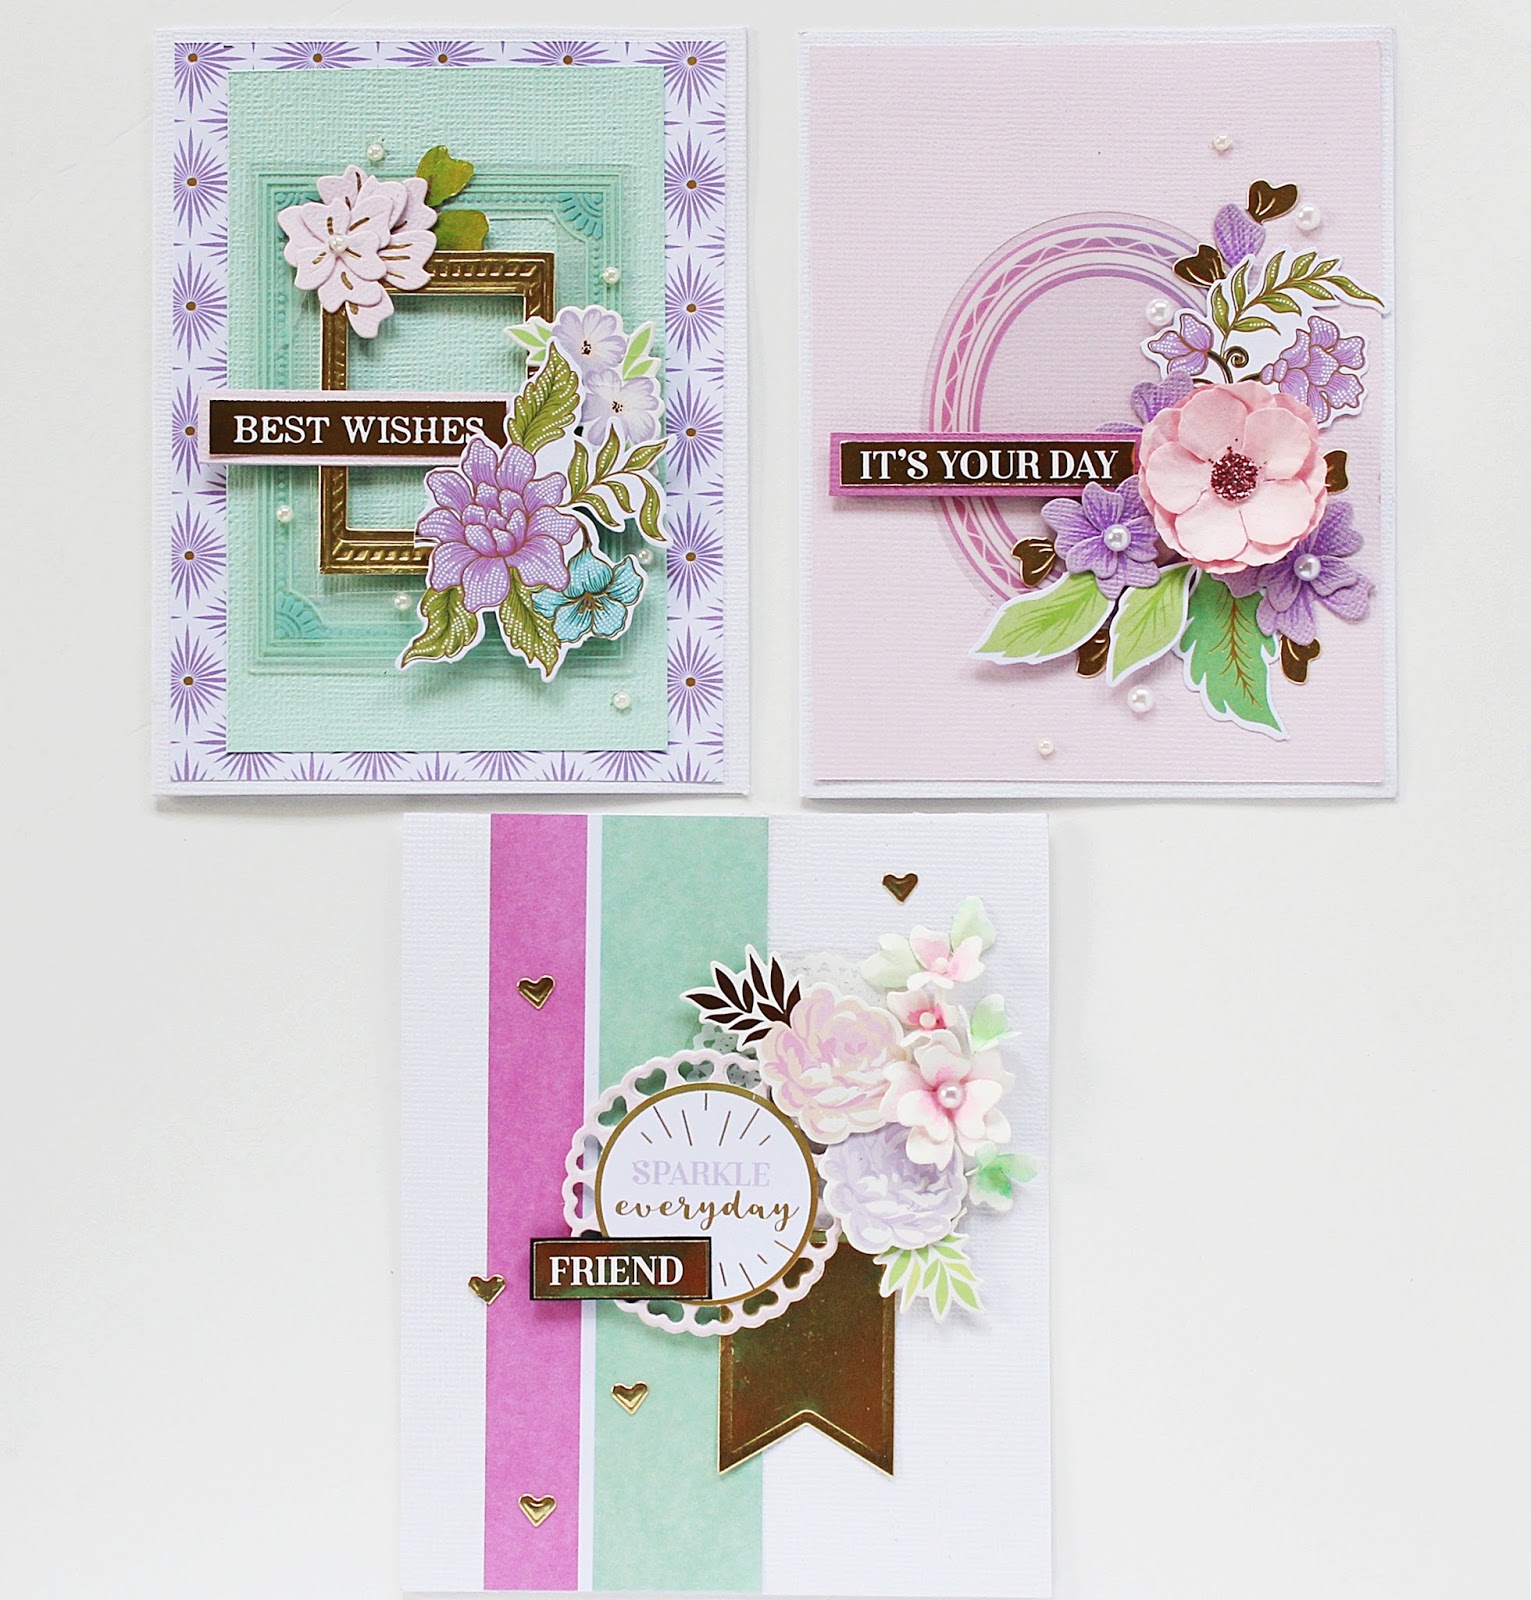
I will talk about each card one by one. Let's start with card number one. This also happens to be my favorite out of the whole lot :D
To start with, I took one of the pre-scored A2 card bases included in the kit. Next, I layered a piece of pink cardstock on the card base. I then pulled out some coordinating embellishments which would work for my card design. I absolutely love clustering florals, and it was really fun to coordinate the different elements together.

I first adhered the clear frame sticker and then added the central pink flower over it. I love how they have included a mix of handmade flowers as well die cut ones in the kit, so you have a lot of variety. Also as you can see, the sentiment has a gold foil finish to it. Foil is always difficult to photograph as it never shows up well in pictures :(

I then added a big die-cut piece above the pink flower. To add some more layering to my flowers, I adhered few flowers which were die-cut from purple textured cardstock using the mini flower die included in the kit. I also added some green leaves to complete my cluster.
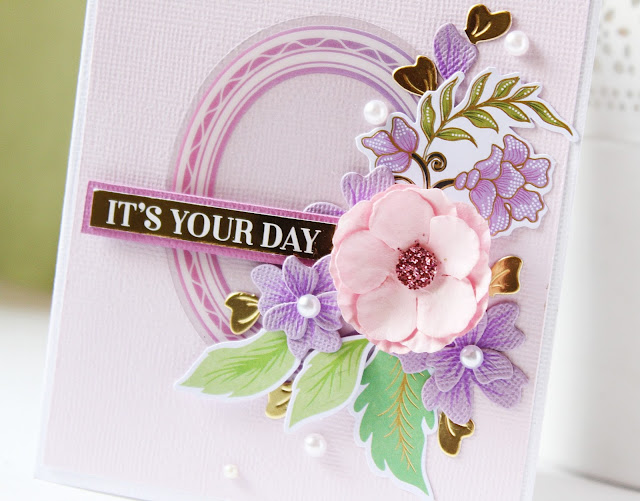
Next, I added bits of the flower petals as accents to further embellish my card. They were also cut using the same flower die from gold foil cardstock.

The sentiment was a gold foil sticker included in the kit, which was then matted on to some purple cardstock, again from the kit itself. To finish off my card, I add few white pearls.
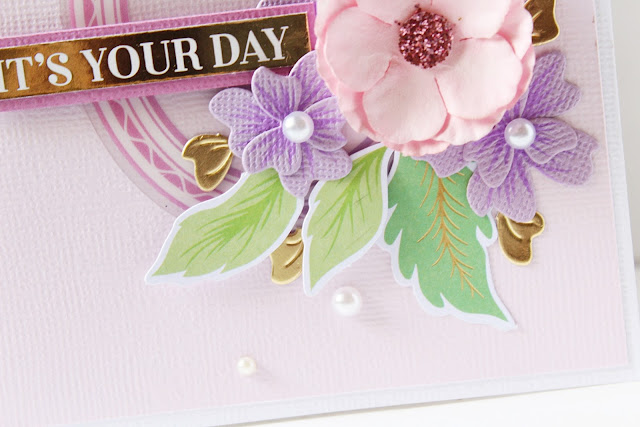
Here is a side view of the card to show you the dimension. This card came together in no time, and every single element on this card is from the kit. (They even include foam squares and foam tape in the kit, so there is no need to even use your own adhesive. Isn't that so awesome!)

Moving on to card number two. The colours I have used on this one are not something I work very often with, so it was nice to work with these colour tones :)
I again started with an A2 white card base. I layered a purple pattern paper over it, and then again layered a teal cardstock over the pattern paper.
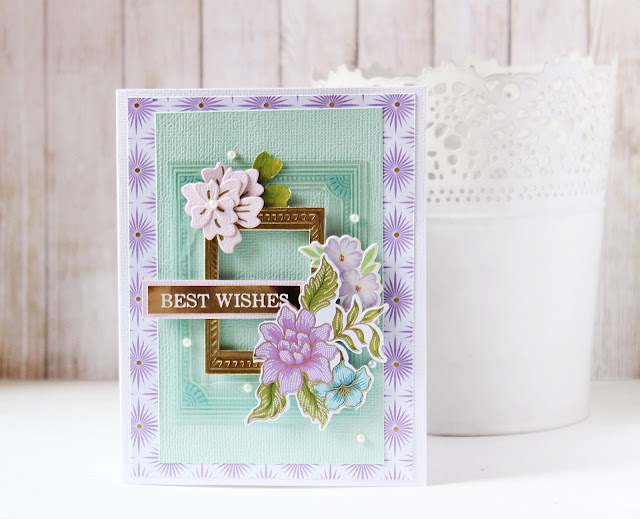
For this card, I first added the clear acetate sticker on the panel and then die-cut a rectangular frame using the die included in the kit. It was cut using gold foil cardstock ( included in the kit). I popped the frame on foam dots for some dimension.

Next, I adhered two die cuts to create my focal on the right hand side.

For my focal on the left hand side, I die-cut the florals using the flower dies in the kit out of mauve cardstock. I also added some hand-painted green leaves.

The sentiment is again a gold foil sticker, and was matted on pink textured cardstock. Added a few pearls and this card was done!

My final card using this kit. This one is a bit different from the other two cards, as I have mixed in handmade flowers as well as die cuts.
To create this card, I created my own card base using the white textured cardstock included in the kit. Next, I adhered a strip of pattern paper.

For the focal element of my card, I die cut the heart frame multiple times from white cardstock and stacked them one on top of the other to create a raised look. In the center of the frame, I adhered a die cut piece. I also added two gorgeous floral die cuts to compliment the frame. If you see closely, you will find that I have tucked in an acetate doily behind my floral pieces.

I adhered a gold foil banner below the heart frame. It was die cut using the banner die included in the kit. The sentiment is a gold foil sticker which was matted on black cardstock.

I also made my own handmade flowers using the flower dies from the kit. I die cut them out of white cardstock, colored the centers using inks, and embossed them to give them dimension. I then added pearls to the centers of each flower. The green fillers were also made in the same way. You can see the foil on the leaves and the sticker in this picture.

To finish off the card, I adhered three hearts which were left over bits after die cutting the circle heart frame. Don't they look so pretty?!

I still have a lot of elements left over from the kit and could easily create another 4 - 5 cards using them. Each kit is very well designed and would work for all style of cardmakers. I encourage you to check out this month's card kit which you can find on the Spellbinders website HERE. Below is a picture the contents of the kit. Picture has been taken from the Spellbinders website only for reference.
 Before you go, I wanted to share pictures of the card kit which have been clicked by me :) The kit comes beautifully packaged, in a sturdy cardboard box. Here's how it looks :

And here's a look at the contents. Didn't I mention earlier that the kit is full of gorgeous things! :)

That's it from my side for today. I hope you like the cards I shared. I would love to hear if any particular card is your favourite! Thank you for stopping by!
I am very excited about today's post as this is something I have never worked with before. I have always been fascinated with the idea of Card Kits and when Spellbinders reached out to me to ask if I would be interested to create some cards using their March Card Kit, I was really thrilled. The March Card kit is available for purchase on the Spellbinders website and you can find it HERE. The kit is jam packed with lots of dies, cardstocks, pattern papers, card bases and matching envelopes, and gorgeous embellishments. You can create 10 or more cards with each kit and they are absolute value for money!
Here's a look at my cards using it.
I will talk about each card one by one. Let's start with card number one. This also happens to be my favorite out of the whole lot :D
To start with, I took one of the pre-scored A2 card bases included in the kit. Next, I layered a piece of pink cardstock on the card base. I then pulled out some coordinating embellishments which would work for my card design. I absolutely love clustering florals, and it was really fun to coordinate the different elements together.

I first adhered the clear frame sticker and then added the central pink flower over it. I love how they have included a mix of handmade flowers as well die cut ones in the kit, so you have a lot of variety. Also as you can see, the sentiment has a gold foil finish to it. Foil is always difficult to photograph as it never shows up well in pictures :(

I then added a big die-cut piece above the pink flower. To add some more layering to my flowers, I adhered few flowers which were die-cut from purple textured cardstock using the mini flower die included in the kit. I also added some green leaves to complete my cluster.

Next, I added bits of the flower petals as accents to further embellish my card. They were also cut using the same flower die from gold foil cardstock.

The sentiment was a gold foil sticker included in the kit, which was then matted on to some purple cardstock, again from the kit itself. To finish off my card, I add few white pearls.

Here is a side view of the card to show you the dimension. This card came together in no time, and every single element on this card is from the kit. (They even include foam squares and foam tape in the kit, so there is no need to even use your own adhesive. Isn't that so awesome!)

Moving on to card number two. The colours I have used on this one are not something I work very often with, so it was nice to work with these colour tones :)
I again started with an A2 white card base. I layered a purple pattern paper over it, and then again layered a teal cardstock over the pattern paper.

For this card, I first added the clear acetate sticker on the panel and then die-cut a rectangular frame using the die included in the kit. It was cut using gold foil cardstock ( included in the kit). I popped the frame on foam dots for some dimension.

Next, I adhered two die cuts to create my focal on the right hand side.

For my focal on the left hand side, I die-cut the florals using the flower dies in the kit out of mauve cardstock. I also added some hand-painted green leaves.

The sentiment is again a gold foil sticker, and was matted on pink textured cardstock. Added a few pearls and this card was done!

My final card using this kit. This one is a bit different from the other two cards, as I have mixed in handmade flowers as well as die cuts.
To create this card, I created my own card base using the white textured cardstock included in the kit. Next, I adhered a strip of pattern paper.

For the focal element of my card, I die cut the heart frame multiple times from white cardstock and stacked them one on top of the other to create a raised look. In the center of the frame, I adhered a die cut piece. I also added two gorgeous floral die cuts to compliment the frame. If you see closely, you will find that I have tucked in an acetate doily behind my floral pieces.

I adhered a gold foil banner below the heart frame. It was die cut using the banner die included in the kit. The sentiment is a gold foil sticker which was matted on black cardstock.

I also made my own handmade flowers using the flower dies from the kit. I die cut them out of white cardstock, colored the centers using inks, and embossed them to give them dimension. I then added pearls to the centers of each flower. The green fillers were also made in the same way. You can see the foil on the leaves and the sticker in this picture.

To finish off the card, I adhered three hearts which were left over bits after die cutting the circle heart frame. Don't they look so pretty?!

I still have a lot of elements left over from the kit and could easily create another 4 - 5 cards using them. Each kit is very well designed and would work for all style of cardmakers. I encourage you to check out this month's card kit which you can find on the Spellbinders website HERE. Below is a picture the contents of the kit. Picture has been taken from the Spellbinders website only for reference.


And here's a look at the contents. Didn't I mention earlier that the kit is full of gorgeous things! :)

That's it from my side for today. I hope you like the cards I shared. I would love to hear if any particular card is your favourite! Thank you for stopping by!


Beautiful cards Huseena!
ReplyDeleteEach card is gorgeous love the blend 😘
ReplyDeleteCheers
You have used the Spellbinders kit Beautifully Hussena! It's always a brighter day when Your cards show up in my blogy stream:))
ReplyDeleteThese are so beautiful !
ReplyDeleteWhat a treat!! Gorgeous cards they are! And the first one is my fav too 😍
ReplyDeleteYou did a gorgeous job showcasing what you can do with this kit!!
ReplyDeleteWOW WOW WOW these are beautiful and so so gorgeous. I love every single detail. You totally nailed this!
ReplyDeleteBeautiful cards..
ReplyDeleteHugs
Mukta