Saturday, March 29, 2014

A Glittered and Stenciled Congrat's!

Hi friends!
I am back again :D And, this time I am sharing another stenciled card today. Stencils are SO in trend right now and there are so many different options of using them. The Pinterest board seems to be full of different types of stenciled card and projects and I was really inspired by Jennifer McGuire's recent post on using stencil embossing paste and embossing powders to create a glittered background. This is such a quick and easy way to make an ornate background for the cards. I really loved it a lot and this is my first try doing it. It definitely needs a lot of improvement but I just wanted to share my first trial here :)
So, here's a look :
                                                               

Since, I wanted to keep the background as my main focus,I have limited my embellishing to just that one flower and a few pearls and of course the glittered strip bordering the stenciled background and the black cardstock. I  have also stamped and embossed my sentiment using silver embossing powder. The flower is handmade using punches and I have also distressed the embossed piece with Scattered Straw and Antique Linen Distress inks to co-ordinate with the golden embossing powder!

Supplies used :
Base cardstock -Fabriano Elle Erre!
MFT Fancy Flourish, Jef punches.
Stencil -Memory Box Rhapsody stencil, Sakura Acrylic Modelling Paste.
Versamark Dazzle Watermark stamp pad, Ranger Super Fine Gold and Silver Embossing powders.
Distress inks- Festive Berries, Scattered Straw, Antique Linen.
The Paper Company All Occasion messages stamp set.
Pearls and glitter strip.

Challenges entered :
Color Conceptions -Glam with Glitter ( Made it to Top 3 )
PPS -Clean and Simple
Moxie Fab World -Styling with Stencils

Hope you like my attempt at a CAS card. Any comments/suggestions are welcome :D
Have a nice day everyone!

Friday, March 28, 2014

Heartfelt Wishes!

Hi friends!
I am posting after a long time. I have been busy with my children's exams and also was down with fever and an eye infection. So, I was not very active in the blogland but I will be catching up with you soon :)
Well, today I am sharing a card which I made as an inspiration for the Lulupu blog where we are celebrating Lulupu's 2nd birthday this whole month with some really amazing prizes up for grabs.
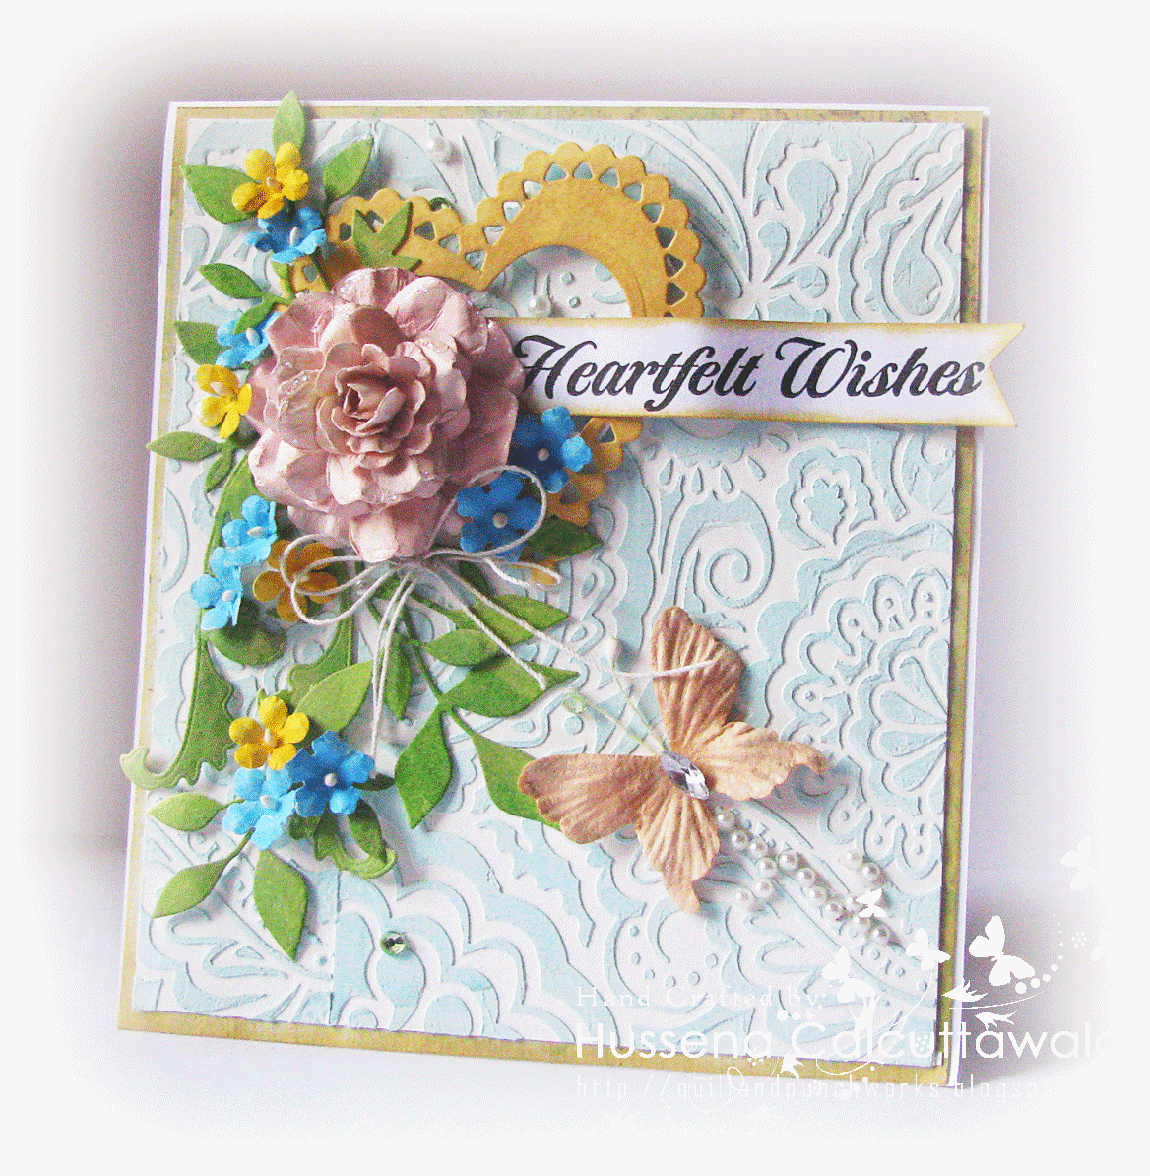
Here's a look at my card which I have shared there as well!
                                                                 

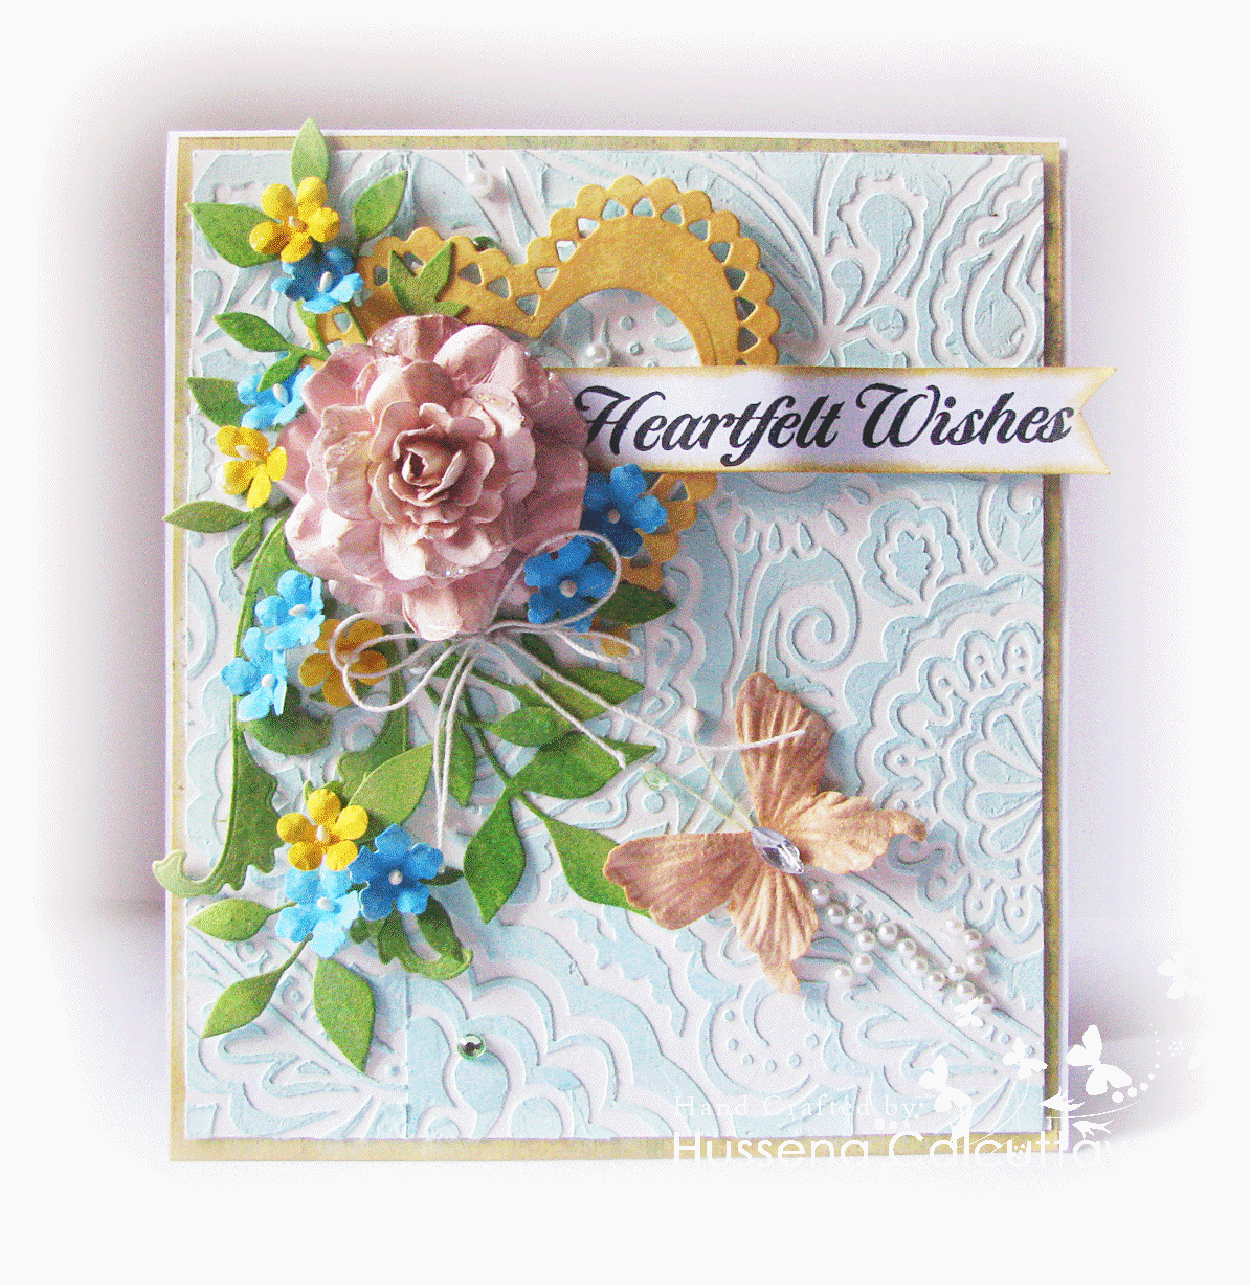
I have created the base of my card using Memory Box Rhapsody stencil and Modelling paste to which I have added a little bit of Distress Stain- Salty Ocean. This gives such a nice tinge of color to the stenciled area. The central pink flower is handmade and so are the filler's. I have shared a TUTORIAL for the flower on the Lulupu blog. Please do check it out!
To create my card, I have followed the sketch from Cardabilities. I really loved the sketch this time and wanted to play along with them.

Challenges entered :
Word Art Wednesdays - Anything Goes
Kaboodle Doodles- Dreaming of Spring
Fussy and Fancy -Shabby chic

Hope you all like my card. Do leave me your comments. Would love to hear from you!
Have a nice day everyone!

Tuesday, March 4, 2014

An altered NINE Drawer Box :)

Hi friends,
I am sharing an altered nine drawer box with you all, today! Recently, I have been working on different types of projects other than cards, that is. When I received this gorgeous package from Craftslane in January, it contained some of the most beautiful drawer boxes, papers, embellishments and lot more! it's taken me quite a bit of time to work on this box, but finally here it is  :) I have gone very pastel this time. The soft, shabby-chic colors look so beautiful in real life. Unfortunately, the camera does not capture these soft colors so well. Rather than my talking about it, why don't I show what I have made.  :
                                                               

Here's various views of the box :


For this box, I have used the Papermaina 6X6 Vintage Notes paper pad. from Craftslane. All those small die-cuts are from the same pack. This makes working so much easier, as you have already got a color-coordianted die-cut sheet along with the colors, designs and patterns very easily. Craftslane really do stock some really amazing things like MDF Boxes, Paper pads, Flowers and Dies. The small mulberry flowers are also from their store!
This box is completely hand-painted, though I have to admit that I have not done a perfect job of it. Definitely, need more practice! I have decoupaged pattern papers on the top and the sides as well as on the drawers using Mod Podge glue. The flowers on the top are all handmade, and I have done stenciling on the sides of the box using Sakura Modelling Texture Paste and Distress re-inker -Spun Sugar and the Prima Damask Stencil of-course.

Supplies used :
Dies : Cheery Lynn Fanciful Flourish, Cheery Lynn Olive branches, Cheery Lynn Mini Polynesian Doily die and Joy! Crafts Flower dies.
Camlin Acrylic paints, Mod Podge

Challenges entered :
Itsy Bitsy - Say it with Roses Winner! )
Cheery Lynn -Doilies ( I have used the Cheery Lynn Fanciful Flourish, Cheery Lynn Olive branches, Cheery Lynn Mini Polynesian Doily die. )
The Craft Garden - Pastels
Rhedd's Creative Spirit : March Challenge Altered.

I hope you all like my project! Do leave me your comments/suggestions. Would love to hear from you :)
Have a nice day everyone!

Saturday, March 1, 2014

An Altered Photo Frame!

Hi friends,
Today, is  the first day of a new moth, and we have a very exciting challenge at Lulupu as this is also the second birthday celebration of the Lulupu store! And, here is what I have crated for this month's inspiration. It's a photo-frame which I have altered. I am sorry, I completely forgot to take the before pictures to show what this frame looked like before. Trust me, you would have been surprised to see the transformation.

                                                                           
A closer look at the blooms which are handmade :
 I have worked on the frame from scratch. This was a very plain white and red photo-frame. I first added two layers of Gesso on the base and then, applied two coats of Camlin teal color on it. This helped cover the base design completely and once it was dry, I took the Prima Designer stencil and the Sakura Modelling Texture paste and mixed some drops of the Distress Stain -Spiced Marmalade to it and applied it all over the sides of my frame to create the damask design on my frame!
I think it gives a beautiful, rich look to the frame and by adding the color to the texture paste there is a small hint of orange showing in the stenciled design! The flowers on my frame are all handmade and they are made by using the Distress Re-inker Spiced Marmalade and water added to a Mini Mister and sprayed directly on paper! Does'nt it give a vibrant look :)
The corners and the golden leaves on the frame are all made with die-cuts covered with UTEE and heat-embossing it. If you want to see how I made the corners using UTEE, here's the LINK to the tutorial that I shared on the Rainbow Craftykari blog!

Supplies used :
Dies - Cheery Lynn Gardenia Strip, Cheery Lynn Flourish Leaf Strip,Spellbinder's Leaf Foliage die, Joy! Crafts Vintage Flourishes Corner die.
Distress Re-inker -Spiced Marmalade, Distress Inks -Shabby Shutters, Mustard Seed, Distress Stains- Mowed Lawn, Wild Honey.
Sakura Modelling Texture paste, Prima Damask Designer Stencil, Punched flowers, Gold Ultra Thick Embossing Enamel, Glossy Accents, Pollens and Pearls.

Challenges entered :
Cheery Lynn Designs- Flowers ( Have used the Cheery Lynn Gardenia Strip to make my flowers)
Itsy Bitsy -Say it with Roses 
Crafts 4 Eternity- Texture

I hope you all like my project! Do leave me your comments/suggestions. I would love to hear from you! :)