Wednesday, May 23, 2018

Spellbinders Guest Post Two | Romancing The Swirl

Hello everyone!
I am really excited and honoured to be guesting on the Spellbinders Paper Arts blog this month. I have two cards to share today I made using dies from the Romancing The Swirl collection by Amazing Paper Grace/Becca Feeken. This collection has some beautiful dies which are perfect for making shaped cards, and today I will be sharing one such card I made using these dies. Let's have a look at my card first:


To create this shaped card, I first took a sheet of White 8.5" X 11" heavyweight cardstock and cut the base of my card using the frame outline die from the Spellbinders Ringlet Round Etched die set. Once my card base was cut, I die-cut the lacy frame outline from the same Ringlet Round Etched die set, first from some white paper, next from some white fun foam, and lastly from gold mirror cardstock. I adhered all the three layers using liquid adhesive to form my card front. It is very difficult to capture the foil on camera, and in most pictures, it looks like I have used dark brown cardstock, but that's not the case :(

Next, I wanted to add some pink polka dots pattern paper to the center of my card front. I die-cut the pattern paper using the inside frame outline die from the same set, and then once again from white fun foam so that my pattern paper would have a raised look.

To further accentuate my design, I added a elegant frame which was cut from gold mirror cardstock, and adhered onto my pattern paper. This die is also from the same set I used to create my card base - Spellbinders Ringlet Round Etched die set. Each and every die in this entire collection is so thoughtfully designed, and all the dies coordinate with each other so beautifully! 

Once I adhered my frame, I wanted to add a sentiment to my card. I decided to use the Nestabilities Curvy Labels Etched dies for my sentiment piece. I stamped my sentiment using Versafine Onyx Black ink on the die-cut piece, lightly inked the edges using pink dye ink and popped the piece on foam tape for dimension.

It was now time to embellish my card, which also happens to be my most favorite part while making cards. :) I first made a bow from some White Seam Binding Ribbon and adhered it to the left side of my card, because I knew I would be placing my floral cluster over it, and I just wanted a little bit of the ribbon to show through. For making my handmade flowers, I used Foamiran sheets with the Card Creator A2 Corner Cotillion Dies set. I die cut both the flowers and leaves from white Foamiran sheets. I also cut some extra flowers so that I could create my own filler flowers.

The central flower was made by lightly inking the centers of the die cut pieces using pink dye ink, and then heating them with the help of an iron to give it a fuller look. I also added a bunch of thread pollens to give it a more realistic touch. I lightly inked the leaves using a green dye ink and heat set them so that they would have a curled look. I adhered everything  on my card base with the help of a Hot Glue Gun.

I used the exact same techniques for creating my filler flowers. This time I used lesser number of die cut pieces so that the flowers wouldn't be as big as my main flower.

Here's a closer look at the fillers. I also added some white shimmery buds for my flower foliage.

The flowers add lots of dimension to this card, and I love how beautiful they look against the gold mirror cardstock.

Here's a final look at my card. I love how unique and elegant this die is, and it surely can be used for creating lots of other projects too other than cards.


My second card for today incorporates lots of layering. Here's a look at it:

To create my card, I first took a pre-scored and cut A2 white card base. I wanted my card front to have a nice and elegant card frame, so I decided to go with the large panel pattern die from the Card Creator A2 Corner Cotillion Dies set. I cut the die from regular white cardstock. I then adhered some blue textured cardstock behind my frame so that the intricate pattern would show up clearly.

I wanted to have an intricate design behind my Hemstitch Circle piece, so I decided to stretch my frame pattern die from the Flourished Square Etched die set to come up with this design on the top and bottom of my card. I die cut it from gold mirror cardstock and then snipped the die cut into four pieces so that I could tuck in two pieces behind the circle die cut.
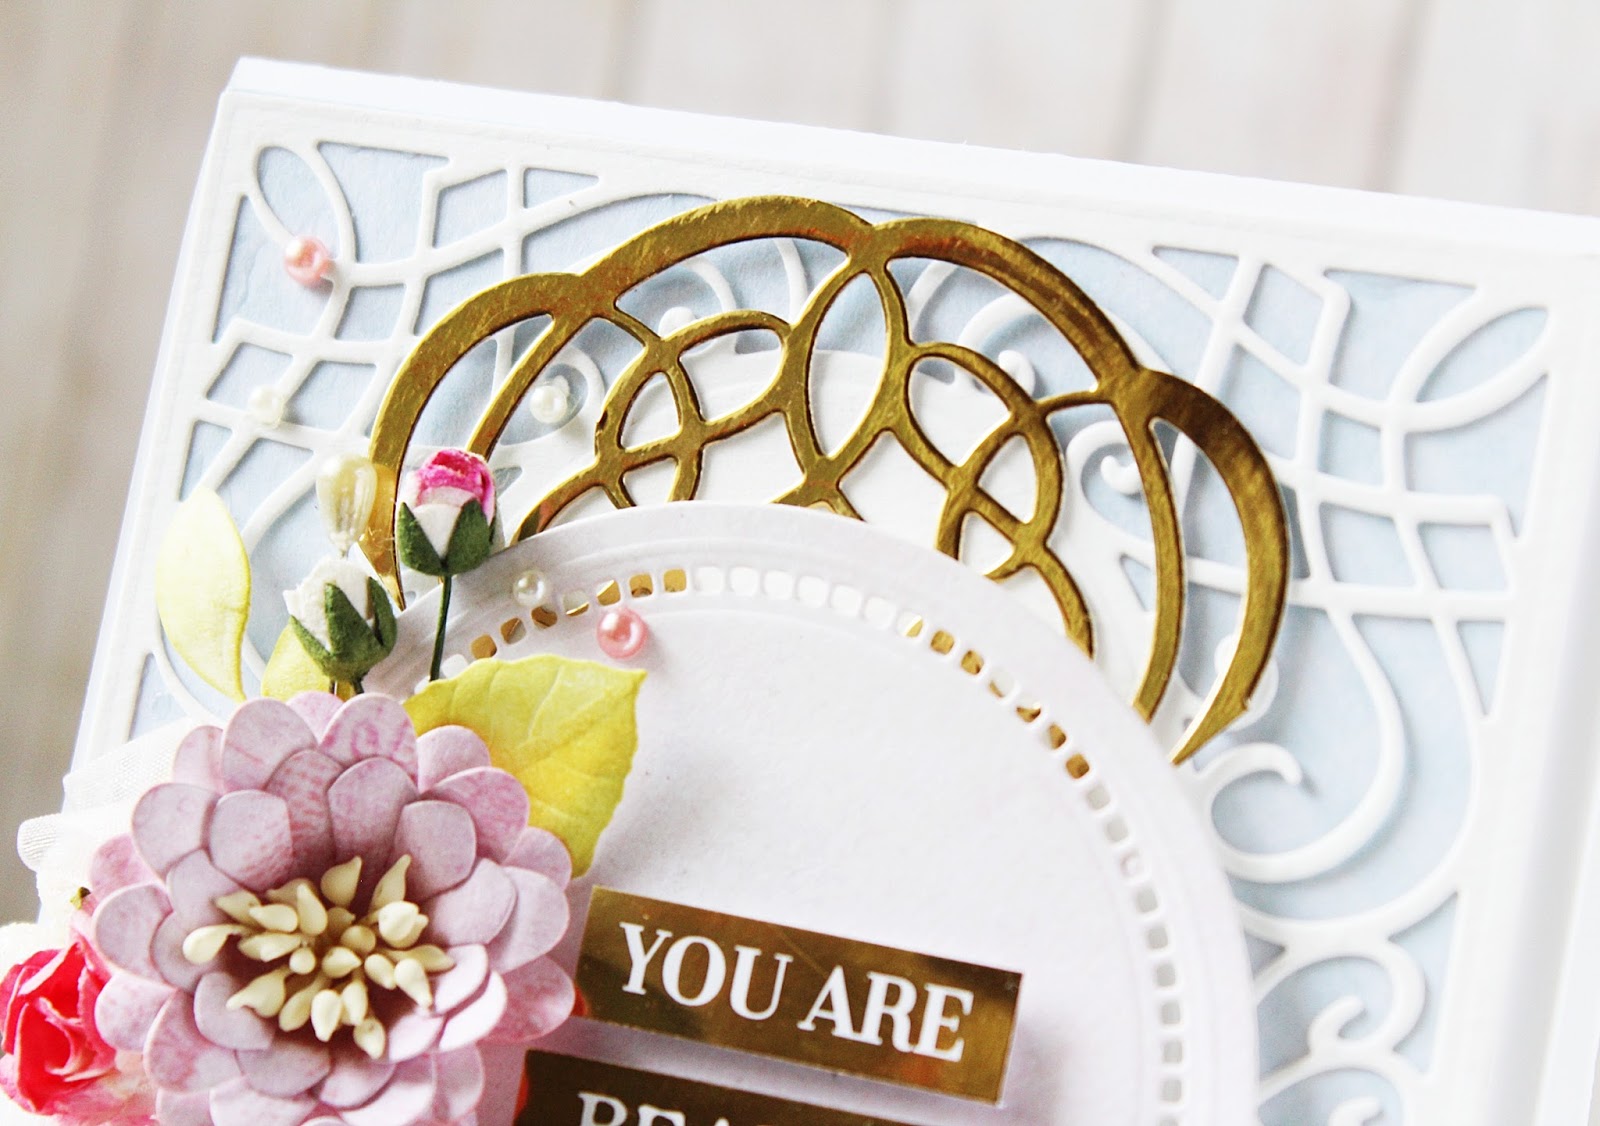
Once I adhered the two pieces, I die-cut the hemstitch circle 2 from the Hemstitch Circles Etched dies using white cardstock. I also added two foil stickers to the center of the circle to create my own sentiment.

This time instead of using Foamiran sheets, I die cut the flowers from patterned paper to give it a vintage look. I used the Card Creator A2 Corner Cotillion Dies to cut my flowers and leaves. The leaves were cut from White Foamiran and inked using a green dye ink. I also added some cream pollens to the centers of my flowers.

For my foliage, I used organza ribbon, a dark pink mulberry flower and some pink fillers.

I also added a white hatpin, and rose buds. To complete the look of my card, I decided to add some pearls in pink and white too!

I like the look of the organza against the pink vintage flowers. What do you think?


Spellbinders supplies used :
S4-930 Nestabilities Curvy Labels Etched Dies
S4-928 Nestabilities Hemstitch Circles Etched dies
S5-364 Card Creator A2 Corner Cotillion Dies
S5-367 Shapeabilities Flourished Square Etched die set
S5-369 Shapeabilities Ringlet Round Etched die set
PE-100 Platinum 6 Die Cutting and Embossing Machine - 6" Platform
T-001 Tool' N One


Other supplies used : Neenah Solar White 110 LB cardstock, American Crafts Colored 12×12 cardstock, White 80 LBS Cardstock Sheets, Gold Foil Cardstock, Papericious Ephemera 12" X 12" pattern paper, White Foamiran sheets, White Fun Foam; Stick It Double Sided Adhesive Sheets; Adhesive: Scrapbook Adhesives 3D Foam Squares, Tombow Mono Multi Liquid Glue, Double Sided Foam Tape; Versafine Onyx Black Ink Pad, Distress inks, McGill Inc. Paper Blossoms Tool kit, Mulberry flowers, Micro Rose Buds, Organza Ribbon, Seam Binding Ribbon, Thread Pollens, Fillers, Pearls.


Thank you so much, for taking out time and reading my post. I hope I could inspire you with my creations. Have a great day ahead.

Spellbinders May 16th Blog Hop | Winner


Hello everyone!
I'm here to announce the winner from the Spellbinders May 16th Blog Hop. I apologize for the delay in announcing the winner, but better late than never, right? :) Thank you so much for leaving such lovely comments on my post. I am so happy to know you liked my gift box.


I used random.org for selecting the winner.


The lucky winner is 
.
.
.


Congratulations to you, Anila! Please e-mail Spellbinders at socialmedia@spellbinders.us with the subject line Spellbinders May 16th Blog Hop Winner from Hussena's blog to claim your certificate.


Thank you once again, everyone.

Wednesday, May 16, 2018

Spellbinders May 16th 2018 Blog Hop


Hello everyone!

I am really excited and honored to be a part of the Spellbinders blog hop today. You must have come here from the super talented, Elena Salo's blog. If not, I do have the full blog hop list at the end of the post, so you can start the hop from the beginning. We are showcasing two new amazing collections from Spellbinders today: 


I have a gift box to share today which I created using the dies from the Romancing The Swirl collection by Becca Feeken. If you'd like to see more project examples using this collection, you can check out my posts on the Spellbinders blog HERE, HERE, and HERE.

I wanted to create a simple and elegant gift box featuring these dies. Here's a look at what I have made:

To create this gift box, I first took a sheet of 12" X 12" baby pink cardstock, and cut it into two pieces measuring - 6 1/2" by 7 1/2". Once my pieces were cut, I scored the 61/2" paper edge at the top of my scoreboard at 4 inches and 6 inches respectively. For my 71/2" paper, I scored the top at 5 inches and 7 inches.

To create the lid of the box, I used gold foil cardstock. I die-cut the centre of the paper using the Flourished Square Etched dies. (I die cut the paper before scoring and folding it to create my lid). I used the frame pattern die to create the delicate pattern on the edge of my lid.

The back of the box looks like this. I wanted to keep it simple, hence didn't embellish the back side.

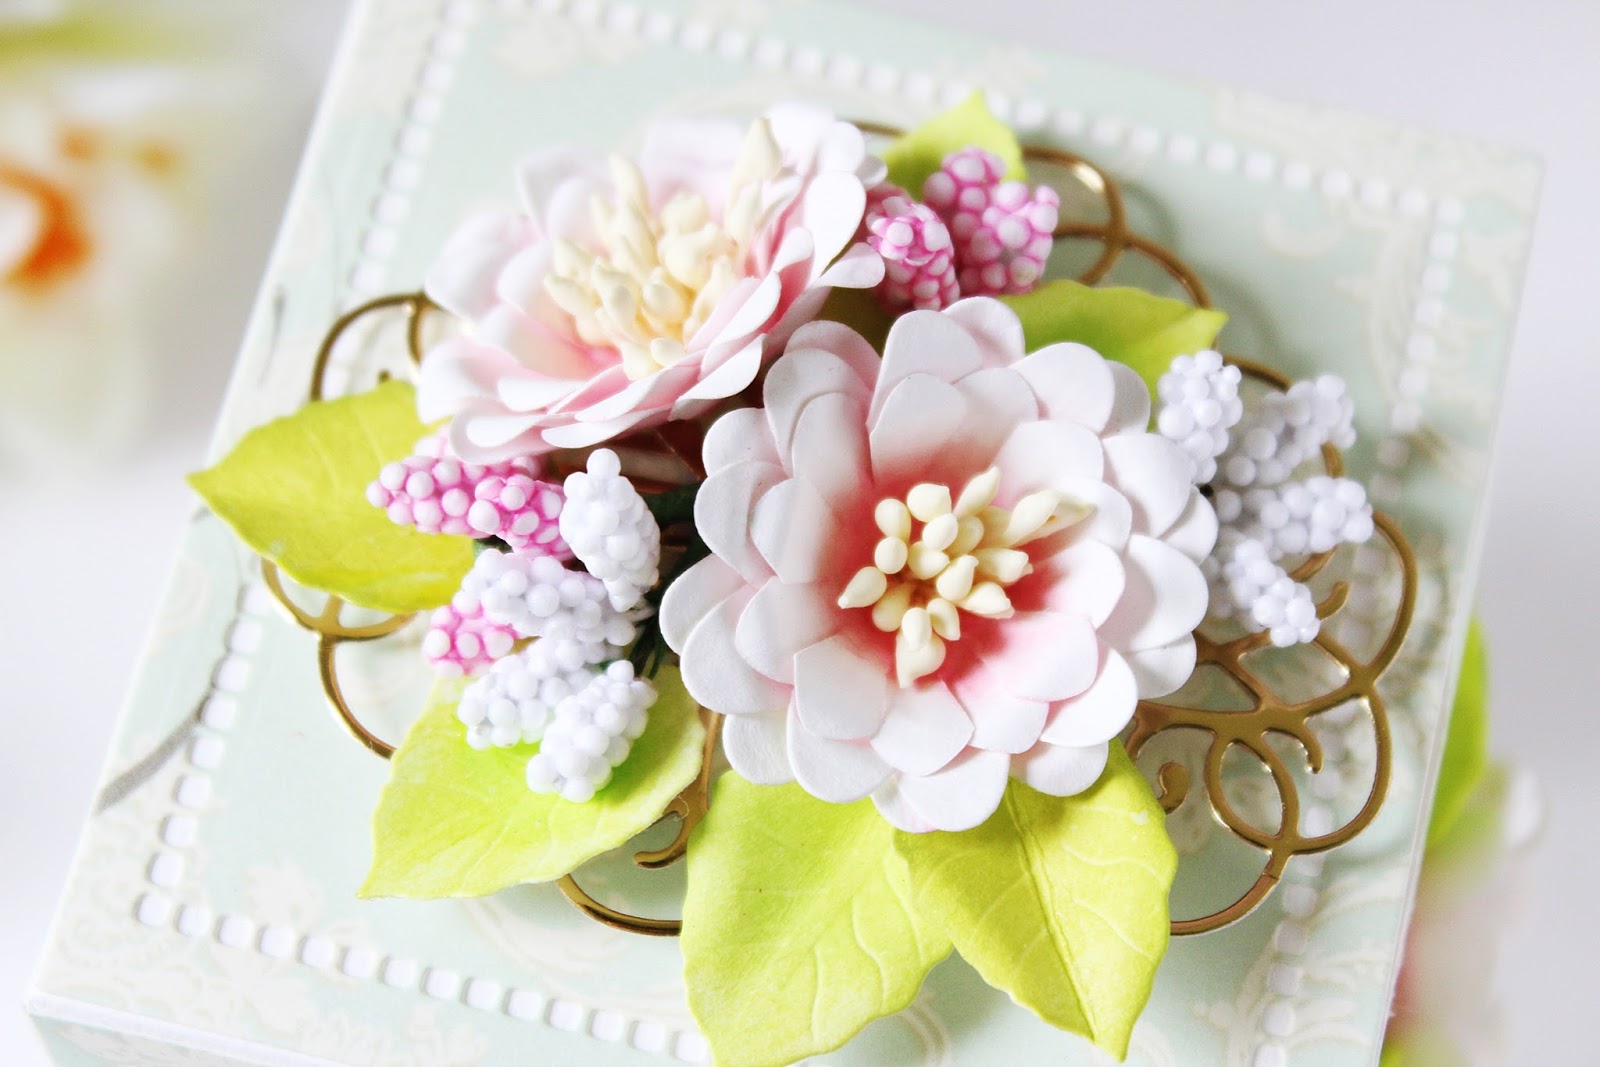
I decorated my lid with some handmade Foamiran flowers made using the flower dies from the Card Creator A2 Corner Cotillion Dies. I cut the flowers from white Foamiran sheets, inked the centres using a light pink dye ink, and added a bunch of cream thread pollens to the centres of the flowers to give them a more dimensional and realistic look. The leaves were cut from Olive Foamiran using the leaf die included in the Cinch and Go Flowers III Etched dies set.

The tiny white filler flowers that you see were made using the flower dies from the Happily Ever After Etched dies which is an older die set from Amazing Paper Grace. I cut them from white Foamiran sheets, inked the centre of the flowers using a purple dye ink, and added white wired pollens in the centre to create my own filler flowers. I love how you can mix and match various dies from Becca's collections, and they look so well together! I also added a light pink paper bow to behind my floral cluster. I used the Petite Double Bow and Flower Etched dies to create my paper bow.

Here's a picture showing you the flowers from the other side of the box. These are quite dimensional as you can see for yourself.

Here's how the gift box looks without the lid :) I have done minimal embellishing on the front so that the lid remains the highlight of the project! The pink lacy die cut behind my floral arrangement was die-cut using the ringlet accent die from the Ringlet Round Etched dies set. 

Here's a closer look at the flowers. I LOVE making Foamiran flowers and they are my latest addiction. Do you love them, too? I think they look so soft and pretty!


Giveaways
To celebrate this release, Spellbinders is giving away a $50 gift certificate to a lucky winner. Please leave a comment on Spellbinders blog by Sunday, May 20th 11:59 pm EDT for a chance to win. The winner will be announced in this blog post on the following Monday. Winner is responsible for shipping cost, duties and taxes.

Additional Giveaway:
Spellbinders has very generously allowed me to giveaway a $25 gift certificate to the Spellbinders store. For your chance to win, please leave me a comment below. I will announce the lucky winner on my blog on 20th May, 2018. The winner will be responsible for shipping cost, duties and taxes.


Blog Hop Order:

                            Hussena Calcuttawala >> (You are HERE!)

The next stop on the blog hop is Olga Direktorenko's blog. Click HERE to go to her blog.


Thank you so much for stopping by my blog! I hope you enjoyed seeing what I have made. If you did, please do leave a comment below letting me know that you did! I hope you have a wonderful day ahead!

Monday, May 14, 2018

Guest Post for Spellbinders | Romancing The Swirl

Hello everyone!
I am really excited and honoured to be guesting today on the Spellbinders Paper Arts blog. I am sharing two projects I made using the dies from the Romancing The Swirl collection by Amazing Paper Grace/Becca Feeken. This is another spectacular collection from Spellbinders with amazing Nestabilities shapes, tags, and intricate dies. I have made a paper gift box and a card for today's post. I will start with the gift box first:

The entire gift box is completely handmade using White cardstock and the Swirl Booklet Insert dies from the Romancing the Swirl collection. I have always loved working with Becca's dies because of the endless possibilities they offer! They are extremely versatile, and can be used for a number of different projects. I used the Booklet Insert die to die-cut and create a gift box, and doesn't it look so gorgeous!?

To create this gift box, I took some 80 LBS White cardstock and die cut four panels for the box using the Swirl Booklet Insert die. Once I die cut the four sides of the box, I glued everything together to create a box. If you are interested in knowing the full step by step tutorial for creating a gift box like the one I have made today, please be sure to check out THIS tutorial from Joanna Krogulec. I have followed her measurements to create this gift box. I have used acetate to line the insides of the box instead of vellum as I wanted to convert this into a gift box.

To embellish the front of the box, I die cut the flowers using the flower dies included in the Card Creator A2 Corner Cotillion Dies out of white cardstock. I also added a label behind the flower from the Shapeabilities Swirl Tags Etched die set which was cut from gold mirror cardstock. The leaves are also from the Card Creator A2 Corner Cotillion Dies set and are coloured using the Ranger Twisted Citron Re Inker.

I wanted this box to have a shabby chic feel, so I decided to go with a very soft, pastel color pattern paper for the lid of the box. I die cut the patterned paper using the largest square die from the Nestabilities Hemstitch Square Etches dies.

For my floral cluster, I first die cut a very delicate motif from the Swirl Booklet Insert Etched dies using gold mirror cardstock. I snipped the die cut piece into half so that I could place it behind my floral cluster in a way that it would be seen. Next, I started working on my flowers and leaves. I absolutely love making my own flowers, and hence decided to use the flower dies from the Card Creator A2 Corner Cotillion Dies set to create my florals. I die cut them from white heavy-weight cardstock, embossed them, and lightly colored the centers using a pink dye ink. To complete the look the flowers, I added cream color thread pollens to the centers.

I also added some artificial fillers in white and pink to accentuate my design. For the leaves, I used the leaf dies included in the Card Creator A2 Corner Cotillion Dies and colored them using Ranger Twisted Citron Re-inker. I love the fresh, springy look of the leaves.

This is how the gift box looks from the sides.

The die cut is really intricate and looks so elegant and beautiful!
 
Another view of my floral cluster :)

This is how the box looks without the lid.

And here's a final picture of the box and the lid together. I think this would make for such a wonderful gifting piece, and is sure to bring a smile on the recipient's face. What do you think?


Moving on to my second project for today which is a floral card. To create this card, I first took a card base measuring 4 1/4 by 5 1/2 inches. Then, I matted some pink textured cardstock onto it. Next, I die cut a frame using the large frame die from the Card Creator A2 Corner Cotillion Dies from Gold Mirror cardstock. The design looks very bold and gorgeous, and I am absolutely in love with it.

To create the focal of my card, I first ink blended the negative space of the Card Creator frame die using Distress inks in shades of pink. I also heat embossed my sentiment in gold which is from the Oh Happy Day 3D Vignettes Stamp and Die set collection.

I also ink blended and added two die-cut pieces on the top and bottom of the sentiment. The die I used is from the Swirl Booklet Insert Etched dies, and I think it looks really good with the rest of the design.

To create the floral cluster on the left side of my card, I used the same die cutting and embossing techniques I used on my gift box. I die cut the flowers from white heavy-weight cardstock, embossed them, and lightly colored the centers using a blue dye ink. To complete the look the flowers, I added cream color thread pollens to the centers.

To further embellish my card, I added few rose buds in pink, and fillers in pink and white.

I also created my own handmade fillers by die cutting the smallest flower die from the Card Creator A2 Corner Cotillion Dies and colored them using blue dye ink. For the centres, I used a round, white styrofoam bud, coloured it using red dye ink, and covered it with micro pearl beads.

Here's a view of the complete floral arrangement.

I love how the flowers turned out! Here's a closer look at one of them.

This is how my final crd looks. I hope you like it! :)


Spellbinders supplies used :
S4-926 Shapeabilities Swirl Tags Etched Dies
S4-929 Nestabilities Hemstitch Squares Etched Dies
S5-363 Shapeabilities Swirl Booklet Insert Etched Dies
S5-364 Card Creator A2 Corner Cotillion Dies
SDS-116 Oh Happy Day Elegant 3D Vignettes Stamp and Die Set
T-001 Tool' N One
PE-100 Platinum 6 Die Cutting and Embossing Machine - 6" Platform


Other supplies used : Neenah Solar White 110 LB cardstock, American Crafts Colored 12×12 cardstock, White 80 LBS Cardstock Sheets, Gold Foil Cardstock, White Fun Foam; Stick It Double Sided Adhesive Sheets; Adhesive: Scrapbook Adhesives 3D Foam Squares, Tombow Mono Multi Liquid Glue, Double Sided Foam Tape; Versafine Onyx Black Ink Pad, Distress inks, Distress Re-inkers, McGill Inc. Paper Blossoms Tool kit, Thread Pollens, Fillers, Micro Pearl Beads.


Thank you so much, for taking out time and reading my post. If you liked my projects, please do leave me a comment below. I always love to hear what you think of my projects. :)

Have a nice day everyone!

Thursday, April 5, 2018

Altenew’s 4th Anniversary Blog Hop Day 3 + Giveaway

Hello everyone,
I am so excited to be joining Altenew today for their Fourth Anniversary Blog Hop. You should be here from the awesome, Sara Naumann's blog. If you are starting the hop from my blog, then no worries. I do have the full blog hop list at the end of my post.

I have been following Altenew right since the time they started their venture back in April 2014, and have been, and still am a huge fan of all their products, especially their unique and one-of-a-kind layering floral stamps, dies, and inks. Altenew is, undoubtedly, my most favourite stamp company ever and I always look forward to seeing what they bring in each month in their releases. I am so happy and excited to be a part of today's hop and have a Home Decor project to share I made using supplies from Altenew.

To create my project, I first started with a 10" X 10" MDF Shadow Box from Papericious. I primed the entire Shadow Box using White Gesso and Natural White Chalk Paint, again from Papericious and let it completely dry. Next, I used the French Blue Chalk Paint to create some watercolor stripes on my shadow box. I used strips of masking tape while painting in between the stripes, so that the paints wouldn't seep.

I wanted to create a framed border, and so I stamped the entire border of the Shadow box using various leaves and berries from the Altenew Golden Garden set using Black Archival ink, and I lightly coloured in the berries using the same blue chalk paint. I did this for all four sides of my shadow box.

It was now time to create focal of my project. I used my all time favourite Altenew Build-A-Flower: Rose stamp and die set to stamp and die-cut the two pink roses. This stamp set has six layers for the rose, and it's always a challenge to get all the layers correct, and that's what fascinates me the most about this set! Even though it's challenging to get all the layers aligned correctly, the end result is totally worth it and has a wow factor! I used the Cherry Blossom and Rose Petal inks from Altenew to stamp the roses.

The small white flower bunches and green leaves are also from the Altenew BAF Rose set. I stamped the leaves using Green Meadow inks from Altenew, and then used the coordinating die to die-cut them.

I am a big fan of Altenew's meaningful sentiment sets, and this particular sentiment from the Sentiments & Quotes set is an all time fave of mine! I stamped it using clear embossing ink on black cardstock, and heat-embossed it using Super Fine Detail White embossing powder. The big rose bud on the top is from the Remember This stamp set. I stamped it using black dye ink, fussy-cut it and then coloured it using Zig markers.

Those of you who have been following my work for a long time would know that I love adding a lot of details to my projects. For this project too, I loved adding foliage from different stamp and dies from Altenew. I used the branch die from the Create-A-Wreath die set to die-cut the small branches with berries. I coloured them using dye inks. I also added few little flowers in pink from the Vintage Flowers set by Altenew. (Fun fact: The Vintage Flowers set was the first stamp set that I invested in from Altenew instead of the their highly popular Vintage Roses set. I didn't have a stamp positioning tool back then, and felt the Vintage Flowers set would be easier for me to tackle, but I was of course wrong! The flowers in this set took quite a bit of practice to master, but I think the end results are totally worth it.)

And here's a look at the design again! I wanted to create something different for this special occasion and am quite happy with the way this turned out. What do you think?

Would you like to see more such home decor projects from me or do you find my cards more inspiring? I'd love to hear what you think :)

Special Offer:
Altenew is having some special offers to celebrate their fourth anniversary! Get FREE U.S. shipping with code HAPPY4TH or $5 OFF international shipping with code ANNIV at checkout. Offer valid from April 3rd until April 8th at 11:59 pm EDT. Not valid on prior purchases. Cannot be combined with other promo codes.


Prizes:
Altenew is giving away a $50 gift certificate to 5 lucky winners and one Altenew Academy class to 5 lucky winners. There are also 13 awesome companies/crafty friends who are celebrating with us, and they are offering the following prizes:


Blog Hop Order:
The next stop on the hop is the amazingly talented, Kymona Tracey's blog.
Hussena Calcuttawala (You are HERE!)


Thank you so much for taking out time and leaving me a comment. I truly appreciate your support!