Showing posts with label Altenew Watercolor 36 Pan Set. Show all posts

Monday, July 25, 2022

Altenew Celebrating Watercolors Blog Hop + Giveaway ($300 in Total Prizes!)

Hello, crafty friends!
I am excited to be joining Altenew for their Celebrating Watercolors Blog Hop. We hope to give you some project inspiration and share creative ideas to use the  Altenew Watercolor Pan Sets for your projects. 

If you arrived here from, Tenia Nelson's Blog, then you are on the right track. If this is your first stop, then you will want to start at the beginning, the Altenew Card Blog. We've got tons of inspiration and giveaways for you on the hop today, so keep reading till the end of this post for more information.


Altenew's vibrant Watercolor Pan Sets are intensely pigmented, fade minimally when drying, and some colors have lovely granulating effects. These watercolors coordinate with their line of inks, are stored in convenient and travel-friendly cases, and some water color sets come with a free waterbrush! These are ideal for both beginners and seasoned crafters!

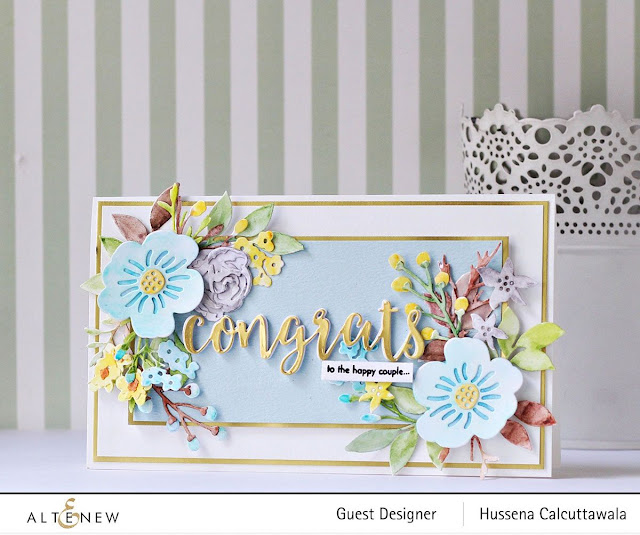
To create my card I first die cut my floral's and my foliage using watercolor paper as I wanted to color these diecuts with watercolors.I have loosely colored the flowers and leaves from three different sets from Altenew Layered Floral Elements Die Set, Bride To Be Stamp & Die Set, Itty Bitty Branches Die Set, Script Words 2 Die Set using the Altenew pan watercolor set.The color scheme i was going for for pastel blue with hint of yellow, gray,brown and green.I die-cut the sentiment fromScript Words 2 Die Set using the gold mirror card-stock from Altenew.I have used an rectangle blue cardstock to create my panel and arranged my floral's on the two edges of the panel to create a frame.I have then layered my blue panel on the gold mirror card-stock and then mounted it on a white panel base along with the gold mirror card-stock again and finally stuck the panel's on my white card-stock base measuring 41/2 inches by 71/2 inches card base.
To finish off my card I have die-cut the congrats sentiment from gold mirror card-stock and layered it with fun foam to give it dimension.I finally stamped the sentiment from the stamp set Paint -a -flower Magnolia Rustica Rubra using Altenew black pigment ink on a strip of white cardstock and foam mounyed it before placing it below the die-cut sentiment.


My third card features the Florescence Embossing Folder and the Hello and Hugs Die Set along with the Altenew Watercolor 36 Pan Set.

 Giveaway Prizes:

$300 in total prizes! To celebrate this release, Altenew is giving away a $50 gift certificate to 2 lucky winners and a $25 gift certificate to 8 winners! Please leave a comment on the Altenew Card Blog and/or each designer’s blog post on the blog hop list below by 05/29/2022 for a chance to win. Altenew will draw 10 random winners from the comments left on each stop of this blog hop and announce the winners on the Altenew Winners Page on 08/09/2022.


Blog Hop Order:
Next Stop on this Blog Hop is the wonderful, Nenette Madero's blog. Just in case you lose your place along the way, here is the complete list of participants so that you can find your way back:


Well, that’s all for my projects today! Thanks so much for stopping by and reading. I hope you have a wonderful day!


If you like what you've seen from me, please give me a follow over on my Instagram (@hussena_cal) and/or subscribe to my blog if you haven't already.

Thursday, May 12, 2022

Altenew Craft Your Life Project Kit: Florescence Release Blog Hop + Giveaway ($300 in total prizes)


Hello, crafty friends!
I'm ecstatic to be joining Altenew for the Florescence Release Blog Hop today showcasing the next installment in their monthly Craft Your Life Project Kit. If you are finding these kits irresistible month after month, you can always subscribe to ensure that you get first dibs on them when they’re released and, bonus, you get them at a discount with your subscription. Check out the details HERE.

If you arrived here from Daniel Diaz's Blog, then you are on the right track. If this is your first stop, then you will want to start at the beginning, the Altenew Card Blog. We've got tons of inspiration and giveaways for you on the hop today, so keep reading till the end of this post for more information.

The Craft Your Life Project Kit, is an exciting monthly package that is sure to get the creative juices flowing! Featuring a 6x8 stamp set, coordinating die set, as well as a stencil set and embossing folder to fit the theme, this project kit has almost everything you need to start crafting. Just add ink and cardstock, and you'll be good to go!

This Project Kit contains the following exclusive products:

  • One 6" x 8" Clear Stamp Set containing 18 stamps made in the USA from high-quality photopolymer
  • Coordinating Die Set with 1 Coordinating Die
  • One simple Coloring/Mask Stencil Set containing 4 Stencils which coordinate with the Stamp Set
  • One 6x6 3D Embossing Folder

Note: These products are NOT sold separately. The stencils coordinate with the embossing folder.


Enjoy floral florescence with stunning flowering blooms with the Florescence Stamp Set. Stamp the two elaborate clusters of poppies, chrysanthemums, and daisies to bring floral beauty to your projects. They are perfect to fill card backgrounds or frame your scrapbook layouts. You can color the floral intricacies with watercolor or brush markers for a vibrant touch. Finally, stamp any of the uplifting sentiments or quotes to brighten a loved one's day. 

I created two cards for today's hop using the Craft Your Life Project Kit: Florescence, so let's dive deep into it! 

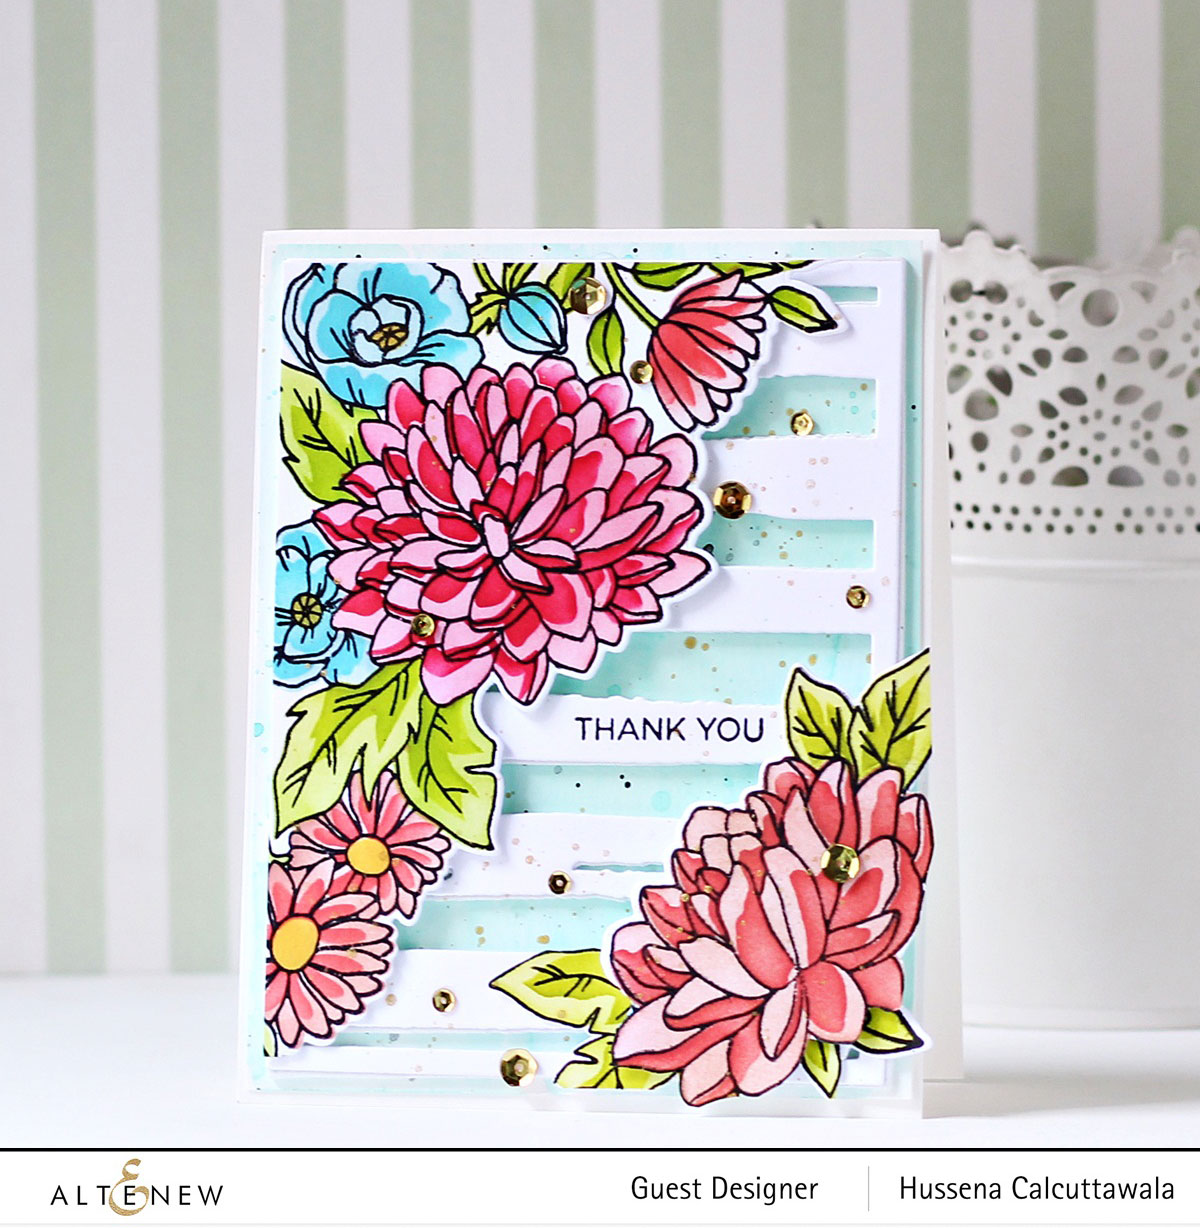
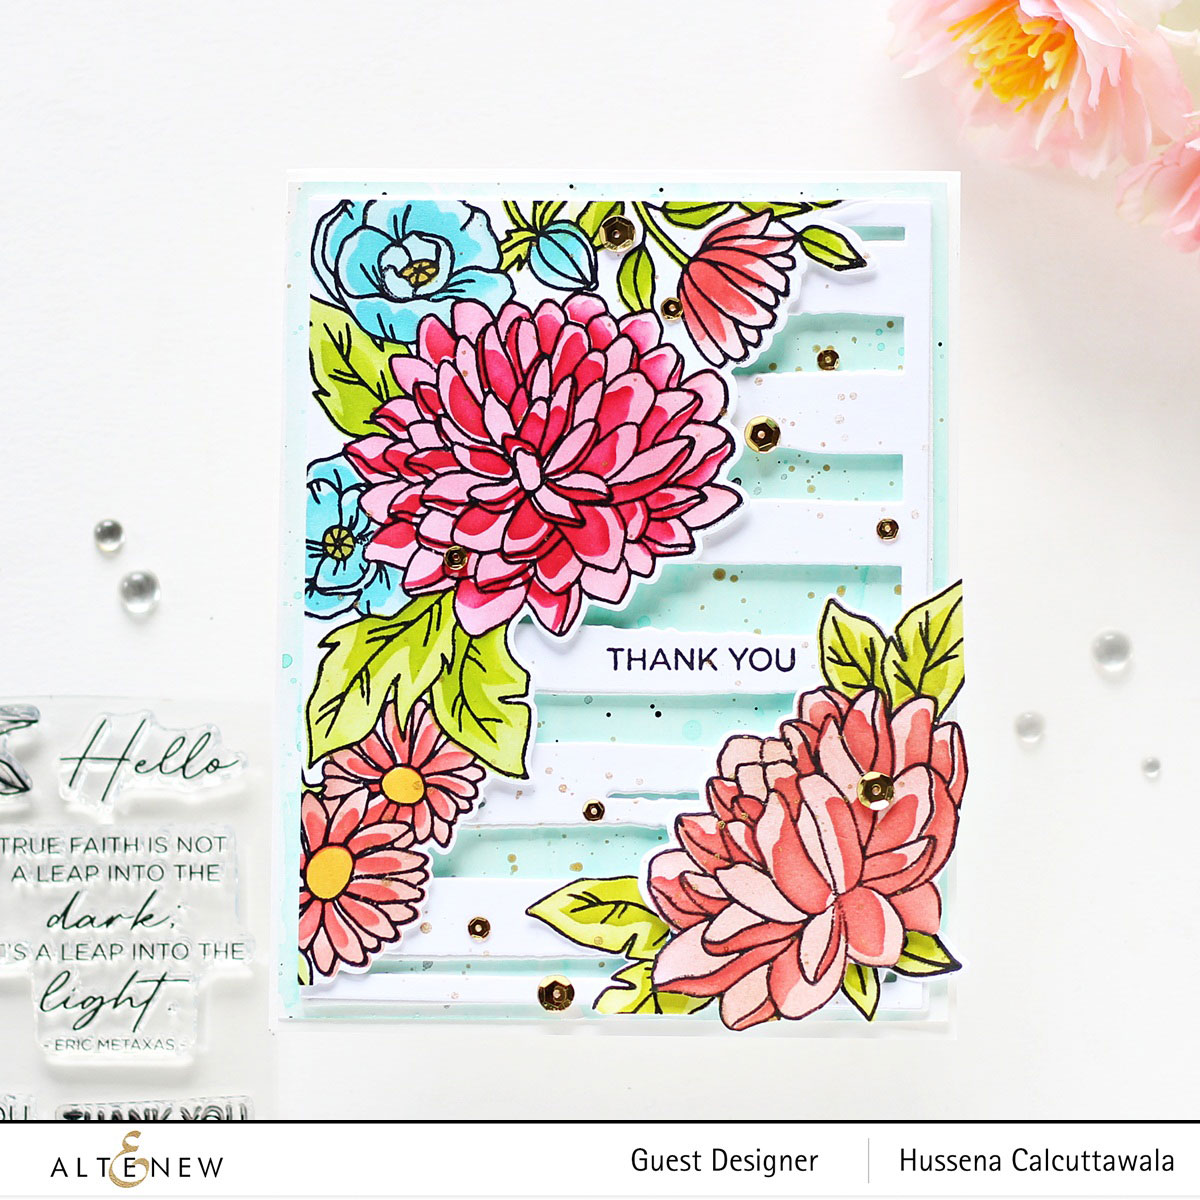
For my first card, I began by stamping one of the floral corners from the Craft Your Life Project Kit: Florescence Stamp Set onto a panel of Neenah Classic Crest Solar White Cardstock using Obsidian Pigment Ink. I then used the coordinating layering stencils, included in the kit, and used Rouge, Coral Bliss, Vineyard Berry, Autumn Blaze, Orange Cream, and Sunkissed inks for the flowers, Parrot and Bamboo inks for the foliage. I die cut the floral spray with the coordinating die. The Simple Coloring Stencil included in this kit makes it super easy to color this fun image! 

Next, I die cut Neenah Classic Crest Solar White Cardstock and White Foam using the Watercolor Stripes Cover Die and adhered the layers together using  Craft Glue for dimension. Next, I trimmed a piece of Watercolor Paper to 4.25" X 5.25", wet my watercolor panel, and used Lagoon and Mountain Mist Paints to create a soft, watercolored background. I let the panel dry and then splattered the card front with Enchanted Gold and Aquamarine paints from the Metallic Watercolor Set for a fun, artsy look. I also used the Jet Black Ink Spray to add some more splatters on the background.

Next, I stamped my sentiment from the the Florescence Stamp Set onto the die-cut panel using Obsidian Pigment Ink. Once that was done, I assembled the different elements on my panel and adhered down the pieces using foam squares. Then, to finish, I adhered the panels together with Craft Glue, before adhering it to a top-folding A2-sized white card base using tape runner. I added a few Antique Gold - Sequins to help add some sparkle to the card front.


My second card features the Florescence Embossing Folder and the Hello and Hugs Die Set.

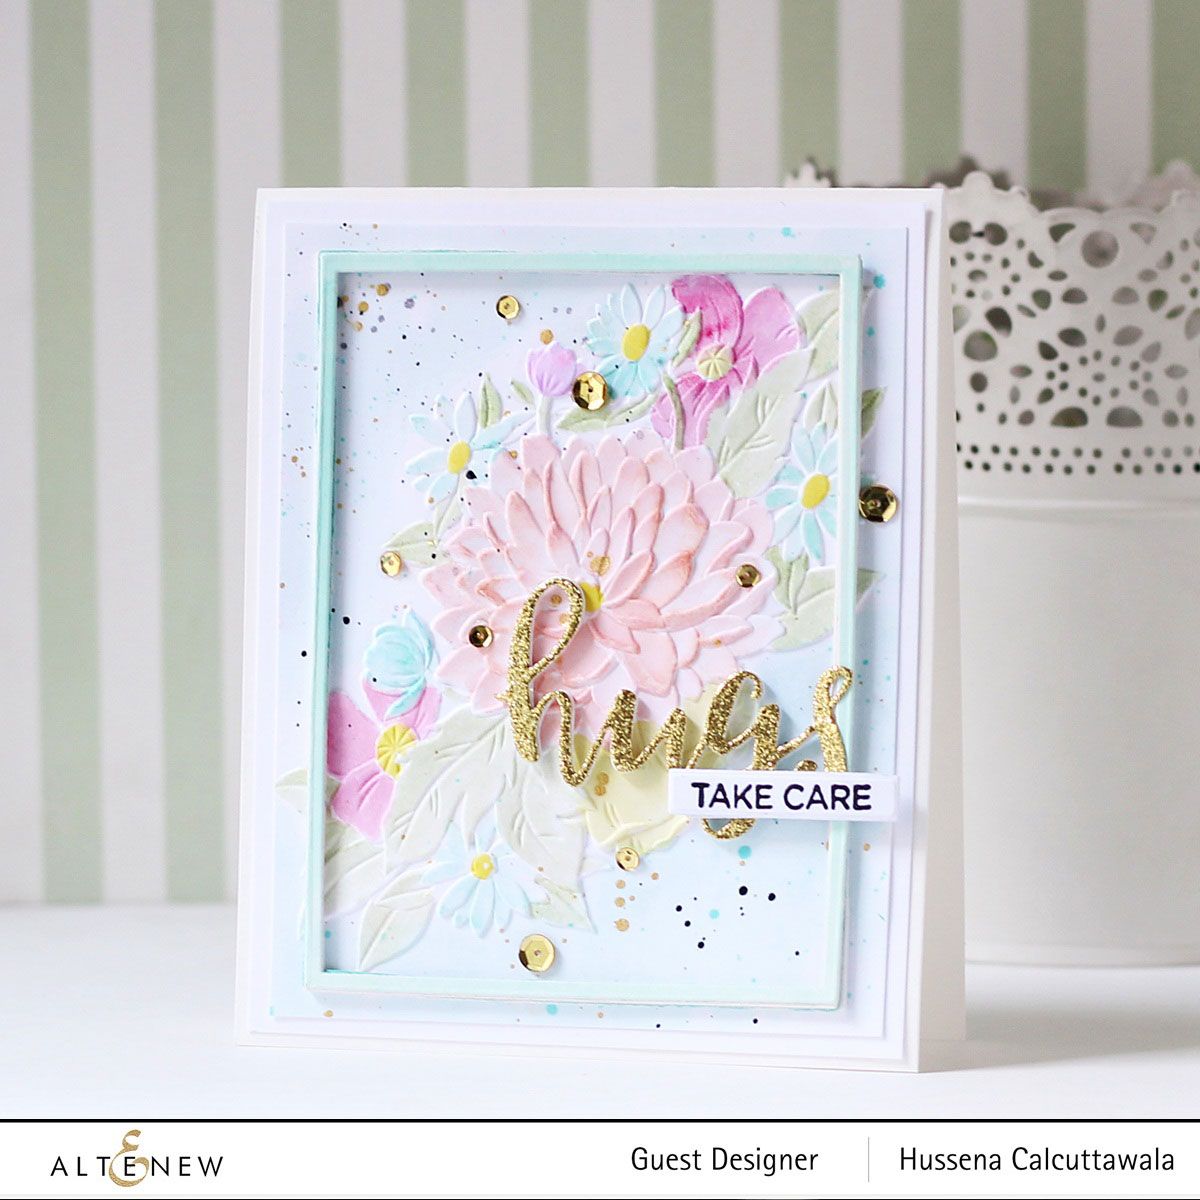
For the second card, I used the super-detailed 3D Embossing Folder included in the Craft Your Life Project Kit:Florescence with some White Cardstock. I ran the embossing folder with the White Cardstock panel through my die-cutting machine to create the raised image. You could very easily leave it like this, but I pulled out my Watercolor 36 Pan Set and did some loose watercoloring to highlight the absolutely stunning detail in the Embossing Folder. I did do some subtle washes of color on the background in coordinating colors. I think the effect is quite dream-like and ethereal. Once it had dried completely (you can use a heat gun if you're in a rush), I splattered the card front with Enchanted Gold, Aquamarine, Prasiolite paints from the Metallic Watercolor Set to add some extra metallic shine. I also used the Jet Black Ink Spray to add some more splatters on the background.

Next, I die-cut Citrine Cardstock and White Foam using the Circled Greetings: Hugs Die. I cut around the outer edge to use the positive image as an accent on my project and adhered the pieces together with Craft Glue. Then, I stamped my sentiment onto a strip of White Cardstock using Obsidian Ink and affixed it to my panel using foam adhesive

Next, I added a die-cut frame to the centre of the panel cut using the Fine Frames Rectangles dies and some White Cardstock. I coloured the frame in the same colors as the card background and adhered it to the panel using foam adhesive. Then, to complete, I adhered down the panel to a top-folding A2-size white card base using tape runner. I finished the design with some sparkling Antique Gold - Sequins around the sentiment to embellish.


Giveaway Prizes:
$300 in total prizes! To celebrate this release, Altenew is giving away a $50 gift certificate to 2 lucky winners and a $25 gift certificate to 8 winners! Please leave a comment on the Altenew Card Blog and/or each designer’s blog post on the blog hop list below by 05/18/2022 for a chance to win. Altenew will draw 10 random winners from the comments left on each stop of this blog hop and announce the winners on the Altenew Winners Page on 05/20/2022.

Blog Hop Order:
Next Stop on this Blog Hop is, Natasha Davies's blog. Just in case you lose your place along the way, here is the complete list of participants so that you can find your way back:

Natasha Davies


Well, that’s all for my projects today! Thanks so much for stopping by and reading. I hope you have a wonderful day!

If you like what you've seen from me, please give me a follow over on my Instagram (@hussena_cal) and/or subscribe to my blog if you haven't already.

Saturday, May 7, 2022

Altenew Craft-A-Flower: Butterfly Bush Release Blog Hop + Giveaway (Total of $200 prizes)


Hello, crafty friends!
I'm so happy and honoured to be joining Altenew for the Craft-A-Flower: Butterfly Bush Release Blog Hop today showcasing the next installment in their monthly Craft A Flower series: Butterfly Bush! Craft-A-Flower is a monthly subscription plan for their Craft-A-Flower Die Set. When signed up, you are guaranteed a spot in their monthly Craft-A-Flower releases and will receive a set each month - at a specially discounted price! ($35.99 →$29.99)

If you arrived here from Eva Bussom's Blog, then you are on the right track. If this is your first stop, then you will want to start at the beginning, the Altenew Card Blog. We've got tons of inspiration and giveaways for you on the hop today, so keep reading till the end of this post for more information.

The Craft-A-Flower: Butterfly Bush Die Set is so beautifully intricate, with gorgeous details and a lovely, substantial size. I have a vibrant blended project for you today, so let’s get started with the details.


To create my card, I first took a 4.25″ x 5.5″ panel of Neenah Classic Crest Solar White Cardstock and placed the flower dies from the Butterfly Bush Die Set about one-third of the way down and as far to the right as possible and ran it through my Platinum 6 Die Cutting Machine.  I repeated the same steps with the leaf and the butterfly layer dies. Next, following the layering guide, I watercolored a layer of Cotton Candy, Coral Berry, and Rubellite from the Altenew Watercolor 36 Pan Set with the lightest color on the base layer. I largely concentrated the color in the center of the flowers and used liquid glue to adhere them altogether. 

I mixed shades of green (Evergreen, Forest Glades, Bamboo, Frayed Leaf) from the Altenew Watercolor 36 Pan Set to get varying shades of green on my leaf die-cut pieces and used liquid glue to adhere them together. Next, to colour the branch and the body of the butterfly, I mixed Mocha and Espresso from the Altenew Watercolor 36 Pan Set to give the design more definition.

Next, to create the card background, I took a piece of Neenah Classic Crest Solar White Cardstock and I used blending brushes and LagoonParrot, and Buttercream inks to add lots of bold, saturated color to the card front. I did a few layers of ink blending to make sure that the color was really vivid and saturated, then spritzed some plain water into my hand and splattered it onto the blended card front with my fingertips, immediately blotting it up with a paper towel. I also added some black splatters using the Jet Black Ink Spray.

Then, I die-cut a frame out of  Neenah Classic Crest Solar White Cardstock and White Foam using the Layer 3 Die from the Precision Layering Mini Slimline A Etched Dies and adhered the layers together with Craft Glue for depth. Next, to colour the butterfly, I used some vibrant blue and purple Copic markers to do flick feathering to the image. I started the lighter color on the outer edges of the butterfly wing, turned my paper around, and then used the darker colour towards the inside of the wing. After coloring the butterfly, I cut out the shadow wing from White Cardstock and coloured it with Lagoon ink and then adhered the layers down using foam adhesive. I really love the additional butterfly dies included in the set. They are so pretty and make for just the perfect accent to add to a card.

Once that was done, I stamped a sentiment from the Castle Garden Stamp Set onto the background panel using Obsidian Pigment Ink. Then, I mat my card panel with Dazzling Diamond Cardstock before adhering it a top-folding A2 white card base using tape runner.


Giveaway Prizes:
$200 in total prizes! To celebrate this release, Altenew is giving away a $50 gift certificate to 2 lucky winners and a $20 gift certificate to 5 winners! Please leave a comment on the Altenew Card Blog and/or each designer’s blog post on the blog hop list below by 05/13/2022 for a chance to win. Altenew will draw 7 random winners from the comments left on each stop of this blog hop and announce the winners on the Altenew Winners Page on 05/15/2022.


 Blog Hop Order:
Next Stop on this Blog Hop is the wonderful, Nandini Karmarkar's blog. Just in case you lose your place along the way, here is the complete list of participants so that you can find your way back:


I really appreciate you stopping by and participating in this blog hop! 
If you like what you've seen from me, please give me a follow over on my Instagram (@hussena_cal) and/or subscribe to my blog if you haven't already.