Hello everyone!
Welcome to my blog! I have a set of springtime cards to share today that I created using the Spellbinders Clear Stamp of the Month Kit - Sending Floral Wishes. My post has been severely delayed, but I still wanted to go ahead and share these cards with you. If you haven't heard about the Clear Stamp of the Month Club by Spellbinders, you can go over to the Spellbinders blog and read more about it HERE.
The Spellbinders Clear Stamp for July is a 9 piece stamp set, containing a large floral bouquet, a small flower sprig, and sentiments perfect for a variety of occasions. Three of the sentiments in particular coordinate with the Decorative Mini Slimline Card Creator Dies set. The stamp set coordinates with the July 2021 Large Die of the Month, so you can mix and match your supplies to create different projects. This “Sending Floral Wishes” stamp set features made in the USA stamps from high-quality photo-polymer for clear, crisp impressions.
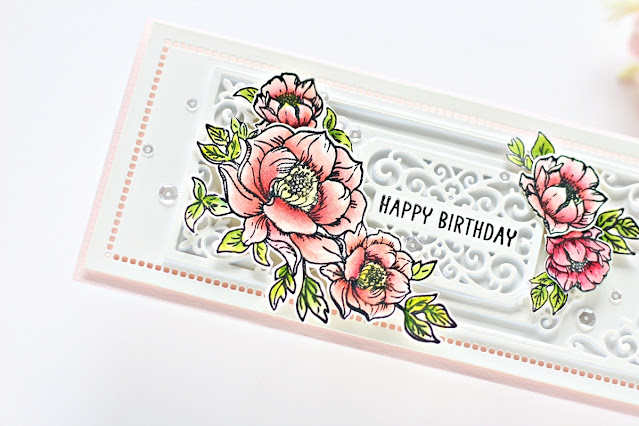
To make my card, I began by die cutting Alabaster Cardstock with the Large Rectangle Rim and Hemstitch Insert from the Hemstitch Slimline Etched Dies. Next, I die cut Alabaster Cardstock with the coordinating Medium Rim and Insert, the Tag, and the Sentiment Label Rim and Insert using the Victorian Splendor Slimline Die Set. I love how this month's stamp set coordinates so well with last month's Amazing Paper Grace Die Set. They look so elegant together!
I stamped the large floral cluster and single stamp onto White Cardstock using Versafine Onyx Black ink and colored the images with Nuvo Alcohol Marker pens before fussy cutting them out with scissors. Once that was done, I stamped a sentiment from the Sending Floral Wishes in the centre of the sentiment label die with black ink.
I adhered the background panels to a top-folding Pink Sand card base measuring 3.75” x 8.75” with foam adhesive. I then popped the floral images onto the card panel using foam adhesive. Then, to finish, I adhered Sparkling Clear Sequins in a variety of sizes for some sparkle and shine.
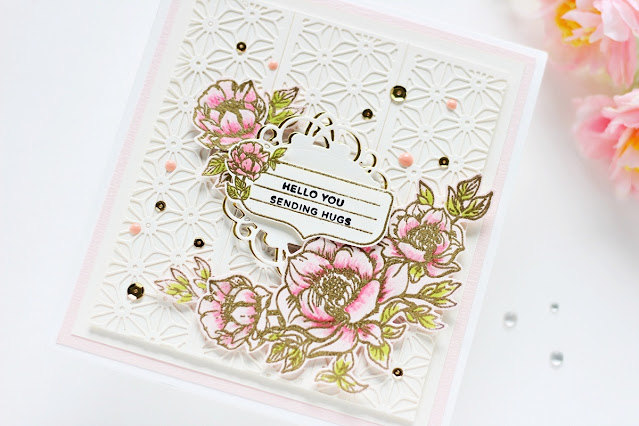
For my second card, I started by die-cutting Alabaster Cardstock with the Small Rectangle Rim and Insert dies. I used it to create a full background by simply die-cutting them in Alabaster Cardstock and getting rid of all the chads. It makes for a very quick and beautiful background panel.
Next, I stamped the large floral cluster and single stamp onto Watercolor Cardstock using Versamark Embossing ink and then heat embossed it using Super Fine Gold Embossing Powder. I colored the images with Zig Clean Clear Brush Markers before fussy cutting them out with scissors. I then die cut Alabaster Cardstock and Gold Mirror Cardstock with the Grand Dome 3D Card Etched Dies. Next, I adhered the gold die cut to the back of the white die cut as a shadow layer.
Once that was done, I stamped and heat embossed the floral address stamp from the Sending Floral Wishes onto Watercolor Cardstock. I fussy cut it out using scissors and added it to my panel using foam adhesive.
To assemble, I matted the die cut background panel with layers of Alabaster Cardstock and Pink Sand before adhering it to a top-folding A7-sized white card base. Next, I popped up the floral images with even more foam adhesive. Then, to complete my card, I added tons of gold sequins and peach enamel dots.
I hope you enjoyed these floral cards and thanks so much for stopping by today. You can subscribe to any of the Spellbinders Clubs between the 1st - 24th of each month and never miss a fun kit like this again!
Don't miss the BOGO (Buy One Get One) Die Cutting Sale going on over at Spellbinders from now until Saturday, July 31st. Be sure to take advantage of the sale and stock up on your favourite die sets!
If you like what you've seen from me, please give me a follow over on my Instagram (@hussena_cal) and/or subscribe to my blog if you haven't already.
Wishing you a great day ahead!


No comments:
Post a Comment