Hello everyone!
This is Hussena from Quill and Punch Works, and I am so excited to be guest designing on the Spellbinders Blog today showcasing the NEW Layered Fleur Bouquet Slimlines Collection by Amazing Paper Grace. The beautiful detailed border and frame dies, as well as the exquisite floral layering dies, inspired me to make a set of three cards perfect for gifting to friends and family!
My first card features the Half Slimline Oval Etched Dies and the Layered Cherry Blossoms Etched Dies along with the Geo Screen Embossing Folder. The Layered Cherry Blossom Set creates such gorgeous flowers that I had to try them out first. I also used one of the slimline background designs from this collection for this bright and cheery friendship card.
To start with, I die--cut Snowdrift Cardstock several times using all of the components of the Layered Cherry Blossoms Etched Dies. Next, I added a bit of Worn Lipstick, Twisted Citron, and Shabby Shutters Distress Oxide Inks to the petals and leaves, Mustard Seed ink to the flower centres, and Rusty Hinge ink for the branch with a sponge dauber to add shading and assembled the pieces with liquid glue.
To create the ornate background panel, I die-cut Snowdrift Cardstock and White Foam twice using the Half Slimline Outline and Insert dies from the Half Slimline Oval Etched Die Set. Next, I trimmed a piece of Pink Sand Cardstock to 8.5" X 3.5" and adhered the die-cut pieces on the panel with liquid glue. Next, I embossed the leftover die-cut oval piece using the Geo Screen Embossing Folder. Once that was done, I mat it with a layer of Silver Glitter Paper and adhered the layers together with liquid glue.
Next, I die-cut Snowdrift Cardstock and White Foam using the 'You' die from the Sweet Sayings Notecard Sentiments Etched Dies. I adhered them together with liquid glue, then ink blended Worn Lipstick Distress ink to the top three-quarters of the sentiment die-cut piece for more depth. Next, I stamped a sentiment from the I'm Here for You Sentiments Clear Stamp & Die Set on to a strip of Snowdrift Cardstock using Versafine Onyx Black ink and popped it on to my panel using foam adhesive. I arranged the branch, leaves, and flowers on top of the card front and adhered them down with liquid glue and foam adhesive. I adhered the card panel to a top-folding white card base measuring 9” x 4” with tape runner to complete. I embellished the flowers with some Glacier Jewels to finish.
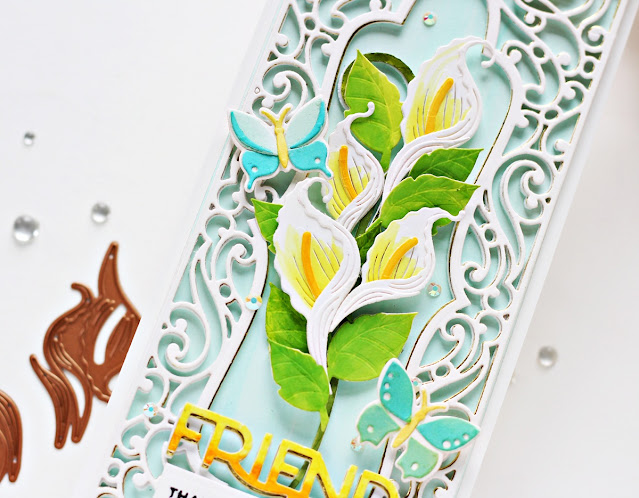
My next card features the Layered Lilies Etched Dies, the Half Slimline Bracket Etched Dies, and the Half Slimline Oval Etched Die Set. and the Butterfly Bliss Garden Shutters 5 x 7" Card Base Etched Dies. I went with a easy and simple design with light shading on the flowers to keep the lilies the star of the show here!
To make my card, I started off by die-cutting Snowdrift Cardstock several times using all of the components of the Layered Lilies Etched Dies. Next, I blended Peeled Paint and Twisted Citron Distress Inks on the leaves and stem to give them lots of colours and a bit of shading, Spiced Marmalade for the flower stamens, and a light flicking of Squeezed Lemonade Distress Oxide Ink in the centre of the lillies with a sponge dauber. I then adhered the pieces together with liquid glue to create the main blooms.
Next, I die-cut Snowdrift Cardstock, Mirror Gold Cardstock, and White Foam twice using the Half Slimline Bracket Etched Dies and adhered the pieces together with liquid glue, offsetting the gold mirror die cut to create a shadow. Then, I trimmed a piece of Snowdrift Cardstock to 8.50" x 1.80" and applied a thin layer of Liquid Watercolor - Aquamarine to the panel. I dragged the color out loosely with an Aqua Brush to create a soft, watercolored background and then adhered the intricate border die-cut pieces on it with liquid glue.
I die-cut Snowdrift Cardstock and Mirror Gold Cardstock using the sentiment die from the Half Slimline Oval Etched Die Set and adhered the layers together, allowing the gold layer to peek out from behind like a shadow. Next, I applied Squeezed Lemonade and Spiced Marmalade Distress Oxide inks horizontally across the sentiment piece with my blending brushes to add shading and dimension. Once that was done, I die-cut Snowdrift Cardstock using the Tag 1 Die in the Swallowtail Tags Etched Dies and stamped a sentiment from the Sentiments for You Clear Stamp Set onto the piece using Versafine Onyx Black ink. I then popped it to the card front using foam adhesive for dimension.
Next, I die cut Snowdrift Cardstock and White Foam twice with the butterfly dies from the Butterfly Bliss Garden Shutters 5 x 7" Card Base Etched Dies. Then, I used Peacock Feathers, Mermaid Lagoon, Evergreen Bough, and Antique Linen Distress inks to colour the die-cut pieces and assembled them with liquid glue, before adhering them to the card front using foam adhesive. To finish, I adhered the card panel to a top-folding white card base measuring 4” x 9” with tape runner. I embellished the background with some Glacier Jewels to finish.
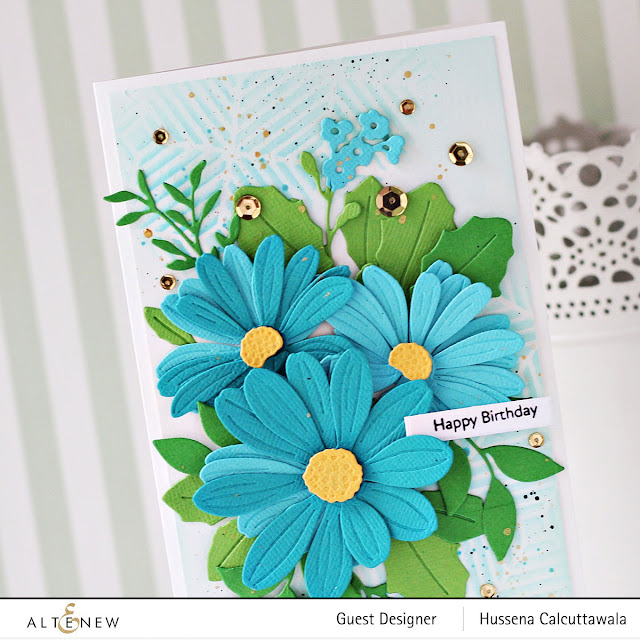
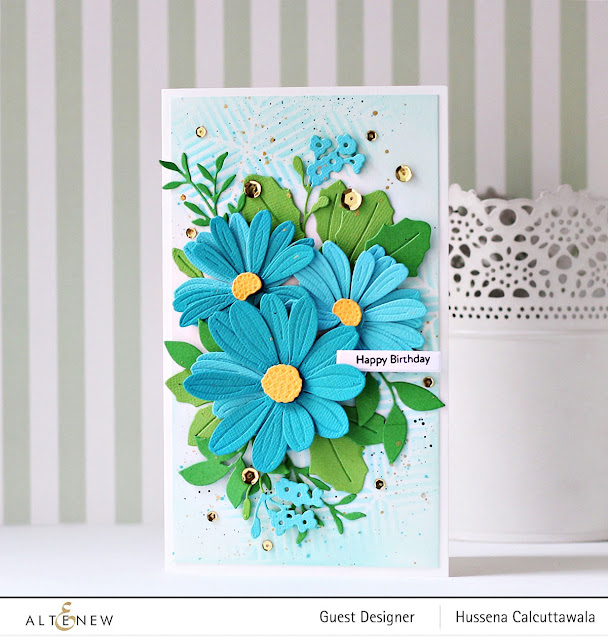
My last project for today features the Layered Daisies Etched Dies, Half Slimline Diamond Etched Dies, Fluted Classics Slimline Etched Dies, and the Bella Ovalette - APG Die of the Month. The Layered Daisies Die Set is one of my favourites from the collection and I love the variety of sizes included in the set. I added die-cut tag to an die-cut background for this slimline floral card.
To create this card, I die-cut Snowdrift Cardstock several times using all of the components of the Layered Daisies Die Set. Then, I added a bit of Worn Lipstick, Picked Raspberry, Abandoned Coral, Wilted Violet, Peeled Paint, and Shabby Shutters Distress Oxide Inks to the petals and leaves and Mustard Seed ink to the flower centres with a sponge dauber to o give them lots of color and a bit of shading and assembled the pieces with liquid glue.
Next, I die-cut Waterfall Cardstock and Mirror Gold Cardstock using the twice using the Half Half Slimline Diamond Etched Dies and adhered the layers together with liquid glue, allowing the gold layer to peek out from behind like a shadow. Then, I die-cut Snowdrift Cardstock using the Large Slimline Rim and Insert Dies from the Fluted Classics Slimline Etched Dies and adhered the intricate background pieces on it with liquid glue.
Then, for the sentiment piece, I die-cut Snowdrift Cardstock and White Foam using the Diamond Insert Die included in the Bella Diamante Set and adhered the pieces together with liquid glue. Next, I die-cut Waterfall Cardstock, Mirror Gold Cardstock, and White Foam using the Inner Oval Design Outline and Insert Dies from the Bella Ovalette Die Set and adhered the layers together with liquid glue, allowing the gold layer to peek out from behind like a shadow. Once that was done, I stamped a sentiment from the Butterfly Sentiments Clear Stamp Set on to the negative oval die-cut piece using Versafine Onyx Black ink and adhered it down using foam adhesive for lots of dimension.
To finish, I arranged the flowers, stems, and leaves on the card front and adhere them down with liquid glue and foam adhesive for dimension. Next, I mat the panel with Waterfall Cardstock and adhered it to a top-folding white card base measuring 9” x 4” with tape runner.
SPELLBINDERS SUPPLIES:
CS-017, CS-027, SCS-118, SCS-160, S4-1192, S2-327, S4-1148, S4-1193, S4-1194, S4-1197, S4-1198, S4-1199, S6-183, S6-186, ST-0147, STP-079, STP-081, SES-030, DOMAPG-FEB21, DOMAPG-MAR22, JD-044, TD056362, TD055792,TD056294, TD056355, TD056119, TD056089, TD056102, TD056164, AD-0081, AD-0084, MISTI, PCGO4E, PE-100, T-021
OTHER SUPPLIES:
Neenah Solar White Cardstock, Picked Raspberry, Abandoned Coral, Shabby Shutters Mermaid Lagoon, Evergreen Bough Distress Oxide ink, Versafine Onyx Black Ink, Tape Runner.
That’s it for today’s post! I hope you enjoyed it and have been inspired to create with these stunning dies and stamp from the Layered Fleur Bouquet Slimlines Collection. Thank you so much for stopping by!
You can find more inspiration over at my Instagram page.


.JPG)

.JPG)


.jpg)


