Showing posts with label Colouring. Show all posts

Sunday, May 22, 2022

Altenew Paint-A-Flower: Magnolia Rustica Outline Stamp Set Release Blog Hop + Giveaway ($200 in Total Prizes)


Hello, crafty friends!
I'm so happy to be joining Altenew for the Magnolia Rustica Outline Stamp Set Release Blog Hop today showcasing the next installment in their monthly Paint-A-Flower series! You can purchase this fabulous set here individually for $15.99, or you can subscribe to receive the new Paint A Flower sets at a discount each month! When signed up, you are guaranteed a spot in their monthly their monthly Paint-A-Flower releases and will receive a set each month - at a specially discounted price! ($15.99 →$12.99)

If you arrived here from Preeti Chandran's Blog, then you are on the right track. If this is your first stop, then you will want to start at the beginning, the Altenew Card Blog. We've got tons of inspiration and giveaways for you on the hop today, so keep reading till the end of this post for more information.
 I have a soft, floral card for you today with a twist, so let’s get started with the details!
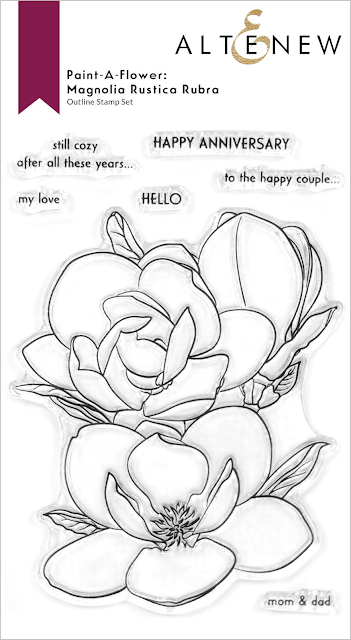
I began by stamping the magnolia image on some Neenah Classic Crest Solar White Cardstock using Obsidian Pigment Ink. I then used Altenew Coral Berry, Grapevine, Sea Glass, Ocean Waves, Evergreen, and Forest Glades Alcohol Markers from the Cosmic Garden Set to add highlights and shadows to the magnolia flower using the pointillist coloring technique. Look closely - I used the palest peach and aqua in the petals for overall color, and then I used the darker tone to add shading. It's simple to get it right on this magnolia image because the shading is already illustrated. I also added a bit of yellow in the flower centres for interest and dimension! 

After I'd completed the coloring, I did a little stenciling. I used my Altenew Blending Brushes to blend some beautiful Sweet Leaf ink to the background panel using the Altenew Sketched Lines Stencil to showcase these meticulously-colored flowers.

While my background was drying, I stamped a greeting from the  Magnolia Rustica Outline Stamp Set using  Obsidian Pigment Ink onto a piece of White Cardstock. Next, I adhered a strip of Citrine Cardstock along the bottom of the piece for a little pizzazz. I adhered  it down on my panel using foam adhesive for extra dimension and added gathered gold thread to give the panel more interest.

Then, to finish, I adhered the panel to a top-folding A2-sized white card base using foam adhesive. I added a few Antique Gold - Sequins to help add some sparkle to the card front.


Giveaway Prizes:
$200 in total prizes! To celebrate this release, Altenew is giving away a $50 gift certificate to 2 lucky winners and a $25 gift certificate to 5 winners! Please leave a comment on the Altenew Card Blog and/or each designer’s blog post on the blog hop list below by 05/28/2022 for a chance to win. Altenew will draw 10 random winners from the comments left on each stop of this blog hop and announce the winners on the Altenew Winners Page on 05/30/2022.

Blog Hop Order:
Next Stop on this Blog Hop is, Eva Bussom's blog. Just in case you lose your place along the way, here is the complete list of participants so that you can find your way back:

 Altenew Card Blog

Emily Midgett

Ann Taylor

Nathalie DeSousa

Carol Hintermeier

Jenny Colacicco

Angela Brennan

Tenia Nelson

Nenette S. Madero

Virginia Lu

Natasha Davies

Amy Hill

Terri Koszler

Nandini Karmarkar

SathyaKala Sankaran

Colleen Balija

LauraJane

Bridget Casey

Linda Westfall

Rosie Neustaedter

Preeti Chandran

                      Hussena Calcuttawala (You are HERE)

Eva Bussom

Daniel Diaz

Sande Woodson


Well, that's all for me today. Thanks so much for stopping by today, and have a marvelous day!
If you like what you've seen from me, please give me a follow over on my Instagram (@hussena_cal) and/or subscribe to my blog if you haven't already.

Thursday, April 8, 2021

Spellbinders | Watercolor Florals by Sushma Hegde


Hello, crafty friends!
Happy Thursday and welcome to my blog! I have a card and bookmark set to share today using the Layered Wildflowers Clear Stamp Set which is a part of the Watercolor Florals Collection by Sushma Hegde. This is such a beautiful collection of floral stamps that can be used with many different techniques to create easy watercolored projects in no time.

I have used the Layered Wildflowers Clear Stamp Set for my projects today. Layered Wildflowers is part of the Watercolor Florals Collection by Sushma Hegde. The set of 10 clear Photopolymer stamps is designed to work with an acrylic block, and made in the U.S.A. Each image when layered on top of each other creates shadows and dimension of a one-layer wildflower. Stamp one or a bunch for a lovely field of florals!

For my card, I first ink blended Tumbled Glass and Twisted Citron Distress inks over a panel of Canson Montval Watercolor Paper using a blender brush. Then, I stamped the layering florals and foliage from the Layered Wildflowers Clear Stamp Set using a variety of dye inks. Once that was complete, I splattered the flowers with black acrylic paint and let dry.

Then, I wrapped some natural hemp around my card panel for interest. I die cut the tag from last month's Amazing Paper Grace Club Kit from a scrap piece of White Cardstock and stamped a sentiment from the Wonderful Spring Stamp set on it using brown dye ink. I then popped it on the panel using foam adhesive. 

I matted my card panel with Gold Mirror Cardstock before adhering it to a top-folding white card base. I love how this card came together in no time! 


Next, I have this bookmark to share featuring the same stamp set. I went with a very artsy, loose watercolored look on this one.

To create my bookmark, I first trimmed a piece of White Cardstock to 2 X 5.5 inches and stamped the flower and the foliage from the Layered Wildflowers Clear Stamp Set using various dye inks. Then, I used my watercolor half-pans to loosely paint the background to add some depth and character to the stamped design. Once I was happy with the way it looked, I went ahead and added some paint splatters with black acrylic paint and let dry.

All that was needed to complete my bookmark was a sentiment, so I went ahead and stamped a quote from the Spring Quotes Stamp Set using Licorice Black ink. I adhered a tag hole reinforcer and attached a handmade tassel and some beads to finish my bookmark. 


I hope you enjoyed looking at my projects today and I hope they inspire you as you create with these gorgeous new products. I would love to hear what you think of them. 

 If you like what you've seen from me, please give me a follow over on my Instagram (@hussena_cal) and/or subscribe to my blog if you haven't already.
Thank you so much for stopping by!

Wednesday, March 10, 2021

Spellbinders & Amazing Paper Grace Die of the Month | March 2021


Hello, crafty friends!
I have a Card to share today featuring the Spellbinders + Amazing Paper Grace March 2021 Die of the Month Set. This month's "Mini 3D Vignette Floral Mason Jar" Set is perfect for making gorgeous cards, gift boxes, gift bags, and more in no time! This die set features 16 dies.

I created a side-folding Mason Jar Shaker Card filled with dimensional flowers using the Mini 3D Vignette Floral Mason Jar. This is a beautiful set of dies and it features a bouquet as well as lovely dimension, and folds flat like all of the 3D Vignettes.

I have a soft corner for Mason Jars and I was thrilled to find that Becca has designed this stunning die set for this month.  To create my card, I die cut the jar, the various flowers, stems, leaves, the lid, the little tag, and the filigree lace element from White Cardstock using my Spellbinders Platinum 6" Machine

Once that was done, I die cut the jar from Acetate, White Fun Foam, and White Cardstock to create the shaker piece for my card front. I also die cut an aperture in the front of the jar, so that the sequins and stems would be visible. I added a bit of soft colour to the front and back pieces of the jar using Pool Play ink with a blending tool for visual interest.

The flowers, stems, and leaves were coloured using Mermaid Markers by Jane Davenport. Once they were dry, I assembled the different flowers together to create a nice bouquet. For my card background, I blended Rustic Rose ink on a piece of White Cardstock using a blending brush, concentrating the colour towards the bottom, to create an ombre effect. I also blended the ink around the sides with a blending brush just to define the edges and added some paint splatters for a nice, artsy look. 

I assembled all the different pieces of the mason jar together and popped it over on my card panel. To create the patterned lid, I used a Gingham Stamp to stamp on the die cut piece in Rustic Rose ink. Then, I adhered it using foam squares to the jar. The little lace filigree element was lightly coloured using Pool Play ink with a blending tool and tucked in below the lid using Craft Glue. I stamped my sentiment on the stitched tag using with Black Licorice ink and threaded some satin ribbon on the top to add over the jar. 

The flowers were all adhered using foam squares, while the leaves were glued down using Craft Glue. I affixed my ink blended background piece to a panel of light blue cardstock and then adhered it to a side-folding white card base using Craft Glue. As the finishing touch, I adhered a couple of Sparkling Clear Sequins. 


The Amazing Paper Grace Die of the Month is available exclusively at Spellbinders Paper Arts during March 2021. You can get the Mini 3D Vignette Floral Mason Jar Set at the special Cub Kit price, along with other membership perks.

If you'd like to see some more project inspiration using the Amazing Paper Grace Die of the Month, check out the Spellbinders Blog where Becca shares some stunning project samples using it.  

Amazing Paper Grace Die of the Month Membership


That’s it for me today! I hope you liked my take on the die set! If you like what you've seen from me, please give me a follow over on my Instagram (@hussena_cal) and/or subscribe to my blog if you haven't already.

Thank you so much for your visit to my blog today!

Friday, March 5, 2021

Spellbinders March 2021 Clear Stamp of the Month | Wonderful Spring


Hello, crafty friends!
Happy March and welcome to my blog! I have a set of Easter-themed cards to share today featuring the Spellbinders Clear Stamp Set of the Month - Wonderful Spring. If you haven't heard about the Clear Stamp of the Month Club by Spellbinders, you can go over to the Spellbinders blog and read more about it HERE


The Spellbinders Clear Stamp for March includes 11 different stamps, three of which have bunny images, and a number of coordinating sentiments. The stamp set coordinates with the Spellbinders Small Die of the Month, so you can mix and match your supplies to create different projects. This “Wonderful Spring” stamp set features made in the USA stamps from high-quality photo-polymer for clear, crisp impressions. 
Here are my cards using this stamp set:

To create my first card, I started by stamping one of the bunny images from the Wonderful Spring stamp set onto Snowdrift Cardstock using Versamark Embossing ink. I heat embossed the image using Super Fine White Embossing Powder and fussy cut it out using a pair of scissors. I added a bit of soft colour to the image using my Zig Clean Colour Brush Markers.

To create the watercolour background, I used a piece of Canson Montval Watercolor Paper which I loosely painted using Tumbled Glass and Shabby Shutters Distress inks. I added a bit of colour from the ink pads on a watercolor palette and used a wet paint brush to pick up that pigment for coloring the background.

Once dry, I die cut a bunch of small flowers, leaves, and foliage from the Simply Perfect Layered Blooms Etched Dies from Watercolor Paper. I coloured the pieces using Mermaid Markers by Jane Davenport and adhered them to my card panel using Craft Glue.  I then attached the bunny and a few of the coloured flower pieces to my panel using foam squares for dimension.

I die cut a tag from the Amazing Paper Grace Die of the Month Set and stamped a sentiment from the Wonderful Spring stamp set on it using Black Licorice ink. I added a little watercolored flower next to the sentiment and then popped it to my panel using foam squares.

As a finishing touch, I added some black paint splatters to the card background. Then I added the entire thing to a top-folding A2-sized white card base with foam squares.


Card Two
I started by stamping the floral spray from the Wonderful Spring stamp set onto Snowdrift Cardstock with Black Licorice ink. I used my MISTI Stamping Tool to stamp the floral sprays on the card front in order to line them up perfectly. I coloured the images using Nuvo Alcohol Markers and then die cut a circle from the centre of the panel using the Standard Circles LG Etched Dies. Then, I blended Shabby Shutters Distress ink around the sides with a blending brush just to define the edges.

I stamped one of the bunnies from the stamp set onto Snowdrift Cardstock with Black Licorice ink, coloured it using my Zig Brush Markers, and then fussy cut it. On another piece of Snowdrift Cardstock, I ink blended Mowed Lawn and Twisted Citron Distress inks over the panel using a blender brush, concentrating the lighter shades towards the bottom.

I wanted to create a little scene on my card front featuring the bunny and the floral sprays, so I stenciled some clouds on this panel using the Cloud Builder Stencil and Broken China Distress ink. I attached this panel to a top-folding A2-sized white card base with tape runner. I added the bunny in the centre of the panel and adhered the die-cut panel to the card base using foam squares. I also added two flowers in the hands of the bunny just for a fun, little touch. 

I stamped a sentiment from the Wonderful Spring stamp set on to a strip of Snowdrift Cardstock with Black Licorice ink. I then attached it to the panel using foam squares. As a finishing touch I added a couple of Clear Sparkling Sequins to the panel using Craft Glue.


The Wonderful Spring Set is available exclusively at Spellbinders Paper Arts during March 2021. You can get the Clear Stamp Set of the Month at the special Club Kit price, along with other membership perks.

I hope you enjoyed looking at my cards today! I would love to hear what you think of them. 

 If you like what you've seen from me, please give me a follow over on my Instagram (@hussena_cal) and/or subscribe to my blog if you haven't already.
Thank you so much for stopping by!

Thursday, November 12, 2020

25 Days of Christmas Tags 2020 – Pinkfresh Studio


Hello, crafty friends!
I am so excited to be a part of the 25 Days of Christmas Tags event hosted by Tracey McNeely. I'm a big fan of this yearly event, so I'm thrilled to be participating today with some of the other Pinkfresh Studio designers! There are tons of inspiration during this event and also lots of prizes to win! You can find all the details on Tracey’s main post of the 25 Days of Christmas Tags!
Pinkfresh Studio is one of the sponsors this year and today the Pinkfresh team is sharing some Christmas Tags on Tracey McNeely’s blog to inspire you!


I have made FOUR Gift Tags for this event, so without further ado, let's dive right into it!

My first two tags were made using the same set of supplies, but I used two different colours for variation. To begin, I die cut the tags using the Essentials: Shaker Tags die set. Next, I used the Basic Plaid Layering Stencil Set to stencil on the tag backgrounds. This is a two-step layering stencil, but I used only one ink colour for both the layers. I first went in and lightly applied the Coral Reef Ink and then for the stencil second layer, I used the same ink pad, but added much more ink colour, to achieve a more saturated colour. This is a great way to stretch your supplies and get more from your ink pads! I did the same for the other tag and used Mint Ink for it.

Once the stenciling was done, I die cut some snowflakes from the Layered Snowflakes Die Set from Silver Glitter Cardstock and White Cardstock. I coloured the snowflakes using the same ink colours to match with the stenciled backgrounds of each tag. I then layered the snowflakes together and adhered them to the tags using white fun foam.

The sentiment is from the Merry and Bright Stamp Set. I stamped it on White Cardstock using Berrylicious Ink and then die cut it using the coordinating die. As the finishing touch, I added a die cut bow to the tag. I used the Artistic Bows Die Set for creating the bow from Vellum and Silver Glitter Cardstock. Don't you think it's just the perfect tag topper!?


Onto my next two tags! 
I used the same bunch of supplies for these too, but I changed the colour of the houses on the tags for more interest. I first die cut the tags from White Cardstock and then white heat embossed the little wintry accessories from the Our Home To Yours Stamp Set on the tags. I ink blended the circles using Sapphire ink, so that the white embossed elements would pop out. Next, I die cut some hill slopes from White Cardstock and stamped a couple of little Christmas trees, fences, and the trail from the Our Home To Yours Stamp Set for my card design. 

Next, I stamped the houses from the stamp set using Berrylicious and Mint and cut them using the coordinating dies. I popped them on my tag using foam squares for dimension. The sentiment is from the Tree Trimmings Stamp Set and I stamped it on the tags using Black Hybrid ink. 

I deliberately kept the design super simple, so that it can be easily re-created and mass-produced for the upcoming Holiday season. It would be wonderful to attach to gifts for friends and family and also can be created in a jiffy! Isn't that a win-win situation?!


That’s it from me! Hope I was able to inspire you with my tags! Please don’t forget to check out and participate in Tracey's 25 Days of Christmas Tags!

Pinkfresh Studio is giving away a $50 gift card to one lucky winner!

 If you like what you've seen from me, please give me a follow over on my Instagram (@hussena_cal) and/or conisder subscribing to my blog if you haven't already.

Thank you so much for stopping by!
Have a great day!

Wednesday, November 4, 2020

Pinkfresh Studio | Watercolored Floral Slimline Cards


Hello crafty friends!
It's my turn to post on the Pinkfresh Studio Card Blog today, and I have two Slimline Cards to share which I created using several products from the October 2020 Release by Pinkfresh Studio. I am so in love with the new slimline supplies and can't really have enough of them!

My first Card for today features the You Are My Favorite stamp and die set along with the Argyle Layering Stencil Set.

I have used the outline floral cluster from the You Are My Favorite stamp to create my card panel. The stamp set comes with three coordinating stencils to colour the different layers, but I heat embossed my flowers and foliage instead of using the stencils. 

To begin, I stamped the outline floral cluster using Clear Embossing Ink on a piece of Canson Montval Watercolor paper. I used Super Fine Gold Embossing Powder to heat set the image and then die cut the image using the coordinating You Are My Favorite Die. Once that was done, I watercolored the florals using Pinkfresh Studio Liquid Watercolours. I used Bubble Gum and Aquamarine to colour the flowers and Key Lime for the leaves. The watercolours are very concentrated in nature, so I diluted them with water for a soft, ethereal look. 

Next, I started working on my card background. I used the Argyle Layering Stencil Set to stencil on my panel using Pinkfresh inks. This is a two-step layering stencil, so I used Mint for the first layer and Misty Coast for the second layer. I love the end result as it looks really soft and dreamy! I adhered this ink blended piece to a panel of Gold Mirror Cardstock, and then to my white slimline card base.  

It was now time to assemble the card together. I fussy cut some of the smaller flowers and leaves from the watercolored image, so that I could play around with my card design. I arranged the different pieces to my panel and adhered them down using foam squares for dimension. Next, I die cut a square frame from White Cardstock using one of the window dies from the Essentials: Shaker Tags Die Set. I wanted it to fit in well with my card design, so I tweaked it a bit and then adhered it to my panel. I also die cut an outer frame from Gold Mirror Cardstock to give it a more defined look. 

Next, I stamped my sentiment in the centre of the panel. It is from the You Are My Favorite Stamp Set and was stamped using Detail Black Ink. The florals and leaves were then adhered around the sentiment piece. To finish, I added some White Jewels and Metallic Gold Paint Splatters on the card. 


My second Card for today features the You Are Amazing StampStencil Set, along with the Days of of Splendor Ephemera Pack and Leafy Squares Stencil

I started off by stamping the leafy outline illutration from the You Are Amazing Stamp using Fresh Pear on a piece of Canson Montval Watercolour Paper to do no-line colouring. I then used the coordinating three-piece Stencil Set to colour the stamped panel. I used Mint for the first layer, Fresh Pear for the second layer, and finally, Misty Coast for the third layer. I chose to use very light ink colours for a soft, watercolored look, but you can always use any colours you like. If you are someone who does not like to spend hours colouring things, then the Stencil Set is just the perfect thing for you. It can be used in multiple ways and always gives great results with minimum time and effort involved!

Next, for my card focal, I die cut a panel using the Diagonal Stitched Rectangles Die Set. I then placed the Leafy Squares Stencil on it and used Mint ink to create my background. Next, I die cut a circle from the centre of this piece using the Essentials: Braided Circle Die Set. I foam mounted this to my card panel for a raised look.

Then, to embellish my card front, I used a couple of die cut pieces from the Days of of Splendor Ephemera Pack. I used some floral pieces along with leaves and foliage to create my floral cluster. I went in and added some glitter accents using Stickles Diamond Glitter Glue on top of the flowers and leaves for added interest.

Next, I adhered the card background to a layer of Pearlescent Green Cardstock, and then onto my White slimline card base. The sentiment was cut using one of the dies from the Thin Words: Everyday Script Die Set, which is a set designed by Pinkfresh exclusively for Scrapbook.com. I cut it once from Red Cardstock and twice from White Fun Foam. I layered them all together and added it to the card using liquid adhesive. Finally, I added some Green Jewels to complete my card.


Hope you enjoyed looking at my cards today! I would love to hear what you think it!
Thank you so much for stopping by!