Saturday, July 20, 2019

Spellbinders + Amazing Paper Grace Die of the Month | July 2019


Hello, crafty friends!
I have a Card to share today featuring the Spellbinders + Amazing Paper Grace July Die of the Month. This month's  Graceful Concertina Die Set is perfect for making gorgeous cards and more. 
Becca Feeken, the designer of these exquisite die sets, has shared some fabulous inspiration and ideas using this month's kit on her blog, which I highly recommend checking out. HERE is a link to her blog post. 

If you want to find out more about the Club – prices, how you sign up and what’s included, please look ——–> HERE. These dies are only available through the Club and are limited to the month of July, so hurry before they are sold out.

Here's my Card using the Graceful Concertina Die Set. I am so thrilled to have got a chance to create something using this set. It's super dainty and elegant!

This one did take me quite some time to put together because of the details in it. It's been a while since I created such an elaborate multi-fold card and it was super fun to work on it! To begin with, I die cut the outer part of the concertina from Cream Heavy Weight Cardstock. I die cut it several times since I planned to make a three-fold card. To highlight the gorgeous design, I decided to use Vellum to add between the cream die cuts. I used Papericious' Vellum Paper which is quite sturdy and was perfect for die cutting. I die cut the concertina dies twice from Cream Cardstock and once from Vellum Cardstock for each layer of the card. I used the tabs given on the side of each die cut to intersect them together to create a three-layer card.

For the layer in the centre of the card, I die cut the intricate die included in the Graceful Concertina set from a Vintage Patterned Paper. I adhered this to the centre of the concertina to create a backdrop for the couple which I included in the front of the panel. The couple die cut is from a previous collection by Becca, and is called the Happily Ever After Etched Dies. I die cut it from White Cardstock and Gold Mirror Cardstock and layered them one on top of the other,  so that I could achieve some depth and dimension. The mini bouquet in the bride's hand was made using the flower dies from the Layered Friends Forever Cafe Scene Etched Dies. I clustered them together to create a small bouquet. I also added some tulle and ribbon to it for added interest.

The sentiment is a die from the Happily Ever After Etched Die Set. I die cut it from Gold Mirror Cardstock and popped it on my card panel using dimensional foam tape. The flowers are all made using the flower dies from the Cinch and Go IV Etched Dies. I die cut them from White Cardstock and coloured them using the Tea Party Mini Cube Set. I embossed the centres and added pollens to it to give them more dimension. The leaves are also cut using the dies included in the Cinch and Go IV Etched Dies and were coloured using the Bamboo Crisp Dye Ink. 

I added these small flower clusters on all my card panels to create the look of Wedding Arches, which are so beautiful and delicate! I assembled it together by adhering the tabs on the sides of the cards and my card was complete!
Disclosure:
Where available, I use compensated affiliate links which means if you make a purchase I receive a small commission at no extra cost to you. Thank you so much for your support!

Spellbinders July 2019 Amazing Paper Grace Die of the Month is Here รข€“ Graceful Concertina

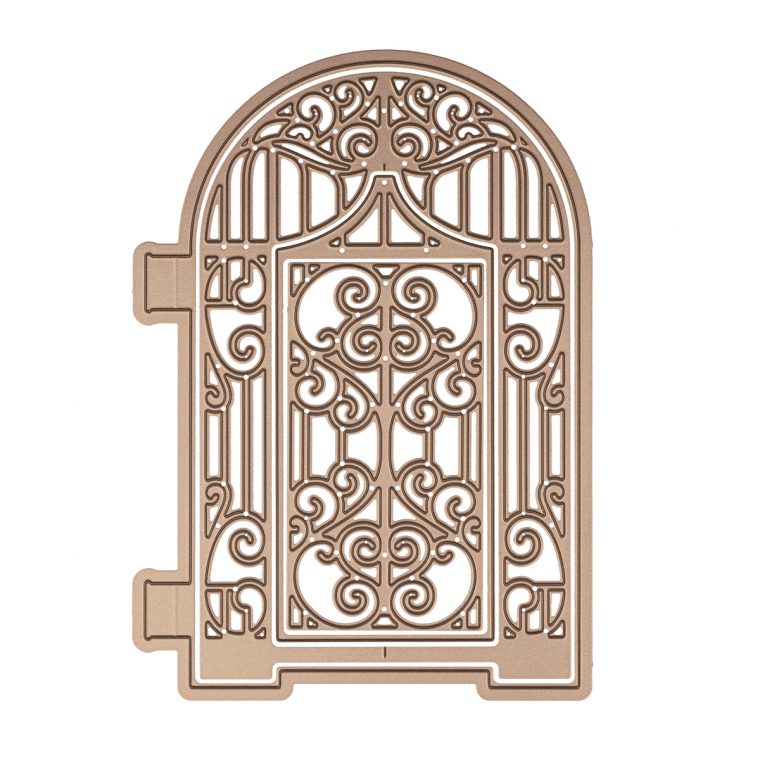
If you are still on the fence about the Amazing Paper Grace Die of the Month Membership, do check out the other project samples created using it on the Spellbinders blog. The dies are total value for money and the cost of the kit includes shipping cost within USA. Isn't that awesome?!


That's it from me today! I hope you liked my card. If you did, please do let me know in the comments below. I always love hearing from you.
Thank you so much for your visit to my blog today!

Tuesday, July 16, 2019

Spellbinders July Card Kit of the Month - Shellebrate

Hello there, everyone!
I have an exciting post to share today featuring the July  Card Kit of the Month by Spellbinders - Shellebrate. If you haven't heard about the Monthly Card Kits by Spellbinders or don't know how to subscribe to one, you can go over to the Spellbinders website and/or blog and read more about them HERE

This "Shellebrate" Kit, like all their other Card Kits, gives you everything you need to create 10 unique cards and even more. You now also get better goodies, including a 40 sheet paper pad, clear stamps, an adorable die set, tons of embellishments, and more!
Card Kit of the Month Membership

I have made FOUR Cards using the kit, so without further ado, let's get started!


To create this card, I first picked out two different patterned papers from the Shellebrate Paper Pad which would work for my card design, Next, I die cut the mermaid's tail, body, face, and hair using the dies included in the kit from Canson Montval Watercolor Paper. I coloured the die cut pieces using the Altenew Tropical Fiesta Watercolor Brush Markers Set. I assembled the entire mermaid together and adhered it to the card panel. I also added some additional details to it, like the tiara on the mermaid's hair which were die cut using the tiny flower dies included in the Kit. I find it so pretty!

I used some die cuts from the Shellebrate Die Cut Shapes Set to create the background for my card. I used a variety of elements so that it would depict an underwater scene. 

For the first half of my sentiment, I used a die cut from the Shellebrate Die Cut Shapes Set. For the other half, I heat embossed the word 'Mermazing' in White on a strip of Black Cardstock and adhered it on my panel using foam tape. I also added some Ranger Diamond Stickles on certains points of body of the mermaid and the fishes for added interest. 


For my second card, I used the Shellebrate Die Cut Shapes Set, and Shellebrate Paper Pad

To create this card, I used a patterned paper from the Shellebrate Paper Pad which had foiled holographic waves on it. Next, I die cut a circle from the centre of this paper so that I could create a scene around this. I took another piece of White Cardstock and ink blended the background to depict the look of ocean water. Then, I used several die cuts from the Shellebrate Die Cut Shapes Set and adhered them on my card panel. I'd like to point out a tiny detail in this scene - I have added a tiny flower to the Sea Horse just to doll it up. Doesn't it look so sweet?

I mounted this panel onto an A2 sized top-folding white card base. I added some purple sparkle stickers from the Shellebrate Foam Stickers as the finishing touch for my card!


To create my card, I first began by die cutting a patterned paper from the Shellebrate Paper Pad using a Diagonal Stitched Rectangle Frame Die Set. Once that was done, I started working on my card design. I used a mix of stickers from the Shellebrate Foam Stickers and several die cuts from the Shellebrate Die Cut Shapes Set to create the entire scene on my card. I also die cut some underwater plants and shells using the dies included in this month's kit and adhered it to my panel. These Kits provide you with all the supplies you would need to create ten cards and more and are incredibly fun to work with! I always have a great time creating cards using the Monthly Card Kits. 

You can see the dimension of the stickers here. I used some sentiment banners from the Shellebrate Foam Stickers to complete my card. 


My last card for today showcases the Shellebrate Die Cut Shapes Set and Shellebrate Paper Pad.

To create this card, I again started out by selecting a patterned paper from the Shellebrate Paper Pad which I could use for my card background. Once I did that, I started thinking about the main elements for my design. I decided to use a film strip, some dolphins and water splashes, fishes and underwater plants for my card. These all came from the Shellebrate Die Cut Shapes Set. There are innumerable die cuts included in this pack to help you create 20 cards or more! 

The sentiment is also a die cut from the Shellebrate Die Cut Shapes Set. I adhered it to my panel using foam tape. I also added some white glitter stars from the Shellebrate Foam Glitter Sentiment Stickers to my panel as the finishing touch. 


And here are all my cards together! Each one is so different from the other, yet was created using a single Card Kit. I love the versatility and the possibilities each kits offers!


If you want to find out more about the Club – prices, how you sign up and what’s included, please look ——–> HERE.

Here's a Video by Spellbinders showing you how to create some more cards using the Shellebrate Card Kit of the Month

That's it from me today! I hope you liked my cards using the Spellbinders July Card Kit of the Month. If you have a favourite, please do let me know. I would love to hear from you! :)

Thank you so much for stopping by!

Thursday, July 11, 2019

Altenew July 2019 Stamp/Die/Stencil/Stamping Mat Release Blog Hop + Giveaway


Hello, crafty friends! 
I'm so happy and honoured to be joining Altenew for their Blog Hop today featuring the July 2019 Stamp/Die/Stencils. You should have arrived here from Ilina Crouse's blog.  If you arrived here on your own, then you will want to start at the beginning, the Altenew Card Blog so that you don’t miss a thing!  
We've got tons of inspiration and giveaways for you on the hop today, so keep reading till the end of this post for more information.


To create my card, I first took a piece of Coldpressed White Watercolor Cardstock measuring 4 1/4" X 5 1/2" and used the Purple Wine Watercolor Brush Marker from the Altenew Tropical Fiesta Set to create the light watercolor wash on the background. Once I was happy with it, I added few black and orange paint splatters on the background for some interest.

I heat embossed several flowers, fillers, and leaves from the Pen Sketched Flowers Stamp and the Altenew Charming Doodles Stamp sets using Pure White Crisp Embossing Powder. Then, I coloured them all using the different brush markers from the Altenew Tropical Fiesta Set and cut them out using the coordinating dies. I adhered these images to my panel using foam tape for dimension.

The sentiment comes from the Crystal Frames Stamp set. I stamped it using the Altenew Obsidian Pigment ink, which is, by far, the BEST black ink I have ever used! It gives clean, crisp impressions every time. Definitely recommend this ink to everyone out there. :)
Next, I added a thin strip of Gold Glitter Washi Tape on the edge of the sentiment banner to accentuate it and finally adhered few gold sequins to complete my card.


My next card features the Altenew Charming Doodles Stamp & Charming Doodles Die Set again with the Crystal Frames Die Set. I love the Crystal Frames Die Set because of its elegant frames, and I can see myself using it for so many different projects!

To create my card, I first took a piece of A2 sized Smooth White Cardstock and used the Dotted Scales Debossing Cover Die to create the debossed effect on my panel. Then, I used Tumbled Glass Distress ink to lightly colour the top half of my panel. I also added few black paint splatters for added interest.

Next, I die cut the geometric frame from the Crystal Frames Die Set from Gold Mirror Cardstock. I also stamped some flowers, leaves, and foliage from the Charming Doodles Stamp set using the Altenew Obsidian Pigment ink on White Heavyweight Cardstock. The Charming Doodle Stamp set is a layering stamp set and I used different dye inks from Altenew to fill in the solid images. Then, I die cut these out using the coordinating Charming Doodles Die Set. I played around my arrangement till I was satisfied with the design and then adhered them all on to the panel using foam dots.

The sentiment is from the Crystal Frames Stamp set. I used the Altenew Obsidian Pigment ink to stamp it on a strip of White Cardstock. The Obsidian ink has easily become my go-to black ink for stamping images. It's that good!


Moving on to my third card for today, and this one features another beautiful set - Pen Sketched Flowers Stamp. I used this set with the Crystal Frames Die Set.

This card did not turn out the way I had envisioned, but I still wanted to share it with you'll. For my card, I started by creating a stenciled background so that the flowers would pop against it. I used the Beveled Squares Stencil and Altenew Warm Sunshine Dye ink for the background. I used a Ranger Mini Ink Blending Tool with the Warm Sunshine Dye ink to stencil on the card panel. Next, I added few black paint splatters to add some more interest to the design.

The flowers and leaves are from the Pen Sketched Flowers Stamp set. I stamped several of them on White Cold Pressed Watercolor Cardstock using VersaMark Embossing ink. I used the Antique Gold Crisp Embossing Powder for heat embossing the images and then coloured them using the Altenew Tropical Fiesta Brush Markers Set. I die cut all the images using the Pen Sketched Flowers Die Set and adhered them to my card panel.

To add some interest to my  design, I die cut a frame from the Crystal Frames Die Set using Gold Mirror Cardstock. I adhered that to my panel and did the floral arrangement around it. The sentiment is from the Pen Sketched Flowers Stamp as well.  I added a strip of the Golden Trim Washi Tape to my sentiment banner to accentuate the look. Lastly, I adhered few gold sequins to my card as the finishing touch.


My last card for today features the Sophisticated Wreath Stamp Set and Sophisticated Wreath Die Set. I also used the Crystal Frames Stamp set to create the focal for my card.

 For this card, I first stamped the geometric frame from the Crystal Frames Stamp set using Altenew Obsidian Pigment ink on my card panel. Next, I stamped the flowers and foliage from the Sophisticated Wreath Stamp Set using the Cherry Blossom Oval Set. The flowers are a 2-step layered stamp, so I used only Razzleberry and Rubellite from the set. The leaves and small filler flowers are also a part of the same set. For the leaves, I used Parrot Crisp Dye ink for the most part. Once the stamping was done, I die cut all the images using the coordinating Sophisticated Wreath Die Set.

Before adhering  my images to the panel, I lightly ink blended the background using Tumbled Glass Distress ink. I adhered few of the stamped images directly to my card base, while some were adhered using foam dots just to create some interest in the design.

The sentiment is also from the Crystal Frames Stamp set. I stamped it using the Altenew Obsidian Pigment ink. For the finishing touches, I added few clear sequins and my card was ready!
Disclosure:
Where available, I use compensated affiliate links which means if you make a purchase I receive a small commission at no extra cost to you. Thank you so much for your support!

Giveaway:
To celebrate this release, Altenew is giving away a $50 gift certificate to 6 lucky winners! Please leave a comment on the Altenew Card Blog and/or Altenew Scrapbook Blog by 7/16/2019 for a chance to win.

They’ll also draw a winner to receive a $20 gift certificate from the comments left on each designer’s blog on the blog hop list below. All winners will be announced on the Altenew blogs on 7/16/2019.

Blog Hop Order:
Just in case, you lose your place along the way, here is the complete list of participants so that you can find your way back.

                           Hussena Calcuttawala (You are HERE!)


Thank you so much for your stopping by and reading this blog post. I hope you liked the cards I made. I would love to hear if you have a favourite!

Have a wonderful day!

Tuesday, July 9, 2019

Spellbinders Vintage Treasures Blog Hop + Giveaway


Hello, crafty friends! 
I'm beyond thrilled and honoured to be joining Spellbinders for their Blog Hop today featuring the Vintage Treasures Collection by Amazing Paper Grace. You should have arrived here from the Spellbinders Blog.
 We've got tons of inspiration and giveaways for you on the hop today, so keep reading till the end of this post for more information.

For my first card today, I have used the Marquise Diamond Pendant Etched Dies, Brillante Rondelle Etched Dies, and the Cinch and Go V Etched Dies. You might have seen my projects using them earlier, if you haven't and would like to take a look, click HERE.

I always love working with Becca's dies as they are so exquisite and elegant! For my card, I used the Marquise Diamond Pendant Etched Dies to create the main focal. I die cut it twice, once from White Cardstock and the other from Gold Mirror Cardstock. I offset the die cuts a bit while adhering it to my card panel, so that the gold would peek through. I did the same process for my next layer as well. I die cut the decorative label frame two times, once from White Cardstock and once from Gold Mirror Cardstock using the Brillante Rondelle Etched Dies. I popped this frame on foam dots for added dimension.

To embellish the card, I created some handmade paper flowers using the Cinch and Go V Etched Dies. I die cut these flowers from White Heavyweight Cardstock and coloured them using Distress Ink Re-inkers. I shaped the petals using an Embossing Ball Tool and added pollens in the centres for a fuller look. I die cut the leaves using dies included in the same die set and coloured them with Re-inkers.
 At this point I felt that my background looked a bit plain, so I used the Fun Stampers Journey Deco Wall Stamp and Journey Gold Ink Pad to stamp on the entire card panel. This gave the card some interest, in my opinion.

I stamped the sentiment in the centre of the die cuts to complete my card design. I then decided to add some corners to this panel to further embellish it. I die cut them from White Cardstock and Gold Mirror Cardstock using dies from the Swirl Tags Etched Dies. Finally, I matted this card panel on to some Gold Mirror Cardstock, which was then adhered to a top folding card base.


My next card is made in some of my favourite colour tones. I love using pastel colours for my cards as they look so elegant. For my card, I used the Bella Luce Oval Etched Dies, Cinch and Go V Etched Dies, and the Swirl Tags Etched Dies. 

My creative process for creating this card was very similar to the previous one. My cards primarily consist of layering as that's the style I enjoy the most. For this one, I started by die cutting a piece of White Heavyweight Cardstock using the Bella Luce Oval Etched Dies. This is an intricate die, but cuts like butter when I am using the Spellbinders Platinum 6 Die Cutting and Embossing Machine. All my dies cut perfectly in a single pass, and you don't require any additional shims whatsoever as well.
I die cut two more pieces using another intricate frame die from the  Bella Luce Oval Etched Dies from White Cardstock and  Gold Mirror Cardstock. I offset the die cuts a little so that the Gold Mirror world peek from the sides. This is one of my all time favourite techniques to use to highlight different dies in a project.

For the focal, I die cut some flowers using the Cinch and Go V Etched Dies from Light Pink Cardstock. I shaped them lightly using an Embossing Tool and added brads to the centres so that they would stay put. It's been such a while since I used brads on any project! These used to be so in vogue few years ago, but are not to seen anymore. I also added some mulberry rose buds, pollens, and filler flowers to complete my floral arrangement.

I decided to use this wonderful saying/sentiment from the Fun Stampers Journey Inside and Out Stamp set for my card, which was stamped using Versafine Onyx Black ink. For this card too, I wanted to add some corners, albeit a different design this time, which are from the  Swirl Tags Etched Dies. Once I adhered the four corners on my card panel, I matted this panel onto some Gold Mirror Cardstock, which was then adhered to an A2 sized top folding card base.

And here's something a little bit different from my side. I decorated the inside of the card as well to give it a more finished look. Let me know if you liked the idea!

And here's a look at both my cards together. I hope you liked them!

Disclosure:
Where available, I use compensated affiliate links which means if you make a purchase I receive a small commission at no extra cost to you. Thank you so much for your support!

Giveaway:
To celebrate this release, Spellbinders is giving away a $50 gift certificate to 3 lucky blog readers – selected from the comments across all of the blogs in the hop. Giveaway closes on Sunday, July 14th 11:59 pm EDT. The winners will be announced in the blog hop post the following Monday. The winner is responsible for shipping cost, duties and taxes.

Blog Hop Order:
Next Stop on this Blog Hop is Jean Manis's blog.
Just in case, you lose your place along the way, here is the complete list of participants so that you can find your way back.

Spellbinders
                           Hussena Calcuttawala (You are HERE!)
Jean Manis
Mallika Kejriwal
Jennifer Snyder
Laurel Beard
Anita Kejriwal
Melody Rupple
Marie Heiderscheit
Brenda Noelke
Mindy Eggen
                          Varada Sharma                           

Thank you so much for your stopping by and reading this blog post. I hope you liked the cards I made. I would love to hear if you have a favourite!

Have a wonderful day!

Tuesday, July 2, 2019

Spellbinders July 2nd Decorative Glimmer Blog Hop


Hello, crafty friends! 
I'm so excited to be joining Spellbinders for their Decorative Glimmer Blog Hop featuring the January and April Glimmer Plates. You should have arrived here from the super talented and creative, Yana Smakula's blog. If you arrived here on your own, then you will want to start at the beginning, the Spellbinders Blog so that you don’t miss a thing!  We've got tons of inspiration and giveaways for you on the hop today, so keep reading till the end of this post for more information.

For my first card today, I have used the Fanciful Corners Glimmer Hot Foil Plate and the Circle Pattern Glimmer Hot Foil Plate. You might have seen my cards using them earlier, if you haven't and would like to take a look, click HERE.

I love using these two Glimmer Plates in combination with each other because I find it gives a very elegant look. For my card, I used the Glimmer Hot Foil System to foil the four corners from the Fanciful Corners Glimmer Hot Foil Plate on to my card panel using Glimmer Hot Foil Roll - Gold. Once that was done, I die cut a hemstitch circle from the Nestabilities Hemstitch Circles Etched Dies using white cardstock. I used the smallest circle from the Circle Pattern Glimmer Hot Foil Plate to foil on this die cut using Glimmer Hot Foil Roll - Gold.

Then, I stamped my sentiment in the centre of this foiled circle die cut and popped it on my panel using foam dots. To embellish the card, I created some mini handmade paper flowers and added few gold pollens for the finishing touches. I matted this card panel on to some Gold Mirror Cardstock and Pale Blue Textured Cardstock, which was then adhered to a top folding card base.


My next card is bold and dramatic - That's how I would describe it! I seldom use coloured cardstock for my card panels and this was really refreshing for me!

When I saw the Flower Border Glimmer Hot Foil Plate, I was not sure how to use it for a project. Then, it occured to me that I could use it to create my own background piece, and that's what I did for my card. I took out my Flower Border Glimmer Hot Foil Plate and Glimmer Hot Foil Roll - Copper and foiled the plate on a piece of Navy Blue Cardstock. I was really happy with how it turned out and decided to keep the rest of the design simple.
I die cut a border using the Shapeabilities Infinity Link Border Etched Dies again from the same Navy Blue Cardstock. I adhered this border in the middle of my card panel and started working on my embellishments.

For the focal, I die cut the ornate frame from the
Amazing Paper Grace Giving Occasions Stamp and Die Set using Copper Foil Cardstock. Next, I added a strip of Navy Blue Cardstock in the centre of this die cut and then added my sentiment piece, which are actually foiled stickers from a past Spellbinders Card Kit.

I also die cut few flowers and leaves using some previous Club Dies from Spellbinders. I added blue pearls to the centres of the flowers as the finishing touches. I matted this panel on a piece of Copper Foil Cardstock and then adhered this to a top folding card base.

Disclosure:
Where available, I use compensated affiliate links which means if you make a purchase I receive a small commission at no extra cost to you. Thank you so much for your support!

Giveaway:
To celebrate this release, Spellbinders is giving away a $50 gift certificate to 3 lucky blog readers – selected from the comments across all of the blogs in the hop. Giveaway closes on Sunday, July 7th 11:59 pm EDT. The winners will be announced in the blog hop post the following Monday. The winner is responsible for shipping cost, duties, and taxes.

Blog Hop Order:
Just in case, you lose your place along the way, here is the complete list of participants so that you can find your way back.


Thank you so much for your stopping by and reading this blog post. I hope you liked the cards I made. I would love to hear if you have a favourite!

Have a wonderful day!