Showing posts with label Clear Stamp of the Month. Show all posts

Monday, February 21, 2022

Spellbinders February 2022 Clear Stamp & Die Club Kit | Old School Notes


Hello, crafty friends!
Hope your Monday is off to a great start! I have a Birthday Card to share today made using the Spellbinders Clear Stamp & Die of the Month  Old School Notes.

The Spellbinders Clear Stamp of the Month features a cute typewriter with stamped details inside, several types of flowers, and darling sentiments, which you can mix and match with the other Club Kits for February Kits such as the Large Die of the Month Kit for endless possibilities! This is a 17-piece clear photopolymer 4 x 6 stamp set perfect for many cardmaking projects and lots of occasions. This “Old School Notes” stamp set features made in the USA stamps from high-quality photo-polymer for clear, crisp impressions. 

There is also a Spellbinders Clear Stamp Club Kit without the die set, which you can opt for if you don't wish to receive the coordinating dies.

 You may notice a theme from my last post - Typewriters. I’m having such a blast creating with these this month! I decided to create a watercolored Birthday Card using the Old School Notes Stamp set along with the Typing Class Die Set and the Nestabilities Hemstitch Rectangles Etched Dies.

To create my card, I first stamped a number of the images from the  Old School Notes Stamp set on to Snowdrift Cardstock using Versafine Onyx Black ink. Next, I colored the images using the Jane Davenport Watercolors Neutrals Set. Once the images were all colored and dry, I die cut the images using the coordinating dies

Next, I die-cut Beeswax, DahliaRainforest, and Teal Topaz Cardstock using the flower and leaf dies included in the Typing Class Die Set. Then, I went ahead and stamped some additional solid leaves from the stamp set on to Snowdrift Cardstock using Electric Lime ink and cut them out using the  coordinating dies to use as foliage. Next, I die-cut Snowdrift Cardstock using the typewriter message die included in the Clear Stamp & Die of the Month Club and stamped a sentiment on it using Versafine Onyx Black ink and popped it on my panel using foam adhesive

Next, to create my card background, I die-cut Snowdrift Cardstock using the Extra Large Frame Die from the Hemstitch Rectangles Etched Die Set. Then, I wet my panel with water and used Tumbled Glass, Peacock Feathers, and Cracked Pistachio Distress Inks with a Water Brush in a dabbing motion, allowing the colors to mix slightly. I let the panel dry and then added some grey and teal paint splatters for interest. Then, I stamped one of the sentiment pieces from the Old School Notes Stamp set using Pumice Stone Distress Oxide ink randomly all over the panel to create a vintage letter look. I really love how it adds a little something to the background. 

Once that was done, I adhered the stamped images to the background panel using foam adhesive. Then, I matted the panel with layers of Silver Glitter and Silver Fox Cardstock before adhering it to a top-folding white card base with tape runner. 


I hope you liked my card and thank you so much for stopping by today. You can subscribe to any of the Spellbinders Clubs between the 1st - 24th of each month and never miss a fun kit like this again!
  

Don't miss out on the Be our Valentine Sale that is currently going on at Spellbinders. You can SAVE $25 Off $100+ on your orders on the Spellbinders website. This is a cart-level discount that will be applied to all orders with a subtotal of $100+, clubs are not eligible for this promotion.


 If you like what you've seen from me, please give me a follow over on my Instagram (@hussena_cal) and/or subscribe to my blog if you haven't already.
Wishing you a great day ahead!

Saturday, January 22, 2022

Spellbinders January 2022 Clear Stamp & Die of the Month | One Love, One Heart


Hello, crafty friends!
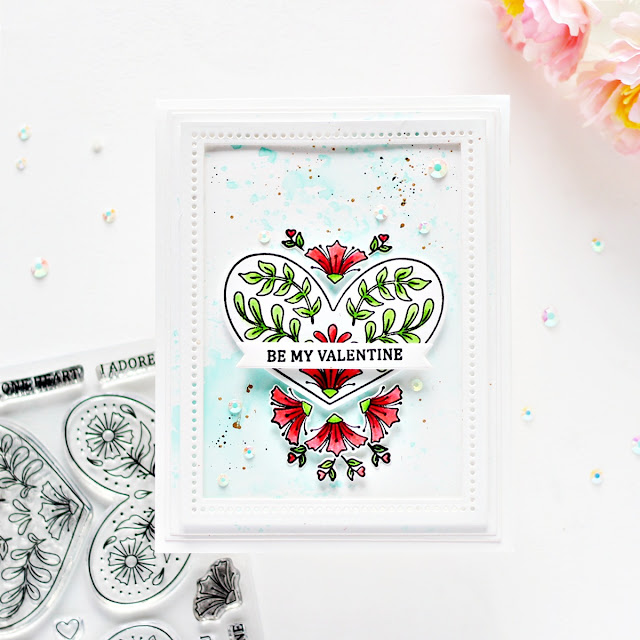
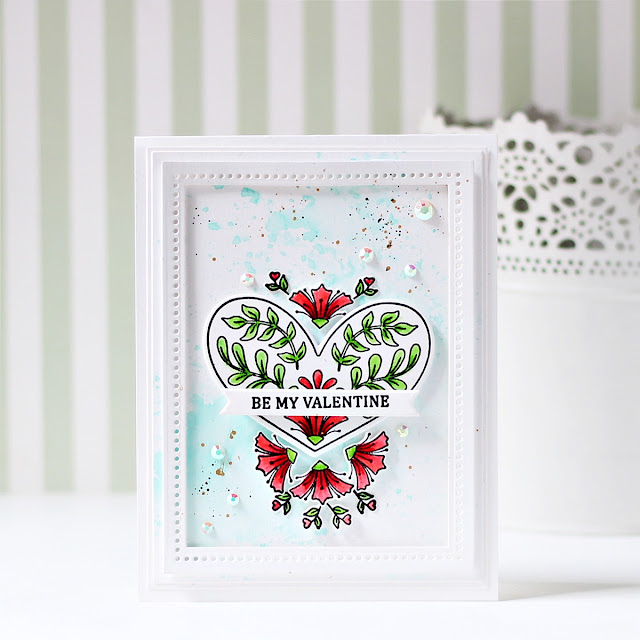
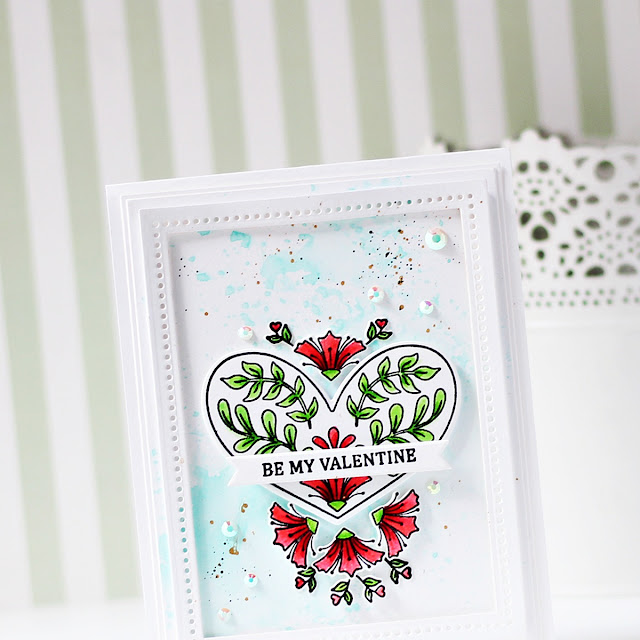
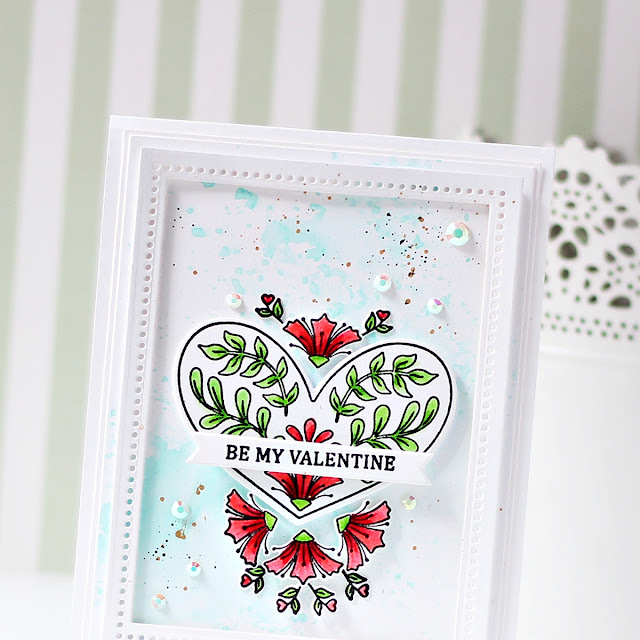
Hope your weekend is off to a great start! I have a Valentine's Day Card to share today made using the Spellbinders Clear Stamp & Die of the Month  One Love, One Heart.

The Spellbinders Clear Stamp of the Month features three wonderful hearts with stamped details inside and beautiful sentiments, which you can mix and match with the other Club Kits for January Kits for endless possibilities! This is a 12-piece clear photopolymer 4 x 6 stamp set perfect for many cardmaking projects and lots of occasions. This “One Love, One Heart” stamp set features made in the USA stamps from high-quality photo-polymer for clear, crisp impressions. 

There is also a Spellbinders Clear Stamp Club Kit without the die set, which you can opt for if you don't wish to receive the coordinating dies.

 The pretty heart designs from the set inspired me to create this love-themed card, which would just perfect to gift to a loved one this Valentine's Day. I used the Clear Stamp and coordinating dies from the set along with the Nestabilities Hemstitch Rectangles Etched Dies for my design.

For my card, I started by trimming a piece of Snowdrift Cardstock to 4″ x 5.25″ and created the background pattern using the 'Ink Smooshing' technique. I just pressed Tumbled Glass and Salty Ocean Distress Inks onto different areas of my craft mat and spritzed them with water until they beaded up. I then pressed my piece of cardstock into the droplets and dried it with a Heat Gun. I continued pressing the cardstock into the ink droplets until I had look that I liked and was happy with.

Next, I I stamped one of the heart designs and the individual floral images from the One Love, One Heart Stamp Set onto Snowdrift Cardstock using Versafine Onyx Black Ink. I coloured the images using Zig Clean Colour Real Brush Markers and then cut them out with the coordinating dies (included if you subscribe to the Clear Stamp & Die of the Month Kit) and popped them up in the middle of the card using foam adhesive. Next, I stamped a sentiment from the same set onto a strip of Snowdrift Cardstock using Versafine Onyx Black Ink and used one of the banner dies included in the Kit to cut out the card sentiment and popped it down on my panel using  foam adhesive.

To accentuate my design, I die-cut Snowdrift Cardstock and White Fun Foam using the Extra Large Hemstitch Die from the Nestabilities Hemstitch Rectangles Etched Dies. I adhered down the frame to my panel using liquid adhesive and then mat the card panel with  Snowdrift Cardstock. Then, to finish, I adhered it to a top-folding A2-sized white card base with liquid adhesive. Lastly, I adhered a few Iridescent Crystal Gems around my stamped design to add some sparkle and shine to the panel. 


I hope you liked my card and thank you so much for stopping by today. You can subscribe to any of the Spellbinders Clubs between the 1st - 24th of each month and never miss a fun kit like this again!
  

Don't miss out on the Feel The Love Sale that is currently going on at Spellbinders with up to 40% off on a wide range of gorgeous dies, stamps, glimmer plates, tools, and more! There are so many AMAZING deals that you definitely shouldn't miss! 
 

 If you like what you've seen from me, please give me a follow over on my Instagram (@hussena_cal) and/or subscribe to my blog if you haven't already.
Wishing you a great day ahead!

Thursday, January 13, 2022

Spellbinders January 13th Clubs Blog Hop + Giveaway


Hello, crafty friends!
I'm delighted to be joining Spellbinders for the January 2022 Clubs Inspiration Blog Hop today. Spellbinders is celebrating all their Club Kits in shop for January 2022.

If you arrived here from Deborah Jenkins' Blog, then you are on the right track. If this is your first stop, then you will want to start at the beginning, the Spellbinders Blog. We've got tons of inspiration and giveaways for you on the hop today, so keep reading till the end of this post for more information.

I have an A2 Shaped Note Card cum Pocket to share for the hop today using the Spellbinders  – January 2022 Die of the Month Set. This month’s Large Die of the Month Kit, “A Pocket Full of Love“, is a large set of 11 dies that cuts a beautifully ornate pocket as well as a fun shaped note card to insert.  You can add the pocket to your cards and scrapbook pages or use it on its own for a gorgeous and unique love letter like I’ve done here. It all fits in an A2 envelope, which is perfect for Valentine’s Day, but could totally be used for other occasions throughout the year!

To create my card, I first Alabaster Cardstock using the Pocket Tab Dies from the A Pocket Full of Love Die Set. I die cut the layers twice, and then adhered them together using Craft Glue to create the pocket for my note-card. Next, I die-cut Alabaster Cardstock and White Foam using the Decorative Pocket Die from the set and layered the pieces atop the pocket using Craft Glue. Next, I die-cut Wild BerryPink SandRainforest, Fern, Gold Glitter Cardstock, and White Foam using the Flower die included in the set. I layered the pieces together and adhered it down my pocket using Craft Glue for a strong hold. 


Once that was done, I die-cut Beeswax and Glacier Cardstock using the Note Card Insert Die in the A Pocket Full of Love Die Set. Next, I die-cut Alabaster Cardstock, Gold Glitter Cardstock, and White Foam Sheets using the Pull-Out Decorative Heart Die from the set and adhered the layers together with Craft Glue for a strong hold. I adhered the ivory die-cut piece on top of the gold glitter die-cut with liquid glue, offsetting them a bit to form a shadow. I also die-cut Wild Berry Cardstock and  White Foam using the Tiny Flower Die from the Set and layered them together for a raised effect. Next, I stamped a sentiment from the "One Heart, One Love" Clear Stamp of the Month Set on to a strip of Snowdrift Cardstock using Versafine Onyx Black and popped it on to my panel using foam squares for dimension.


Once that was done, I embossed Glacier Cardstock using the NEW "Spreading Love" Embossing Folder from Spellbinders. This Club has sold out for the month, but you can check back later in the 'Past Clubs' section on the website to get your hands on it.  Be sure to sign up for the Spellbinders Clubs right away on the 1st of the month not to miss out on any future designs! I trimmed the embossed panel to size to fit on my card base and then adhered down my card elements on it with liquid glue. Then, to finish, I mat my card panel with Mirror Gold Cardstock before adhering it a side-folding A2 Alabaster card base with tape runner. I didn't stamp a sentiment in the pocket letter, but if you wish, you could do that to personalize your card even further.


Giveaway:
To celebrate this release, Spellbinders is giving away a $50 gift certificate to 3 lucky blog readers – selected from the comments on our blog. Giveaway closes on Sunday, January 16th, 11:59 pm MST. The winners will be announced in this blog hop post the following Wednesday. The winner is responsible for shipping cost, duties and taxes.

Please note, store credit (gift certificate) cannot be applied to Club Subscriptions. Store credit can be applied to shop past Club products, Club extras and regular releases.

Blog Hop Order
Next Stop on this Blog Hop is, Jeanne Bobish's blog.
Just in case you lose your place along the way, here is the complete list of participants so that you can find your way back:

                           Hussena Calcuttawala (You are HERE)

Thank you so much for your stopping by and reading this blog post. I hope you liked my project! 

If you like what you've seen from me, please give me a follow over on my Instagram (@hussena_cal) and/or subscribe to my blog if you haven't already.
Wishing you a great day ahead!

Monday, December 13, 2021

Spellbinders December 2021 Clear Stamp & Die of the Month | Color Outside the Lines


Hello, crafty friends!
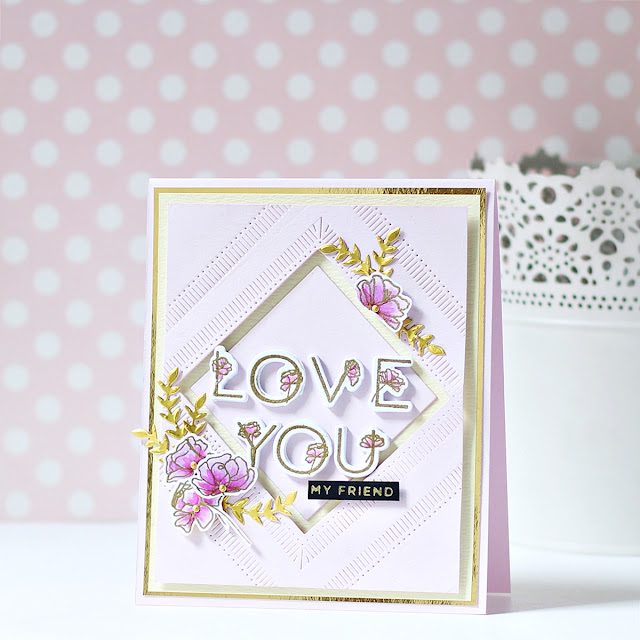
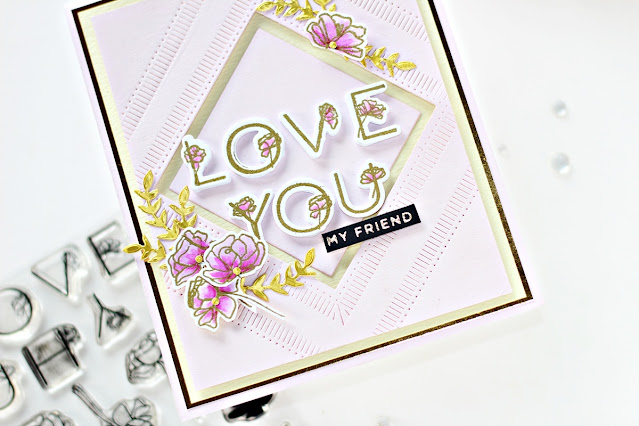
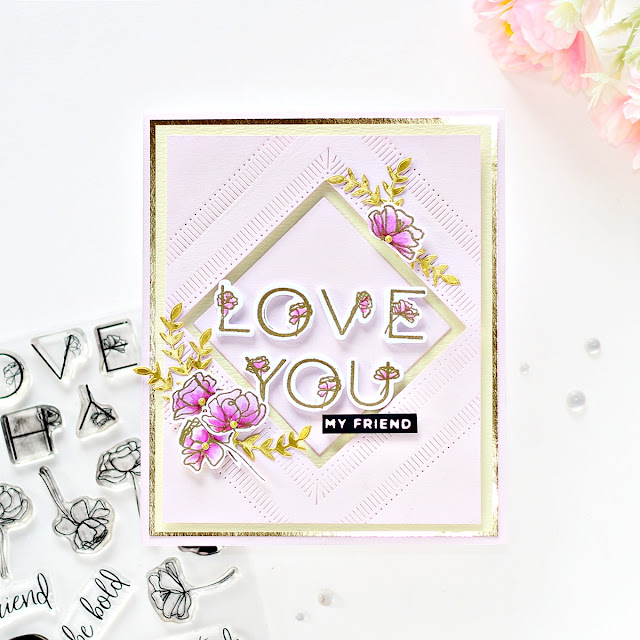
Happy December and welcome to the start of a fresh new week. I have a friendship card to share today made using the Spellbinders Clear Stamp & Die of the Month - Color Outside the Lines.

The Spellbinders Clear Stamp of the Month is all about florals and outside the line details. This is a 19-piece clear photopolymer 4 x 6 stamp set perfect for many cardmaking projects and lots of occasions. This “Color Outside the Lines” stamp set features made in the USA stamps from high-quality photo-polymer for clear, crisp impressions. 

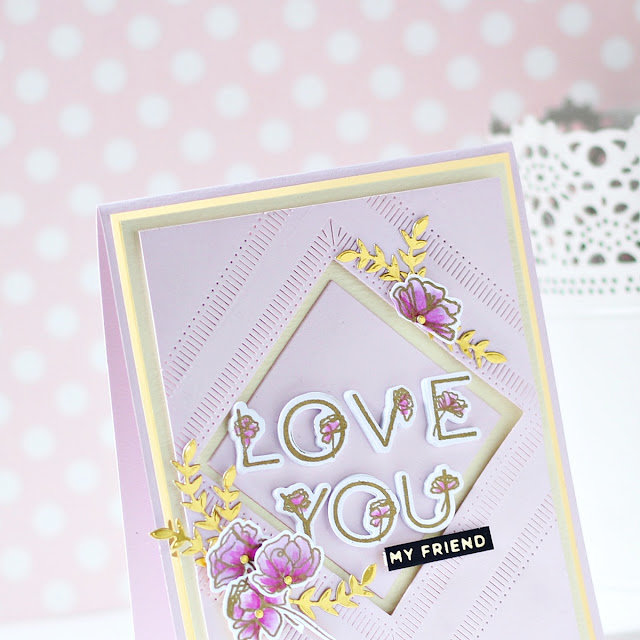
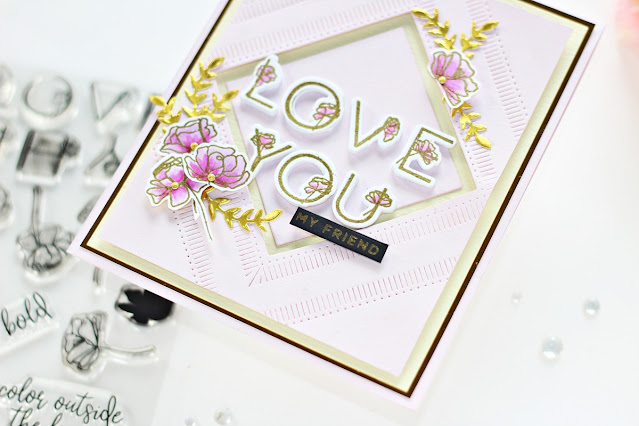
 The pretty layered flowers and elegant floral letters from the set inspired me to create this friendship-themed card. I used the Clear Stamp and coordinating dies from the set along with the Fluted Classics Square Etched Dies for my design.

To create my card, I began by stamping the floral letters in Versamark Embossing ink on a piece of Snowdrift Cardstock and heat embossed it using Super Fine Gold Embossing Powder, before die cutting it with the matching coordinating dies. Next, I stamped the outlined floral images included in the Color Outside the Lines Set using Versamark Embossing ink on another piece of Snowdrift Cardstock and heat embossed the images using Super Fine Gold Embossing Powder. I did some quick colouring using Copic Markers and then cut out the pieces with the matching coordinating dies.

Next, I die cut Lilac Cardstock using the Large Outer Rim and Medium Outer Rim Dies from the Fluted Classics Square Etched Dies and foam mounted the die-cut panel to a piece of Lemon Yellow Cardstock. Once that was done, I die cut Lilac Cardstock using the Medium Outer Square and Inner Rim Dies from the same set and adhered the die-cut square piece to the centre of the panel using Liquid Glue. Then, I adhered each of the die cut letters down using foam squares in the center of the die-cut frame over the card panel to create the card sentiment.

Next, I die cut Mirror Gold Cardstock using the leaf die included in the Simply Perfect Layered Blooms Die Set. I die cut a few leaves to go along with my floral stamped images and adhered all the pieces down on my panel using Liquid Glue. The, for my sentiment, I used Gold Hot Foil to foil Onyx Cardstock using one of the sentiments from the Mini Sincere Sentiments Glimmer Hot Foil Plate and cut it out using the coordinating die. I adhered the piece onto my panel using foam tape for a raised effect. Then, to complete, I mat my background panel with Mirror Gold Cardstock before adhering it to a top-folding lilac card base with tape runner.


I hope you liked my card and thank you so much for stopping by today. You can subscribe to any of the Spellbinders Clubs between the 1st - 24th of each month and never miss a fun kit like this again!
  

Merry Member Appreciation
Spellbinders are offering a free gift in December Clubs. Gifts vary by club. Total Package Members receive the best value as they will receive all the clubs and all the free gifts!
 

If you like what you've seen from me, please give me a follow over on my Instagram (@hussena_cal) and/or subscribe to my blog if you haven't already.
Wishing you a great day ahead!
Wednesday, November 10, 2021

Spellbinders November 2021 Clear Stamp & Die of the Month | Around The Holidays

Hello, crafty friends!
Happy Wednesday! I have a Christmas Card to share today made using the Spellbinders Clear Stamp & Die of the Month - Around The Holidays.

The Spellbinders Clear Stamp of the Month is a 9 piece stamp set containing decorative holiday details on a curved line with curved sentiments too. This stamp set is perfect for lots of Holiday occasions and can be used in a variety of ways. The Stamp Set coordinates with this month's Large Die of the Month and Glimmer Die of the Month Sets, so you can mix and match your supplies to create different projects. This “Around The Holidays” stamp set features made in the USA stamps from high-quality photo-polymer for clear, crisp impressions. 

I used the curved borders from the kit along with the coordinating dies to create my card.

For my card, I started by cutting a piece of Snowdrift Cardstock with the border die included in the Clear Stamp and Die of the Month Kit. Next, I stamped the snowflake border in Versamark Embossing ink on Snowdrift Cardstock and heat embossed it using Super Fine Gold Embossing Powder before die cutting it with the matching border die. Then I cut Mirror Gold Cardstock using one of the borders from the Clear Stamp and Die of the Month Kit and adhered the layer underneath the front card panel to add a gold border to it. 

Once that was done, I stamped the presents border on to Snowdrift Cardstock using Versamark Clear Embossing ink and heat-embossed it using Super Fine Gold Embossing Powder to make painting such small images a bit easier by providing a slightly raised edge to contain the pigment. I coloured the images using Copic Markers and then die cut each of the presents using the coordinating dies included in the Clear Stamp and Die of the Month Kit.

I assembled the different components of the card front together, then backed it with a piece of foiled patterned paper from a previous Spellbinders Card Kit of the Month Paper Pad. Once that was done, I stamped one of the sentiments in the stamp set, positioning it to follow the arc of the die cut card front using Versafine Onyx Black ink. Then I placed the die cut presents along the die cut edge and popped them on to my panel using foam squares

Next, I die cut Snowdrift Cardstock using the Holiday Word Blocks Etched Dies (I snipped off the holly leaves from the Ho Ho Ho piece to use for my card design) and coloured the pieces using Copic Markers. Then I matted my card front to a piece of Pomegranate Cardstock before adhering it to a top-folding white card base using the Bearly Art Precision Craft Glue. Lastly, I added custom-coloured Crystal Jewels to the die-cut leaves to embellish my card. 


I hope you liked my Christmas card and thank you so much for stopping by today. You can subscribe to any of the Spellbinders Clubs between the 1st - 24th of each month and never miss a fun kit like this again!
  

Don't miss out on the BIG Pre Holiday Clearance Sale going on now with a HUGE assortment of newly clearanced products. The offer is now live and available through November 11th, 2021 at Midnight PST.

If you like what you've seen from me, please give me a follow over on my Instagram (@hussena_cal) and/or subscribe to my blog if you haven't already.
Wishing you a great day ahead!
Monday, October 11, 2021

Spellbinders October 2021 Clear Stamp of the Month | Sending You


Hello, crafty friends!
Happy Monday! I am back today with a nature-inspired thank you card made with the Spellbinders Clear Stamp of the Month - Sending You. Check out the exclusive coordinating You - Die Set. Spellbinders now offers a coordinating die set that you can purchase separately as an add-on for the Clear Stamp of the Month Club Sets. I love this option as I can quickly and easily cut my favorite images from the set out and no longer have to fussy cut the images! The Clear Stamp and Coordinating Die of the Month Club kit is already sold out, however the stamp set on it’s own is still available.

The Spellbinders Clear Stamp for October is a 24 piece stamp set containing 3 large sentiment stamps – Sending, For, and You, and 21 different secondary sentiments! The stamp set is super versatile and one that I will reach for often in my stash! The Stamp Set coordinates with this month's Small Die of the Month and Large Die of the Month Sets, so you can mix and match your supplies to create different projects. This “Sending You” stamp set features made in the USA stamps from high-quality photo-polymer for clear, crisp impressions. 

I used some of the sentiments from the kit along with some bright florals from the Hex Tile Stamps for a thank-you card.

I started by stamping the outline images from the Hex Tile Stamps on a piece of Snowdrift Cardstock using Black Licorice ink. Then I stamped the layers for each bloom over top using Vineyard Berry and Sand Dunes inks from Altenew. Once that was done, I fussy cut the images using a pair of scissors.

I die cut Snowdrift Cardstock using the outer diamond die from the Diamond Floral Frame Glimmer Hot Foil Plate & Die Set and stamped a sentiment from the Clear Stamp of the Month Kit onto it using Black Licorice ink. Next, I die cut Gold Mirror Cardstock twice using the inner diamond die from the Diamond Floral Frame Glimmer Hot Foil Plate & Die Set and kept it aside to work on my panel. 

Then, I did some very light "ink smooshing" on a piece of Watercolor Cardstock using Tumbled Glass and Twisted Citron Distress inks. Once my panel was dry, I adhered down the two foiled die cut pieces to the centre of my card front using foam adhesive. Next, I adhered down the white die cut piece using the Bearly Art Precision Craft Glue. The 'Sending' was stamped in Black Licorice ink onto Snowdrift Cardstock and cut out with one of the coordinating dies. I popped in on to my panel using foam adhesive for dimension. 

I tucked in the stamped floral images around the centerpiece and adhered them down using liquid adhesive. I also added some foliage pieces die cut from Snowdrift and Gold Mirror Cardstock using the floral accessory dies from the Flourished Fleurit Die Set. I inked the white die cut leaves using Pine Needles and Shabby Shutters Distress inks and then added them to my floral arrangement using the Bearly Art Precision Craft Glue. I then adhered the card front to an A2-sized top-folding white card base using foam adhesive. To finish off the card, I added Crystal Jewels to the flower centers and to my panel for a bit of sparkle. 


I hope you liked my floral card and thanks so much for stopping by today. You can subscribe to any of the Spellbinders Clubs between the 1st - 24th of each month and never miss a fun kit like this again!  

If you like what you've seen from me, please give me a follow over on my Instagram (@hussena_cal) and/or subscribe to my blog if you haven't already.
Wishing you a great day ahead!
Wednesday, September 8, 2021

Spellbinders September 2021 Clear Stamp of the Month | A Little Birdie Told Me


Hello, crafty friends! 
Happy Monday, friends! I am back today with two nature-inspired cards made with the Spellbinders Clear Stamp of the Month - A Little Birdie Told Me. Check out the exclusive coordinating Tweet Friends - Die Set. There's also something NEW this month - Spellbinders now offers a coordinating die set that you can purchase separately as an add-on for the Clear Stamp of the Month Club Sets. I love this option as I can quickly and easily cut my favorite images from the set out and no longer have to fussy cut the images!

The Spellbinders Clear Stamp for September is a 21 piece stamp set containing adorable bird images and sentiments perfect for a variety of occasions. The Stamp Set coordinates with this month's Large Die of the Month Set, so you can mix and match your supplies to create different projects. This “A Little Birdie Told Me” stamp set features made in the USA stamps from high-quality photo-polymer for clear, crisp impressions.  

To create my card, I first stamped a bunch of the little floral and bird images in the set on to a piece of Snowdrift Cardstock using Versafine Onyx Black ink and then coloured them using Artist Markers. Once that was done, I used the coordinating die set to cut them all out.

Next, I stamped the wreath and the bow images on another piece of Snowdrift Cardstock using Versafine Onyx Black ink. Then, I stamped the banner and the sentiment onto Snowdrift Cardstock using the same black ink and used the coordinating die set to die cut the image. 

Next, I used the largest rectangle die from the Candlewick Rectangles Etched Die Set to emboss the die frame on the front of the card. Embossing with dies is easy to do on any machine with the Tan Embossing Mat. You need to just put the paper between the die and the Tan Embossing Mat and run it through your Spellbinders Platinum 6" Die Cutting & Embossing Machine as you would for an embossing folder. This is a great technique to get more out of your dies and adds so much to the look of the card.

It was now time to assemble the card together. I popped up the bird, the floral images, the sprigs, and the sentiment banner on my card panel using foam adhesive. I used the Ranger Stickles Glitter Glue in Diamond to add a bit of shimmer and shine to the flower centers and the wings of the bird. Then, to finish, I adhered my card panel to a top-folding white card base made from Snowdrift Cardstock


My next card is made in a different size from my usual cards. I made a Square Card using the bird and floral images in the A Little Birdie Told Me stamp set. 

For my card, I first stamped a bunch of the little floral and bird images in the set on to a piece of Snowdrift Cardstock using Versafine Onyx Black ink and then coloured them using Zig Clean Color Brush Markers. Once that was done, I used the coordinating die set to cut them all out.

Next, I trimmed a piece of pink polka dot patterned paper to size and stamped a sentiment from the A Little Birdie Told Me stamp set in the centre of the panel using the same black ink. Then, I die cut Alabaster Cardstock using the largest square die from the Hemstitch Squares Etched Die Set. Once that was done, I die cut the panel using the smallest circle die from the Hemstitch Circles Etched Dies to create an aperture. 

I then arranged the various die cut elements around the circle and and popped them on the card panel using foam adhesive. Next, I adhered the patterned paper below the die cut panel using foam adhesive. Then, to finish, I adhered my card panel to a top-folding kraft card base made from Portbello Cardstock. Lastly, I added a bit of Ranger Stickles Glitter Glue in Diamond to the flower centers for some sparkle and shine.


I hope you liked my cards and thanks so much for stopping by today. You can subscribe to any of the Spellbinders Clubs between the 1st - 24th of each month and never miss a fun kit like this again!
  

If you like what you've seen from me, please give me a follow over on my Instagram (@hussena_cal) and/or subscribe to my blog if you haven't already.
Wishing you a great day ahead!