Saturday, June 16, 2018

Guest Post for Spellbinders | Special Moments | Part Three


Hello everyone!
I am really excited and honoured to be guesting on the Spellbinders Paper Arts blog this month. This post is a part of a series featuring dies from the Special Moments collection by Marisa Job. You can check out my first and second post using the dies from the Special Moments collection HERE and HERE. I love how there a number of different dies in this collection, and there is something for everyone! Today, I have a floral, layered card to share. Here's what I have created:

To create my card, I first took a White card base and matted some light pink cardstock over it. Once my base was ready, I started by die cutting the second largest die from the Vintage Stitched Squares Etched die set from a light cream patterned paper. Next, using White 80 LBS cardstock, I cut out the swirl frame using the Outer Circle die from the Miss You Swirl Etched Die set.

I wanted this frame to be dimensional, so I die cut it four-times from white cardstock, and adhered one frame on top of the other to create a thick die cut. This is a great way to create your own dimensional, die cuts if you don't have white fun foam on hand. I colored the frame using a light beige marker.

For the focal of my card, I decided to use the Happy BDay frame die from the Happy Birthday W/ Numbers Etched Die set. It was cut from gold foil cardstock, and I also die cut it once from White Fun Foam so that I could pop it on my card panel. I also used the mini circle die which is included in this die set to die cut the circle and stamp my sentiment "gorgeous" on it. I lightly inked the edges of the circle with pink dye ink.

Now for my most favourite part - creating handmade flowers! I used Pink Foamiran sheets to create the flowers. I used the Shapeabilities Floral Oval Etched Die set to die cut my flowers. I added cream thread pollens in the centre of the flowers to give them a fuller look.  For the leaves and foliage, I used the flower crescent die from the same die set. I die cut the leaves from Olive Foamiran to match with my pink flowers.

I also created a small flower cluster on the other side of my card. I added a huge White Satin Bow over which I have adhered my flowers and leaves. I also added some of my handmade mini filler flowers here and there.

Here's a closer look at one of the flowers.

And here are the fillers. Please excuse the Hot Glue Gun strings which seem to be all over the place. I forgot to remove them from my card before photographing.

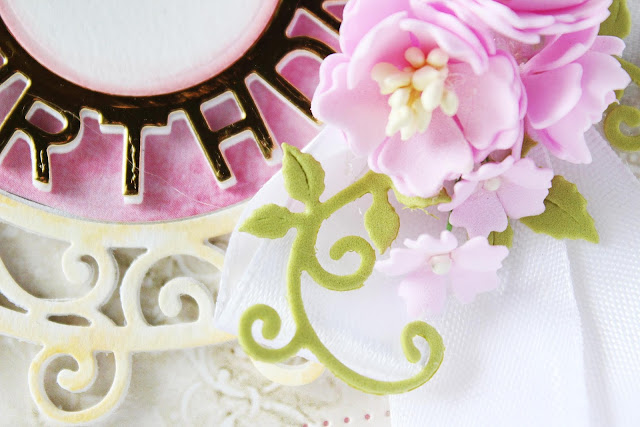
A flat-lay close up of the arrangement. You can see the gold foil sentiment in its full glory here. :)

And here's my card. I hope you like it!

Spellbinders supplies:
S4-943 Happy Birthday W/ Numbers Etched Dies
S5-374 Shapeabilities Special Day Frame Etched Dies
S5-378 Shapeabilities Floral Oval Etched Dies
S7-215 Shapeabilities Vintage Stitched Squares Etched Dies
T-001 Tool' N One
PE-100 Platinum 6 Die Cutting and Embossing Machine - 6" Platform


Other supplies used : Neenah Solar White 110 LB cardstock, White 80 LBS Cardstock Sheets, Gold Foil Cardstock, Papericious The Wedding 12" X 12" Patterned Paper, Pink Foamiran Sheets, Olive Foamiran Sheets; Adhesive: 3D Foam Squares, Tombow Mono Multi Liquid Glue, Double Sided Foam Tape, Hot Glue Gun; Stamps, Dye Inks, Versafine Onyx Black ink pad; Tombow Dual Brush Pen Set: 10 Pastel; Embellishments: White Satin Ribbon, Pink Fillers, Pollens

Thank you so much, for taking out time and reading my post. If you liked my card, please do leave me a comment below.

Have a nice day everyone!

Thursday, June 14, 2018

Guest Post for Spellbinders | Special Moments | Part Two


Hello friends!
I am really excited and honoured to be guesting on the Spellbinders Paper Arts blog this month. This post is a part of a series featuring dies from the Special Moments collection by Marisa Job. You can check out my first post using the dies from the Special Moments collection HERE. This is an amazing collection with some gorgeous, intricate dies. I love how there a number of different dies in this collection, and there is something for everyone! Here's a look at my first card:

When I first saw the Special Day Frame Etched die set from this collection, I knew I had to create a card using it! I love how ornate and pretty it looks. To create my card, I started by die cutting the second largest die from the Vintage Stitched Squares Etched die set from a light blue patterned paper to create my first card layer. Next, from gold foil cardstock, I cut out the outside swirl die from the Special Day Frame Etched Die set.

To further embellish my card, I used the middle swirl frame from the same die set, but this time I die cut it from White 80 LBS cardstock and stacked four-five die cuts together to give it a raised look. I colored the frame using a light pink marker to match with the colour tones of the sentiment. The little circle die cut that you see in the center of the frame was die cut from a patterned paper using the small circle insert die. My whole card is practically made using the Special Day Frame Etched die set. I love how it offers so many elements in just a single die set!

I'm obsessed with creating Foamiran flowers at the moment, and had to incorporate some on this card too :D I used the Shapeabilities Floral Oval Etched die set to die cut my flowers from Ivory Foamiran sheets. I inked the centers using a light pink dye ink, and then added cream thread pollens to finish the look. The leaves were hand cut by me, and were slightly inked at the edges to give it a more realistic look.

I also created few mini filler flowers using the smallest flower die from the Shapeabilities Floral Oval Etched die set. This time I added yellow wired pollens to the centre. I also added two pink fillers to finish my floral cluster.

Here's a closer look at he flowers.

This picture shows the true colour of the gold foil cardstock. It's always so hard to capture it on camera.

And a final picture to show you all the dimension on the card.


My next card is a break from my layered, floral cards. I wanted to create a CAS crd using these dies, and here's what I came up with:
To create this card, I first started with an A2 White card base. I matted some gold foil cardstock on the base, and then layered a piece of black textured cardstock over it. I know it's not quite visible in the picture, but I have used black woodgrain cardstock. You can see the texture a bit on the circle. I love the subtle texture it adds to the card!

I have used the Floral Lace Border Etched die set to create that gorgeous geometric background on my card. I cut out four strips of the lace from gold foil cardstock and adhered them over the black card panel.

I used the Swirls Border Etched die set on the two sides of my cards to create a delicate looking cluster. The light blue mini flowers are made using the smallest flower die from the  Shapeabilities Floral Oval Etched die set. I inked the swirls using a green marker to create the foliage for my carnation and blue flowers.

I also added some yellow fillers to accentuate my card.

And here's a final look at the card. I die cut a circle using the Spellbinders Standard Circles SM, heat embossed a sentiment in gold, popped it on my card front, and I was all done!

Spellbinders supplies:
S4-116 Nestabilities Standard Circles SM Etched Dies
S4-942 Shapeabilities Swirls Border Etched Dies
S4-944 Shapeabilities Floral Lace Border Etched Dies
S5-374 Shapeabilities Special Day Frame Etched Dies
S5-378 Shapeabilities Floral Oval Etched Dies
S7-215 Shapeabilities Vintage Stitched Squares Etched Dies
T-001 Tool' N One
PE-100 Platinum 6 Die Cutting and Embossing Machine - 6" Platform


Other supplies used : Neenah Solar White 110 LB cardstock, White 80 LBS Cardstock Sheets, American Crafts 12" X 12" Black Woodgrain Cardstock, Gold Foil Cardstock, Papericious The Wedding 12" X 12" Patterned Paper, Ivory Foamiran Sheets, Olive Foamiran Sheets; Adhesive: 3D Foam Squares, Tombow Mono Multi Liquid Glue, Double Sided Foam Tape; Versamark Dazzle Embossing ink, Ranger Super Fine Gold Embossing powder; Kuretake Zig Clean Color Real Brush Pens, Tombow Dual Brush Pen Set: 10 Pastel; Embellishments: Carnations, Yellow Fillers, Pollens

Thank you so much, for taking out time and reading my post. If you liked my cards, please do leave me a comment below. Let me know which one is your favourite :)

Have a nice day everyone!

Tuesday, June 12, 2018

Guest Post for Spellbinders | Special Moments


Hello friends!
I am really excited and honoured to be guesting on the Spellbinders Paper Arts blog. I have a card to share today I made using several dies from the Special Moments collection by Marisa Job. This is a spectacular collection with a wide variety of gorgeous, intricate dies. I love how there a number of different dies in this collection, and there is something for everyone! Here's a look at my card:

To create my card, I first started by die cutting the largest die from the Vintage Stitched Squares Etched die set from a lilac patterned paper. I adhered this square piece on my card base.

To embellish my card, I die cut the lattice oval die from the Shapeabilities Floral Oval Etched die set. I used White 80 LBS cardstock for die cutting the oval. I also die cut the same die from some White Fun Foam so that I could pop the white die cut piece on the foam for added dimension. I lightly colored the frame using a light pink marker. I also added touches of purple ink here and there on the lattice frame so that it would highlight the pink.

I wanted this card to have a very light, fun, and whimsical look to it so I decided to create some simple handmade flowers to go with the frame! I used the flower crescent die from the Shapeabilities Floral Oval Etched die set to create the floral foliage around my frame. I die cut the flowers from White cardstock, colored the centers of each flower using different color markers, and added a black enamel dot to the centers. So simple yet pretty, isn't it?

The leaves were also lightly colored using green markers. I added some gold foiled buds here and there for added interest.

The Shapeabilities Floral Oval Etched die set also offers stand-alone flowers in case you don't want to use the entire flower crescent die, which I think is very thoughtful and well designed. I die cut the largest flower using the stand-alone piece and added it to the right side of my card to help balance my card design.

The Special Day sentiment comes from the Shapeabilities Special Day Frame Etched die set. I die cut it from black cardstock and popped it using white foam for dimension.

Here's a close up of the florals. I loved how this card turned out :) What do you think ?

Spellbinders supplies:
S5-374 Shapeabilities Special Day Frame Etched Dies
S5-378 Shapeabilities Floral Oval Etched Dies
S7-215 Shapeabilities Vintage Stitched Squares Etched Dies
T-001 Tool' N One
PE-100 Platinum 6 Die Cutting and Embossing Machine - 6" Platform


Other supplies used : Neenah Solar White 110 LB cardstock, White 80 LBS Cardstock Sheets, Gold Foil Cardstock, Papericious Whimsical 12" X 12" Patterned Paper, White Fun Foam; Stick It Double Sided Adhesive Sheets; Adhesive: 3D Foam Squares, Tombow Mono Multi Liquid Glue, Double Sided Foam Tape; Kuretake Zig Clean Color Real Brush Pens, Tombow Dual Brush Pen Set: 10 Pastel, Tonic Studios Nuvo Crystal Drops

Thank you so much, for taking out time and reading my post. If you liked my card, please do leave me a comment below. :)

Have a nice day everyone!

Thursday, June 7, 2018

Spellbinders Guest Post Three | Romancing The Swirl

Hello friends!
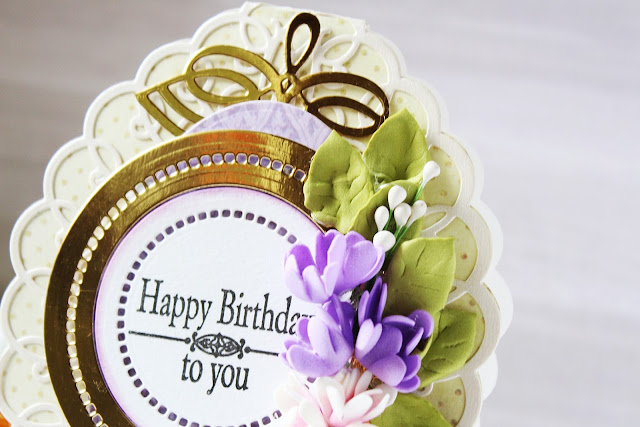
I am back to share my third guest post for Spellbinders. This post was supposed to go live a while back, but things just got in the way and I couldn't get around publishing this post. Nonetheless, I am happy I got a chance to share them now! I have two projects to share today I made using dies from the Romancing The Swirl collection by Amazing Paper Grace. This is another spectacular collection with amazing Nestabilities shapes, tags, and intricate dies. I have made a shaped card and it's coordinating gift box for today's post. I will start with the card first:

To create this card, I started by die cutting the base of my card using the Sweetheart Swirl Etched Dies. I die-cut the frame pattern from white heavyweight cardstock as well as pattern paper so that I could adhere the pattern paper over the white card base. This formed the base of my card. Next, I used the coordinating frame outline from the same die set, and die-cut it using some white metallic cardstock and adhered that to my card base.

For the focal element of my card, I decided to die cut two circles from the Nestabilities Hemstitch Circle Etched Dies. I used gold mirror cardstock for die cutting the bigger circle, while I used White 80 LBS cardstock to cut the smaller circle. I also lightly inked the edges of the smaller circle using pink dye ink.

If you see my card closely, you will find that I have added two ovals behind the bigger gold circle. I cut those from purple pattern paper and tucked them behind the circle for added interest. The ovals were cut using the die included in the Card Creator A2 Corner Cotillion Dies.

I decided to create my florals this time from coloured Foamiran sheets. I used Lilac and Ivory coloured Foamiran sheets to die cut my flowers. For the ivory colour flowers, I used light pink dye ink to color the centers of my flowers. I also embossed and heat set them to give them a more natural and realistic look. The flowers were made using the small flower dies included in the Card Creator A2 Corner Cotillion Dies. The leaves were also cut using dies from the same set, and were cut from Olive Green Foamiran.

Here is a look at the full flower arrangement. I also added some white wired pollens as foliage.

I also added some intricate motifs cut from gold mirror cardstock to my card panel to further embellish my card. I used the Trefoil Crest Etched Dies for it. I snipped off a part of the die cut to fit on my card panel.

Here is a final look at the floral arrangement. I hope you like what I have made :)


My second project is a coordinating gift box I made for my card. Since the cards I make are very dimensional, I need to make gift boxes for them so that they can be mailed easily.

I made the gift box keeping in mind the measurements of my card. This was a shaped card, so the dimensions were customized according to it. Once I created the box, I adhered pattern paper on the lid of the box. I also die cut and used the frame pattern from the Card Creator A2 Corner Cotillion Dies over my pattern paper. I think it looks quite elegant!

I wanted to keep the embellishments on the box to a minimal. I decided to use the same flowers and leaves I used on my card to coordinate with the box. I also added an intricate motif below the flowers which was die cut using the swirl accent die from the Swirl Booklet Insert Etched dies.

Here is a closer look at the flowers. I love the soft pink colour!

I wanted to add some detailing to the sides of the box as well and hence decided to use the same die I used on the lid of my box. I die cut the frame pattern from the Card Creator A2 Corner Cotillion Dies and trimmed it into two strips so that I could add them to the two sides of my box.

And here is how the box looks :)


Spellbinders supplies used :
S4-927 Trefoil Crest Etched Dies
S4-928 Nestabilities Hemstitch Circle Etched Dies
S5-363 Shapeabilities Swirl Booklet Insert Etched Dies
S5-364 Card Creator A2 Corner Cotillion Dies
S5- 365 Sweetheart Swirl Etched Dies
PE-100 Platinum 6 Die Cutting and Embossing Machine - 6" Platform
T-001 Tool' N One


Other supplies used : Neenah Solar White 110 LBS cardstock, Neenah Solar White 80 LBS Cardstock Sheets, Gold Foil Cardstock, Papericious Whimsical Pattern Paper Pack 12 X 12, Ivory Foamiran Sheets, Lilac Foamiran Sheets, Olive Foamiran Sheets, White Fun Foam; Stick It Double Sided Adhesive Sheets; Adhesive: Scrapbook Adhesives 3D Foam Squares, Tombow Mono Multi Liquid Glue, Double Sided Foam Tape; Versafine Onyx Black Ink Pad, Distress inks, Clear Stamps, McGill Inc. Paper Blossoms Tool kit, Wire Pollens


Thank you so much, for taking out time and reading my post. I am so happy and thankful to the entire Spellbinders team for inviting me to be a Guest Designer and sending me these stunning dies to work with. I totally loved working with the Romancing The Swirl collection. I hope I could inspire you with my creations. If I did, please do let me know. :) Thank you so much for stopping by!