Showing posts with label Lindy's Stamp Gang mists. Show all posts

Saturday, December 26, 2015

Life is beautiful- Layout

Hello, everyone!
I'm posting after a long time on my blog but have not stopped crafting. I have been posting regularly on the Papericious blog and I will be catching up with all my remaining posts here soon. Today, I have the very gorgeous Infinity Collection from Papericious to share. As soon as I received these papers in my DT kit, I knew it would be perfect for a mixed media layout. The gorgeous prints and the coordinating die cuts are perfect for creating a shabby chic project, so here's a look at what I have made using these beautiful papers.


To create my LO, I selected one of the 12 X 12 " sheet from the Infinity collection and stuck it on a sturdy 12 X 12" cardstock. I, gessoed over the entire paper, once that was dry, I went to work with texture paste and a stencil which I had created using a die cut. Then, I sprayed and colored over my stenciled area with Lindy's Stamp Gang and Heidi Swapp sprays. All the die cuts that I used on this layout, are from the Infinity Collection Die cuts pack itself. I, further embellished it using my handmade flowers and a little bit of stamping on the background to create more texture.
My LO was totally inspired by the Mood Board from Scrap Around the World- December Challenge. The gold glitter, the sentiment- "Future is bright" and the colors of the moodboard are my main inspiration which I've tried to incorporate within my layout.

Here are some close-up pictures for you to see all  the details :


Here's a look at the inspiration picture from Scrap Around the World.

Please don't forget to leave me your comments/ suggestions. I love receiving your feedback. :)

Wednesday, October 28, 2015

An Altered hoop and a Tag !

Hello, everyone!
Today I have two projects to share with you all. These projects were created for the Papericious blog to introduce the new Adhesive buttons/flairs that have been released this month. I really enjoyed using these buttons on my projects. :) 

So, here's a look at what I created using these buttons. The first one is an altered hoop and the second one is a Mixed media tag!

For this hoop, I have used the Pattern Papers from the Papericious Grey Bloom collection and the Wooden Collection. The pink flowers and the leaves are fussy cut from the Grey Bloom collection paper and mounted on square foams for dimension. As you can see, I have used these buttons for the centre of my bow as well as a part of my sentiment.  These make very pretty centres and look great on cards, layouts and mixed media projects!


Here are few of the close ups!


I am entering my altered Hoop for the PPS challenge : Inspired by a song. I was inspired by THIS song from Francesca Battistelli.

Moving on to my Mixed Media tag :

 I first created a burlap flower using the Tim Holtz Tattered florals die and layered it with some tulle and fabric cotton laces and finished it off with an adhesive button. Isn't it gorgeous??
I have created the background of the the tag using embossing paste and a stencil from Tim Holtz with Distress Stain Sprays.


 I am entering this tag in the Stamploration Mixed Media Challenge.

Thank you for your time and have a nice day everyone! Please do not forget to leave your comments/suggestions. I love to get feedback from you :)

Sunday, September 27, 2015

Dream- Mixed Media Canvas

Hello, friends!
I am back again sharing a Mixed Media Canvas I have made using our Papericious's this month's release - "The Vintage Attire" and "The Golden Garden" collections. The Vintage Attire premium collection has some really beautiful prints, perfect for creating any backgrounds and all the Mixed Media fans would love the designs in this pack. I have used the Vintage Attire to create the base of my canvas design by doing paper tearing and layering these papers using Gel Medium, then I gessoed over it. Here's a look at it :


 Close-up of the sentiment and textures :

 To create the background of my canvas, I have layered strips of paper from The Vintage Attire collection by Papericious, then did stenciling using stencils from MFT and Tim Holtz using Wendy Vecchi Embossing paste in white. Once it dried, I used Lindy's Stamp Gang Mists- Hottie Pattotie. I have paper pieced some flowers and leaves from The Golden Garden collection by Papericious  and then embellished it using MDF pieces, a white resin frame and my handmade flowers, and some pollen fillers too.
The sentiment is stamped using Visible image stamp and heat embossed it using White embossing powder on a black cardstock paper. The word 'Dream' are alpha stickers from the Chickaniddy Crafts- Date Night collection which I have colored with Versafine Onyx black ink and added Glossy Accents over it.

My canvas was inspired by the this time's gorgeous inspiration photograph at the Scrap Around the World blog and it measures 10 X 10 inches. Here's a look at the beautiful picture :
I was inspired by the colors, the soft pink and the browns and the beautiful flower on the book and the script background. 
I'm also entering this in the PPS September challenge- Embossing. I've done heat embossing on the sentiment and on the MDF pieces.
I am entering this canvas for this month's STAMPlorations Mixed Media challenge - Sep  ( I have used  stencils on my background )
                                         
I have taken bits of the inspiration picture and included in my canvas. The quote is perfect with the theme of my canvas, too! Taking time to live life does, indeed inspire our work. :)

Hope you like my work. Your comments totally make my day, so do leave me your feedback.
Have a nice day everyone.

Wednesday, January 28, 2015

DIY Round Gift Boxes

Hello everyone,
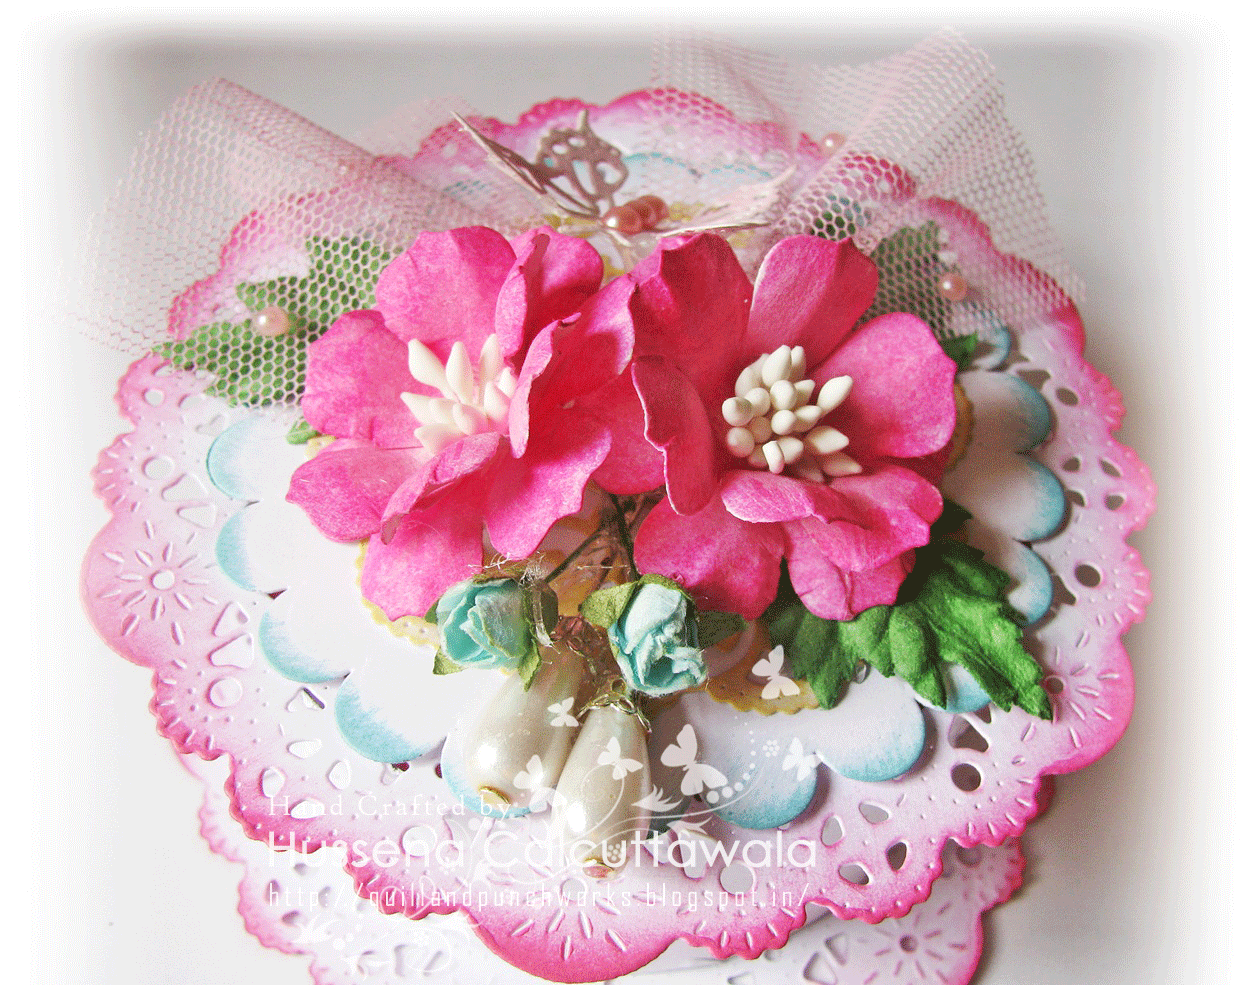
I'm here to share some gift boxes this time. These are totally made from scratch using dies as a base. I have a small pictorial on how I went about creating them. These are pretty easy to make once you have practiced with atleast one of them. For the tutorial on how to make them, I googled it and found a quite easy video on YouTube though the lady in the video used SVG cut files to make hers. The process is same. Here's a look at my boxes :

My second box which I made :

 Closer view of the box :

The first box I made was in White :
How it looks when opened : 

A close up of the details :

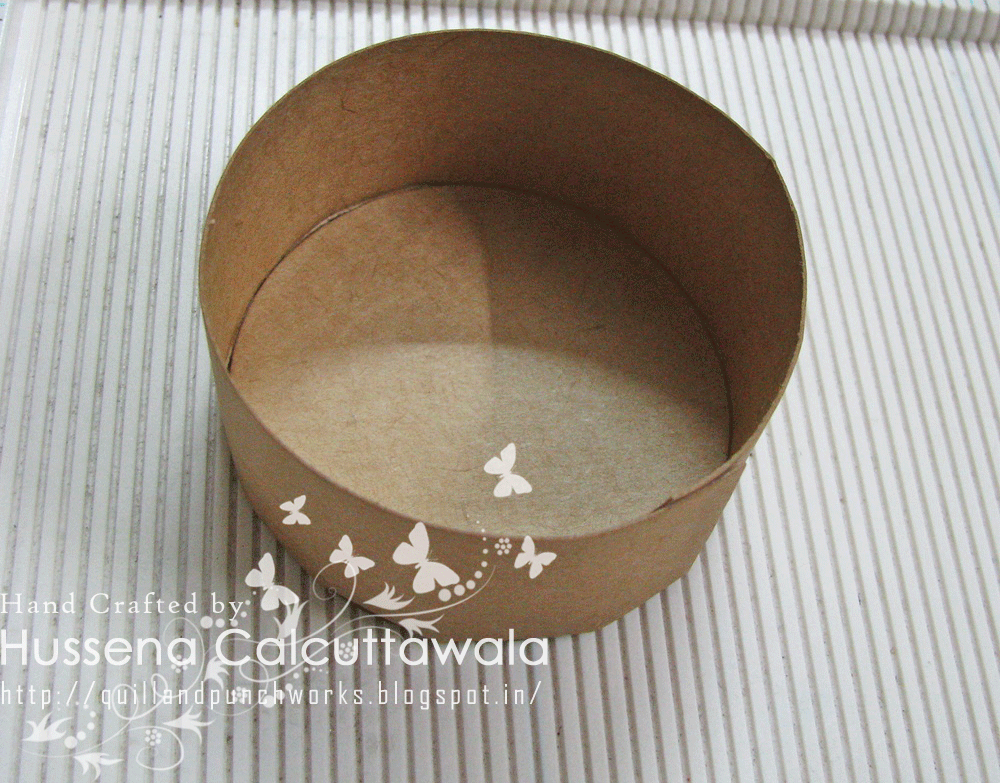
A small pictorial of the dies used to make the box :
The strip is handcut and it measures approximately 10 inch by 3 inch. I have scored at the half inch mark and cut small slits to make it easy to adhere it on the round base.


I ended up making not one, but two of these boxes as the first one was my practice go and the second one, my finished product. Though, as it is usual, I ended up loving the first one more than the other  which is the White and pink box.

To make the base of these boxes, I die cut 4 circles, mine are 3 inches in size and you will need two doily dies for the upper and lower halves. (This is totally optional). You will need an approximately 10 inch by 2 inch paper strip for the base and for the lid you can use a 10 inch by 3 inch paper strip as the lid of the box has to be a bit larger than your base for your box to fit/close properly.

The flowers on my boxes are handmade using two of my favorite dies from Cheery Lynn- Medium Tea Rose and Gardenia Strip and the two doilies that I have used are also from Cheery Lynn - Sophie's Heart Mini die being my all time favorite!
While one of my box is made using a kraft colored cardstock, the other one is totally pastel with soft colors and a splash of hot pink!! 
Do let me know which one is your favorite among the two. ;)

Supplies used :
Kraft cardstock- Darice, White cardstock- Campap.
Pattern papers- DCWV Fresh Florals Stack.
Dies : Cheery Lynn- Medium Tea Rose, Cheery Lynn Gardenia Strip, Cheery Lynn French Pastry doily die, Cheery Lynn Sophie's Heart Mini doily die, Cheery Lynn Tropical Flourish die, Cheery Lynn Flourish Leaf strip die, Cheery Lynn Exotic Butterflies (Small), Cheery Lynn BAF Embellishments #3 die, Jags Circle dies, Papertrey Ink Filigree Border die.
Embossing folder- Provocraft Swiss Dots folder.
Inks- Distress inks- Picked Raspberry, Vintage Photo. Distress Stains- Mowed Lawn, Picked Raspberry, Spun Sugar, Distress Stain Spray- Picket fence, Lindys Stamp Gang Hottie Patottie Hot Pink spray.
Golden and White Pollens, Leaves, Hat pins, Rose buds, Tulle, Pearls, Golden strips.

Challenges entered :
Cheery Lynn- Anything goes ( Winner! )
Lulupu- 3D with Dies ( Made it to Top 3 )
SSS- Anything Goes
613 Create Avenue- Anything Goes with Twist ( I have used Patterned paper, die-cut, dry embossing, flower and ribbon (tulle).

Tuesday, December 2, 2014

You are awesome!

Hello everyone!
I am back again to share a shabby-chic card with you all. Love this style of card making and can't stay away from it for long. :P
Recently, I have been getting quite involved with the mixed media trend and I guess my card does incorporate a bit of Mixed media this time around! Here's a look at what I have created :

The base of my card has been made using three different patterned papers. The light pink striped pattern paper is from Graphic 45, followed by the blue one from Prima Marketing Cigar Box paper pad and finally the alpha one from Prima Marketing Coffee Break Paper pad.

The small butterflies were paper pieced from Prima Marketing Forever Green paper pad. For the base of my floral arrangement, I have used a Prima Marketing Doily Die #1 and popped it up on foam dots and colored with Distress ink- Tattered Rose.

 I have created a shabby-chic card so to create the look, I have distressed all the papers using a paper distressing tool and have inked all the edges of the papers with Distress ink- Tattered Rose. The flowers are all from my stash and I have Gesso-ed the edges of the flowers using Heidi Swapp Color Shine- Tropicana Teal Mist mixed with Gesso and painted using a paint brush to give that light blue colour to the flowers. The Gesso gives the flower a very nice texture and colour!

The sentiment has been stamped and paper-pieced and popped up on foam dots to give that raised look. I have used a lot of rhinestones on my card to add the bling factor to it. :D

Hope you all like it.

Supplies used :
Base cardstock- Campap and Fabriano Brustro.
Dies- Prima Marketing Doily Die #1.
Patterns papers - Graphic 45 (RAK from Piali), Prima Marketing A4 Cigar Box Secrets paper pad. Prima Marketing Forever Green 6 by 6 paper pad,  Prima Marketing Coffee Break Journaling Notecards - 4 X 6.
Flowers- Stash and few were RAK from Priya.
Stamps- Technique Tuesday Incredible stamp set.
Inks- Versafine Onyx Black ink pad, Distress ink- Tattered Rose.
Heidi Swapp Color Shine- Tropicana Teal Mist, Lindys Stamp Gang Hottie Pattotie Mists. (Used to colour the flowers).
Gesso, Rhinestones, Fillers, Mulberry Leaves.


Challenges entered :
Cardabilities - Sketch challenge ( Featured )

Have a nice day everyone!

Saturday, August 3, 2013

A Mixed Media Tag !!

Heya friends:)
So am back again sharing with you all a tag I have made for the inspiration at the Crafter's Corner blog where our current challenge is everyone's favorite theme : "Anything Goes"...So I decided to make a tag this time and its a mixed media style which is quite new to me...  I have done a lot of distressing ,spritzing with the  Lindy stamp gang spays and stamping too ..This is a tag which is layered with different techniques rather than actual layers ..So here's look at what I have created :
And here's a close up of the flowers which I have colored  using the Lindy stamp gang spray ..These sprays have vibrant colors and a very nice shimmer to it ..I have really enjoyed working with it a lot :          
   
   A little bit about how I have made this tag ..Firstly I distressed the entire tag with the vintage photo distress ink then I have sprayed the Lindy Hottie Patottie spray on the background...  Then I used The Crafter's workshop stencil to create the hexagon background  with  my vintage photo distress inks then I did the stamping of the dress form and the leaf flourish finally finishing off with a punched lace and the floral arrangement .  
I hope you all like my tag..Please do leave me your comments /suggestion's...Would love to hear from you :)
PS : Flowers and Leaves are from a prize package which I won at Archana 's  Craftycity.com  site ..She has a large collection of paper flowers and various craft supplies at very reasonable rates  ..Do check out her site :)

Supplies Used :
Base CS : Fabriano Elle Erre.
Punch : MS lace doily punch .
Die : Magnolia Do hickey Die Leaf and swirl.
Flowers and Leaves are from a prize package which I won at Archana 's Craftycity.com  site ..She has a large collection of paper flowers and various craft supplies at very reasonable rates  ..Do check out her site :)
Stencil : The Crafter's Workshop Hexagons.
Stamp : Prima Marketing.
Inks : Distress inks : Vintage photo,Scattered straw,Versafine Onyx Black,Lindy stamp gang mists-Hottie Patottie.
Seam binding ribbon,Rhinestones,Small flower's and filler's from stash.
Charm -Crafter's Corner.

Challenges entered :
For the love of crafting -Make a tag.
Sarah Hurley Challenge blog -Texture and Dimension
Creative Moments : Anything but a card
Dragons Dream : Tag it on : Use Stencil/mask,paint and Ribbon.
Stampotique Designer's Challenge : Tag youre it !!
The stamping chef : No cards allowed .

That's It from me ..Have a nice day everyone :)