Showing posts with label DCWV patterned papers.. Show all posts

Wednesday, November 11, 2020

Spellbinders + Amazing Paper Grace Die of the Month | November 2020


Hello, crafty friends!
Hope you are doing well and are keeping healthy!
I have a Card to share today featuring the Spellbinders + Amazing Paper Grace November Die of the Month. This month's "Pop Up 3D Vignette Sleigh" Set is perfect for making exquisite cards, table setting favors, 3D sleigh pieces filled with goodies, and more.

If you want to find out more about the Club – prices, how you sign up and what’s included, please look ——–> HERE. These dies are only available through the Club and are limited to the month of November, so hurry before they are sold out. If there are any leftovers, they are added to the Spellbinders store for sale at full price. You can see all of the past Dies of the Month HERE.


I have created a 2D Card Front using the Pop Up 3D Vignette Sleigh Set.

The die set consists of 21 dies to help you create a realistic 3D Pop Up Vignette Sleigh, Table Center Piece, Table Setting Favor, Sleigh pieces filled with Candy and Goodies, Part of a Wonderland Menagerie, a Flat 2D on the front of a card and much more. This die, like all the other 3D Vignettes dies, collapses flat to be sent in a regular envelope. Isn't that so cool!?

To create my card, I first die cut the different components of the sleigh from Butter Cream Cardstock, Gold Foil Cardstock, and Baby Pink Cardstock. I ran all the pieces through my Platinum 6" Die Cutting and Embossing Machine and then segregated them to make the process of assembly easy and quick. I assembled it together following THIS video. I wanted to use this sleigh for my card front, so I didn't die cut the vignette tabs and crossbars for creating a 3D piece. The flowers and leaves were die cut from Whip Cream Cardstock, while the decorative swirls were die cut from Baby Pink and Gold Foil Cardstock

Once my sleigh was ready, I started working on my floral arrangement. I lightly colored the die cut petals using Rustic Rose Ink and the centres with Sweet Pear. The evergreen leaves were colored using Sweet Pear as well. I also die cut some berries and colored them using Rustic Rose Ink. The die cut flowers had nice, embossed grooves on them, so I decided to keep it simple and just layer the poinsettias together in clusters. Once I had inked all the petals, I added glitzy gems to the flower centres and then adhered them to my card panel along with the leaves and berries. The sleigh was attached to my card front using foam squares for dimension. 

I die cut a sentiment tag from Gold Foil Cardstock using the gift/decorative end die in the set. I chopped off the bottom of the piece so that it'd work as a sentiment tag on my card. I stamped my sentiment on a piece of Butter Cream Cardstock and then adhered it to my panel using foam dots. 

Then, I die cut a decorative card panel using the frame die from the October 2018 Large Die of the Month Set from Spellbinders. I cut a piece of Baby Pink Cardstock and added it to the back of the frame to create a more sturdy panel. Then, I trimmed a piece of foiled patterned paper from the DCWV Blush 12" X 12" Paper Pad and adhered it to a mat layer of Gold Foil Cardstock. This was then mounted to a 6" X 6" card base made from Butter Cream Cardstock.


If you haven't had a chance to look at the Spellbinders Club Kits yet, do check them out. You can find more information about them HERE.

If you would like to see more project inspiration using the Amazing Paper Grace Die of the Month, visit the Spellbinders blog to see the project samples created using it. There is also a super helpful YouTube video which you can see HERE which shows you how to use the die set in a creative way!

The Club dies are absolutely great value for money and the cost of the kit includes shipping cost within USA. So, what are you waiting for? Sign up as soon as possible!
Amazing Paper Grace Die of the Month Membership


 If you like what you've seen from me, please give me a follow over on my Instagram (@hussena_cal) and/or subscribing to my blog if you haven't already.

Thank you so much for your visit to my blog today!

Saturday, April 18, 2020

Spellbinders + Amazing Paper Grace Die of the Month | April 2020

Hello, crafty friends!
I have a Card to share today featuring the Spellbinders + Amazing Paper Grace April Die of the Month. This month's "Pop Up 3D Vignette Typewriter" Set is perfect for making exquisite cards and more. 

If you want to find out more about the Club – prices, how you sign up and what’s included, please look ——–> HERE. These dies are only available through the Club and are limited to the month of April, so hurry before they are sold out. There is also a super helpful YouTube video that you can see HERE which shows you how to assemble the die set.

Here's a look at my Card using the Die Set. This typewriter die is so elegant and I can't have enough of it!

This card measures about 6" X 6" and is quite layered and happens to be one of my favourite cardmaking styles! To create my card, I first began by die cutting the Pop Up 3D Vignette Typewriter Die Set from Gold Mirror Cardstock as well as the DCWV Blush 12" X 12" Paper Pad. I used two different patterns along with the Gold Mirror Paper as I wanted the typewriter to have a stylish look. I layered and adhered the basic body of the typewriter, so that I could start working on the other elements of my card.

Next, I die cut the blank pages coming out of the typewriter from the Scripts & Music Notes 12" X 12" Paper Pad and the Blush Paper Pad, both from DCWV. I die cut the words 'News Flash' from patterned paper and then added a piece of Gold Mirror Cardstock at the back to give it an inlaid effect. Then, I die cut the words 'You R Mine' from Gold Mirror Cardstock and adhered them to the paper to form a complete sentiment. I did this just to add some interest to my card design. These word dies are included as a part of the Pop Up 3D Vignette Typewriter Die Set.

I wanted the typewriter to be the star of the card and hence kept the embellishing minimal. I used some Mulberry Retro Flowers and some die cut leaves to create floral clusters near the focal point. I also tucked in some strands of satin ribbon under one of the bunches form added interest.

To enhance the look of the typewriter, I adhered some pink oval rims to give it a more complete look. I like the way this turned out - I would love to know what you think of it!


 I  also made a Pop Up 3D Typewriter yesterday for the Spellbinders April 2020 Clubs Hop, which you can check out HERE for more inspiration!

If you are still on the fence about the Amazing Paper Grace Die of the Month Membership, do check out the project samples created using it on the Spellbinders blog. The dies are great value for money and the cost of the kit covers shipping cost within USA. So, what are you waiting for? Sign up as soon as possible!
Amazing Paper Grace Die of the Month Membership
That's it from me for today! I hope you liked my card.
If you would like to see more of my work using Spellbinders, do follow my Instagram page - @hussena_cal
Thank you so much for your visit to my blog today!

Wednesday, September 25, 2019

Spellbinders Guest Post | Candlewick Sampler Collection by Becca Feeken


Hello everyone,
 I am ecstatic and honoured to be guest designing on the Spellbinders blog today! I am here to share some projects that I’ve made with the absolutely delightful Candlewick Sampler Collection by Becca Feeken.

The Candlewick Sampler Collection was inspired by the Candlewick embroidery, a type of elegant white-on-white embroidery with its hints of dotted motifs and knots. Becca Feeken adds these designs to her collection for paper crafters!

My first card is a shaped card created with the 
I adore cards with belly bands as it makes the project look so elegant and pretty! This might look complicated to create, but is super simple. I first took two sheets of Light Pink Cardstock and die cut the border from the Candlewick Exquisite Topper Etched Dies. I took another sheet of White Cardstock and die cut another set of borders using the Candlewick Colonnade Border Etched Dies. I inserted the flaps on the two sides of the card, in between the sheets of the Pink Cardstock so that the decorative flaps could easily open. 

Once the basic structure of the card was done, I started working on the embellishments. I die cut the intricate borders from the Candlewick Colonnade Border Etched Dies using Light Pink Cardstock and adhered a strip of Gold Mirror Cardstock on both the sides to accentuate the look. I also trimmed two squares of Light Pink & Gold Mirror Cardstock to adhere to the centre of the card for the recipient to pen down his/her message. 

I kept the main structure of the card simple to ensure that the belly band the star of the project. I trimmed a strip of Fun Stampers Journey Vellum and Light Pink Cardstock respectively, and adhered them one on top of the other. I die cut two frames and stamped my sentiment in the centre. Then, I die cut several flowers from the Candlewick Grand Pocket Etched Dies using White Foamiran and embossed them in the centre using an Embossing Tool. The leaves were die cut from Green Foamiran and embossed too. I added pollens to the flower centres and additional foliage to complete my floral arrangement. 


When I got my hands on the Candlewick Rosebud Etched Dies, I was floored! It's one of the most beautiful flower die sets ever! I die cut the flowers from the Candlewick Rosebud Etched Dies using White Cardstock and lightly embossed the petals to give them structure. I wanted some pink undertones for my flowers, so I added pink pollens for the flower centres. I also die cut the delicate flourishes and leaves included in the set and arranged them around my floral panel.

After I completed my floral arrangement, I started working on the rest of the card. I die cut the ornate Candlewick Lace Card Front Etched Dies four times from Beige Cardstock to form a complete background panel. Next, I die cut the lacy ornaments from the Candlewick Petticoats Etched Dies from White Cardstock & Light Pink Cardstock and adhered them one on top of the other for an inlay effect.  I added one last layer here, which was the sentiment piece, die cut and stamped using the Vintage Elegance Giving Occasions Stamp & Die Set

To complete my card, I matted my card panel onto Light Pink & Gold Mirror Cardstock respectively, which was then, adhered to a top folding card base. 


This was fairly simple to make, as the gorgeous frame from the Candlewick Canopy Etched Dies did all the work for me. I die cut the frame from Gold Mirror Cardstock and White Fun Foam. This made for such a magnificent centre piece, that I decided to keep the embellishments simple

I die cut a couple of sakura blossoms from the Candlewick Grand Pocket Etched Dies using White Foamiran and the leaces using Green Foamiran. I inked the centres of the flowers using Altenew Pink Diamond Dye ink and embossed them using an Embossing Ball Tool. I also added thread pollens to the centres to give them a fuller look. I also added some mini flowers around the 3D flowers to complete my floral arrangement. I die cut a white label for the sentiment and stamped my sentiment on it. 

Next, I die cut four corners using Gold Mirror Cardstock. If you see carefully, you will notice that I have used a light pink patterned paper for my background to enhance the overall look of the card. To finish it off, I adhered my panel to a top white folding card base. 

Other Supplies: 
Neenah Solar White 110 LB cardstock, Cream Linen Textured 12 x 12 Cardstock, Light Pink 12 X 12 Cardstock, Beige 12 X 12 Cardstock, White & Green Foamiran Sheets, Gold Mirror Cardstock, White Fun Foam; Inks: Altenew Pink Diamond Dye ink, Versafine Onyx Black Ink Pad; Adhesive: Scrapbook Adhesives 3D Foam Squares, Tombow Mono Multi Liquid Glue, Double Sided Foam Tape, Mini Glue Gun; McGill Inc. Paper Blossoms Tool kit, Pollens, Rose Buds. 

I hope you loved the Candlewick Collection and my cards using them! These dies are extremely versatile and can be used in so many ways. I can't wait to work with them again! If you would like to see more of my work using Spellbinders dies, do follow my Instagram page.

Thank you for stopping by, and wishing you a lovely day!

Monday, August 26, 2019

Spellbinders Becca Feeken Holiday 2019 Blog Hop + Giveaway


Hello, crafty friends! 
I'm beyond thrilled and honoured to be joining Spellbinders for their Blog Hop today featuring the 3D Holiday Vignettes & Glistening Holiday Collections by Amazing Paper Grace. You should have arrived here from the super talented and amazing, Becca Feeken's Blog.
 We've got tons of inspiration and giveaways for you on the hop today, so keep reading till the end of this post for more information.


For my first card, I used the Merry Filigree Quatrefoil Glimmer Hot Foil PlateNestabilities Hemstitch Squares Etched Dies, and the Shapeabilities Flourished Square Etched Dies.

The Glistening Holiday Glimmer Plates designed by Becca are so beautiful that they make every project made with it look so elegant. For my card, I started by foiling the square filigree frame from the Merry Filigree Quatrefoil Glimmer Hot Foil Plate using the Glimmer Hot Foil Roll - Gold.

While my Glimmer Hot Foil System was out, I also foiled the sentiment from the Merry Filigree Quatrefoil Glimmer Hot Foil Plate using the Glimmer Hot Foil Roll - Rose Gold. I die cut the filigree frame using the Nestabilities Hemstitch Squares Etched Dies, and the sentiment using the Nestabilities Standard Circles LG Etched Dies

I wanted to add some layering to the background so that the foiled pieces would remain the main focal of my card. I die cut the flourished square frame die from the Shapeabilities Flourished Square Etched Dies using Gold Mirror Cardstock.

It was now time to start adhering the various components of the cards together. I first adhered a light pink patterned paper to my card base, and then added layers of White & Mirror Gold Cardstock to give it a finished look. Next, I adhered the flourished square frame and the foiled pieces. I used White Fun Foam while adhering the foiled pieces to give it some added dimension.

To embellish my card, I used a faux Silk flower, some mulberry flowers and rose buds, as well as some leaves. I also added white satin bows below my floral arrangement to complete the card design.


My second and last card for today features the Shapeabilities Grand Christmas Lattice Arch Etched DiesShapeabilities Nativity Layering Set Etched Dies, and the Shapeabilities Cinch and Go Poinsettia Etched Dies.

For my card, I first started by die cutting the lattice arch frame die from the Shapeabilities Grand Christmas Lattice Arch Etched Dies using Neenah Classic Crest Solar White 110 LBS Cardstock. I also die cut the arch inlay die and the sentiment die from the same set.

I used Chipped Sapphire and Mermaid Lagoon Distress inks to colour the background of the arch inlay to depict the Nativity scene. Next, I die cut the silhouette images and the insert for the outer frames from the Shapeabilities Nativity Layering Set Etched Dies using White Cardstock & Gold Mirror Cardstock. I adhered these die cuts together on my card panel.

To embellish my card, I die cut some poinsettias from the Shapeabilities Cinch and Go Poinsettia Etched Dies Etched Dies using White heavy weight Cardstock. I embossed the centres using an Embossing Ball Tool and added golden stamens to the centres for a richer look.

To complement the flowers, I die cut some holly leaves from the Shapeabilities Grand Snow Globe Etched Dies using Gold Mirror Cardstock. I adhered these around my poinsettias and my card was almost complete. I matted this panel to my card base and my card was finished.

If you would like to see more inspiration using the 3D Holiday Vignettes Collection, you can check out THIS post on my blog or on the Spellbinders Blog.
Disclosure:
Where available, I use compensated affiliate links which means if you make a purchase I receive a small commission at no extra cost to you. Thank you so much for your support!

Giveaway:
To celebrate this release, Spellbinders is giving away a $50 gift certificate to one lucky blog reader – selected from the comments across all of the blogs in the hop. Giveaway closes on Sunday, September 1st, 11:59 pm EDT. The winner will be announced in the blog hop post the following Tuesday. The winner is responsible for shipping cost, duties and taxes.

Blog Hop Order:
Next Stop on this Blog Hop is, Bibi Cameron's blog.
Just in case, you lose your place along the way, here is the complete list of participants so that you can find your way back.
                           Hussena Calcuttawala (You are HERE!)


Thank you so much for your stopping by and reading this blog post. I hope you liked the cards I made! I would love to hear if you have a favourite!

Have a wonderful day!

Friday, April 19, 2019

Spellbinders + Amazing Paper Grace Die of the Month | April 2019


Hello, friends!
It might seem that I am on a roll these days and it's actually true. I have been crafting almost every day this week, which is a first for me. Today, I'm happy to share a project which I have never tried making in the past. This is an interactive card made using the Amazing Paper Grace Die of the Month -  Elegant Swivel & Sashay Card Die Set. If you haven't seen Becca Feeken's project samples using it yet, you must check them out. Her cards are incredibly stunning!

Now, onto my card, using this die set. I chose pastel tones for this card so as to not take away the focus from the intricacy of the die cuts. If you are like me, and aren't very good at figuring out measurements yourself, but want to know how to assemble this card in an quick and easy way, do watch Becca's tutorial on YouTube. It will really help you with creating the basic structure of your card. Here is a look at my card:

I have used patterned papers from the DCWV Scripts and Music Notes Premium Stack for this card. As you can see, there is a lot of layering on this card! I have used almost all the dies from this die set to put my card together. The flowers and leaves have been cut from Foamiran sheets and lightly embossed to give it a 3D look. 

I have added some foliage and mulberry rose buds to complete the floral arrangement.  

This is how the Twist and Fold effect looks like once opened. Who wouldn't love to receive such a card with such beautiful die cuts? I have used the same Foamiran flower here too and added the die cut words 'Thank You' which were cut from Vellum and Gold Mirror Cardstock respectively.  

Another look at the Pop and Twist part of the card. The card folds flat and can be mailed, albeit you will need to add a magnet or a belly band to secure it. 

A look at the pop-up panels. I have used the same patterned papers throughout to maintain the continuity of the colour tones and design.


And here is how it looks once closed. It's a bit bulky because of the layers and, I think, I will add tiny magnets on the inside to help it fold flat. 

And here is a look at the die set from Spellbinders. So many dies are included in one set. I find it real value for money!
If you are still on the fence about the Amazing Paper Grace Die of the Month Membership, do check out the other project samples created using it on the Spellbinders blog. The dies are total value for money and the cost of the kit includes shipping cost within USA. Isn't that awesome?!

I hope you liked my card using it! If you did, please do leave a comment below letting me know.
Thank you so much for stopping by!
Have a great day ahead!

Saturday, October 22, 2016

Shabby Chic Floral Card | Photo Tutorial

Hello, bloggy friends!
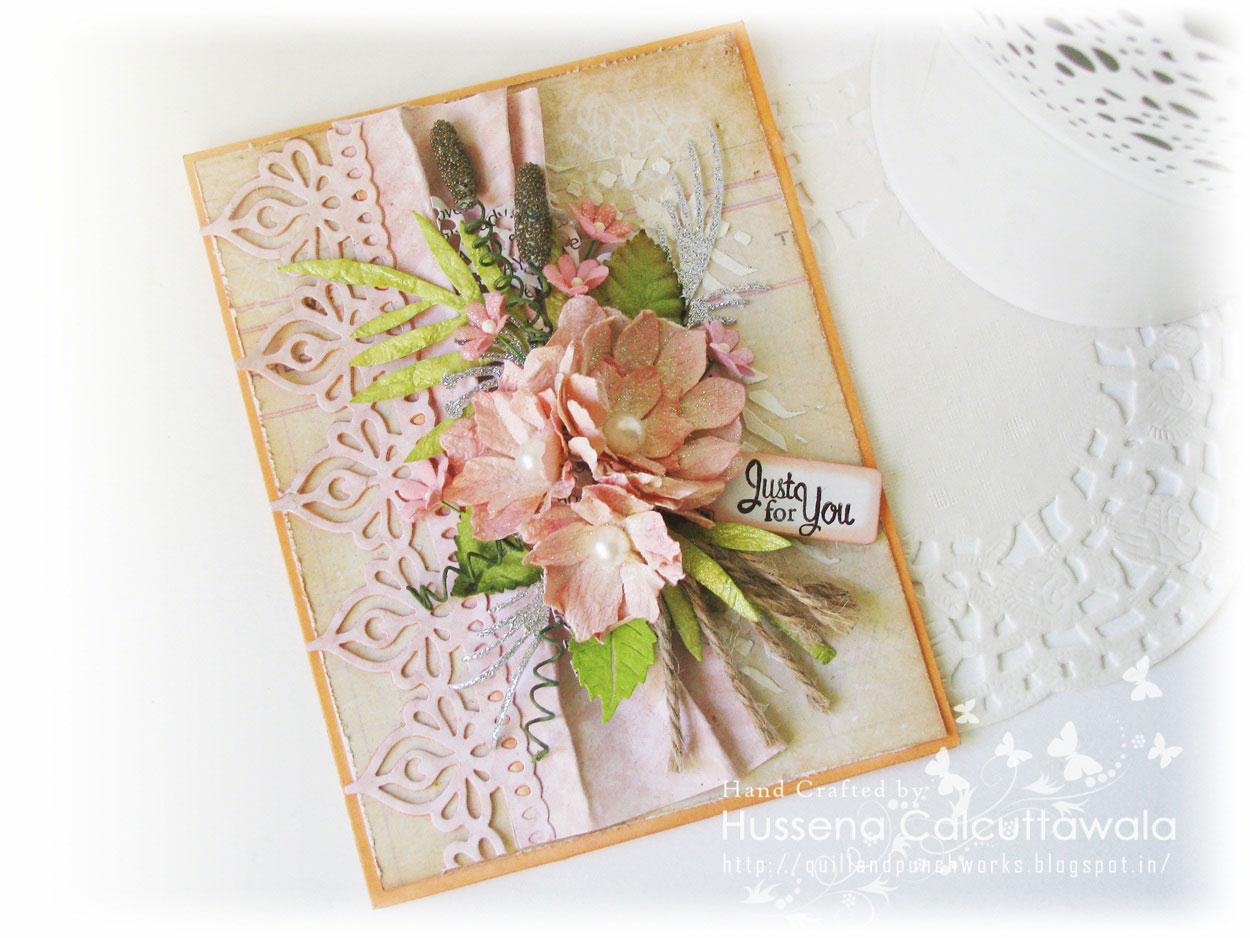
I am sharing a shabby-chic card after a very long time. My current love is making stamped cards, but I do like to make layered cards from time to time. I made this for my Guest Post at Itsy Bitsy. You can check it out HERE, if you haven't already.

Here's a look at my card first :


- - - - - - - - - - - - - - - - - - -

I also have a small tutorial to share on how I created the background for my card and the products used.

Step 1 - I have used a peach colored card base which was sent to me in the kit along with a piece of pattern paper which I have distressed using a pair of scissors & colored the edges using two different shades of Distress inks.

Step 2 - After distressing, I glued the pattern paper to the cardbase & then using a stencil from Itsy Bitsy (Floral) and some Modelling Paste, I did some stenciling using a Spatula to add some texture. I also added a bit of Distress ink to the Modelling Paste to give it a hint of colour.

Here is how it looks once the stenciling is done!

Step 3 - This is what I have used for embellishing my card. The Pattern papers that you see on the left were the ones I have worked with & the little flower embellishments were created using flowers from this set. I absolutely love the Glitter Paper from Itsy Bitsy & I have used it for die-cutting my leaf & foliage. Also used some dies for embellishing my card.

This border die by Spellbinders is absolutely regal & so intricate. I absolutely love using this.


I'm linking my card to the Simon Says Stamp - Use Pink, Happy Little Stampers- Mixed Media Challenge (Nature), Fab n Funky - Fabulous Flowers, Fusion - I'm going with the inspiration picture this time. (I'm inspired by the colours of the florals) and Cards 4 Galz- Use atleast one die.


I hope you like this card of mine. I would love to hear your comments/suggestions regarding it.

Have a nice day everyone!