Hello there, crafty friends!
I have a couple of cards to share today featuring the November Card Kit by Spellbinders - Christmas Wishes. If you haven't heard about the Monthly Card Kits by Spellbinders or don't know how to subscribe to one, you can go over to the Spellbinders website and/or blog and read more about them HERE.
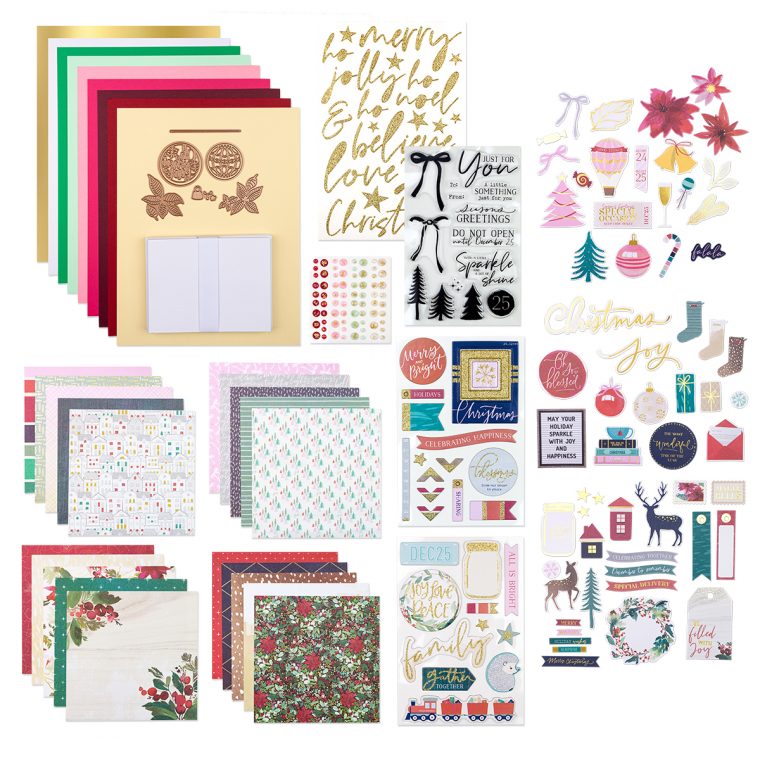
This "Christmas Wishes" Kit, like all their other Card Kits, gives you everything you need to create 10 unique cards and even more. You now also get better goodies, including a 40 sheet paper pad, clear stamps, an adorable die set, tons of embellishments, and more!
I have FIVE Cards to share with you today using this kit, so let's get started!

My first card features the Christmas Wishes Paper Pad, Christmas Wishes Die Cut Shapes Set, Christmas Wishes Chipboard Sticker Pack, along with the stamp set included in the kit.

For my card, I started by selecting a patterned paper design from the Christmas Wishes Paper Pad and die cut a circle in the centre of this paper using the Nestabilities Standard Circles LG die set. I took another piece of White Cardstock and created a mini scene using different stamps included in the Christmas Wishes Stamp set included from the kit. I incorporated some ink blending and masking in this scene to make it look a bit more realistic.

I used a layer of White Fun Foam between the patterned paper and the stamped scene to make the top panel pop a bit. I also adhered a die cut from the Christmas Wishes Die Cut Shapes Set and a sentiment banner from the Christmas Wishes Chipboard Sticker Pack. I also added a couple of stars and photo corners from the same chipboard set to complete my card.

My next card features the Christmas Wishes Paper Pad, Christmas Wishes Die Cut Shapes Set, and the dies included in the kit.

To create my card, I started by die cutting the ornament die included in the kit from Gold Mirror Cardstock and some foiled patterned paper. I also die cut the strings and the little accessories for the ornament from Gold Mirror Cardstock.

Once that was done, I did the assembly for it, and picked out two ornament die cuts from the Christmas Wishes Die Cut Shapes Set. I adhered these three over a patterned paper from the Christmas Wishes Paper Pad. I also added a sentiment banner from the Christmas Wishes Die Cut Shapes Set and some gemstones for the finishing touch.

Once that was done, I did the assembly for it, and picked out two ornament die cuts from the Christmas Wishes Die Cut Shapes Set. I adhered these three over a patterned paper from the Christmas Wishes Paper Pad. I also added a sentiment banner from the Christmas Wishes Die Cut Shapes Set and some gemstones for the finishing touch.

My next card is made entirely using the flower and leaf dies from the kit.

I took a piece of A2 Navy Blue Cardstock and die cut a couple of poinsettia flowers and leaves all over this panel to create my own background piece. Then, I die cut several of these poinsettias from Red Cardstock and leaves from Green Cardstock and used the inlay technique to adhere them over the previously die cut panel. I also added the centres of the flowers which were die cut from Gold Mirror Cardstock.

My panel was almost done and I decided to die cut a circle from Vellum using the Nestabilities Hemstitch Circles Dies. I topped this up with another circle die cut from the Christmas Wishes Die Cut Shapes Set.

My panel was almost done and I decided to die cut a circle from Vellum using the Nestabilities Hemstitch Circles Dies. I topped this up with another circle die cut from the Christmas Wishes Die Cut Shapes Set.

My fourth card features the Christmas Wishes Paper Pad, and the Christmas Wishes Die Cut Shapes Set along with the dies from the kit.

For my card, I first picked out a patterned paper from the Christmas Wishes Paper Pad which would go well with the design of my card. Once I did that, I die cut some poinsettias and leaves using Red and Green Cardstock respectively, and adhered them over a watercolored wreath die cut from the Christmas Wishes Die Cut Shapes Set. I also added some punched sprig leaves and flower centres to the poinsettias.

I stamped two bows using two different ink colours and fussy cut them to place them over the wreath. I also added a white gemstone to the centre of the bow and die cut pieces in the centre of the wreath for my card sentiment.

I stamped two bows using two different ink colours and fussy cut them to place them over the wreath. I also added a white gemstone to the centre of the bow and die cut pieces in the centre of the wreath for my card sentiment.

My final card uses the Christmas Wishes Paper Pad, and the Christmas Wishes Die Cut Shapes Set.

This is my favourite from the lot because I love the way it turned out. To start with, I picked out two different patterned papers from the Christmas Wishes Paper Pad. I adhered one directly on to my card panel, while I die cut from the other to create hills for my scene. Once they were die cut, I adhered these panels in a way that one would overlap over the other to create the illusion of a hill.

I used lots of die cuts from the Christmas Wishes Die Cut Shapes Set to create the entire scene for my card. I adhered few directly, while some were popped up using foam tape. The sentiment banner is also from the same set.

I used lots of die cuts from the Christmas Wishes Die Cut Shapes Set to create the entire scene for my card. I adhered few directly, while some were popped up using foam tape. The sentiment banner is also from the same set.

If you want to find out more about the Club – prices, how you sign up and what’s included, please look ——–> HERE.
I know that I say this every month, but this kit is amazing and so worth the cost! You get everything you need to create AT LEAST ten cards. How awesome is that?!
That's it from me today! I hope you liked my cards using the Spellbinders November Card Kit. If you have a favourite, please do let me know. I would love to hear from you! :)
Thank you so much for stopping by!


Great cards! My favorite is also your favorite. I plan to make some very similar to yours. TFS.
ReplyDeleteHugs
Kay