Hello everyone!
Welcome to the Lulupu Sparkle with Prima blog hop!
You should have come here from the very talented, Nikita's blog.
If not, here's a link to follow the complete hop list starting from the Lulupu blog.
Today is the Day 8 of the Blog hop and I hope you all have been enjoying all the gorgeous inspiration that the Lulupu team and the Guest Designers have been sharing up to now. We also hope you're hopping along each of the blogs and leaving us some love as they are lot of prizes to be won this month! Not only that, we have a month long challenge this month where we are asking you to use your Prima products to create a 'sparkly' project for this festive season. We not only are giving prize to to the Winner, but also to do the Top 3 this time. You really don't want to miss this opportunity :)
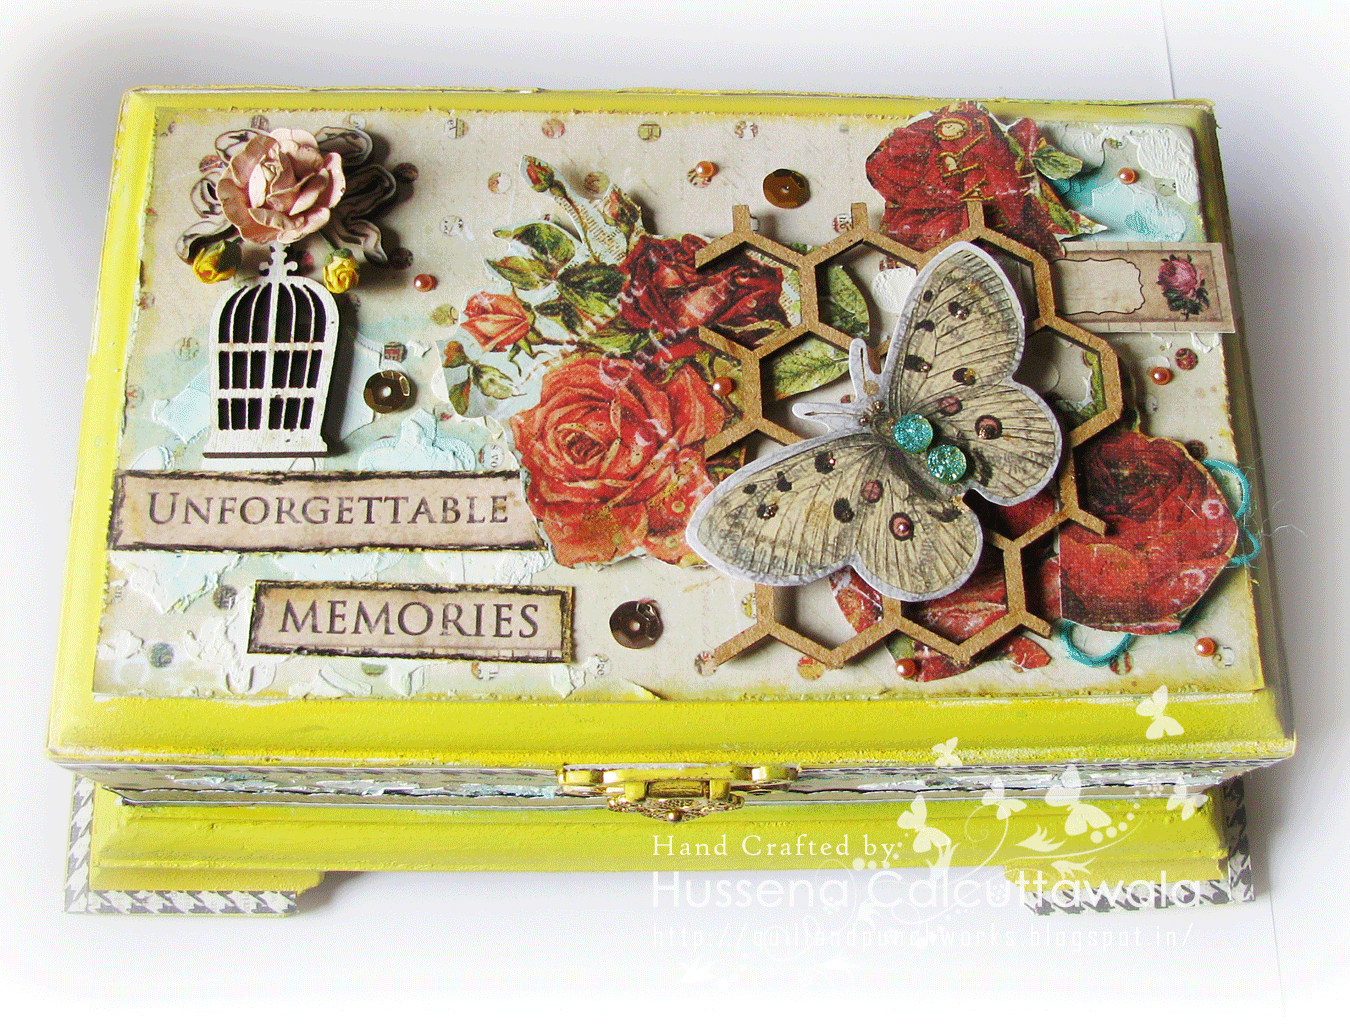
Now, coming to my project, I have an altered MDF box to share with a step-by-step tutorial.
The insides of the box which I have covered with a pattern paper from the Prima A4 Cigar Box paper pad.
Now, for the tutorial part :
Step 1- Paint the MDF box with White Gesso entirely. This will help in the paint coverage as Gesso gives tooth to your projects and so it takes colours very well.
Step 2- Measure and cut the pattern papers you're going to use. I've used Prima A4 Cigar box paper collection entirely for my box right from the base paper to ALL the embellishments as well.
Distress your papers after cutting them either with a Distressing tool or with the help of a small pair of scissors and ink the edges using Distress inks of your choice. I have used Scattered Straw thought it is totally optional.
Step 3- Before sticking the papers to your box, paint the box using paints of your choice. I have used Acrylic paints from Camlin- Chromium Yellow and Cobalt Blue.
Then, I have done stenciling using modelling paste from Sakura and a art knife and ofcourse a stencil of your choice.Mine is from My Favorite Things.
After these steps, I painted the insides of the box as well with Gesso and Blue paint and layered the Prima pattern paper inside as well. This is from the Prima Cigar Box paper pad too!
To embellish my box on the top, I've paper pieced the flowers from the Cigar Box paper pad again, mounted it on foam and adhered it to the top of the Honeycomb MDF piece.
The butterfly die-cut, the wooden cage and the bow are all from the Prima Epiphany collection- Wood icons and Ephemera pack.
I have used the Prima Coffee Break Crystals on the butterfly and also some gold sequins from the Epiphany Ephemera pack. The sentiment and the small tag n the right hand side are from a discontinued collection of Prima now, called Prima Romance Novel paper pad. I have liberally used Ranger Platinum Stickles on the butterfly and flowers though it does'nt seem to show in the photograph. :(
Hope you like my project. Do leave me your comments and views regarding it.
You next stop on the hop is another incredible crafter, Mallika Kejriwal
Have a nice day everyone!


Gorgeous box Hussena ! I like all the embellishments on top of the box .. I am now falling for Prima's Cigar box collection now ..:-P
ReplyDeleteWow! what a make over. Loved the papers you have used Hussena, very striking.
ReplyDeleteWOW!!! It looks Beautiful Hussena!!! Love these PPs and all the embellis you used!!!!
ReplyDeleteDefinetly going to try this one...... looks pretty.
ReplyDeleteGorgeous box, Hussena!! Just love the colors you choose, best co ordinations. Epiphany embellishments look pretty on your box :).
ReplyDeleteThanks for sharing tutorial.
Oh wow. This looks gorgeous Hussena! I love the colours and textures here!
ReplyDeleteBeautiful box with a step by step tutorial !! Happy..happy me :) loved the texture n pretty papers you have used .No dimensional handmade blooms ?? Paper pieced ones also look lovely !
ReplyDeleteSo beautiful ...you work so well with these colors
ReplyDeleteGorgeous Box.. beautiful make over to it.. :)
ReplyDeleteThis is absolutely gorgeous!! The top looks amazing!! I love how you decorated it!! What a beautiful box!! Have a great day :)
ReplyDeleteLisa
A Mermaid's Crafts
Wow very pretty one.
ReplyDeleteHussena, your box is beautiful and created so wonderfully. I love the paste you used and the pretty stencil. Super box!!!
ReplyDeleteGorgeous box! Love everything you did with this!!
ReplyDeleteThat's an adorable box! love the colors you used. And I can't stop looking at the vintage roses <3
ReplyDeleteWow! Talk about a complete transformation! This is gorgeous!!
ReplyDeleteColor combo is awesome dear! loved the project :)
ReplyDeleteIts wonderful:)
ReplyDeleteWhat a BEAUTIFUL box!!! Really love all your embellishments Hussena :)
ReplyDeleteBeautiful as always :)
ReplyDeletevibrant colours & wonderful use of the embellishments :) great work Hussena :)
ReplyDeleteBeautiful box hussena. Loved the prima papers. As always decoration is nice.
ReplyDeleteYour altered box is so pretty, Hussena!! Thank you so much for taking the time to do those great step-by-step instructions!! Hugs, Darnell
ReplyDeleteThis is so very creative :)
ReplyDelete