Showing posts with label Altered items. Show all posts

Saturday, April 29, 2017

Pretty Paper Studio | Fifth Birthday Blog Hop

Hi everyone!
Pretty Paper Studio is turning 5 this month and we are celebrating with a Blog Hop! There is also a giveaway so do read till the end of the post to know more!


Here's what I have to share with you for this hop. It's an Altered Embroidery Hoop turned into a Home Decor piece.


I have shared a detailed tutorial on the PPS blog on how I created this hoop which you can check out HERE. The theme for this month is 'Gratitude'. I have used the chipboard pieces - Be Thankful to go along with the theme.

- - - -
Now on to the deets for the Blog Hop :
You need to leave a comment on every stop of the hop and like the Pretty Paper Studio Facebook page, follow Pretty Paper Studio on Instagram and Pinterest, subscribe to the YouTube channel and join the Facebook group. You will also need to follow our Guest Bloggers Mummy On My Mind, Cuddles and Crumbs and Explore with Mafaza on Instagram.

Here's the Blog Hop list :

Blog Hop Prize

 One winner will be picked randomly and will receive a Silhouette Cameo 3 Electronic Cutting Machine worth AED 1250. Simple. International entries are welcome too! You got to follow all the instructions to stand a chance though – that’s the only condition.
Pretty Paper Studio reserves the right to final decision regarding the judgment method and winning Entries. This contest is not sponsored by or affiliated with Silhouette America.
Blog Hop ends on May 1st, 2017 and a winner will be announced on the PPS blog on May 5th, 2017.
Alright then, hop on! I would love to hear what you think about my project. Thanks for stopping by!

Thursday, August 11, 2016

Altered Perfume Box

Hi, crafty friends!
I have an Altered Box to share today made using Papericious papers & Mudra stamps. I have made one after a long time, here's a look at it :


Here's how I went about altering it :
  • I first gessoed the entire box so that it could take paint easily.
  • I then used the Prima Chalkboard paint - Egg Blue to color my base. I made sure to cover all sides of the box as well as the insides to give it a nice, shabby look.
  • I then measured and cut pattern papers from The Gentleman paper pack and distressed the edges of the paper using Hickory Smoke Distress Ink.
  • Then, I have die-cut a scalloped border using the Mi Estilo paper pack and I have used this border on all four sides of the box. 
  • To embellish the top of the box, I have die-cut a few decorative frames using Spellbinders Dies. I have stamped the sentiment from the Mini Bunch set.
  • The flowers & the leaves are stamped & fussy-cut using the Daisy Bloom set. 
  • I have also used some die-cut leaves and some glitter flourishes to create my foliage.
  • I added a decorative buckle to the box which has been die-cut using a Spellbinder's die. I have added velcro dots on the insides for the closure.
  • Added some pearls and a butterfly to complete the overall look.
I'm entering my altered box in the Inky Chicks- 5 or more flowers ( I have used stamped flowers), Crafty Boots- Use a stamp, Love to Scrap - Use 2 of something (Stamped Daisies) and Things to Alter- Anything Goes challenge ( I unfortunately don't have a picture of the perfume box I altered before starting on my project ), SSS- Try to contain yourself (I have upcycled a box).

I hope you like my project. Do leave me your comments/suggestions regarding it. I love hearing from you.

Have a nice day everyone.

Friday, June 3, 2016

Guest Post for Happy Momentzz!

Hello everyone!
I was so excited to be invited as a Guest Blogger for Sharada's Happy Momentzz's 5th birthday party!

 I'll be sharing with you a simple DIY project using a very common household item- which is a cereal box which I have upycycled into a gift bag. I know this idea is not very new, and has been done many times, but my process is a little different and hopefully you will enjoy this tutorial and give it a try :)

So, let's start with our project :

You will need :-
1. An empty cereal box. ( I have used one from Kellogg's Chocos- Small size).
2. White Chart Paper.
3. 12 X 12'' Pattern Papers of your choice.
4. Eyelets and Cord to make the handles of your gift bag.
5. Some die-cuts, paper flowers, embellishments to decorate. (This is totally optional).

Steps (1-4)
  • After selecting a cereal box of your choice, very delicately and patiently open the box completely on the bottom and from the side seams. Try to do this without tearing the paper. 
  • Once the box has been opened completely, using a craft knife and a ruler, cut apart the top part of the box which consists of the flaps.
  • Now, trace the rest of the box (except the bottom part as shown in the picture) on to a chart paper using a pencil and a ruler and cut it out. 
  • Now, score this paper according to the folds of the box, this will make it easier to bend the paper on the sides when you construct your bag! ( Refer to my picture below for an idea )

Steps (5-6)
  • Once you have cut and scored your chart paper glue it on the cereal box using any liquid adhesive. I have used fevicol.
  • Now fold the box into shape and glue the sides and for the base of the box measure and cut a small piece of chart paper in the approximate size of the box base and glue it separately.

Your box should look something similar to the one in the below picture.


Steps (7-8)
  • Once the box/bag base is ready you need to distress the edges of your box using Distress Ink of your choice. I have used Cracked Pistachio Distress Ink as it is very similar in color to the pattern paper that I have used to make my bag.
  • Once the edges are distressed it's time to add pattern paper. Cut your pattern paper 1/4 inch smaller than the size of the box size that you are covering.

Steps (9-10) 
  •  Once the pattern paper is glued, it's time to embellish your bag with die-cuts of your choice and also add in your eyelets and handle of your bag before adding on all your embellishments.


Here's how now final bag looks like after I added the flowers and some foliage to it.


I hope you liked my project and will give it a try. These DIY bags are just perfect for gifting to any of your family or friends while at the same time helping to recycle a common household item which could otherwise be trashed :)


Wednesday, May 25, 2016

Altered Tin | Photo Tutorial

Hello friends!
I am posting after quite a long time. I am trying to be more regular on my blog, but somehow don't seem to find time. :(
If you want to be updated with my latest work, please do follow Papericious and Pretty Paper Studio. You will find all my new work there :)
Moving onto today's post, I have an altered DIY tin to share. This is a very easy to do fun crafty makeover and I even have a step by step tutorial for it, so sit back, relax and hope you like it!


Wednesday, October 28, 2015

An Altered hoop and a Tag !

Hello, everyone!
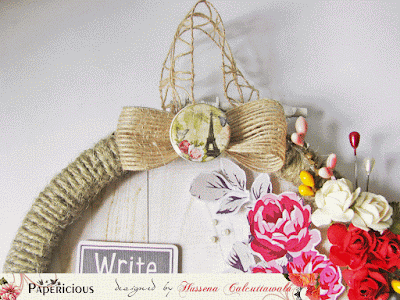
Today I have two projects to share with you all. These projects were created for the Papericious blog to introduce the new Adhesive buttons/flairs that have been released this month. I really enjoyed using these buttons on my projects. :) 

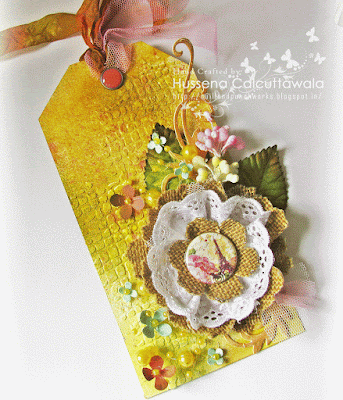
So, here's a look at what I created using these buttons. The first one is an altered hoop and the second one is a Mixed media tag!

For this hoop, I have used the Pattern Papers from the Papericious Grey Bloom collection and the Wooden Collection. The pink flowers and the leaves are fussy cut from the Grey Bloom collection paper and mounted on square foams for dimension. As you can see, I have used these buttons for the centre of my bow as well as a part of my sentiment.  These make very pretty centres and look great on cards, layouts and mixed media projects!


Here are few of the close ups!


I am entering my altered Hoop for the PPS challenge : Inspired by a song. I was inspired by THIS song from Francesca Battistelli.

Moving on to my Mixed Media tag :

 I first created a burlap flower using the Tim Holtz Tattered florals die and layered it with some tulle and fabric cotton laces and finished it off with an adhesive button. Isn't it gorgeous??
I have created the background of the the tag using embossing paste and a stencil from Tim Holtz with Distress Stain Sprays.


 I am entering this tag in the Stamploration Mixed Media Challenge.

Thank you for your time and have a nice day everyone! Please do not forget to leave your comments/suggestions. I love to get feedback from you :)

Monday, October 20, 2014

Sparkle with Prima Lulupu Blog Hop!

Hello everyone!
Welcome to the Lulupu Sparkle with Prima blog hop!
You should have come here from the very talented, Nikita's blog.
If not, here's a link to follow the complete hop list starting from the Lulupu blog.

Today is the Day 8 of the Blog hop and I hope you all have been enjoying all the gorgeous inspiration that the Lulupu team and the Guest Designers have been sharing up to now. We also hope you're hopping along each of the blogs and leaving us some love as they are lot of prizes to be won this month! Not only that, we have a month long challenge this month where we are asking you to use your Prima products to create a 'sparkly' project for this festive season. We not only are giving prize to to the Winner, but also to do the Top 3 this time. You really don't want to miss this opportunity :)

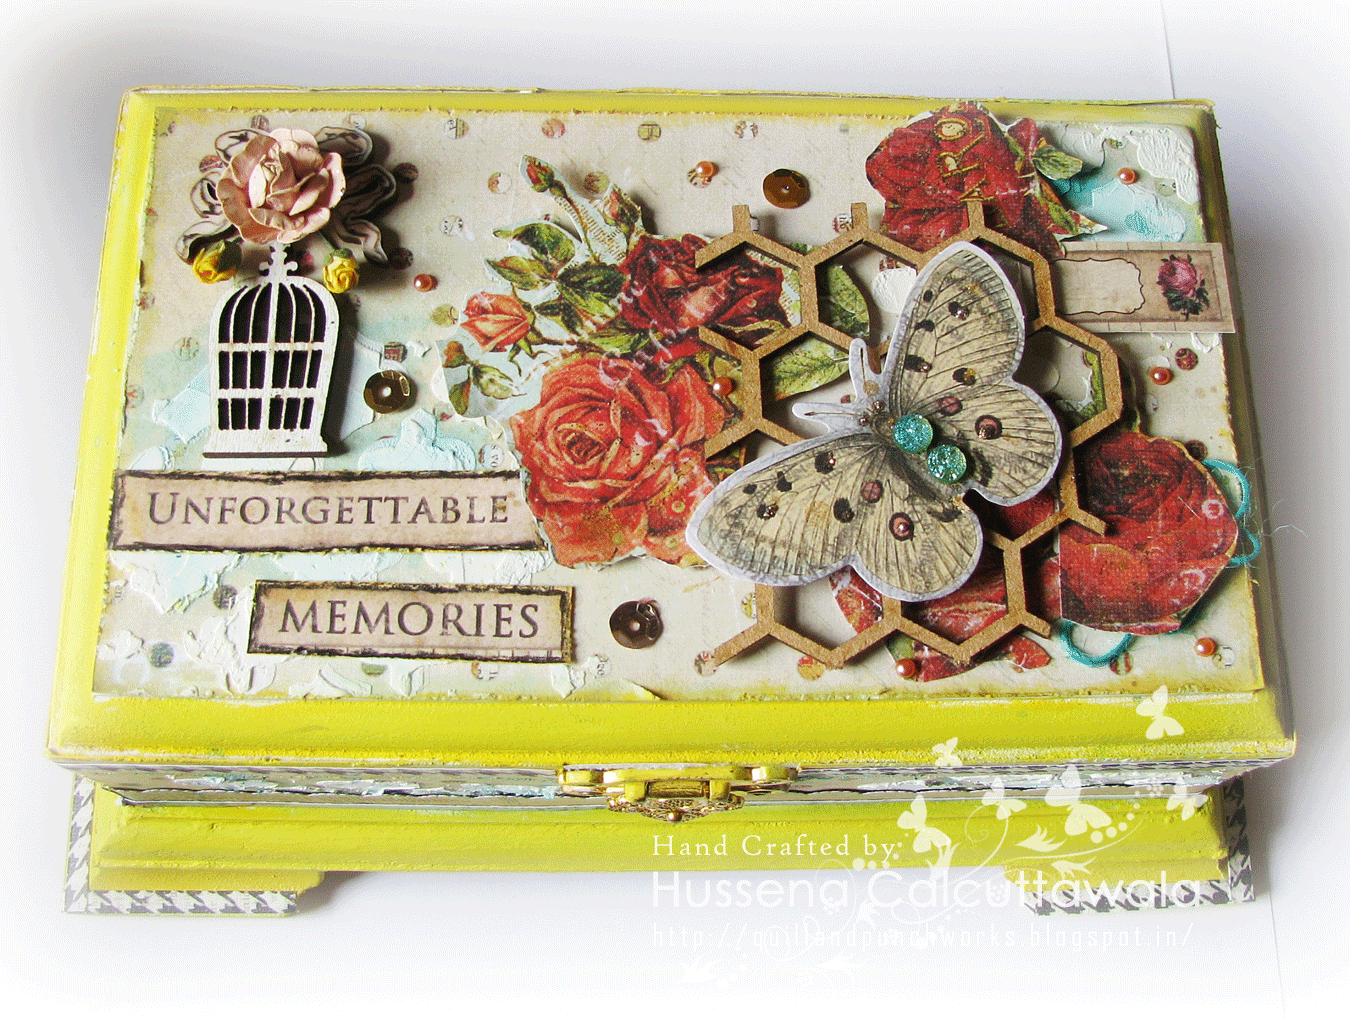
Now, coming to my project, I have an altered MDF box to share with a step-by-step tutorial. 


 The insides of the box which I have covered with a pattern paper from the Prima A4 Cigar Box paper pad.

Now, for the tutorial part :

Step 1- Paint the MDF box with White Gesso entirely. This will help in the paint coverage as Gesso gives tooth to your projects and so it takes colours very well.

 Step 2- Measure and cut the pattern papers you're going to use. I've used Prima A4 Cigar box paper collection entirely for my box right from the base paper to ALL the embellishments as well.
Distress your papers after cutting them either with a Distressing tool or with the help of a small pair of scissors and ink the edges using Distress inks of your choice. I have used Scattered Straw thought it is totally optional.

 Step 3- Before sticking the papers to your box, paint the box using paints of your choice. I have used Acrylic paints from Camlin- Chromium Yellow and Cobalt Blue.
Then, I have done stenciling using modelling paste from Sakura and a art knife and ofcourse a stencil of your choice.Mine is from My Favorite Things.

Step 4 - I've done stenciling on the top and all four sides. Then, added blue splatters using Heidi Swapp- Tropicana Teal mist and Heidi Swapp- Gold Lame mist. (This step is optional)

After these steps, I painted the insides of the box as well with Gesso and Blue paint and layered the Prima pattern paper inside as well. This is from the Prima Cigar Box paper pad too!
To embellish my box on the top, I've paper pieced the flowers from the Cigar Box paper pad again, mounted it on foam and adhered it to the top of the Honeycomb MDF piece.
The butterfly die-cut, the wooden cage and the bow are all from the Prima Epiphany collection- Wood icons and Ephemera pack.
I have used the Prima Coffee Break Crystals on the butterfly and also some gold sequins from the Epiphany Ephemera pack. The sentiment and the small tag n the right hand side are from a discontinued collection of Prima now, called Prima Romance Novel paper pad. I have liberally used Ranger Platinum Stickles on the butterfly and flowers though it does'nt seem to show in the photograph. :(

Hope you like my project. Do leave me your comments and views regarding it. 
You next stop on the hop is another incredible crafter, Mallika Kejriwal

Have a nice day everyone!

Tuesday, March 4, 2014

An altered NINE Drawer Box :)

Hi friends,
I am sharing an altered nine drawer box with you all, today! Recently, I have been working on different types of projects other than cards, that is. When I received this gorgeous package from Craftslane in January, it contained some of the most beautiful drawer boxes, papers, embellishments and lot more! it's taken me quite a bit of time to work on this box, but finally here it is  :) I have gone very pastel this time. The soft, shabby-chic colors look so beautiful in real life. Unfortunately, the camera does not capture these soft colors so well. Rather than my talking about it, why don't I show what I have made.  :
                                                               

Here's various views of the box :


For this box, I have used the Papermaina 6X6 Vintage Notes paper pad. from Craftslane. All those small die-cuts are from the same pack. This makes working so much easier, as you have already got a color-coordianted die-cut sheet along with the colors, designs and patterns very easily. Craftslane really do stock some really amazing things like MDF Boxes, Paper pads, Flowers and Dies. The small mulberry flowers are also from their store!
This box is completely hand-painted, though I have to admit that I have not done a perfect job of it. Definitely, need more practice! I have decoupaged pattern papers on the top and the sides as well as on the drawers using Mod Podge glue. The flowers on the top are all handmade, and I have done stenciling on the sides of the box using Sakura Modelling Texture Paste and Distress re-inker -Spun Sugar and the Prima Damask Stencil of-course.

Supplies used :
Dies : Cheery Lynn Fanciful Flourish, Cheery Lynn Olive branches, Cheery Lynn Mini Polynesian Doily die and Joy! Crafts Flower dies.
Camlin Acrylic paints, Mod Podge

Challenges entered :
Itsy Bitsy - Say it with Roses Winner! )
Cheery Lynn -Doilies ( I have used the Cheery Lynn Fanciful Flourish, Cheery Lynn Olive branches, Cheery Lynn Mini Polynesian Doily die. )
The Craft Garden - Pastels
Rhedd's Creative Spirit : March Challenge Altered.

I hope you all like my project! Do leave me your comments/suggestions. Would love to hear from you :)
Have a nice day everyone!

Saturday, March 1, 2014

An Altered Photo Frame!

Hi friends,
Today, is  the first day of a new moth, and we have a very exciting challenge at Lulupu as this is also the second birthday celebration of the Lulupu store! And, here is what I have crated for this month's inspiration. It's a photo-frame which I have altered. I am sorry, I completely forgot to take the before pictures to show what this frame looked like before. Trust me, you would have been surprised to see the transformation.

                                                                           
A closer look at the blooms which are handmade :
 I have worked on the frame from scratch. This was a very plain white and red photo-frame. I first added two layers of Gesso on the base and then, applied two coats of Camlin teal color on it. This helped cover the base design completely and once it was dry, I took the Prima Designer stencil and the Sakura Modelling Texture paste and mixed some drops of the Distress Stain -Spiced Marmalade to it and applied it all over the sides of my frame to create the damask design on my frame!
I think it gives a beautiful, rich look to the frame and by adding the color to the texture paste there is a small hint of orange showing in the stenciled design! The flowers on my frame are all handmade and they are made by using the Distress Re-inker Spiced Marmalade and water added to a Mini Mister and sprayed directly on paper! Does'nt it give a vibrant look :)
The corners and the golden leaves on the frame are all made with die-cuts covered with UTEE and heat-embossing it. If you want to see how I made the corners using UTEE, here's the LINK to the tutorial that I shared on the Rainbow Craftykari blog!

Supplies used :
Dies - Cheery Lynn Gardenia Strip, Cheery Lynn Flourish Leaf Strip,Spellbinder's Leaf Foliage die, Joy! Crafts Vintage Flourishes Corner die.
Distress Re-inker -Spiced Marmalade, Distress Inks -Shabby Shutters, Mustard Seed, Distress Stains- Mowed Lawn, Wild Honey.
Sakura Modelling Texture paste, Prima Damask Designer Stencil, Punched flowers, Gold Ultra Thick Embossing Enamel, Glossy Accents, Pollens and Pearls.

Challenges entered :
Cheery Lynn Designs- Flowers ( Have used the Cheery Lynn Gardenia Strip to make my flowers)
Itsy Bitsy -Say it with Roses 
Crafts 4 Eternity- Texture

I hope you all like my project! Do leave me your comments/suggestions. I would love to hear from you! :)

Wednesday, September 18, 2013

Guest Desiging for Lessology's Birthday celebration Month :)

Hi Friends,
Today sharing with you all an upcycled Gift box which I have made for my Guest Designer spot at LESSology as they are celebrating their second birthday blogoversary. I am thrilled to  be a part of their birthday celebration as the team of LESSology is a very talented  bunch and they always come up with some fabulous upcycling ideas.If you haven't checked out their blog yet drop in here I promise you won't be disappointed :)  Ok now here's a look at what I have made for  my guest designing spot :                                                        
I have up-cycled an old I-cod tablet box to create this gift box. Here is a look at how it looks from the top and the sides :                                                    
                                                
This is the box that I have upcycled :
                                                       
To make the base of my box I have first taken some water-color paper and added texture to it by stenciling it with texture paste and the damask Prima stencil.I have added a dash of Lindy's sprays to my texture paste to give a hint of color to it.Then, I have distressed it completely using Spun Sugar and a bit of Fired Brick distress inks.Also, I have distressed the edges of the paper using my scissors and this forms the base of the box on the top and on the sides.I have then embellished it using MDF embellishments and my ever favorite flowers using Spellbinder dies and colored it using Distress Stains.A little bit of pearls here and there and some delicate foliage completes my project! :)
I have also decorated the insides of the box with some Martha Stewart punched laces and a base white paper.
Finally, added some yummy chocolates to it and my gift is ready to be shared :)

Supplies used :
Base CS -Brustro Water-color paper.
Camlin Texture Paste.
Prima marketing Damask Stencil.
Dies & Punches :
Spellbinders Resplendent Rectangles die,Spellbinder's Rose Creations die, Spellbinder's Foliage die.
Martha Stewart Doily Lace Punch, Martha Stewart 3 in 1 Butterfly punch.
Stamps & Inks :
TPC Birthday clear stamp set.
Distress inks - Vintage photo, Fired brick, Spun sugar and Shabby shutters.
Versafine Onyx Black ink pad.
MDF embellishments, Glitter strips, Rose buds, Small flowers and Pearls.

Challenges entered :
Itsy Bitsy -Pretty with P challenge ( My P's are Pink, Pearls and Posy )
Artistic Inspiration - Anything goes/Frame it ( Made it to Top 3 )
There she goes -The gift of giving 
Craft Room challenge - Use something wooden.(Corner & Flourish )
Color Conceptions -Spread your wings with Distress inks! ( Made it to Top 6 )


Hope you like this gifting idea.Most of us love to receive or give chocolates as gifts and when it's packaged beautifully, it's all the more fun to receive.